
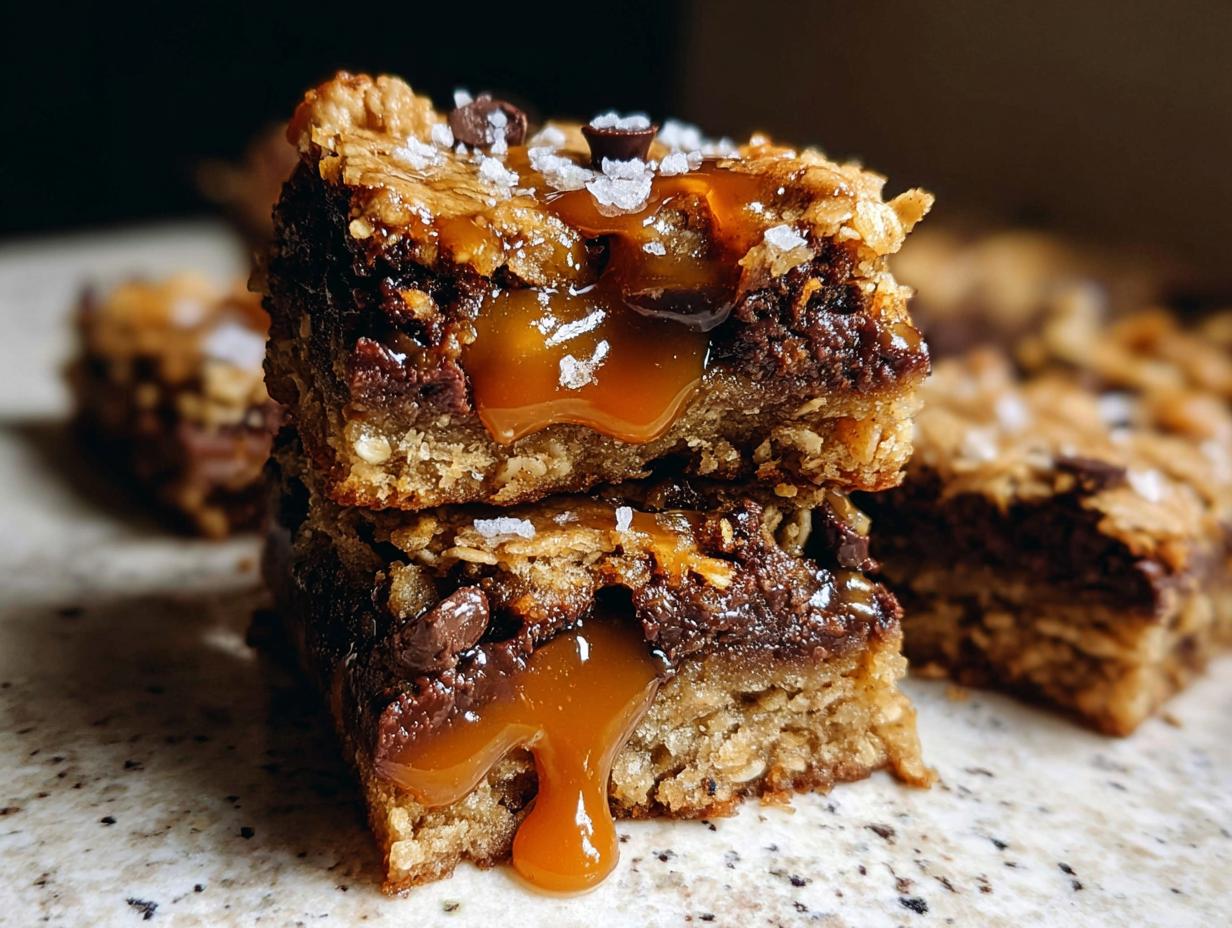
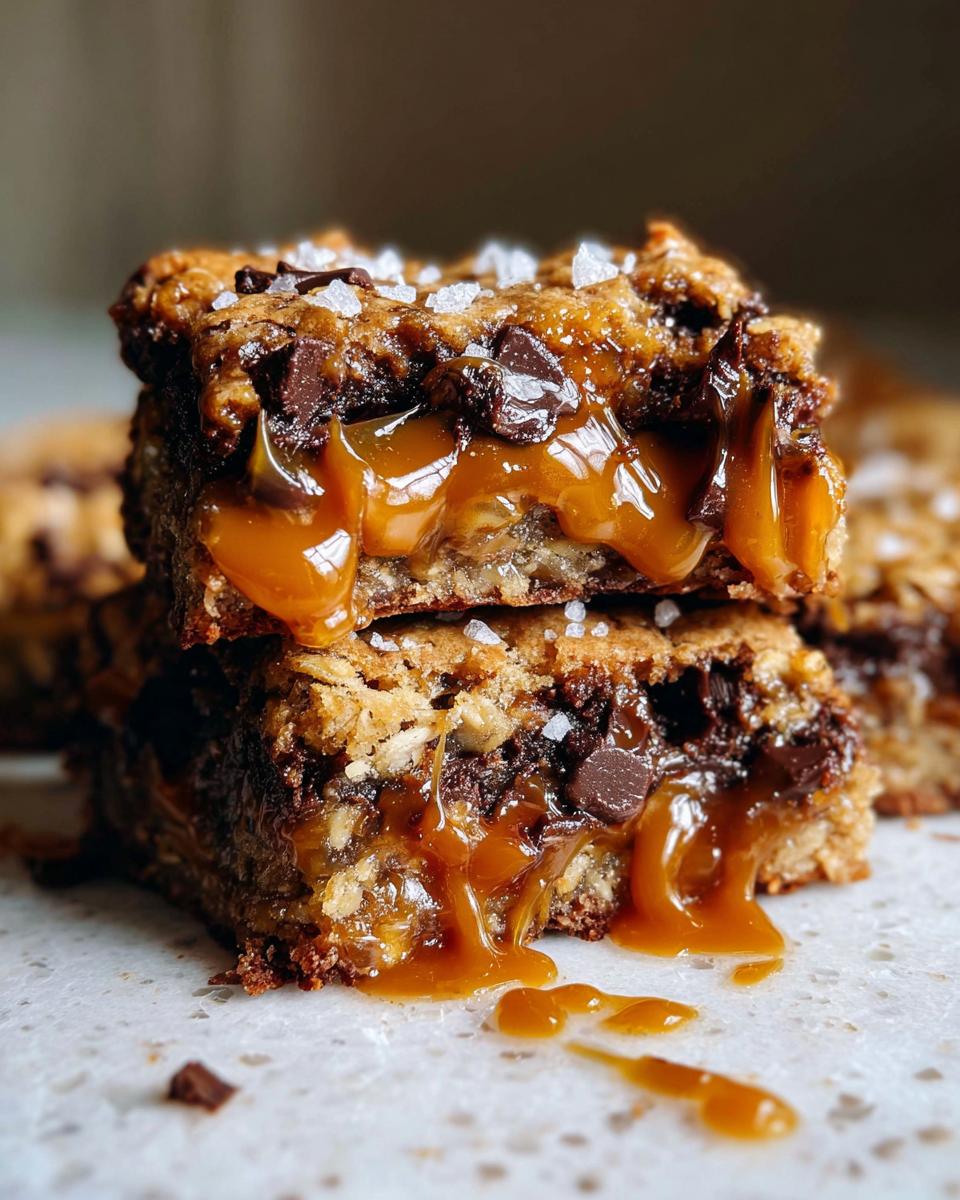
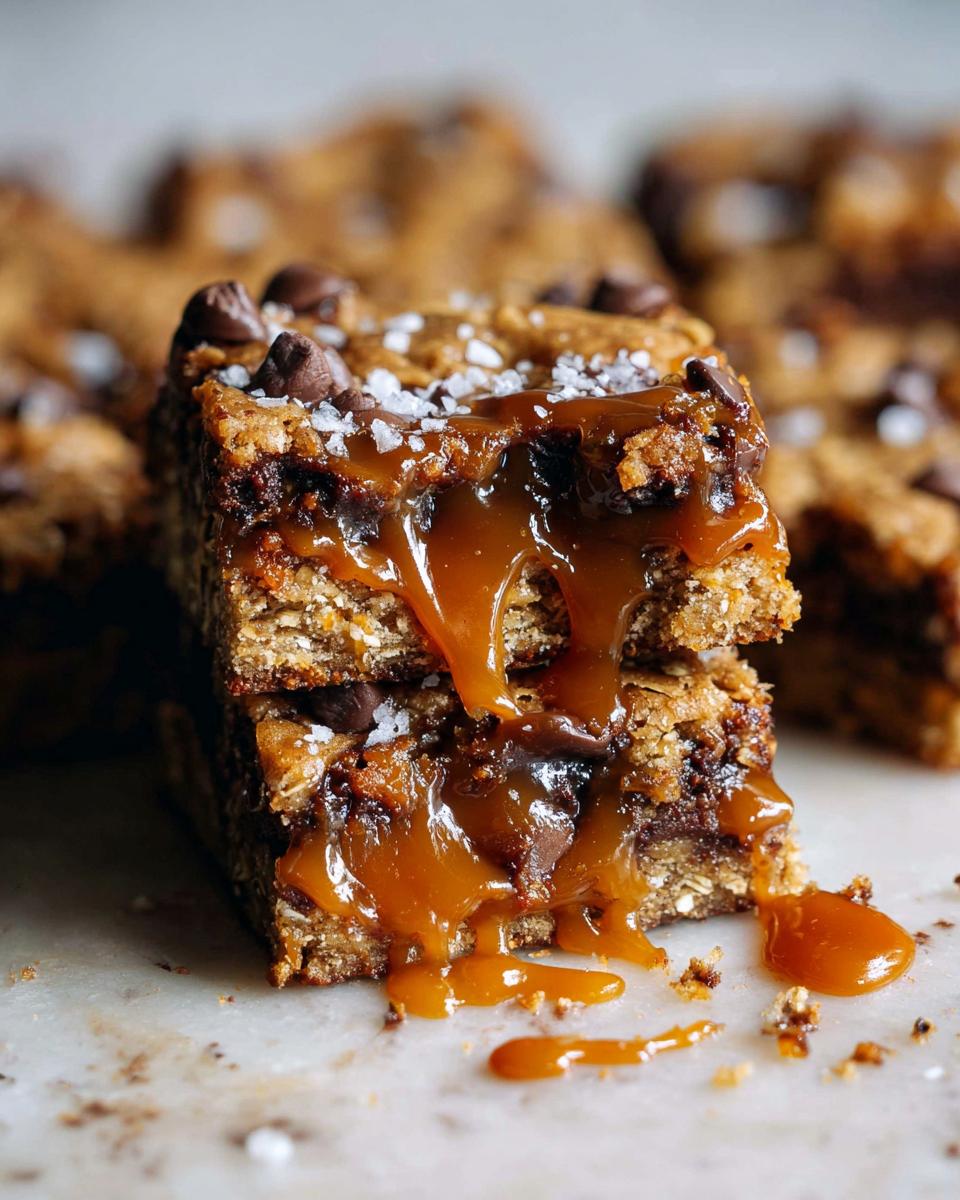
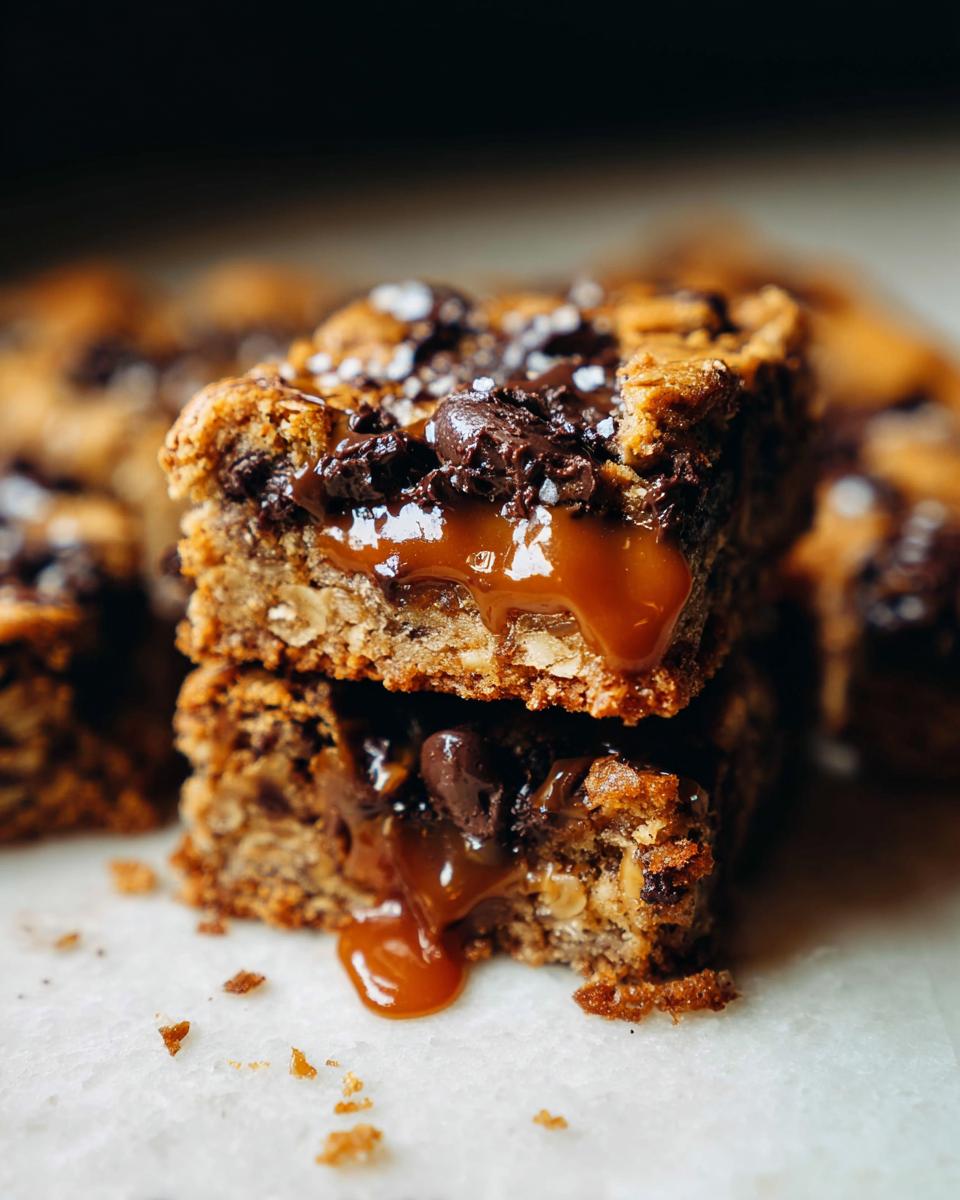
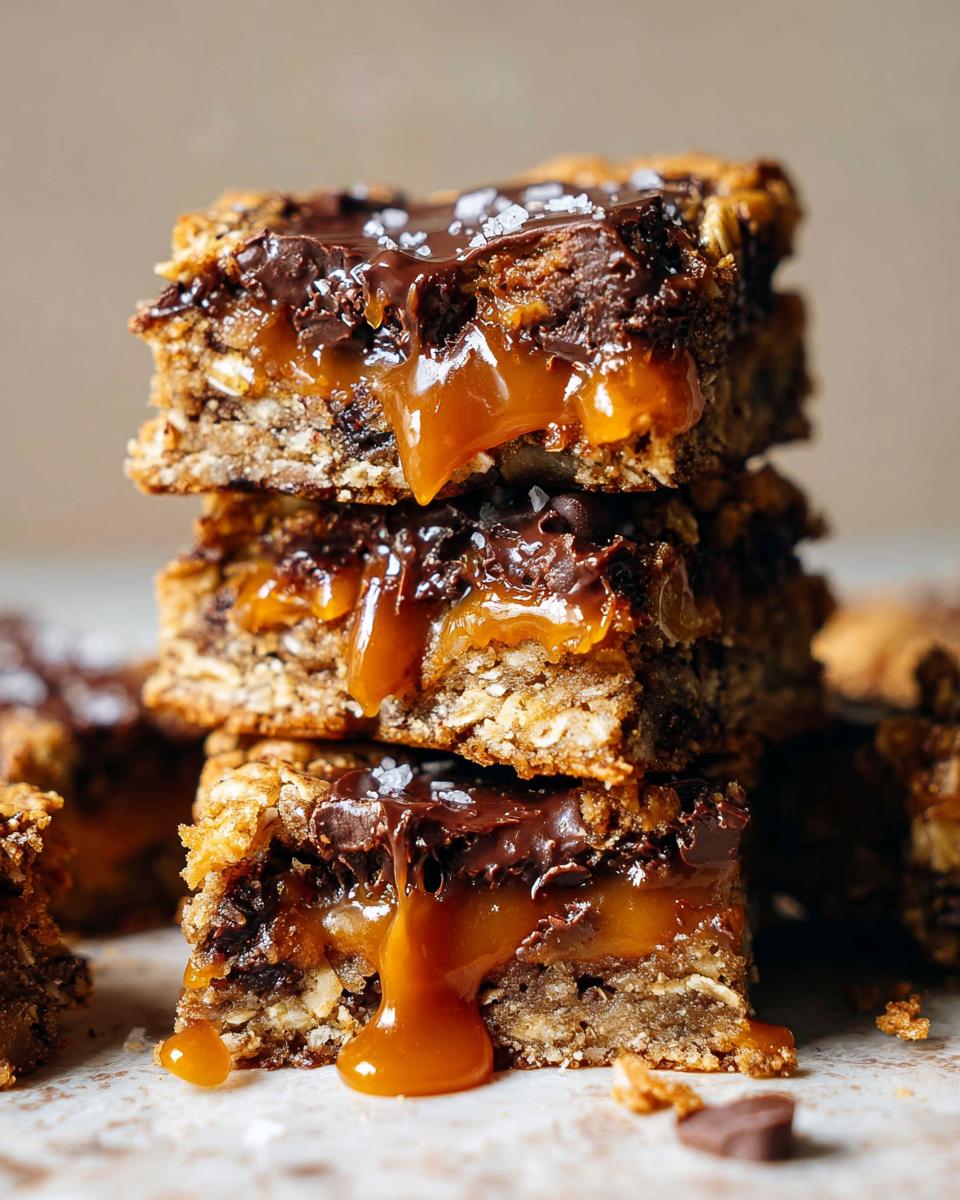
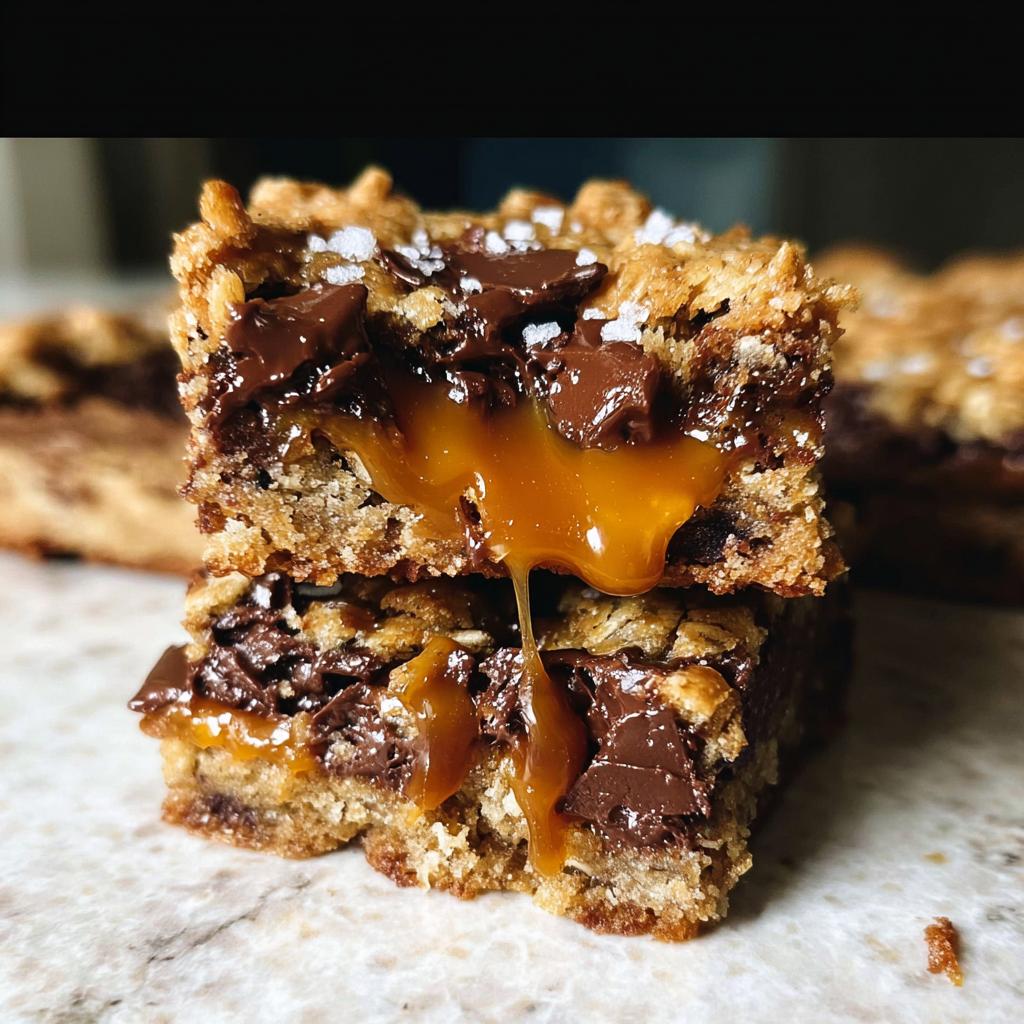
Are you craving something that just screams indulgence? You know, that perfect moment where salty meets sweet, and everything gooey comes together? Well, stop dreaming because I’ve got the ultimate recipe for you: incredibly rich Salted Caramel Chocolate Chip Cookie Bars! These are honestly the easiest pan bakes you’ll ever whip up, and they disappear instantly at any potluck. I still remember the first time I made these for a keto gathering. I wanted a knockout dessert that stayed true to my plan, and man, did this deliver! When my friends couldn’t believe they were low-carb, I knew these bars were special. Baking for people you love should feel this good—delicious and guilt-free!
Why You Will Love These Salted Caramel Chocolate Chip Cookie Bars
Seriously, you need these bars in your life. Forget fussy layer cakes; these are pure, straightforward joy baked right in a pan. Once you try this cookie bar recipe, you’ll be making it for every single occasion. Here’s the scoop on why they are instant winners:
- Incredible Flavor Layering: It’s the trifecta of goodness—oatmeal cookie, melted chocolate, and that gooey, homemade salted caramel. It just hits every note perfectly.
- Super Low Effort: Even though the flavor is gourmet, the process is so simple. You make the caramel while prepping the dough, assemble, and bake. It’s one of the best beginner easy pan bakes out there.
- Perfect for Sharing: Baking in an 8×8 dish means you get 16 generous squares. They transport like a dream, making them top-tier potluck ideas.
- Texture Heaven: You get that satisfying chew from the oats mixed with the soft, rich center and that drizzle of chunky caramel on top.
- Make-Ahead Friendly: Truthfully, they taste even better the next day after they’ve chilled and settled down.
- Chocolate Chip Overload: We use two types of chocolate chips in this recipe, so you know it’s going to be intensely chocolatey!
Essential Equipment for Perfect Salted Caramel Chocolate Chip Cookie Bars
Okay, listen up! These Salted Caramel Chocolate Chip Cookie Bars aren’t fussy, but they do require the right tools, especially when you’re dealing with molten sugar. If you have a set of standard baking basics, you’re already 90% there. You don’t need fancy gadgets, just a little focus!
Here’s my must-have list. Make sure you have these things ready before your water and sugar even hit the stove:
- A heavy-bottomed saucepan: This is non-negotiable for the caramel!
- An 8×8 baking dish (standard size is perfect for these easy pan bakes).
- A medium bowl for whisking your dry dough ingredients.
- A large mixing bowl for bringing the cookie dough together.
- A silicone spatula or wooden spoon for mixing the caramel.
I have to stress the saucepan. When you’re making homemade caramel, especially balancing sugar and water, you are walking a fine, hot line. If your pan is too thin, the heat distributes unevenly. You end up with patches of burnt sugar right next to sugar that hasn’t even started melting! Trust me, a heavy-bottomed saucepan spreads that heat out slowly and evenly, giving you perfect amber caramel every single time. It’s worth using the nice one!
Gathering Ingredients for Your Salted Caramel Chocolate Chip Cookie Bars
Alright, let’s get shopping! Since we have two major components here—that silky caramel and the hearty oat cookie—we have to keep our ingredients separated so we don’t accidentally pour flour into the hot sugar. This is where organization saves the day, especially when timing is tricky. Keeping things ready helps you move smoothly through the process, which is key for success with salted caramel desserts.
Before you even think about turning on the stove, make sure everything is measured out and ready to go. I’ve listed exactly what you need below, focusing on the little prep notes that make a huge difference in the final texture. For a deeper dive into how oats perform in baking, check out my guide on oat-based baking.
For the Homemade Salted Caramel
The caramel is the heart of these bars, and it needs happy, relaxed ingredients. If your dairy is cold, the hot sugar seizes up, and suddenly you’re wrestling a giant, hard candy block! Don’t let that happen to you.
- Granulated sugar: You need 3/4 cup of this to start the magic.
- Water: We need 1/4 cup plus 2 tablespoons of this to help dissolve the sugar evenly.
- Unsalted butter: Make sure it’s sliced, about 4 1/2 tablespoons worth.
- Heavy cream: This is crucial! It must be room temperature, about 1/4 cup plus 2 tablespoons. Warm it up just slightly if needed—but keep it away from the sugar pot until the amber stage!
- Vanilla extract: Just 1 teaspoon for depth.
- Kosher salt: A hefty pinch goes in the caramel itself.
- All purpose flour: We use 7 tablespoons here to thicken the caramel slightly—don’t skip this, it helps it stay spreadable!
For the Oatmeal Chocolate Chip Cookie Dough
This is what gives our cookie bar recipe that wonderful chewy structure. We aren’t just throwing random chips in; we are layering texture!
- Quick oats: 1 cup is required for that classic texture.
- All purpose flour: Need 1 1/4 cups for the main body of the dough.
- Baking powder: 1/2 teaspoon for a slight lift.
- Kosher salt: Another 1/2 teaspoon to season the dough perfectly.
- Unsalted butter: 1/2 cup, and make sure it’s room temperature—soft like it’s waiting for you to make cookies!
- Dark brown sugar, packed: 1 cup, packed tightly. The molasses flavor in the dark brown sugar is essential here!
- Egg + egg yolk: You need one whole large egg plus one extra egg yolk. That extra yolk adds richness and chewiness we can’t live without.
- Vanilla extract: 2 teaspoons for the dough.
- Semisweet chocolate chips: Use 1/2 cup of these for the base layer.
- Dark chocolate chips: We need 3/4 cup of these for the melting layer over the base.
- Walnuts or pecans, finely chopped: 3/4 cup of your favorite nut for texture.
- Flaky sea salt: For sprinkling right at the end—this is for finishing!
Step-by-Step Guide to Making Salted Caramel Chocolate Chip Cookie Bars
Okay, deep breath! This is where the magic happens. Since we have a caramel sauce that cooks quickly and needs perfect timing, we tackle that first. Then we can make the dough while the caramel cools down just enough. Remember, timing is everything in baking, but don’t stress! This is a foolproof method, especially if you’ve got all your ingredients ready to go like we talked about. You can check out my thoughts on the perfect oven temperature here: oven temperature guide. Also, if you want to see where I originally got some inspiration for these amazing layers, check out this other great recipe!
Creating the Rich Salted Caramel Layer
This is the most critical part. We are making caramel from scratch, and it takes concentration, but it’s worth every second! I always feel like a mad scientist when I watch the sugar change color.
- First things first: have all your caramel ingredients measured out! Especially that room-temperature heavy cream—seriously, don’t forget that step in the prep.
- Take your heavy-bottomed saucepan and combine the granulated sugar and the water. You’ll want to stir this gently just once to evenly wet the sugar crystals.
- Pop it over medium heat and just let it be. Don’t stir anymore! If sugar starts clinging to the sides, just use a wet pastry brush to gently wash it down.
- Watch closely! It will turn clear, then start bubbling, and finally graduate to that gorgeous, deep amber color. This is your cue! The second it hits a deep, uniform amber, remove the entire pan from the heat immediately.
- Quickly whisk in the sliced butter. It will bubble up like crazy, so stand back a little!
- As soon as the butter is incorporated, *slowly* pour in that room-temperature heavy cream while whisking continuously. Slow and steady here prevents seizing! Keep whisking until it is completely smooth.
- Whisk in your vanilla extract and that hefty pinch of kosher salt. Give it a little stir.
- Now, do one last little burst of heat! Return the pan to medium heat and let it bubble gently for about two full minutes—no more, no less.
- Finally, take it off the heat for good and whisk in the 7 tablespoons of flour. This thickens it up just enough so it doesn’t run everywhere when we layer it.
Set that gorgeous caramel aside while we move on to the cookie dough. It will thicken as it sits, which is exactly what we want later!
Preparing the Oatmeal Cookie Dough Base
While the caramel is cooling down slightly, let’s get this chewy, oaty base mixed up. This part is easy peasy!
- In your medium bowl, quickly whisk together the dry dough ingredients: the quick oats, flour, baking powder, and salt. Set this aside.
- In your large mixing bowl, get that softened butter creamed together with the packed dark brown sugar. You want this smooth and fluffy—a good five minutes with a hand mixer, or some serious elbow grease if you’re mixing by hand!
- Beat in your one large egg, that extra egg yolk, and the vanilla extract until everything looks combined and creamy.
- Now introduce the dry ingredients into the wet mixture. Mix on low speed, or fold gently by hand.
- Here’s the trick for great chocolate distribution: Stop mixing just before the flour is completely gone. Toss in that 1/2 cup of semisweet chocolate chips and fold them in until you see just a few streaks of flour left. Overmixing makes tough bars!
Assembling and Baking Your Salted Caramel Chocolate Chip Cookie Bars
Time to build the layers! We’re doing a partial bake here, which is critical for keeping the bottom from getting soggy under that heavy caramel.
- Preheat your oven to 350°F and prep that 8×8 pan really well with parchment paper that hangs over the sides—this is your handle for lifting them out later!
- Press about two-thirds of your cookie dough evenly into the bottom of that prepared dish. Don’t worry about perfection here; it’s going to settle.
- Sprinkle that 3/4 cup of finely chopped nuts evenly over the dough base.
- Bake this base layer for exactly 8 minutes. You want it set but still pale.
- Pull the pan out and immediately evenly distribute the 3/4 cup of dark chocolate chips right over that warm base. They’ll start melting from the residual heat!
- Grab your caramel. If it’s gotten too stiff while you were baking, just pop it on the stove for 15 seconds to get it pourable again. Drizzle all that wonderful caramel over the chocolate chips.
- Take the reserved dough you chilled and dot it randomly over the top of the caramel layer. Think blobs, not an even layer!
- Bake everything again for another 20 to 25 minutes. You’re looking for the top dough blobs to just be lightly golden brown.
Now comes the hardest part, the waiting game! You have to let them cool on the counter for about 30 minutes, and then—this is essential for clean cuts—chill them in the refrigerator for a full hour. This helps the caramel set up just right so these amazing Salted Caramel Chocolate Chip Cookie Bars don’t turn into one giant, beautiful mess when you slice them.
When they are perfectly chilled, lift them out using those parchment paper handles, sprinkle generously with flaky sea salt, and slice into 16 squares. Seriously, if you followed my advice to check out external recipes, you may have seen this one over at Butternut Bakery, but now you have my complete technique for success!
Tips for Achieving Perfect Salted Caramel Chocolate Chip Cookie Bars
I want these Salted Caramel Chocolate Chip Cookie Bars to be legendary in your kitchen, not a frustrating baking memory! Caramel making and bar assembly can sometimes trip people up, but honestly, it’s just a matter of knowing a few tiny secrets. Once you master these three points, you’ll be making these beautiful salted caramel desserts flawlessly every single time.
These tips focus on the exact problems I ran into when I first started experimenting with layering sticky caramel in a cookie base:
Never Rush the Cream Temperature
I cannot stress this enough: If you pour cold heavy cream into your hot amber sugar bath, you risk thermal shock. Translation? Your beautiful sauce instantly turns into grainy clumps that are impossible to smooth out. It happens fast! Always, always, always take the heavy cream out of the fridge when you start measuring your sugar and water. If you forget, give it 20 seconds in the microwave—just warm, not hot. Happy cream makes smooth caramel!
The Secret to Clean Cuts is Cold, Cold Dough and Caramel
You absolutely must respect the chilling time, or you’ll ruin the structural integrity of your beautiful layers. When these bars come out of the oven, they are molten lava—the caramel layer is liquid gold, and the cookie dough is super soft. If you try slicing them warm, you’ll end up with a gooey, delicious puddle of crumbs rather than those perfect squares you see in pictures. Let them cool on the counter until they are merely warm, and then wrap that pan up tight and pop it in the fridge for at least 60 minutes. That chilling time firms up everything so they slice beautifully. It’s the secret to making these look professional when you take them to that next potluck!
Use the Right Salt for the Right Place
We use two kinds of salt in this recipe, and they serve different purposes. The kosher salt goes *into* the caramel mixture and the cookie dough itself. This salt dissolves and seasons the layers from the inside out. The flaky sea salt is for the very end—sprinkled on top *after* the bars are sliced or right before the final chill. This top layer of flaky salt won’t dissolve; it stays crunchy and delivers that sharp, bright burst of saltiness that cuts through the rich chocolate and caramel. It’s an easy upgrade that makes these easy pan bakes feel fancy.
Variations for Your Salted Caramel Chocolate Chip Cookie Bars
Just when you thought these Salted Caramel Chocolate Chip Cookie Bars couldn’t get any better, we can tweak them! Honestly, they are fantastic just as written, but I love experimenting when I have extra ingredients hanging around. If you want to keep your baking exciting, trying out a few simple swaps or additions is the way to go. You can change up the texture, the level of sweetness, or even introduce a tiny warmth in the spice profile, all while keeping that magical gooey caramel layer intact.
For those ready to branch out, here are three simple ways you can make this recipe your own. If you’re interested in learning more about how spices interact with sweet treats, definitely take a peek at my guide on baking spices—it’s fascinating!
Swap Out the Nuts (or Skip Them Entirely!)
The texture is important, and nuts bring a great crunch, but maybe you have an allergy, or maybe you just don’t love pecans. That’s fine! You can easily swap the 3/4 cup of chopped walnuts or pecans for something else that brings that necessary textural contrast. My favorite switch is using salted, toasted coconut flakes—it adds this amazing tropical sweetness that pairs surprisingly well with the dark chocolate chips.
If you’re avoiding nuts altogether, simply omit them. Instead, you can gently increase the amount of dark chocolate chips by another 1/4 cup to make sure that cookie layer stays nice and dense. Just try not to overmix when you add them in!
Play with Your Chocolate Percentages
We call for semisweet and dark chocolate chips, which give us that perfect balance of sweetness and depth. But you have total control here! If you’ve got a sweet tooth that rivals mine, swap that 1/2 cup of semisweet for milk chocolate chips. It makes the entire bar much sweeter and softer when it melts.
On the flip side, if you like things less sweet or want a more intense, grown-up flavor that really lets that caramel shine, use bittersweet chocolate chips (or even 70% cacao chunks) for both the base chocolate layer and the melting layer. The slight bitterness balances the sugar in the caramel beautifully. Remember, since these are salted caramel desserts, you want that salt to really stand out!
Introduce a Subtle Spice to the Dough
The cookie dough is delicious as is, thanks to the brown sugar, but sometimes I feel like it needs just a hint of warmth, especially when I serve these during the cooler months. Cinnamon and nutmeg are your best friends here!
Try mixing in just 1/2 teaspoon of ground cinnamon along with the dry ingredients (flour, oats, baking powder, salt). It’s such a subtle addition that most people won’t notice it until they realize how cozy and complex the flavor is. It blends right into the oat flavor profile but gives the final product a little extra something special. It’s a tiny change that makes these easy pan bakes feel brand new!
Storage and Reheating Instructions for These Easy Pan Bakes
One of the best things about these Salted Caramel Chocolate Chip Cookie Bars is you almost never have leftovers because they are just *that* addicting! But hey, future you will thank present you for saving some, right? How you store these matters because we have that gooey caramel layer that needs careful handling.
Since these are great easy pan bakes, keeping their texture perfect for a few days isn’t hard, but listen closely, because the fridge and room temp storage have different results.
Room Temperature Storage (Use this first!)
If you plan on eating these within two or three days, the counter is actually your friend. The caramel stays softer and more pleasingly gooey, which is exactly what we want for these salted caramel desserts!
Make sure you have them cut first! Once sliced, place them in an airtight container. I like layering them with wax paper or parchment paper between the layers—this stops that beautiful flaky salt from rubbing off onto the caramel layer below it. Keep them somewhere cool and dry. Don’t put them near the stove or in direct sunlight where the chocolate might start sweating!
Honestly, after day three, I start getting worried about the dough softness, so try to get through them before then if you store them this way.
Refrigeration for Longer Freshness
If you need them to last longer, like up to a week, the refrigerator is the way to go. It solidifies the caramel layer, which gives you those incredibly clean cuts we talked about earlier, perfect for presentation!
Wrap them tightly—and I mean TIGHTLY—in plastic wrap, or place them in a completely sealed container. Keep in mind that the cold air will firm up the dough and the caramel significantly. They will be much firmer than when they were fresh out of the initial chill.
Pro Tip: If you are taking them to a party or serving them straight from the fridge, make sure you pull them out about 30 minutes before you plan to eat them. That little bit of warmth softens the chewiness up again perfectly.
How to Reheat for That Fresh-Out-of-the-Oven Gooeyness
Sometimes you just need that molten moment, right? Reheating is simple, but you only want to reheat individual bars or small batches, not the whole pan! Microwaving is your best bet for speed, but short bursts are key.
Take one or two bars and place them on a microwave-safe plate. Zap them for just 10 to 15 seconds on medium power. Don’t blast them on high! You want the chocolate to soften and the caramel to become wonderfully stretchy again, not turn into a liquid mess.
If you are serving these with ice cream—and you absolutely should—a quick 20-second microwave bomb makes the whole experience heavenly.
Frequently Asked Questions About Salted Caramel Desserts
I know you’ve got questions bubbling up! When you’re working with layered treats like these Salted Caramel Chocolate Chip Cookie Bars, it’s only natural. I’ve gathered the most common things people ask me about, especially concerning timing and making these perfect salted caramel desserts!
Can I make the salted caramel ahead of time?
Yes, you absolutely can! I often make a double batch of the caramel when I have time because it’s such a great base for other salted caramel desserts. Once it’s completely cooled down, it will be very thick, almost like fudge. Store it in an airtight jar in the refrigerator for up to two weeks. When you are ready to make the bars, just gently reheat a portion of it on the stove over low heat until it’s smooth and pourable again, just like we did in the assembly steps. It reheats beautifully, so don’t stress about making it all the day of!
Are these Salted Caramel Chocolate Chip Cookie Bars good for a potluck?
Oh, they are practically *made* for potlucks! These are some of the best easy pan bakes because they travel so well. Since the recipe yields 16 good-sized bars, you’re bringing plenty to share. The best part is that they don’t require any specialized serving dishes because they are meant to be eaten handheld! Just make sure they are thoroughly chilled before you transport them. If they’re cold, everything stays neatly stacked until everyone digs in. They are always the first thing to disappear!
How long do I really need to chill them before slicing?
I know waiting is the absolute worst part of baking, but this step is crucial for success! The recipe calls for about an hour of firm chilling in the fridge after they’ve cooled on the counter. If you try slicing while they are even slightly warm, the caramel is going to ooze out and ruin your clean edge. Chilling solidifies the caramel and gives the dough firmness. If you chill them overnight, even better! You’ll get those impossibly neat squares that look amazing on any serving platter.
Can I skip the oats in this cookie bar recipe?
You *can* skip them, but honestly, I wouldn’t recommend it unless you have to! The quick oats are what give the base layer its characteristic chew and help absorb some of the moisture from the caramel without making the bottom soggy. If you truly can’t use them, you should replace the 1 cup of quick oats with an equal amount of all-purpose flour. Just remember the texture will be noticeably denser and less chewy—more like a regular chocolate chip cookie base, rather than a hearty bar base!
Share Your Experience Making Our Cookie Bar Recipe
Well, we navigated the molten sugar, we layered the chocolate, and we chilled them until they were perfect little bricks of joy! Now that you’ve made your incredible batch of Salted Caramel Chocolate Chip Cookie Bars, I really, truly want to hear all about it! These recipes live and breathe because of the community that tries them, tweaks them, and shares their kitchen victories.
Don’t be shy! Did you serve these at a big family event? Did your friends rave about them? Did you try swapping out the nuts for something wild? Come on down to the comments section below and tell me everything!
Most importantly, if you loved these gooey, chewy treats—please take a moment to leave a star rating right on the recipe card above. Those ratings help other bakers know they are on the right track when diving into rich salted caramel desserts like this one. Happy baking, and I can’t wait to see what you create next!
Salted Caramel Chocolate Chip Cookie Bars
Ingredients
Equipment
Method
- Prepare all caramel ingredients before starting. Make sure the heavy cream is at room temperature to prevent the caramel from seizing. Warm the cream slightly in the microwave if needed.
- Add the water and sugar to a heavy-bottomed saucepan. Stir gently to mix evenly, avoiding sugar splashing onto the sides of the pot.
- Place the saucepan over medium heat and let the sugar dissolve without stirring.
- When the mixture becomes clear and starts bubbling, watch as it changes color from clear to light golden, then to a rich amber. If the sugar browns unevenly, gently move the sugar in the pot to distribute darker areas evenly.
- When the sugar is evenly amber, remove it from the heat immediately and whisk in the butter.
- While whisking gently, slowly pour in the heavy cream and mix until the mixture is smooth.
- Whisk in the vanilla and salt.
- Return the mixture to medium heat and let it bubble for about 2 minutes.
- Remove from the heat and whisk in the flour.
- Set the caramel aside while you prepare the cookie dough.
- Preheat your oven to 350F. Grease and line all sides of an 8×8 baking dish with parchment paper.
- In a medium bowl, whisk together the oats, flour, baking powder, and salt. Set this mixture aside.
- In a large mixing bowl, mix the softened butter and dark brown sugar until smooth. You can do this by hand or with an electric mixer.
- Mix in the egg, egg yolk, and vanilla.
- Pour in the dry ingredients and mix until just combined. Before the flour is fully incorporated, add the 1/2 cup of semisweet chocolate chips.
- Spread about 2/3 of the dough in the bottom of the prepared baking dish. Top this layer with an even layer of the chopped nuts.
- Bake for 8 minutes. Place the remaining dough in the refrigerator while this bakes.
- After 8 minutes, remove the crust from the oven and spread an even layer of the dark chocolate chips over the top.
- Pour the caramel over the chocolate chips. If the caramel has thickened too much, heat it briefly on the stove to make it pourable again.
- Pour an even layer of caramel over the chocolate chips. Top this with random blobs of the leftover cookie dough from the refrigerator.
- Bake for 20 to 25 minutes, or until the top is very lightly golden.
- Let the bars cool at room temperature for about 30 minutes, then chill them in the refrigerator for about an hour.
- Use a knife around the edges if needed to release the bars from the pan. Lift the bars out, sprinkle with flaky sea salt, and slice them.


