
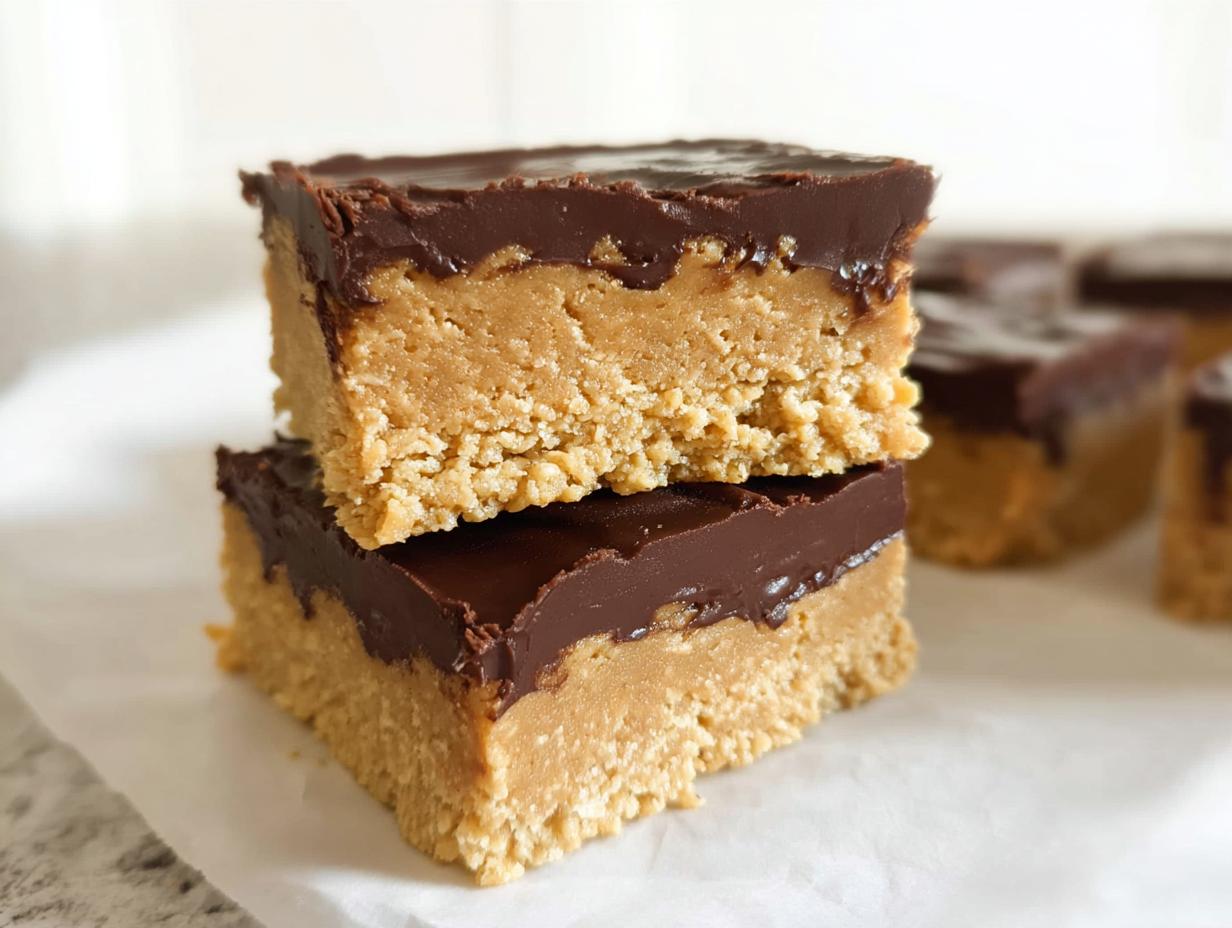
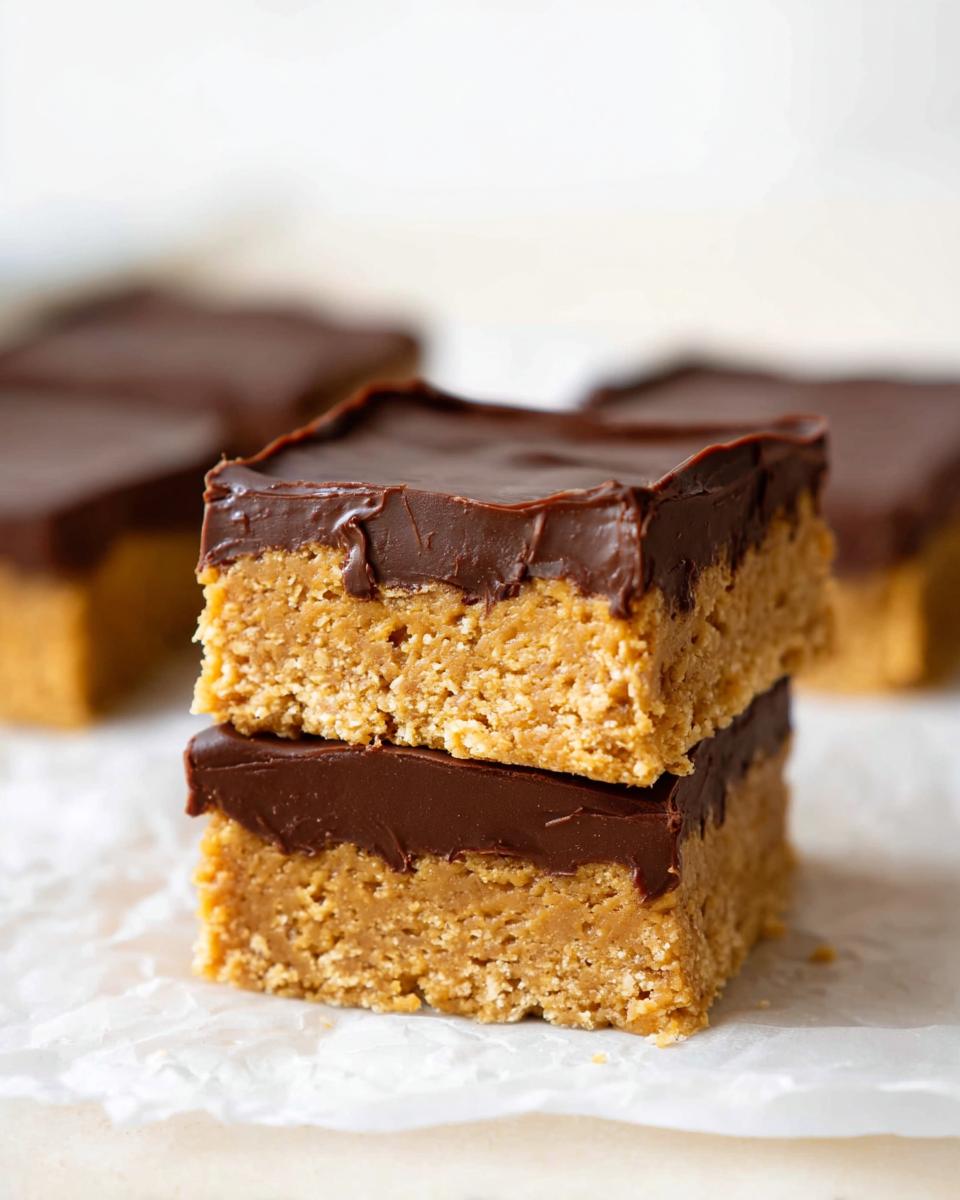
Oh my goodness, if you are fighting those afternoon sweet cravings and just need something deeply satisfying without spending hours in the kitchen, I have the absolute perfect answer for you. We are making the easiest, richest, little squares that disappear way too fast! These Peanut Butter Chocolate Fudge Squares are pure comfort food nestled into a small package. Truly, this recipe is a lifesaver, and it hardly counts as ‘baking’ since it all sets up in the fridge.
I’ll actually never forget the day I first truly committed to eating low-carb. It was a tough week, and the cravings felt like they were winning! I decided to channel my inner chef, grabbing what I had on hand—peanut butter, cocoa powder, and some good chocolate. As I melted everything together and poured it into a pan, the kitchen smelled like pure heaven. When I took that first bite of the soft, dense fudge squares, it was a revelation. You absolutely can create treats that feel indulgent, even when you’re watching your carbs. I’m Sarah Johnson, The Keto Performance Chef, and I promise this recipe is going to become a staple for you too.
Why You Will Love These Peanut Butter Chocolate Fudge Squares
Honestly, these squares are magic. They hit that deep chocolate and salty peanut butter craving perfectly, and they are so incredibly practical for busy weeks. You don’t need to turn on your oven for long—just a few minutes to get that lovely chocolate top just right. If you need a quick fix for dessert, this is it!
- You start to finish this in under 20 minutes, which I love! Prep is only about fifteen minutes, tops.
- The ingredient list is short and sweet. Forget complicated pantry stocking; we are keeping this simple.
- The flavor is intensely rich. Since they are so decadent, they make truly satisfying rich bite sized desserts. Portion control happens naturally when something tastes this good!
- It’s a classic flavor combination that pleases absolutely everyone—it is impossible to go wrong with peanut butter and chocolate.
Essential Equipment for Perfect Peanut Butter Chocolate Fudge Squares
Okay, let’s talk tools! Since this is more of a no-bake candy situation, you don’t need a fancy stand mixer, which is great news for quick cleanup. But having the right structure helps everything set beautifully, which is crucial when dealing with these dense layers.
You’ll only need three main items, aside from your measuring cups, of course. Make sure you grab these things before you even start mixing your sugars for the base. Remember, preparation is half the battle in the kitchen!
- An 8-inch square baking pan is the perfect size. This ratio of deepness for the base versus the glaze makes for ideal rich bite sized desserts.
- A large bowl. You’ll be doing all your mixing for the peanut butter base right in here, so give yourself room to work without splattering everything over your counter.
- Either a microwave or a double boiler setup. This is just for melting down that beautiful chocolate for the top layer. I usually just use the microwave because I’m impatient, but watch it closely!
Now, here’s my biggest recommendation, and this comes from years of wrestling sticky fudge out of pans: You absolutely must use parchment paper! Don’t just grease the bottom. Line that Peanut Butter Chocolate Fudge Squares pan so that the paper hangs over two opposite sides.
Why the parchment sling? Because when this fudge is cold, it becomes solid! Cutting it inside the pan is a recipe for disaster and uneven squares. Once everything is set firm, you can just grab those paper handles and lift the entire block out onto your cutting board. Trust me, it saves your sanity and keeps your final squares looking professional.
Gathering Ingredients for Your Peanut Butter Chocolate Fudge Squares
Before we mix anything, we need to get organized, especially with temperature! This is key to getting that lovely, velvety texture instead of a crumbly mess. A lot of people online have trouble grabbing their ingredients when they aren’t ready. I always pull out my butter and peanut butter about an hour before I plan to start mixing so they are perfectly soft. It makes blending so much easier!
We are going to break this into two parts: the thick, creamy base, and the shiny chocolate topping that makes this such a wonderful chocolate fudge recipe. When you gather your chocolate, remember, since this is such a rich treat, the quality of the chocolate really shines through. If you check out some inspiration on delicious dessert ideas, you’ll see how important that chocolate choice is!
For the Peanut Butter Base
This is what gives us that dense, satisfying chewiness. Make sure your butter and peanut butter are truly at room temperature; cold ingredients fight each other instead of blending nicely.
- 1 3/4 cups powdered sugar
- 1/2 cup packed brown sugar
- 1/4 cup butter, at room temperature
- 1 cup smooth peanut butter, at room temperature
- 1/2 teaspoon vanilla
For the Chocolate Glaze
This layer needs to be ultra-smooth, which is why we add that tiny bit of corn syrup—it keeps the glaze from getting dull! Use the best quality semisweet chocolate you can find here; it makes that final layer look like it came from a fancy chocolatier!
- 4 oz semisweet chocolate
- 1 tablespoon butter
- 1 tablespoon corn syrup
- 3 tablespoons cream
Once you have all this ready, you can move on to mixing! If you are looking for more fun ways to incorporate sweets into your diet, you should check out other ideas over at some fantastic recipe hubs!
Step-by-Step Instructions to Make Peanut Butter Chocolate Fudge Squares
This is where the magic happens, and I promise you, it rushes by fast! Since we aren’t actually baking, we are mostly focused on mixing and chilling. My biggest advice is this: read all ten steps once before you touch a single ingredient. That way, you know exactly when to prep your pan and when to move things to the fridge. Having everything ready keeps the process smooth!
Preparing the Base Layer
This first part creates that thick, satisfying peanut butter bottom layer. It comes together fast because those sugars and fats just melt into each other.
- First things first: take your 8-inch square baking pan and grease it up really well. Then, line it with parchment paper, making sure you leave some overhang on two sides—that’s your handle for later!
- In your big bowl, toss in the powdered sugar, brown sugar, soft butter, peanut butter, and vanilla.
- Grab your electric mixer or just use a sturdy wooden spoon if you want a small arm workout. Beat this whole mixture until it looks fully combined and a little crumbly but holds together when you press it.
- Pat this peanut butter mixture firmly and evenly into the lined pan. It needs to be flat, so press it down hard!
- Now, pop that pan into the refrigerator. We want this base nice and cold while we whip up the topping, which shouldn’t take long at all.
Making and Applying the Chocolate Glaze
This is so much easier than making traditional stovetop fudge, and it’s exactly what makes these fantastic homemade candy ideas. We are aiming for shiny and silky smooth here.
- Take your chopped semisweet chocolate, the tablespoon of butter, and the corn syrup, and melt them down. I use the microwave in 30-second bursts, stirring well in between, or you can use a double boiler if you prefer more control.
- Once that’s melted and smooth, stir in the three tablespoons of cream. Keep mixing until the glaze turns completely smooth, glossy, and completely uniform in color. No streaks allowed!
If you wanted a very subtle peanut butter swirl effect—though I love mine layered—this is *right* before you pour. You could dollop a spoonful of extra peanut butter on top of the base layer and gently swirl it with a knife *before* pouring the chocolate over it. But for this version, we keep the layers separate and clean!
Setting and Cutting Your Rich Bite Sized Desserts
Patience is a virtue, especially when we are dealing with making perfect squares! The chilling step is non-negotiable if you want clean cuts.
- Pour that gorgeous chocolate glaze right over your chilled peanut butter layer. Gently tilt the pan so the chocolate flows to all the edges, covering everything nicely. If you want it perfectly flat, you can use an offset spatula, but usually, tilting works fine.
- Back into the cold it goes! You need at least 30 minutes, but honestly, two hours is better. You want this fudge to be totally firm so it doesn’t squish when you cut it.
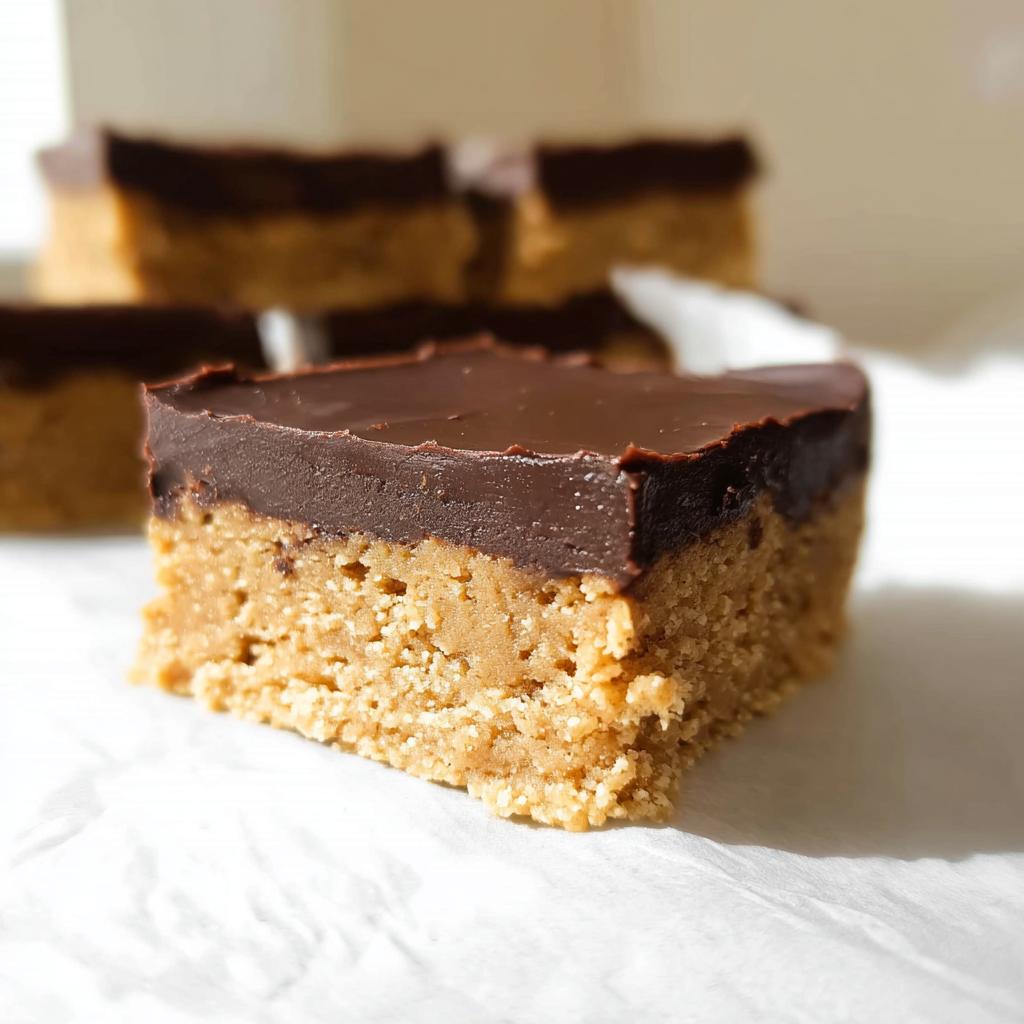
- When it’s rock hard, use those parchment paper handles to lift the entire block onto your cutting board. Take a very sharp knife, wipe it clean between cuts, and slice them into beautiful, uniform squares. Now you have those perfect rich bite sized desserts ready to go!
Expert Tips for Perfect Peanut Butter Chocolate Fudge Squares
Now that you have the steps down, I want to share a few little tricks that I learned while experimenting in the kitchen. These aren’t in the main instructions, but they separate a good batch of fudge squares from an absolutely *amazing* one. Even though this is a simple chocolate fudge recipe, a few details really make a difference in the final texture.
First, let’s talk about the peanut butter itself. My notes mention this, but I need you to hear it straight from me: the type of peanut butter matters! If you use a natural peanut butter—the kind where the oil separates and you have to stir it really well—your base might come out a little looser or runnier than expected.
Why? Because those natural versions don’t have the stabilizers that traditional brands like Jif or Skippy rely on. If you use natural, just be prepared that you might need to chill the base layer for closer to 45 minutes instead of 30, or you might need an extra half-cup of powdered sugar to help it firm up when mixing. Traditional brands give you that reliable, dense payoff every time.
When it comes to that shiny chocolate topping, the biggest mistake people make is overheating that beautiful chocolate. If you zap it too long in the microwave, the chocolate can seize up or turn dull and grainy when it cools down. Never let the chocolate get too hot before you add the butter and cream!
I always melt the chocolate in short, careful bursts—maybe 20 seconds at a time—stirring vigorously between each one. You want it barely melted, almost like a thick paste, before you stir in the butter and cream. That residual heat, combined with the added fat, will finish melting the last few lumps and give you that perfect, mirror-like sheen you’re looking for. It’s about gentle heat, not blasting it!
If you want more fantastic low-carb recipe ideas that stick to your eating plan, you can always check out what I’m whipping up over at my main recipe page for newer inspiration!
Storage and Reheating Instructions for Peanut Butter Chocolate Fudge Squares
This is actually one of the best parts about making these squares: they are fantastic for make-ahead treats! If you’re making them for a party or just stocking up on quick snacks, you don’t have to worry about them going stale quickly.
The general rule for these Peanut Butter Chocolate Fudge Squares is that they should always live in the refrigerator. Because the base is full of fats and we want that firm, fudgy texture, letting them sit on the counter will get them too soft, too fast.
- Pop the finished, cut squares into an airtight container. If you stack them, put a small piece of wax paper or parchment paper between the layers so the chocolate top doesn’t stick to the bottom of the next layer.
- Keep them covered in the fridge. This is a big trust factor for you: these fudge squares last for several weeks when stored properly! Seriously, they last so long I sometimes forget I even made them, but they taste just as good on day fourteen as they do on day one.
You never really need to reheat candy like this—it’s meant to be enjoyed cold and firm! If they get too hard directly out of the fridge, just let a piece sit out on the serving plate for about ten minutes before you dig in. That softens the peanut butter just enough to make it perfectly decadent.
Variations on Classic Peanut Butter Chocolate Fudge Squares
While I truly believe my basic recipe for Peanut Butter Chocolate Fudge Squares is the gold standard—rich, simple, and perfect—I know that home cooks like us love to get creative! It’s fun to swap things out based on what’s in the pantry or what flavor mood you’re in that day. This recipe is incredibly forgiving, which is why it works so well for tinkering!
Don’t be afraid to experiment! The base is so sturdy that you can play around with the nut flavor easily. If peanuts aren’t your favorite, or maybe you just ran out, you can swap them right out for other creamy textures. I’ve done this plenty of times when company has allergies, and the results are still wonderfully satisfying.
- Switching Your Nut Butter: Go for it! Almond butter makes a slightly earthier, deeper flavor that pairs beautifully with the chocolate glaze. Cashew butter is a little sweeter and creamier if you prefer that. Just remember what I said earlier: if you use a natural, oil-separated butter, you might need to add a little extra powdered sugar to the base mixture to help it set up firm enough for cutting.
- Chocolate Glaze Remix: The 4 ounces of semisweet chocolate gives us that classic bittersweet profile, but you can certainly mix it up! Try substituting half of the semisweet with milk chocolate if you want a sweeter top layer. Or, for a bit of spice, melt in an extra dash of cinnamon or even a tiny pinch of cayenne pepper with the chocolate when you melt it down. That little kick is heavenly!
Now, if you’re feeling ambitious and want to elevate this beyond a simple layered bar, you can absolutely try creating a proper peanut butter swirl effect. Instead of pouring the entire chocolate glaze on top of the chilled base, try reserving about a quarter of the chocolate glaze.
Pour the chocolate over the base as usual and spread it evenly. Then, dollop small spoonfuls of smooth peanut butter (maybe softened slightly so it drizzles easily) over the chocolate topping. Take a toothpick or the tip of a thin knife and gently drag it through the dollops, pulling the peanut butter through the chocolate top layer just a bit. Don’t overmix! You want distinct ribbons of peanut butter running through the chocolate. Chill that thoroughly, and you get a gorgeous, marbled finish on your rich bite sized desserts!
Frequently Asked Questions About Peanut Butter Chocolate Fudge Squares
Even with a recipe this straightforward, people always have great questions—and I love answering them! It shows you’re thinking ahead about your sweet treats, just like I do. Here are a few things I hear often about making these absolutely perfect bars.
Can I make these Peanut Butter Chocolate Fudge Squares keto-friendly?
That is such a smart question, especially given my background! While this specific recipe calls for regular powdered and brown sugar, you absolutely can adapt it for a low-carb approach. You’d need to swap out the sugars for your preferred keto-friendly alternatives, like erythritol or monk fruit blends that measure cup-for-cup like sugar.
The biggest thing to watch is the chocolate glaze. Make sure you use a high-quality dark or unsweetened chocolate that has zero added sugar, or use specific keto-friendly chocolate chips. Check those labels! With those slight tweaks, you can get a fantastic, low-carb version of these rich bite sized desserts that fits right into your eating plan.
How do I get a clean cut when slicing the fudge?
Oh, slicing can be tricky because we want that firm texture, but we don’t want the fudge to shatter or smear when we cut it, right? This is where that chilling step becomes extra important. You really need it rock solid!
My favorite little kitchen hack to make perfectly clean cuts, giving you gorgeous rich bite sized desserts, is to use a little heat. Take a long, sharp large knife—not a serrated one—and dip the blade into a tall glass of very hot water. Wipe the knife completely dry with a kitchen towel immediately. Then, use that warm, dry blade to slice straight down through the fudge.
For every other cut, rinse the knife in the hot water and dry it again. The heat melts just enough of the chocolate and peanut butter layer to let the blade pass through without dragging or creating rough edges. It sounds fussy, but trust me, the clean lines are worth the extra thirty seconds!
What is the best way to achieve a smooth chocolate fudge recipe topping?
A dull, matte topping ruins the whole decadent feel, doesn’t it? The goal for this chocolate fudge recipe topping is pure, glossy smoothness. The main culprit for a dull or grainy glaze is steam or water contamination, or overheating.
- If you use a double boiler, make absolutely certain the water underneath is simmering gently and not boiling hard enough to splash steam up toward your chocolate bowl.
- If you microwave, take short bursts and stir thoroughly. As I mentioned earlier, you want it *almost* melted before you add the butter and cream. The residual heat from the chocolate does most of the work.
- When you add the cream, stir slowly! If you whisk it aggressively, you incorporate air and can end up with a slightly bubbly, less shiny finish. Gentle folding with a flat spatula until everything is homogenized is the key to that beautiful, smooth sheen.
Share Your Homemade Candy Ideas
Now that you have the rundown on how to make these sensational Peanut Butter Chocolate Fudge Squares, I really, truly hope you give them a try this week! They are such a fantastic, quick treat that always vanishes first at any party. They are proof that satisfying your sweet tooth doesn’t require complicated steps or hours of waiting.
If you make these, please don’t keep the joy to yourself! Snap a picture of your glossy squares—and yes, I absolutely want to see how neat your cuts are!—and tag me on social media. Seeing your results always brightens my day. It helps me know what recipes you love and what I should be sharing next.
And if you found this recipe helpful, leaving a quick rating on the page really does help other dessert lovers find these easy, decadent bars. Head over to my main recipe hub to bookmark this one and explore even more ideas for quick, satisfying sweets!
Peanut Butter Chocolate Fudge Squares
Ingredients
Equipment
Method
- Grease an 8-inch square baking pan, or line it with parchment paper on the bottom and two sides for easy removal.
- In a large bowl, beat the powdered sugar, brown sugar, butter, vanilla, and peanut butter until the mixture is completely combined and crumbly.
- Pat the peanut butter mixture evenly into the prepared pan.
- Refrigerate the base while you prepare the chocolate glaze.
- Melt the chocolate, butter, and corn syrup together in the microwave or a double boiler. Mix well.
- Add the cream and mix until the glaze is completely smooth and shiny.
- Pour the chocolate glaze over the peanut butter layer and spread it evenly to cover the surface.
- Refrigerate the fudge until it is firm, which may take 30 minutes to a couple of hours.
- Slide a knife along the sides of the pan to loosen the fudge. Lift the block out using the parchment paper handles.
- Transfer the fudge to a flat surface and cut it into 1-inch squares, triangles, or rectangles using a sharp knife.


