
Oh, the joy of baking! There’s something truly magical about filling your kitchen with sweet aromas and creating something delicious from scratch. But let’s be honest, for a lot of folks, especially beginners, the idea of baking a cake can feel a little… daunting. Like, what if it sinks? What if it’s dry? I totally get it! I still vividly remember the first cake I ever tried to bake. It was a simple vanilla sponge, and I was determined to impress my family on a birthday. I didn’t have all the right tools or even a proper mixer, but I mixed everything by hand, pouring my heart into it. As the cake baked, the aroma filled my tiny kitchen, and when it came out, it was far from perfect; it had sunk in the middle, but it tasted incredible. That moment ignited my passion for baking, showing me that with a little creativity and courage, anyone could make something delightful that brings people together. That’s exactly why I put together The Ultimate Cake Ideas Recipes Guide for Beginners – to show you that amazing cakes are totally within your reach, no matter your starting point!
Why You’ll Love This Peach Upside Down Cake
Okay, so why this peach upside down cake? Because it’s basically a beginner baker’s dream come true! You’re going to absolutely adore how simple it is to whip up, leaving you with precious little stress and a whole lot of deliciousness.
- Super Easy for Beginners: Seriously, we’re using a cake mix as a base here, which takes *so* much guesswork out of the equation. Plus, the upside-down method means the prettiest part is already done for you!
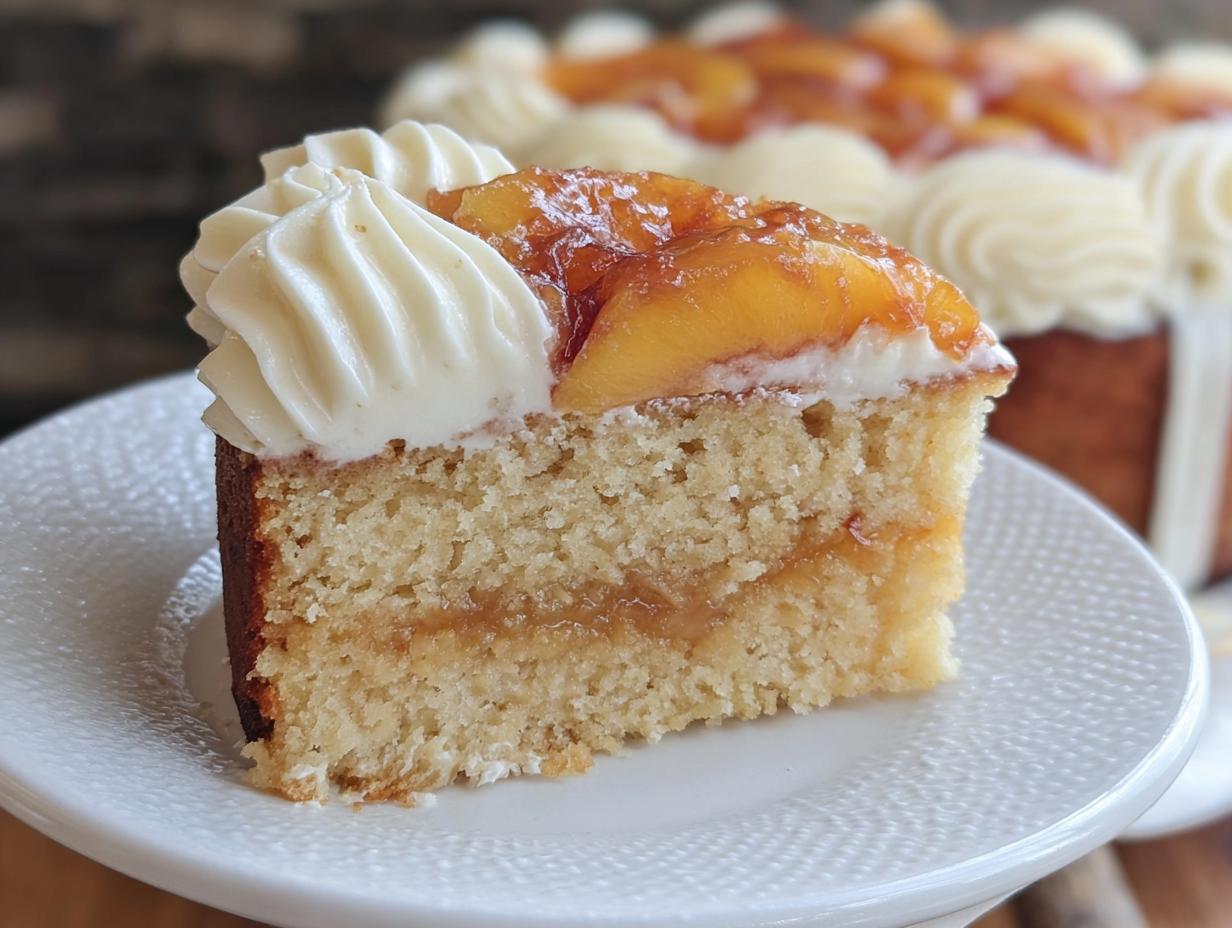
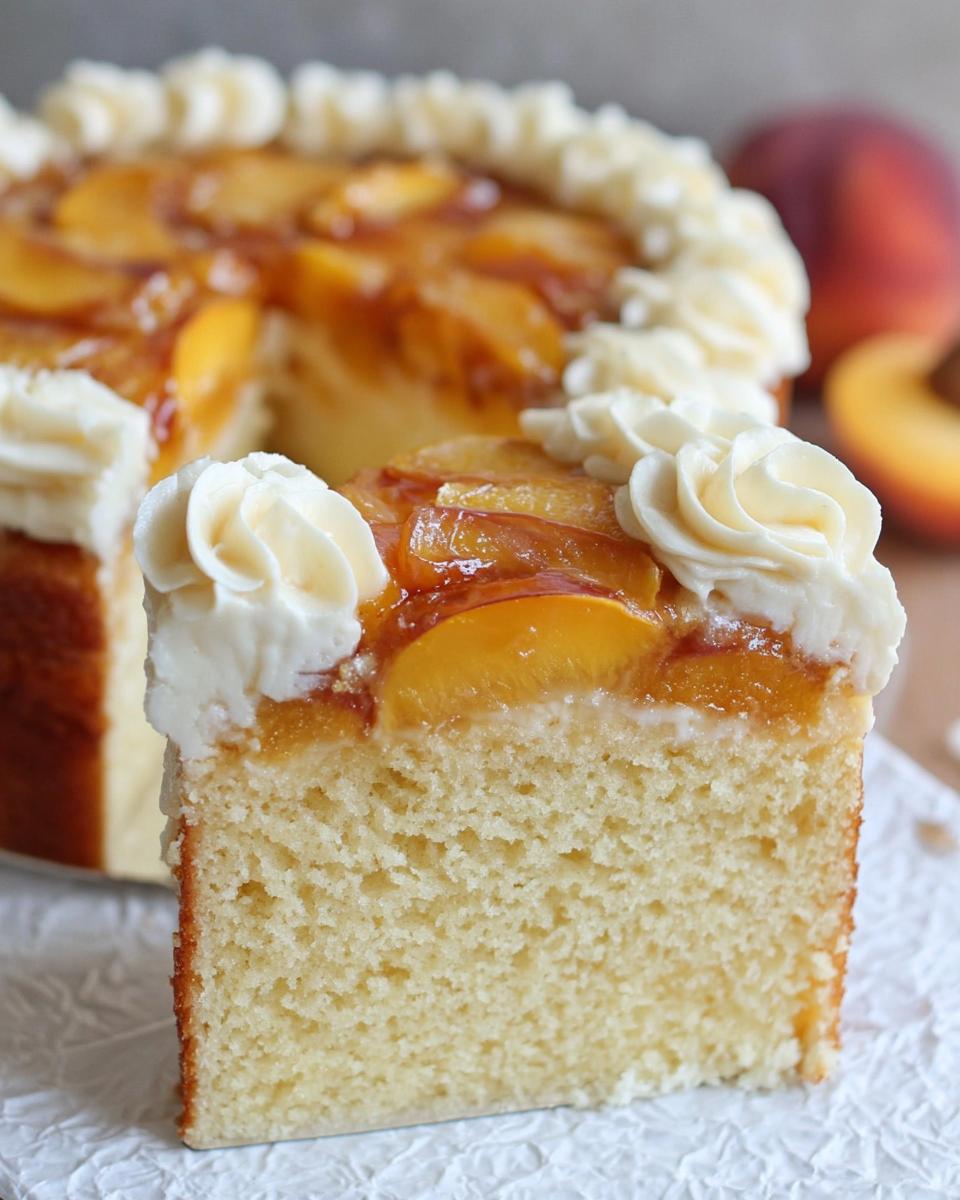
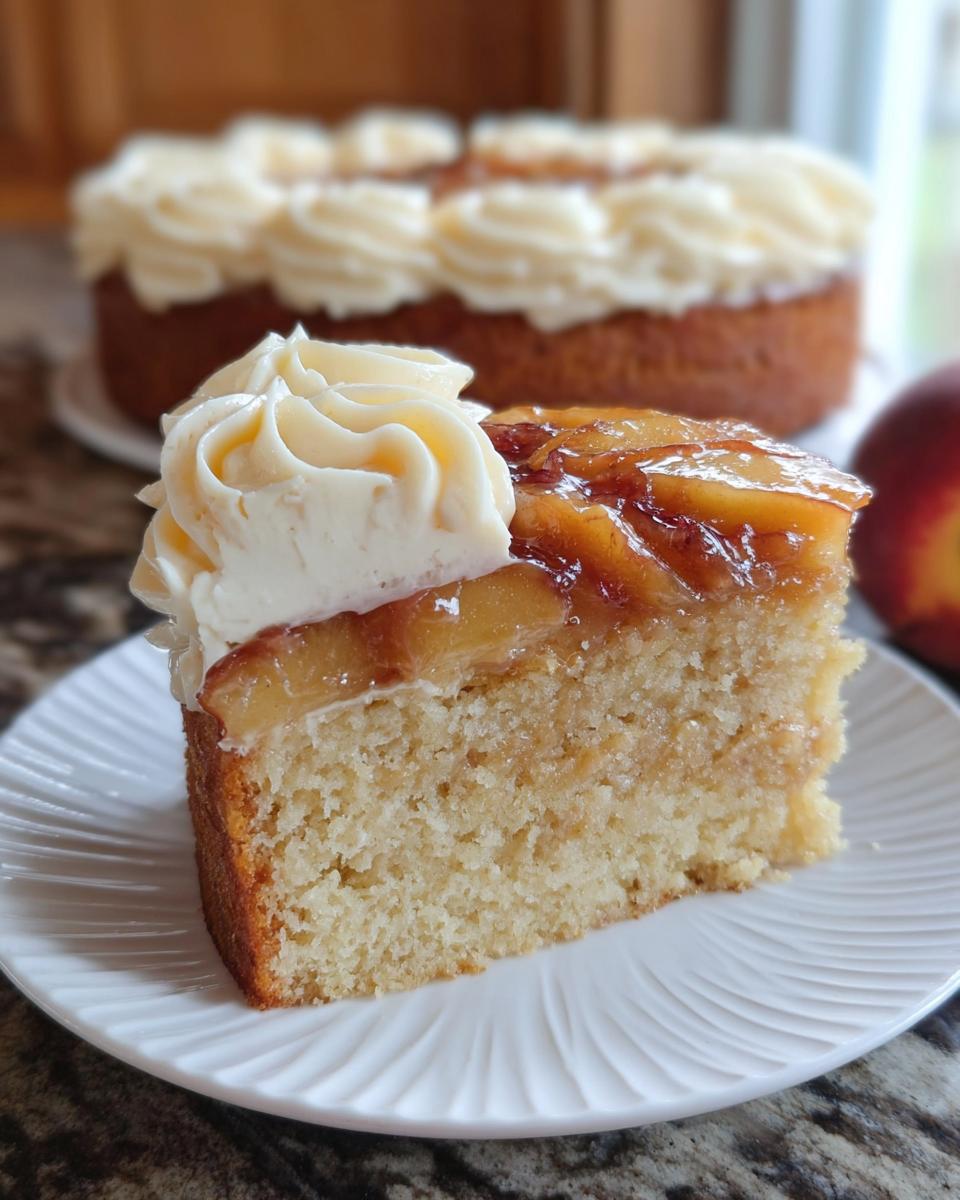
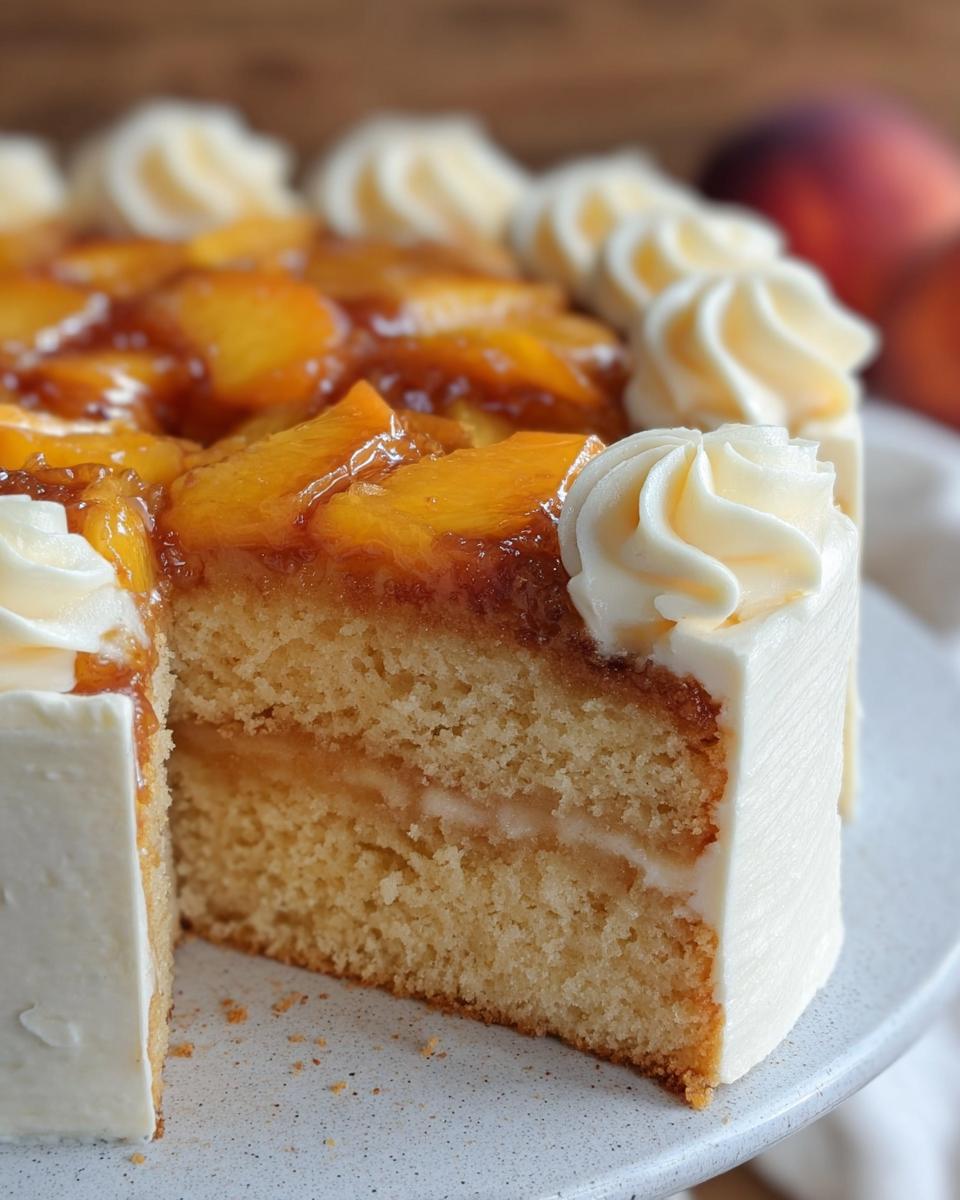
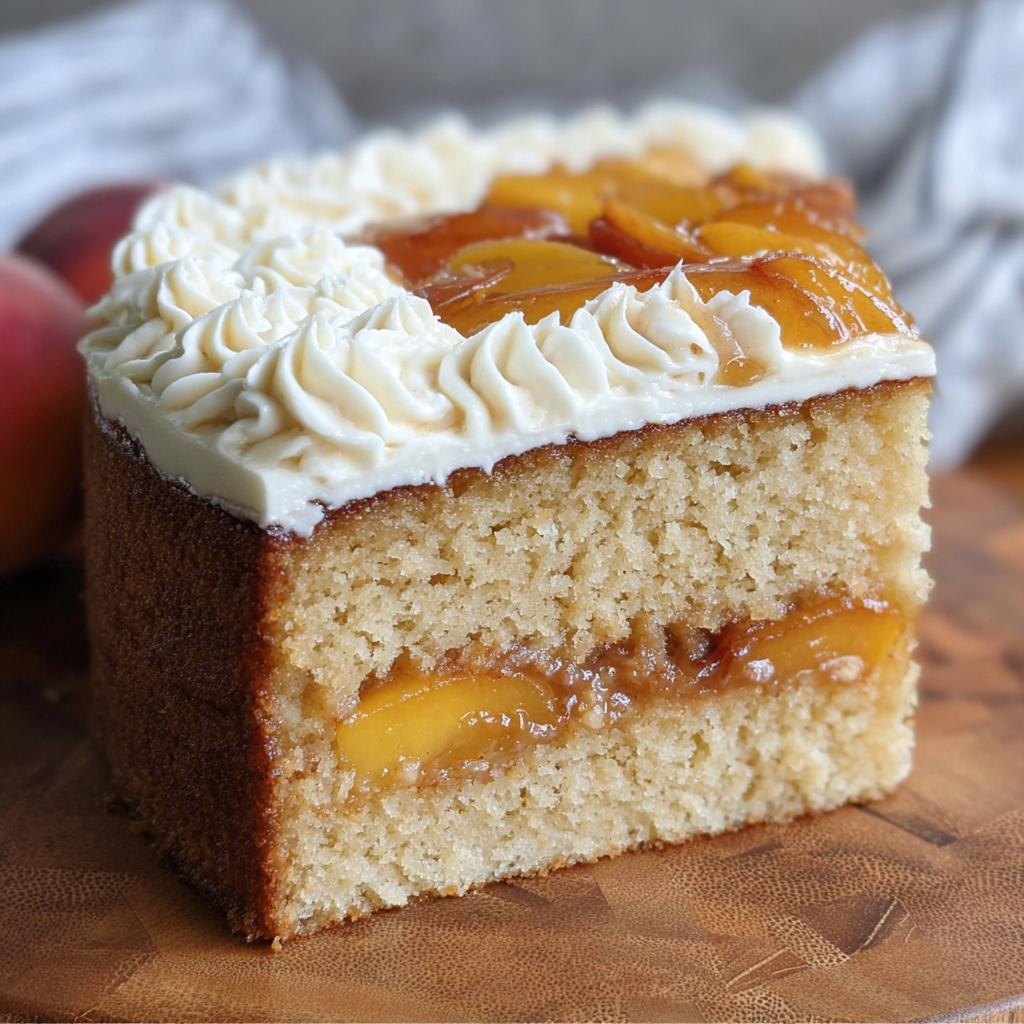
- Incredible Flavor Combo: You get that sweet, juicy, caramelized peach goodness perfectly balanced with a moist, tender cake. And don’t even get me started on that fluffy vanilla buttercream – it’s the perfect hug for this cake.
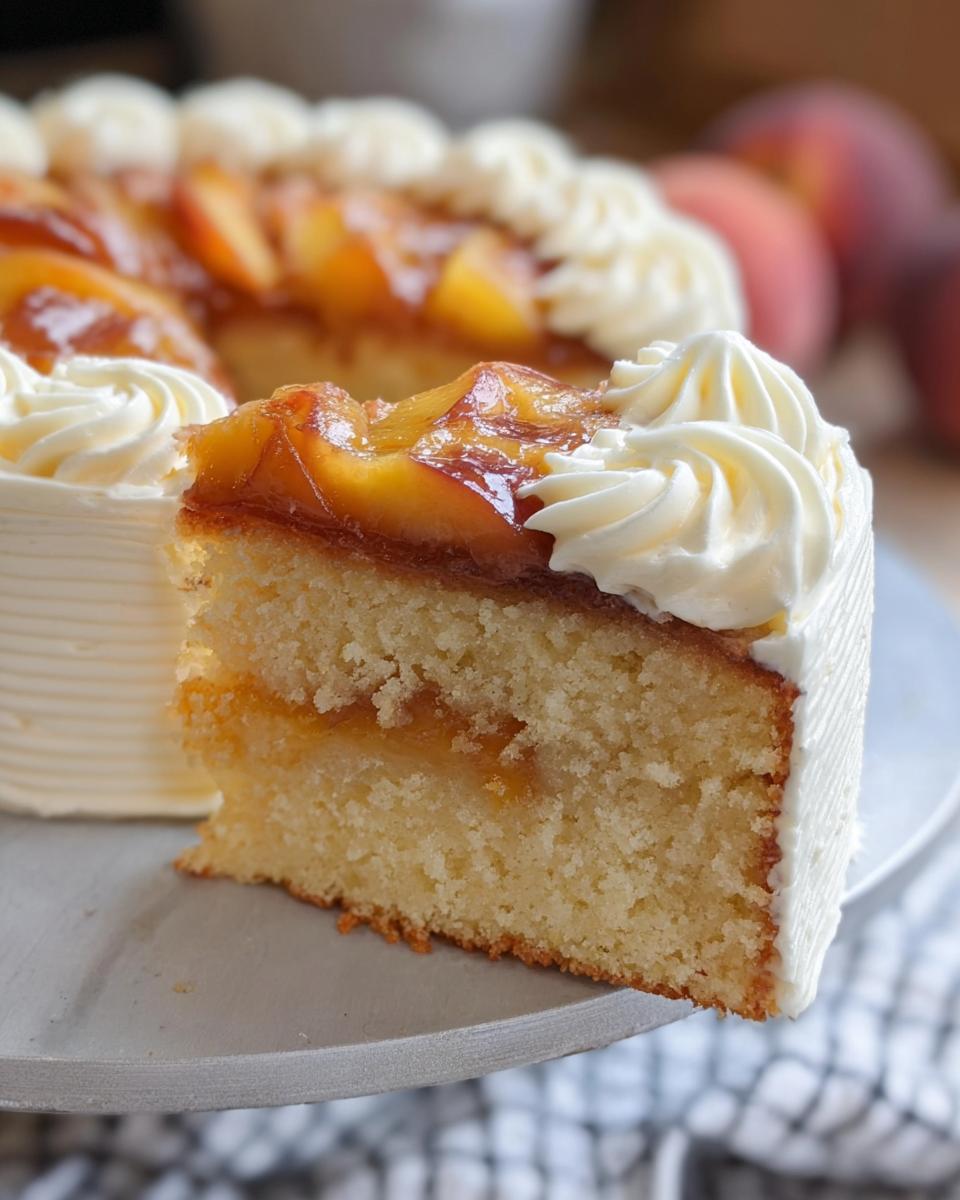
- Looks Like a Pro Made It: Even though it’s easy, this cake looks GORGEOUS. Those peachy swirls on top? Chef’s kiss! It’s one of those desserts that’ll have everyone asking for the recipe.
Essential Ingredients for The Ultimate Cake Ideas Recipes Guide for Beginners
Alright, let’s talk ingredients! This is where the magic really starts. Don’t worry, I’ve kept this recipe super simple, using things you can easily find. Having everything measured out and ready to go makes baking so much less stressful, trust me! We’ve got three main parts to this beautiful cake: the caramel-y peach bottom, the lovely cake itself, and that dreamy buttercream. Here’s what you’ll need:
Peach Brown Sugar Layer
- 1/4 cup unsalted butter, melted
- 2/3 cup brown sugar
- 3 large peaches, sliced (skins on or off, whatever you prefer!)
Peach Yellow Cake
- 3 whole eggs, room temperature
- 2/3 cup sour cream, room temperature
- 1/3 cup vegetable oil
- 2/3 cup buttermilk, room temperature
- 1 teaspoon vanilla extract
- 1 teaspoon cinnamon
- 1/2 teaspoon peach flavoring (optional, but it’s a nice little boost!)
- 1 (15.25oz box) yellow cake mix (any brand works great!)
Classic Vanilla Buttercream
- 1 1/2 cups unsalted butter, softened
- 1 pinch salt
- 1 Tablespoon vanilla extract
- 1/4 cup heavy cream
- 7-8 cups powdered sugar
Step-by-Step Instructions for Your First Cake
Alright, deep breaths! This is where the fun really happens. Don’t stress, I’ll walk you through every single step to create your masterpiece. Remember those room temperature ingredients we talked about? They’re super important here, especially for the cake batter and the buttercream. They help everything mix together smoothly for a tender crumb and silky frosting. You’ve got this! For more fun dessert ideas, check out these dessert recipes.
Preparing the Peach Brown Sugar Layer
First things first, let’s get that gorgeous topping ready. Preheat your oven to 325°F (160°C). Grab your two 8-inch cake pans. You’ll want to grease them really well and then dust them with a little flour – this is your insurance policy against any sticky situations! Divide that melted butter between the two pans, making sure to cover the bottoms. Sprinkle the brown sugar evenly over the butter, and then artfully arrange your peach slices on top. It should look pretty, because it’s going to bake right into the cake! For more tips on this specific cake, you can look at this peach upside-down cake recipe.
Making the Peach Yellow Cake Batter
Now for the cake itself! In a big bowl, whisk together all your wet ingredients – the eggs, sour cream, oil, buttermilk, vanilla, and that optional peach flavoring if you’re using it. It’s good to get these combined nicely. Pop in your cinnamon too! Then, just dump in that box of yellow cake mix. Gently stir it all together until it’s *just* combined. Seriously, don’t go crazy mixing it; we want a tender cake, not a tough one. Divide this yummy batter evenly between your two prepared pans, right on top of those peaches.
Baking and Cooling Your Cake Layers
Pop those pans into your preheated oven. They’ll need about 30 to 32 minutes, but keep an eye on them. The best way to know they’re done is to stick a toothpick into the center – if it comes out clean, you’re good to go! Once they’re out, let them cool in the pans for just a few minutes before you cautiously flip them out onto a wire rack. Let them cool completely. Now, here’s my little trick for easy frosting: wrap each cake layer super well in plastic wrap and pop them in the freezer for at least 30 minutes. This makes them firm and much easier to handle when you’re frosting!
Whipping Up the Vanilla Buttercream
While the cakes are chilling out, let’s make that dreamy buttercream. Get your stand mixer ready with the paddle attachment. Toss in your softened butter and beat it until it’s light and fluffy. Don’t skip this! Add the pinch of salt, vanilla extract, and that heavy cream. Give it another good beat. Now, with the mixer on low speed, gradually add your powdered sugar. If it looks too thick, just add another tablespoon or two of cream until it’s the consistency you like. Once all the sugar is in, crank the mixer up to high and let it go for a good 2 minutes. You want it super light and airy!
Assembling Your Peach Upside Down Cake
Time for the grand finale! Grab a cardboard cake round or a serving plate. Put a little dollop of buttercream on it – this acts like glue for your first layer. Carefully place one of your frozen cake layers, peach-side up, onto the board. Now, spread a nice, even layer of that delicious buttercream all over the top. I like to put a *thin* layer around the sides too, called a crumb coat. It helps trap all those little crumbs. After that first layer sets up a bit, you can add a thicker layer of frosting around the sides. If you have a cake turntable and a cake comb, now’s the time to use them for that pretty textured finish! Slice it up and wow your friends and family!
Tips for Success with The Ultimate Cake Ideas Recipes Guide for Beginners
Okay, fellow bakers, let’s talk about making this cake absolutely perfect. It’s not hard, but a few little tricks can make all the difference, especially when you’re just starting out! First off, don’t skip the room temperature ingredients for the cake and frosting – I know it’s tempting to just pull them out of the fridge, but they really do help everything emulsify and get that lovely, smooth texture we’re after. Also, when you’re mixing that cake batter, a gentle hand is key! Overmixing can make your cake tough, and nobody wants that. Just mix until everything is *just* combined. And please, trust me on the freezing step for the cake layers before frosting. It’s a game-changer and makes frosting so much cleaner and easier!
For more easy recipes to get you baking, I’ve got you covered. And if you’re curious about my baking journey, you can learn more about me here!
Ingredient Notes and Substitutions
Sometimes you might not have a specific ingredient on hand, and that’s totally okay! For the peach flavoring, it’s a little enhancer that gives an extra punch of peach, but if you can’t find it, your cake will still be wonderfully peachy-keen just from the fruit itself. Feel free to skip it! For the buttermilk, a super easy substitute is to take regular milk (whole milk works best) and stir in about a teaspoon of lemon juice or white vinegar. Let it sit for about 5 minutes until it looks a little curdled. Voila! You’ve got a homemade buttermilk substitute that works like a charm for that tender cake crumb.
Frequently Asked Questions about Beginner Cake Recipes
Got questions, my baking pals? I’ve got answers! It’s totally normal to have a few things on your mind when you’re trying a new cake recipe, especially if you’re just dipping your toes into the baking world. Let’s clear up some common queries you might have about this peach upside-down cake and general beginner baking.
Can I use fresh peaches instead of canned in this recipe?
Absolutely! Fresh peaches are fantastic. Just make sure they’re ripe but still a little firm so they hold their shape. You’ll want to peel them and then slice them, just like you would with canned ones, and they’ll work beautifully in that bottom layer. It’s one of my favorite ways to bake if peaches are in season! For more tips on beginner baking, check out this guide.
How do I know for sure if my cake is fully baked?
That’s a classic beginner question, and it’s so important! The toothpick test is your best friend here. When the baking time is up, gently insert a wooden toothpick or a thin skewer right into the center of the cake. If it comes out clean, with no wet batter sticking to it, your cake is done! You might see a few moist crumbs, and that’s perfectly fine – it means the cake is moist, not dry. If there’s wet batter, give it another few minutes and test again.
Can I make this cake gluten-free?
You sure can try! While this recipe uses a standard yellow cake mix, you can swap it out for a good quality gluten-free yellow cake mix. Usually, you might need to adjust the liquid slightly according to the gluten-free mix’s instructions, and sometimes adding an extra egg can help with binding. Keep an eye on the baking time, as gluten-free cakes can sometimes bake a little faster or slower. It’s definitely worth a shot for those who need or prefer a gluten-free dessert!
Serving and Storing Your Delicious Cake
Alright, your beautiful peach upside down cake is done and frosted! First off, how about serving it? This cake is honestly pretty spectacular all on its own. It’s fantastic with a cup of coffee or tea, especially for breakfast or brunch if you’re feeling a little decadent! If you want to go the extra mile, a small scoop of vanilla ice cream melting into a slice is pure heaven. For tips on other delicious treats, you can check out these other ideas.
Now, about storing leftovers – if by some miracle you have any! This cake is best stored at room temperature for a day or two. If your kitchen is really warm, popping it in the fridge is a good idea, but let it come back to room temp before serving so the buttercream isn’t hard. You can also freeze frosted slices, well-wrapped, for about a month. Just let them thaw on the counter when you’re ready for another slice of peachy perfection!
Estimated Nutritional Information
So, while I’m not a registered nutritionist (definitely not!), I can give you a general idea of what you’re looking at calorie-wise with this delicious peach upside down cake. Keep in mind that the exact numbers really depend on the brands you use and how generous you are with that amazing buttercream! For a rough estimate, a serving (about 1/12th of the cake) is likely in the ballpark of 450-600 calories, with pretty significant amounts of carbohydrates and fat, but also some protein from the cake and frosting. For more healthier options, you can peek at these calorie-smart recipes.
Peach Upside Down Cake with Vanilla Buttercream
Ingredients
Equipment
Method
- Preheat your oven to 325 degrees F (160 degrees C). Prepare two 8-inch cake pans by greasing them with shortening and dusting with flour to prevent sticking.
- Divide the melted butter evenly between the two cake pans, brushing it to cover the bottom. Distribute the brown sugar over the butter layer in each pan. Arrange the peach slices in an even layer at the bottom of each pan. Set the prepared pans aside.
- In a large bowl, whisk together all the wet cake ingredients and spices until combined. Add the yellow cake mix and gently stir until just combined. Divide the cake batter evenly between the two prepared cake pans.
- Bake for 30-32 minutes, or until a toothpick inserted into the center comes out clean. Remove the cakes from the oven and carefully invert them onto a wire rack to cool completely. Once cooled, wrap each cake layer securely in plastic wrap and freeze for at least 30 minutes to make assembly easier.
- For the buttercream: In a stand mixer fitted with a paddle attachment, beat the softened butter until light and fluffy. Add the salt, vanilla extract, and heavy cream, and beat again. Scrape down the sides of the bowl.
- With the mixer on low speed, gradually add the powdered sugar. If the mixture is too thick, add 2-3 tablespoons more heavy cream to reach the desired consistency. Increase the mixer speed to high and beat for 2 minutes until the buttercream is light and fluffy.
- To assemble: Place a small amount of buttercream on a cardboard cake round to secure the first cake layer. Place one cake layer, fruit-side up, onto the cardboard round. Spread a layer of buttercream over the cake. Apply a thin layer of buttercream to the sides of the cake for a crumb coat, leaving the top exposed.
- Add a layer of buttercream around the sides of the cake. Using a cake turntable and a scalloped cake comb, carefully create a textured finish on the sides of the cake. Slice and serve.


