
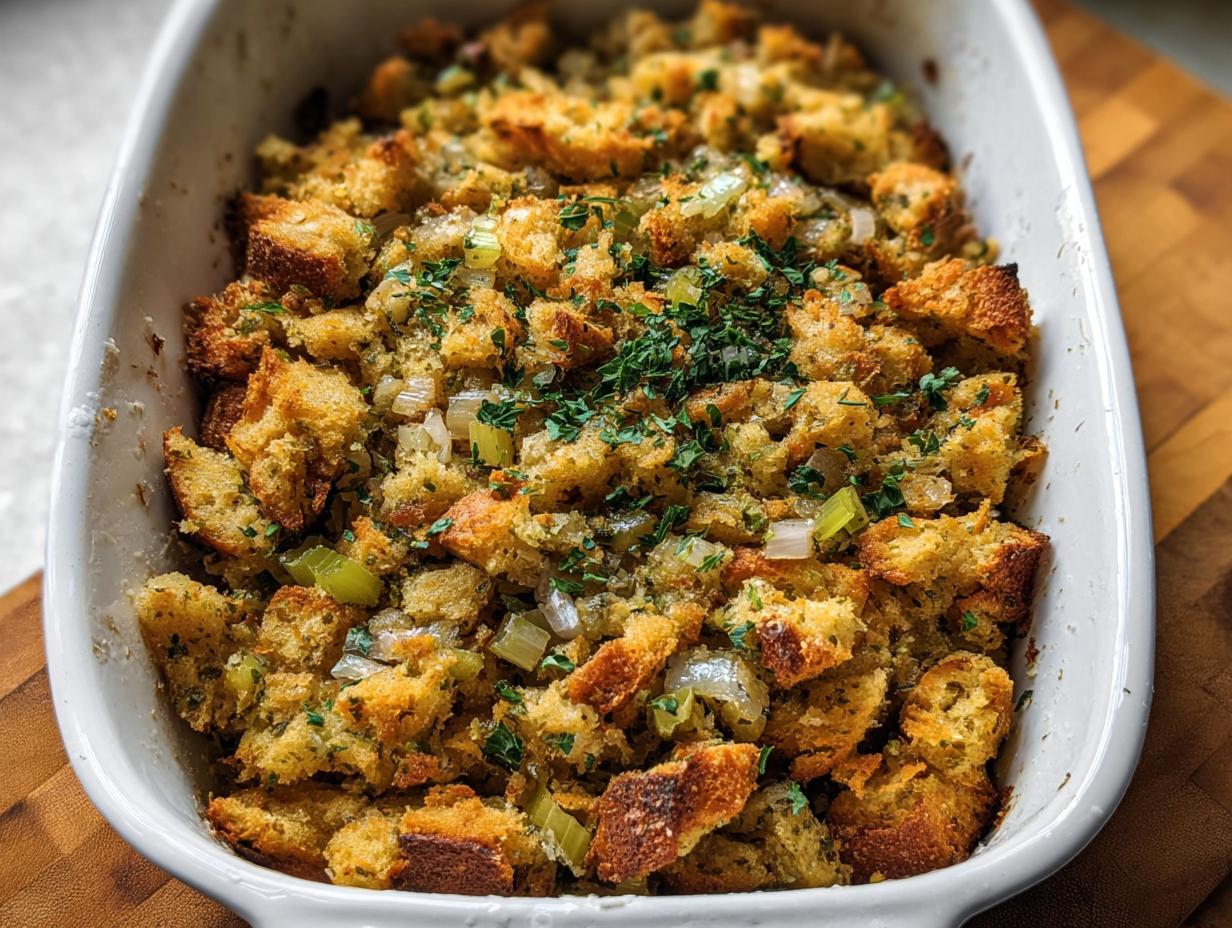
Okay, let’s talk stuffing! I know, I know, it sounds like a holiday-only dish, right? But what if I told you that you can have amazing, flavorful stuffing ready to go, even on a busy weeknight? It’s totally doable! We’re diving deep into **Stuffing Recipes Meal Prep That Actually Tastes Great**, and trust me, this isn’t your typical dump-everything-in-a-pan situation. This is about creating a side dish that’s so good, you’ll want it year-round, and so practical, you can actually prep it ahead without losing a lick of flavor. As ‘The Keto Performance Chef,’ I’ve tinkered with tons of recipes, especially when life got crazy busy after my football days. I wanted that comforting, nostalgic stuffing flavor, but I also needed it to fit a healthier, lower-carb lifestyle. So, I spent ages tweaking until I landed on this gem – a stuffing that’s incredibly tasty, super simple to prep, and totally keto-friendly. Get ready to impress everyone, including yourself!
Why You’ll Love These Stuffing Recipes Meal Prep That Actually Tastes Great
Seriously, you’re going to be obsessed with this stuffing. It’s not just another side dish; it’s a game-changer! Here’s why:
- Super Easy to Make: We keep things simple! You don’t need to be a gourmet chef to whip this up. Most of the magic happens in one pan.
- Flavor Explosion: Forget bland stuffing! We’re packing in fresh herbs, savory veggies, and that perfect buttery goodness. It tastes amazing, every single time.
- Meal Prep Magic: This is where it shines! You can totally make this ahead of time. Just pop it in the oven when you’re ready to eat (or reheat quickly!). It’s perfect for busy weeks.
- Healthy & Keto-Friendly: Yep, you read that right! This recipe uses smart ingredients so you can enjoy all the stuffing goodness without the carb overload. It’s seriously satisfying.
Gather Your Ingredients for Delicious Stuffing Recipes Meal Prep
Alright, let’s get your kitchen prepped for some seriously tasty stuffing! The key to making this meal prep masterpiece work is having all your goodies ready to go. Think of it like getting your station set up before a big game – everything in its place! We’re keeping it straightforward here. You’ll want to grab these things:
For the Stuffing:
- About 18 to 24 ounces of bread cubes – I really like using ones that are toasted or a bit stale, it makes a world of difference in texture!
- 1 cup of unsalted butter, all melted and ready to go.
- 3 cups of diced sweet onion. This is usually about 2 big onions, so just chop ’em up nice and fine.
- 2 cups of diced celery – adds that perfect savory crunch.
- 6 cloves of garlic, minced. Don’t be shy with the garlic!
- 1 teaspoon of kosher salt, or just add to your taste.
- 1 teaspoon of black pepper, again, to your liking.
- 3 tablespoons of fresh sage, all chopped up.
- 3 tablespoons of fresh parsley, also chopped.
- 3 tablespoons of fresh rosemary, finely chopped. Fresh herbs really are the stars here!
- 2 1/2 cups of chicken or vegetable stock.
- 2 large eggs, given a quick whisk.
- And for a final flourish, some fresh herbs for sprinkling over the top.
Step-by-Step Guide to Making Your Stuffing Recipes Meal Prep
Alright, let’s get this stuffing party started! This is where the magic really happens, and honestly, it’s pretty straightforward. We’re going to break it down so you can have that amazing stuffing ready to go, whether it’s for Thanksgiving or just because it’s Tuesday. Trust me, following these steps will lead you straight to stuffing perfection, and it’s perfect for getting ahead of the game.
Preparing the Bread Cubes for Optimal Texture
First things first, let’s talk bread. You absolutely want to toast your bread cubes – it’s a game-changer for texture! Toss them in the oven at 350 degrees F for about 15 minutes until they’re like little croutons. If you’re in a pinch, stale bread works too, or heck, grab some pre-toasted cubes from the store. Cut them to whatever size you like – smaller cubes give you a finer texture, while bigger ones make it more rustic. This whole process is key to nailing the Stuffing Recipes Meal Prep That Actually Tastes Great. For more ideas and inspiration, check out our full recipe collection!
Sautéing the Aromatics for Flavor Depth
Now, let’s build some serious flavor. Melt that butter in a big skillet or Dutch oven over medium heat. Toss in your onions, celery, and minced garlic. Season it up with salt and pepper – don’t be shy! Let those veggies soften for about 8 to 10 minutes until they’re nice and tender. Then, stir in those vibrant fresh herbs: sage, parsley, and rosemary. Cook for just another minute until they smell amazing. Pour in 1 cup of the stock and give it a good stir; this helps scrape up all those yummy bits from the bottom of the pan. If you’re looking for more classic stuffing inspiration, this amazing recipe is worth a peek!
Combining and Baking Your Stuffing Recipes Meal Prep
Okay, time to bring it all together! Pour that flavorful veggie and herb mixture right over your bread cubes in the big mixing bowl or your baking dish. Toss it all gently until every cube is coated. In a smaller bowl, give the remaining 1 1/2 cups of stock a quick whisk with the 2 eggs. Pour this liquid goodness over the bread mixture and fold it all together gently. You want everything to be combined but don’t overmix! Spread it evenly in your prepared 9×13 inch baking dish. Pop it into your preheated oven at 350 degrees F and bake for about 45 to 50 minutes. You’re looking for that internal temperature to hit 160 degrees F. If the top starts getting too brown before it’s done, just loosely tent it with foil. This method ensures your Stuffing Recipes Meal Prep That Actually Tastes Great is perfectly cooked!
Tips for Perfect Stuffing Recipes Meal Prep
Alright, let’s chat about how to make this stuffing truly sing, especially when you’re prepping it ahead! A few little tricks up my sleeve can make all the difference. First off, the bread choice really matters. Using day-old or toasted cubes gives you that lovely texture that holds up way better than fresh bread, which can get kinda mushy. And fresh herbs? Absolutely essential! Dried herbs just don’t give you that bright, vibrant punch. If you ever feel like your stuffing is just a *tad* too dry, don’t be afraid to add a splash more stock – I sometimes do, just depending on how thirsty my bread cubes are feeling! It’s all about getting that perfect balance. For more amazing side dish ideas that are also meal-prep friendly, you know where to look: check out our collection!

Ingredient Notes and Substitutions for Your Stuffing
Okay, let’s talk ingredients! Sometimes you might have something else on hand, or maybe you’re tweaking this for a specific diet, and that’s totally fine. For the bread cubes, while I love toasted or stale bread, use what you’ve got! Sourdough or a hearty whole wheat can be delicious too, just make sure they’re dried out a bit. If you’re keeping this low-carb or keto, you’ll definitely want to swap out the traditional bread cubes for something like keto-friendly bread or even cauliflower florets – they soak up flavor like a dream! For the stock, chicken is classic, but a good vegetable stock works just as well, especially if you want to keep it vegetarian. Don’t be afraid to play around; that’s half the fun!
Make-Ahead and Storage for Stuffing Recipes Meal Prep
This is where the real genius of Stuffing Recipes Meal Prep That Actually Tastes Great comes in! You can totally make this stuffing a day ahead, and honestly, it’s sometimes even better the next day because all those amazing flavors have more time to meld together. Just let it cool completely after baking, cover it tightly with plastic wrap or pop it into an airtight container, and pop it in the fridge. When you’re ready to serve, just reheat it in a moderate oven (around 325-350°F) until it’s warmed through. If the top starts to get a little too dry, a tiny splash of extra stock or a loose tent of foil can bring it right back to life. It’s the perfect way to save time and stress!
Frequently Asked Questions About Stuffing Recipes Meal Prep
Got questions about making stuffing ahead? Totally get it! It’s a bit of a puzzle sometimes, but I’ve got the answers to make your life easier.
Can I use fresh bread for my stuffing?
While using stale or toasted bread cubes is definitely best for texture (they hold up way better!), you *can* use fresh bread in a pinch. Just spread the fresh cubes on a baking sheet and toast them in a 300°F oven for about 10-15 minutes until they feel a little dry. This helps prevent the stuffing from getting too mushy. For more healthy stuffing tips, check out healthy stuffing ideas!
How do I make my stuffing crispier?
Great question! For that perfect crispy top, you have a couple of options. After you bake it the first time, you can uncover it and broil it for a minute or two (watch it SUPER closely so it doesn’t burn!). Or, if you’re reheating it, spread it out in a thinner layer in the baking dish, maybe even on a baking sheet, and bake it uncovered. That helps all the moisture escape and gets it nice and crisp.
Can I freeze stuffing?
Yes, you absolutely can freeze stuffing! Once it’s baked and completely cooled, portion it into airtight containers or freezer bags. It should last in the freezer for about 2-3 months. To reheat, just thaw it in the fridge overnight and then warm it up in the oven as directed in the make-ahead instructions. It freezes surprisingly well!
What are good keto stuffing alternatives?
If you’re going keto, you’ll want to skip the bread entirely! My favorite swap is using cauliflower florets or even finely chopped broccoli. You can also find keto-friendly bread recipes online that use almond flour or coconut flour – they make fantastic cubes and soak up all those savory flavors beautifully. It’s all about experimenting to find what you love!
Serving Suggestions for Your Delicious Stuffing
This stuffing is so versatile, it practically begs to be paired with other delicious dishes! For that classic holiday vibe, it’s amazing alongside roasted turkey or chicken, of course. But don’t stop there! It also goes beautifully with carrots or some simple roasted Brussels sprouts. If you’re keeping it keto, this stuffing is fantastic with our Crack Green Beans or a hearty steak. It’s the perfect savory addition to any meal!
Nutritional Information Estimate
Just a heads-up, the nutritional info for this stuffing is an estimate, since everyone uses slightly different brands and amounts! But generally, expect each serving to be around 400-500 calories, with about 30-40g of fat, 15-20g of carbs, and 8-10g of protein. It can really vary depending on your exact ingredients!

Stuffing Recipes Meal Prep That Actually Tastes Great
Ingredients
Equipment
Method
- Prepare your bread cubes. You can toast them in the oven at 350 degrees F for about 15 minutes until they resemble croutons, or use stale bread cubes. You can also buy pre-toasted bread cubes from the store. Cut cubes to your desired size, small for a finer texture or larger for a rustic feel.
- Preheat your oven to 350 degrees F. Lightly grease a 9×13 inch baking dish or a larger roasting pan with butter, olive oil, or nonstick spray. Place the bread cubes in a large mixing bowl or directly in the baking dish.
- Melt the butter in a large skillet or Dutch oven over medium heat. Add the diced onion, celery, and minced garlic. Season with salt and pepper. Cook until the vegetables soften, about 8 to 10 minutes. Stir in the chopped sage, parsley, and rosemary, and cook for another minute. Pour in 1 cup of the stock and stir.
- Pour the vegetable and herb mixture over the bread cubes and toss to coat evenly.
- In a small bowl, whisk together the remaining 1 1/2 cups of stock and the 2 eggs.
- Pour the egg and stock mixture over the bread cubes. Stir and fold gently until all the bread cubes are thoroughly combined.
- Bake for 45 to 50 minutes, or until the internal temperature reaches 160 degrees F. If the top starts to brown too quickly, you can tent it loosely with foil.
- Allow the stuffing to rest for at least 60 minutes before reheating if made ahead. This recipe can be made a day in advance and reheated. You can also use this mixture to stuff a poultry bird.


