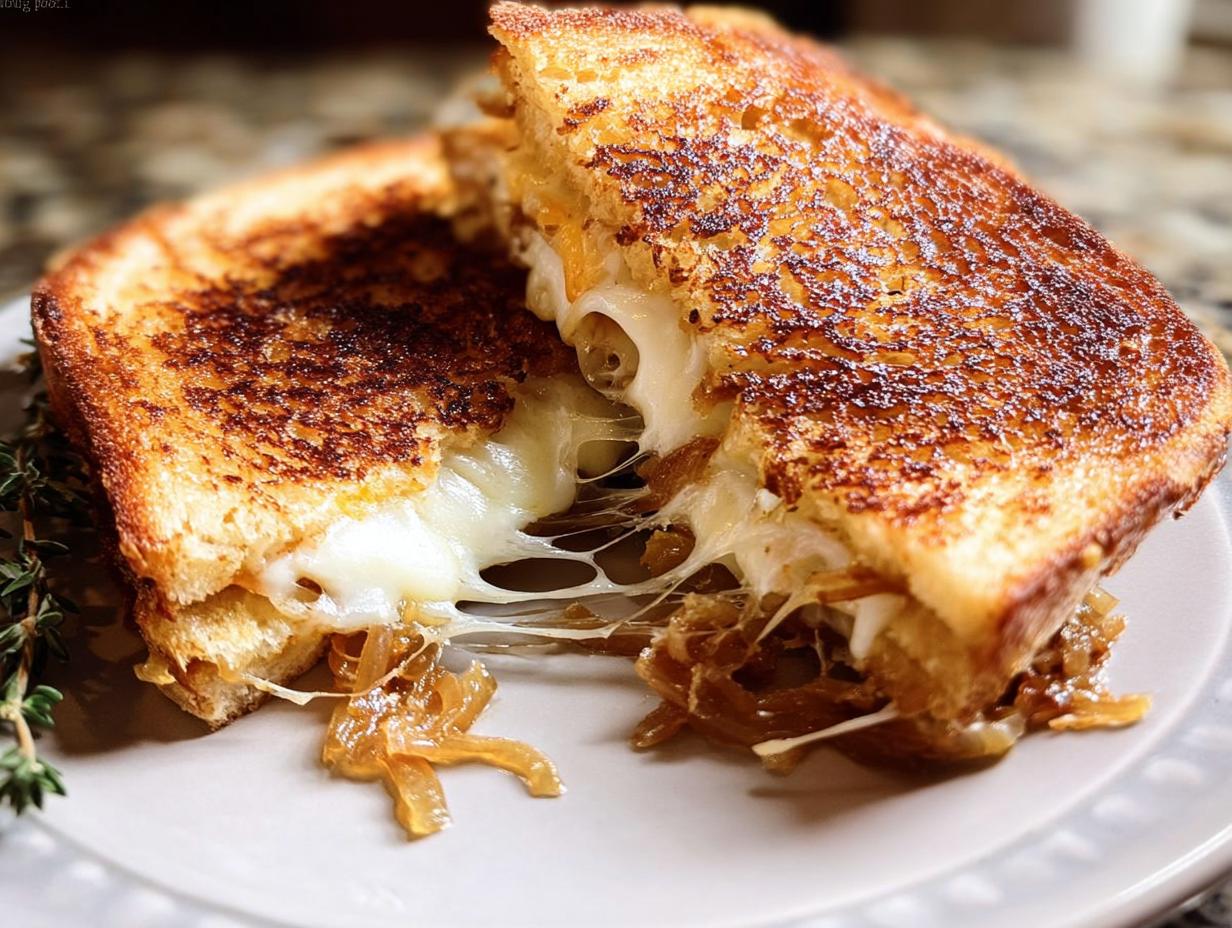
Oh, the humble grilled cheese sandwich. It’s like a warm hug on a plate, right? That gooey, melty cheese, the perfectly toasted bread… it just screams comfort food! But let’s be real, when life gets busy, the last thing we have time for is standing at the stove making one perfect sandwich after another. That’s where meal prep comes in, but the thought of a soggy, sad grilled cheese from the fridge? Not exactly inspiring. Well, get ready to change all that! I’ve cracked the code with these Grilled Cheese Recipes Meal Prep That Actually Tastes Great. Trust me, it’s totally possible to have that glorious, cheesy goodness ready to go whenever a craving hits. I learned this firsthand when I was deep in cookbook development and juggling my job as a sports nutritionist – on a crazy Saturday, I prepped a whole batch of these, froze them, and boom! Weeknight dinner win. It’s proof that meal prep can be delicious AND keep you on track!
Why You’ll Love These Grilled Cheese Recipes Meal Prep That Actually Tastes Great
Okay, so why should you even bother with meal prepping grilled cheese? I’ll tell you why!
- Seriously Easy Meal Prep: We’re talking about making multiple sandwiches at once so you’ve always got a delicious meal ready to go. Prep once, enjoy all week!
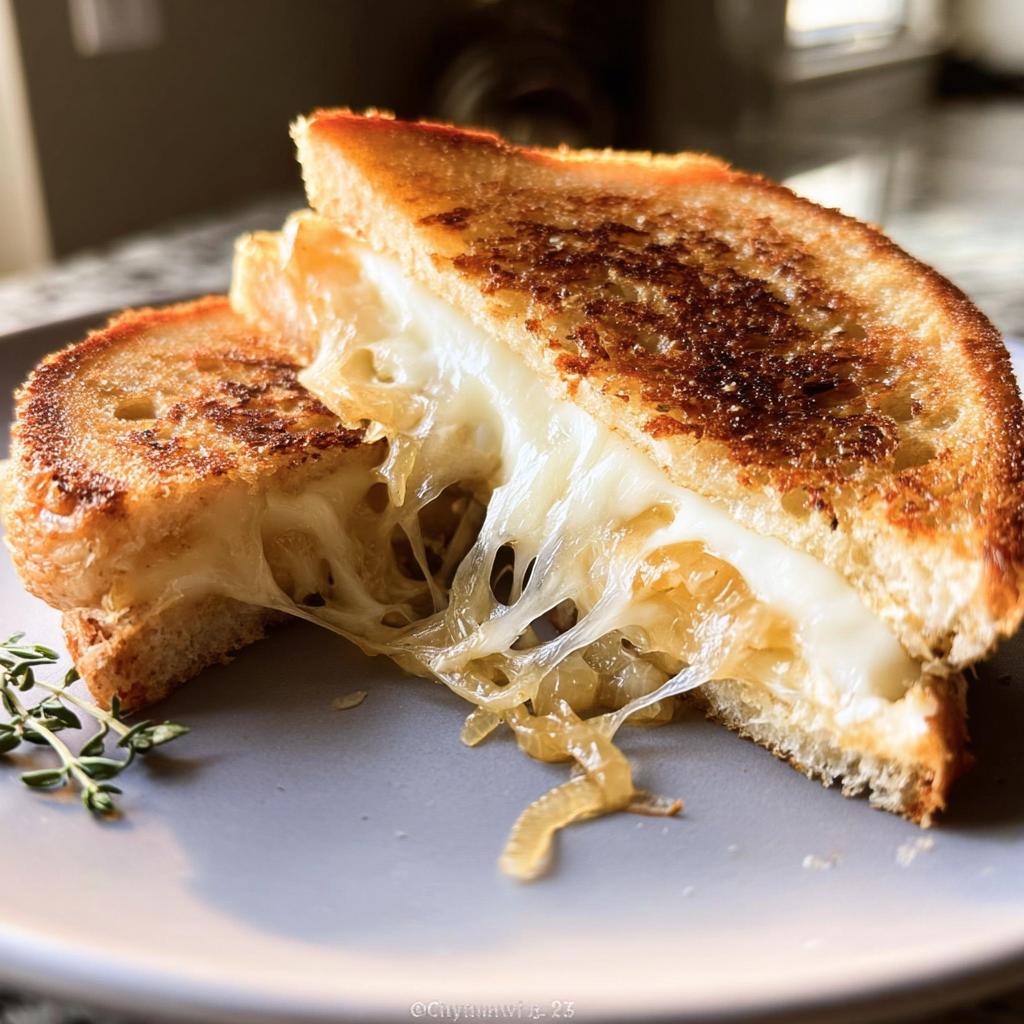
- Flavor That Shines: This isn’t your average sad, cold grilled cheese. The caramelized onions and awesome cheese combo make it taste absolutely amazing, even after sitting in the fridge.
- Ultimate Convenience: Craving comfort food on a busy Tuesday afternoon? No problem! Just reheat and enjoy that gooey, cheesy goodness. Dinner is sorted!
- Satisfies Those Cravings: It’s still that beloved grilled cheese experience – warm, cheesy, and incredibly satisfying. Perfect for lunches, quick dinners, or even a late-night treat.
- You’re in Control: Knowing exactly what goes into your sandwich means you can customize it to your heart’s content.
Gather Your Ingredients for the Ultimate Grilled Cheese Recipes Meal Prep
Alright, let’s get our game faces on and gather everything we need for these amazing grilled cheese sandwiches. Trust me, having the right stuff makes all the difference! We’ve got two main players here: the caramelized onions that bring all the savory goodness, and then our superstar grilled cheese ingredients.
For the Caramelized Onions
This is where the magic starts! You’ll need:
- 2 large yellow onions, diced
- 1 tsp fresh thyme, minced
- 1 tsp fresh rosemary, minced
- 1 tsp brown sugar
- 1 1/2 Tbsp butter
- 1 Tbsp olive oil
- 1 tsp salt (to taste)
- 1 tsp pepper (to taste)
For the Grilled Cheese
And here’s what you’ll grab for the sandwiches themselves:
- 8 slices of your favorite bread – I really love a thick-cut artisan bread for this!
- 12 oz Gruyere cheese, sliced thinly or grated (make sure it’s at room temperature!)
- 6 oz White cheddar cheese, sliced thinly or grated (room temp, please!)
- 4 slices Muenster cheese, thin slices, also at room temperature
- 1 1/2 Tbsp butter, divided
- 1 tsp fresh rosemary, minced
- 1 Tbsp mayonnaise (for spreading on the outside – sounds weird, tastes amazing!)
Step-by-Step Guide to Perfect Grilled Cheese Recipes Meal Prep
Alright, let’s get this party started! This is where we turn all those yummy ingredients into the grilled cheese of your dreams, ready for meal prep. It’s honestly way simpler than you might think, and the payoff is HUGE. We’ll start with those delicious onions and then move on to the main event – the sandwich itself. Just follow along, and you’ll see! For some extra inspiration on delicious sides, check out easy skillet corn.
Caramelizing the Onions for Maximum Flavor
First things first, we need to get those onions soft and sweet. Grab your skillet and melt the butter with the olive oil over medium-low heat. Toss in your diced onions, salt, pepper, and *both* the thyme and rosemary. You want to stir these often, letting them hang out in the pan until they’re nice and soft, which usually takes about 10 minutes. Don’t rush this part – slow and steady wins the race for that amazing flavor! Then, stir in the brown sugar and cook for just another minute. This little bit of sweetness really brings out the best in the onions. Once they’re done, just pop them onto a little plate to cool off.
Assembling and Cooking Your Meal Prep Grilled Cheese
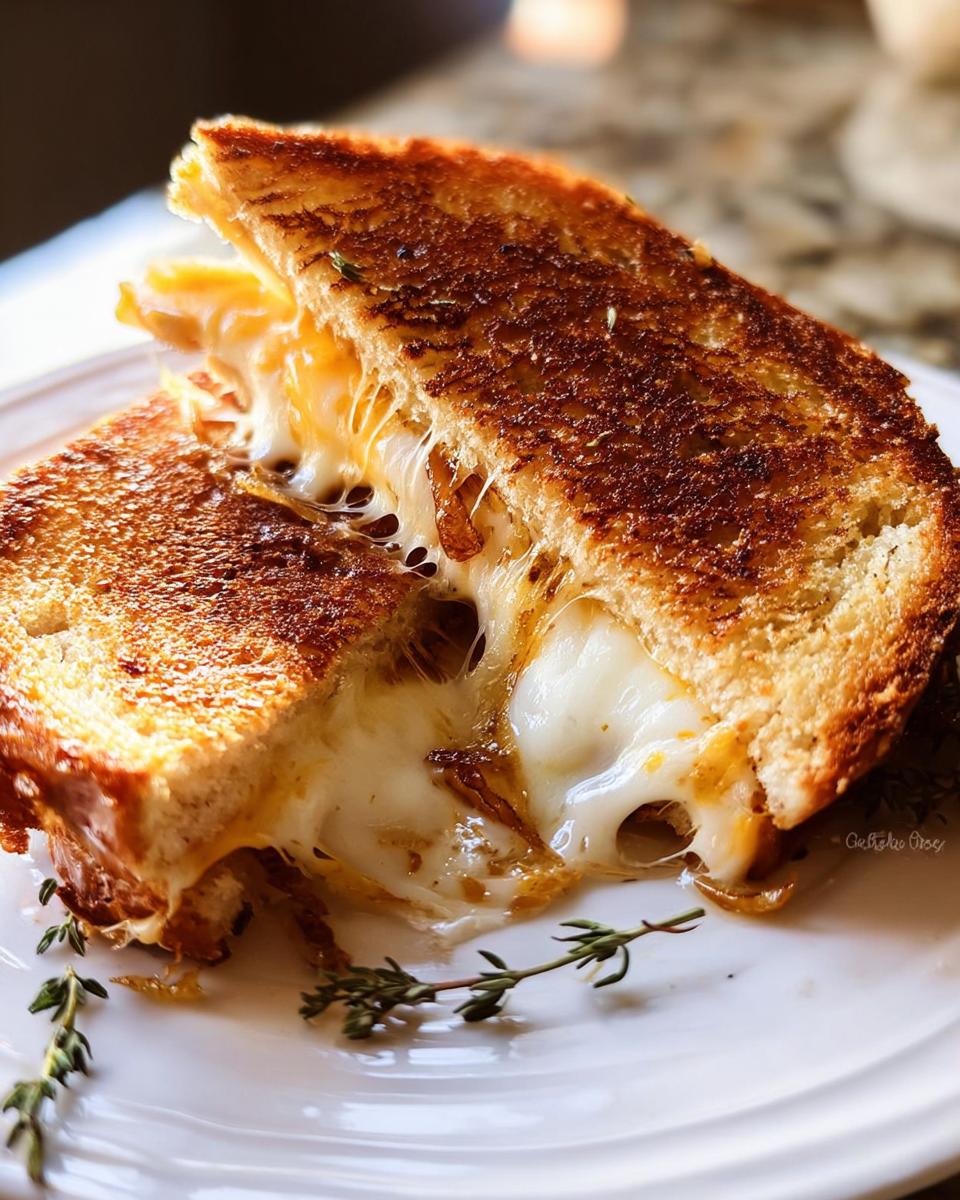
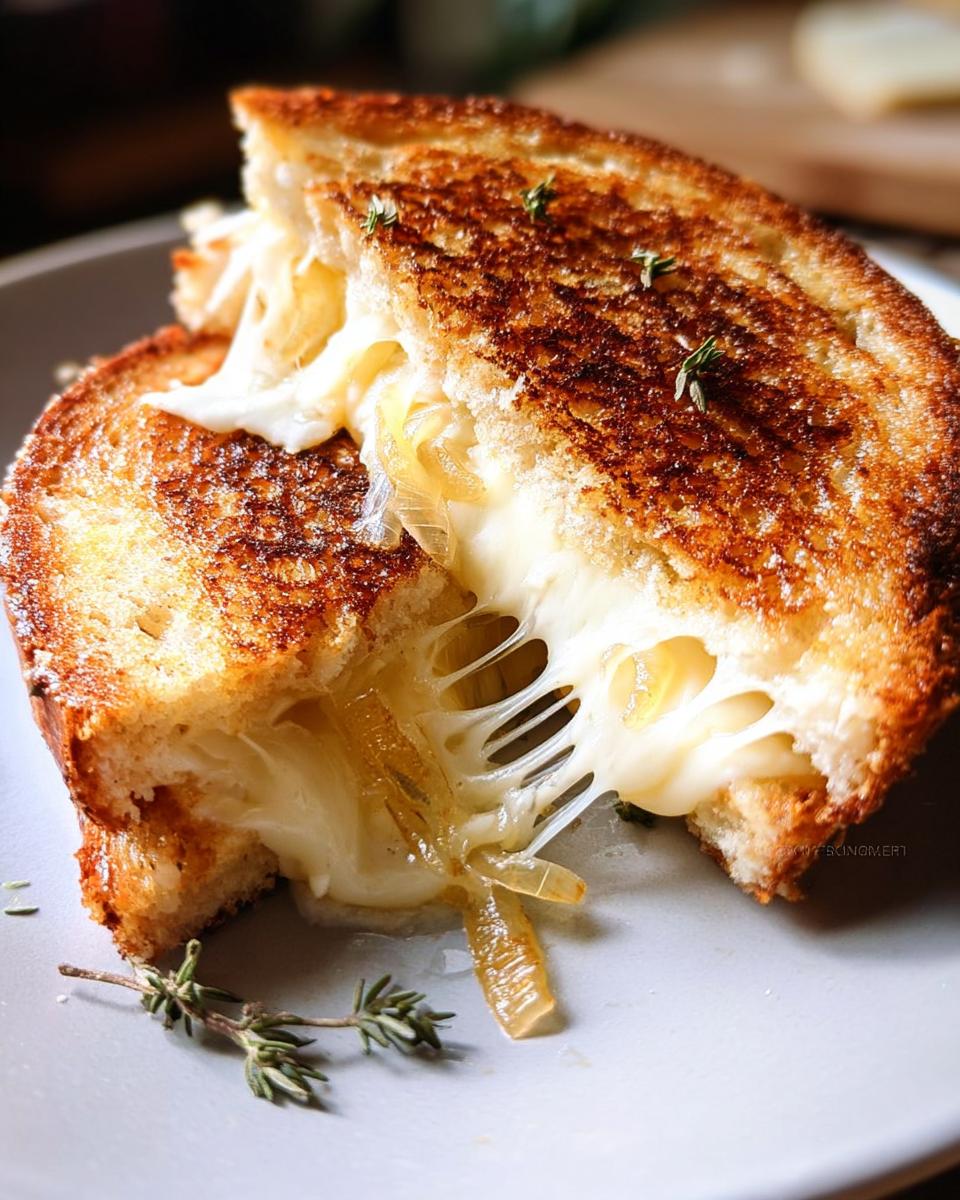
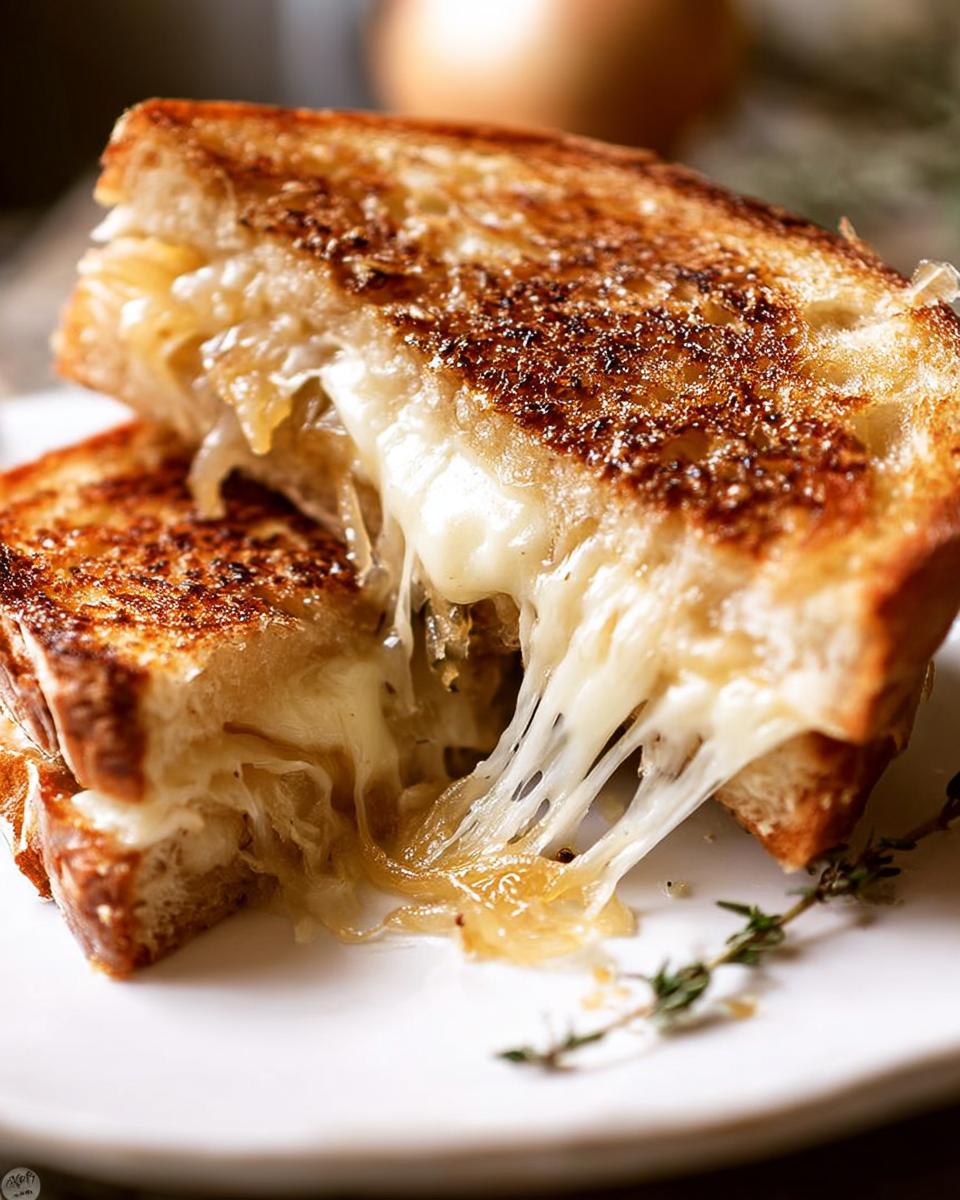
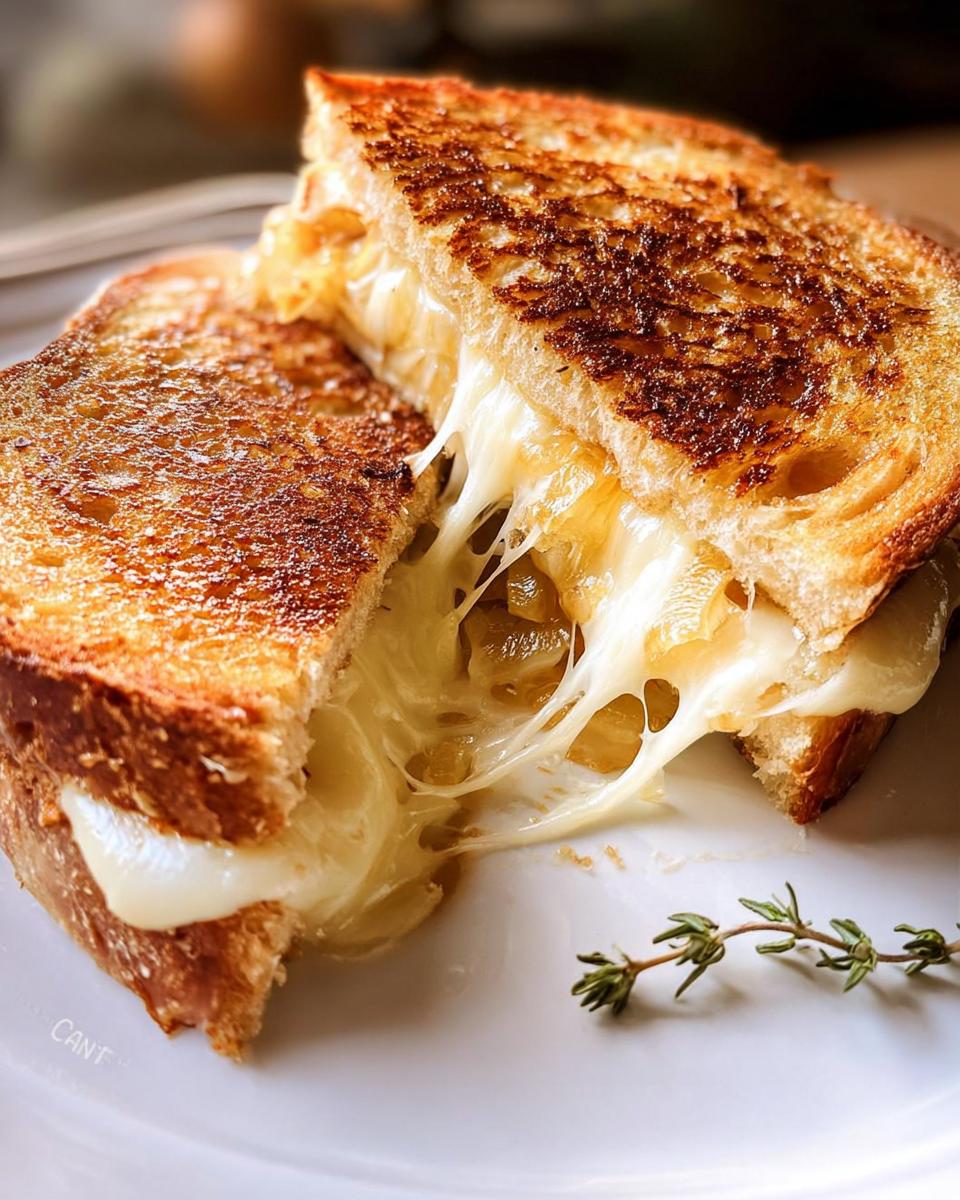
Now for the fun part! Grab two slices of bread and spread a thin layer of mayo on one side of each. Yes, mayonnaise! It makes for the crispiest, most golden crust, trust me on this. Head back to that same skillet, add the remaining butter and the minced rosemary. Swirl it around over medium heat so it coats the bottom nicely. Lay your bread slices into the skillet, mayo-side down. While they’re toasting up to a lovely golden brown (about 2-3 minutes), start layering your cheeses onto the *un-toasted* side of each slice. Pile on that Gruyere, white cheddar, and Muenster. As soon as the bread is golden, sprinkle a couple of tablespoons of your beautiful caramelized onions over one of the cheese piles. Now, carefully sandwich the two pieces of bread together. Keep the heat on low and cook until all that cheese is gloriously melted and gooey. You might need to gently press down with your spatula to help it along. For more amazing grilled cheese ideas, try this gourmet version! Once it’s perfect, slide it onto a plate and repeat with the rest of your bread and fillings!
Tips for Making Your Grilled Cheese Recipes Meal Prep Even Better
Okay, so you’ve got the basic recipe down, but let’s really make these grilled cheese masterpieces sing! Even for meal prep, we want that incredible flavor and that perfect, gooey, melty cheese pull. My favorite part of this whole process is playing around with the cheeses and the bread, because honestly, that’s where the real personality comes out. For more awesome ideas, you can always peek at my general recipe collection!
Choosing the Best Cheeses for Melty Perfection
The cheese combo we’ve got is killer for meltiness and flavor, but don’t be afraid to experiment! Gruyere gives you that nutty, complex taste, while white cheddar brings a sharp tang, and Muenster? It’s your best friend for that ultra-stretchy pull. If you want to go even cheesier, try adding some provolone, Monterey Jack, or a touch of fontina. The key is to mix cheeses that melt well with ones that have a bit more flavor. Make sure they’re at room temperature before you start assembling – they melt so much better that way!
Bread Matters: Selecting the Right Loaf
You know, the bread is just as important as the cheese! For meal prep, you want something sturdy. A thick-cut artisan loaf, like sourdough or a good country white, is perfect because it holds up to toasting and reheating without getting soggy. Avoid super soft, airy sandwich breads if you can – they tend to get a bit sad. Plus, a nice thick slice gives you more surface area for all that delicious cheese!
Storing and Reheating Your Meal Prep Grilled Cheese
So you’ve made your glorious grilled cheese sandwiches – maybe a whole batch for the week ahead! Now, how do you keep them tasting amazing until you’re ready to chow down? It’s super simple, and honestly, they hold up really well. For the best results, let the sandwiches cool completely for about 20-30 minutes after cooking. Then, wrap each one tightly in plastic wrap, or better yet, use a snug piece of parchment paper then foil. This keeps them from getting soggy in the fridge. You can pop these into the refrigerator for up to 3-4 days. If you want to stash them away for even longer, just pop those wrapped sandwiches into a freezer-safe bag or container and freeze them for up to a month. For more amazing meal prep ideas, check out my protein-packed breakfast burritos!
Reheating is just as easy, and crucial for that perfect texture. The absolute best way? Grab your skillet again! Place the sandwich in a dry, preheated skillet over medium-low heat. Cook for about 3-5 minutes per side, or until the bread is golden brown and crispy again and the cheese is gooey and melty. If you have a panini press, that works like a charm too! Just a few minutes in there and you’ll have a sandwich that’s almost as good as fresh. You can also use an oven or toaster oven, but the skillet gives you that perfect crispness.
Frequently Asked Questions About Grilled Cheese Recipes Meal Prep
Got questions? I get it! Meal prepping comfort food like grilled cheese can bring up some unique queries. Here are a few things folks often ask, and for even more inspiration, don’t forget to check out my easy 3-ingredient pancakes!
Can I freeze grilled cheese sandwiches?
Absolutely! Freezing is a fantastic way to make these even more of a grab-and-go meal. Just make sure they’re completely cooled, wrap them up super tight (think foil and then a freezer bag!), and you’re good to go for about a month. They’re still going to be delicious when you reheat them!
What’s the best way to reheat a meal-prepped grilled cheese?
Okay, this is key for that amazing taste and texture! Forget the microwave if you want crispy bread. I seriously recommend using a skillet over medium-low heat, warming it up for a few minutes on each side, kind of like you’re making it fresh. A panini press works wonders too! It brings back that glorious crunch and gets that cheese perfectly gooey and melty again.
Can I add other ingredients to my meal prep grilled cheese?
You bet! That’s the beauty of meal prep – you can totally customize it. While this recipe is awesome with the caramelized onions and cheese combo, feel free to add things like cooked bacon, thin slices of ham, or even a bit of pesto before you grill. Just make sure any raw veggies are cooked first so they don’t make the sandwich soggy.
How long do these last in the fridge?
When stored properly (tightly wrapped!), these grilled cheese sandwiches should stay good in the refrigerator for about 3 to 4 days. They’re perfect for grabbing for lunch on the go or a super quick dinner after a long day.
Serving Suggestions to Complement Your Grilled Cheese
So, you’ve got these amazing grilled cheese sandwiches all prepped and ready to go – fantastic! But what about rounding out that meal? Whether it’s for a quick lunch or a satisfying dinner, pairing your sandwich with the right side can make all the difference. You know I love a good side dish, and you can find a whole bunch of ideas in my list of side dishes. For a classic combo, you can’t beat a warm bowl of tomato soup – it’s the ultimate grilled cheese partner! A light, refreshing salad is also a great choice, like this easy cucumber caprese salad. It adds a nice bit of freshness to cut through the richness of the sandwich. Plus, if you’re prepping ahead, a simple side salad or a handful of some crunchy raw veggies makes for a super quick and wholesome meal.
Nutritional Information
Just a heads-up, these numbers are estimates! Your actual calories, fat, protein, and carbs will vary depending on the specific types of bread, cheese, and amount of butter and mayo you use. But for one of these glorious grilled cheese sandwiches, you’re generally looking at around 600-700 calories, about 40-50g of fat, 25-30g of protein, and 30-40g of carbs. Enjoy!
Grilled Cheese Recipes Meal Prep That Actually Tastes Great
Ingredients
Equipment
Method
- Heat 1 1/2 Tbsp butter and olive oil in a skillet over medium-low heat. Add diced onions, salt, pepper, fresh thyme, and 1 tsp of fresh rosemary. Sauté, stirring often, until onions are soft and starting to brown, about 10 minutes.
- Stir brown sugar into the onions and cook for another minute.
- Transfer the caramelized onions to a plate.
- Spread a thin layer of mayonnaise on one side of two pieces of bread.
- To the same skillet, add the remaining butter and rosemary. Heat over medium heat, swirling to coat the bottom of the skillet with the melted butter.
- Place both pieces of bread in the skillet, mayonnaise side down. Cook until the bread is golden brown and crunchy, about 2-3 minutes.
- As soon as you add the bread to the skillet, add cheese to the top of each piece. Once the cheese begins to melt slightly, sprinkle a couple tablespoons of the caramelized onions over the top of one of the bread pieces.
- When the bread is golden brown, sandwich the two pieces of bread together. Cook on low heat until the cheese is fully melted.
- Transfer the sandwich to a plate. Repeat with the remaining slices of bread and ingredients.
- Slice and enjoy.