You know, I get asked all the time, “Are these Baked Protein Bowls really that fluffy?” And honestly? YES, they absolutely are! Forget those dry, dense protein snacks that leave you chewing forever. I remember when I first started experimenting with meal prep, trying to find something that was both super healthy and genuinely satisfying. After months of one bland container after another, I stumbled upon the magic of a properly made baked protein bowl. It was a revelation! Not only did it fuel my workouts like a champ, but that incredible light and fluffy texture was a game-changer. It’s that kind of edible happiness that makes healthy eating feel like a treat, not a chore. That’s why I’m so passionate about sharing recipes like this – it’s all about creating delicious, nutritious meals that truly hit the spot, especially for us fitness folks!
Why You’ll Love These Baked Protein Bowls
Seriously, these bowls are a total game-changer for anyone who loves good food and wants to eat healthy! Here’s why you’ll be hooked:
- Crazy Easy Prep: You literally just toss everything into one bowl, give it a stir, and pop it in the oven. It’s that simple!
- Deliciously Satisfying: Forget chalky protein snacks. These are genuinely tasty with a wonderful fluffy texture that makes healthy eating feel like a treat.
- Fuel Your Day: They’re loaded with protein to keep you feeling full and energized, whether it’s for breakfast or a post-workout snack.
- Meal Prep Hero: Make a few on Sunday, and you’ve got grab-and-go breakfasts or snacks ready for the entire week. So convenient!
Are These Baked Protein Bowls Really That Fluffy? The Ingredients
Alright, let’s talk about what makes these baked protein bowls so darn fluffy and delicious! It all comes down to the right ingredients, and trust me, I’ve tried a few things to get it just right. For the main bowl, you’ll need one large egg – that’s the binder that helps everything come together. Then, we’ve got 1/4 cup of plain Greek yogurt; I usually go for the full-fat kind for extra richness, but any plain will do. If you’re keeping it dairy-free, a nice unsweetened dairy-free yogurt works just as well!
Next up, 1/3 cup of your favorite milk. I’ve tested this with everything from Fairlife whole milk to simple unsweetened almond milk, and both are fantastic. Flax meal is our secret weapon here for a little extra fiber and healthy fats – about 1-2 tablespoons usually does the trick. Then comes 1/3 cup of flour; I often use a gluten-free blend, but regular all-purpose works too if that’s your jam.
And the star of the show? One scoop of vanilla protein powder! I’m a big fan of Be Well by Kelly Protein Powder because it has no carbs and is sweetened with monkfruit, but honestly, any good quality vanilla protein powder with around 26g of protein per scoop will give you AMAZING results. Don’t forget 1-2 tablespoons of maple syrup or stevia to sweeten it up just right (adjust to your taste!), and 3/4 teaspoon of baking powder – this is crucial for that airy, fluffy lift!
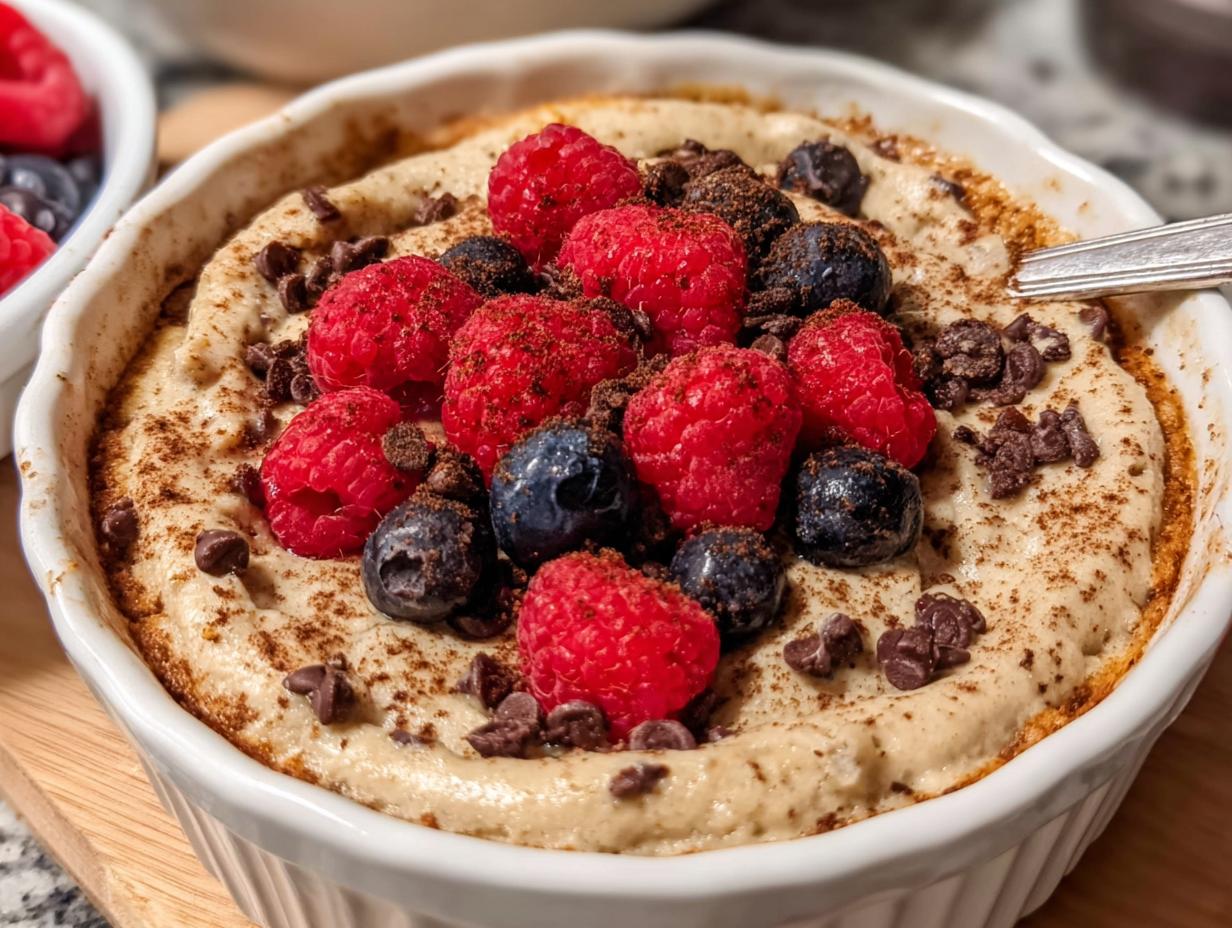
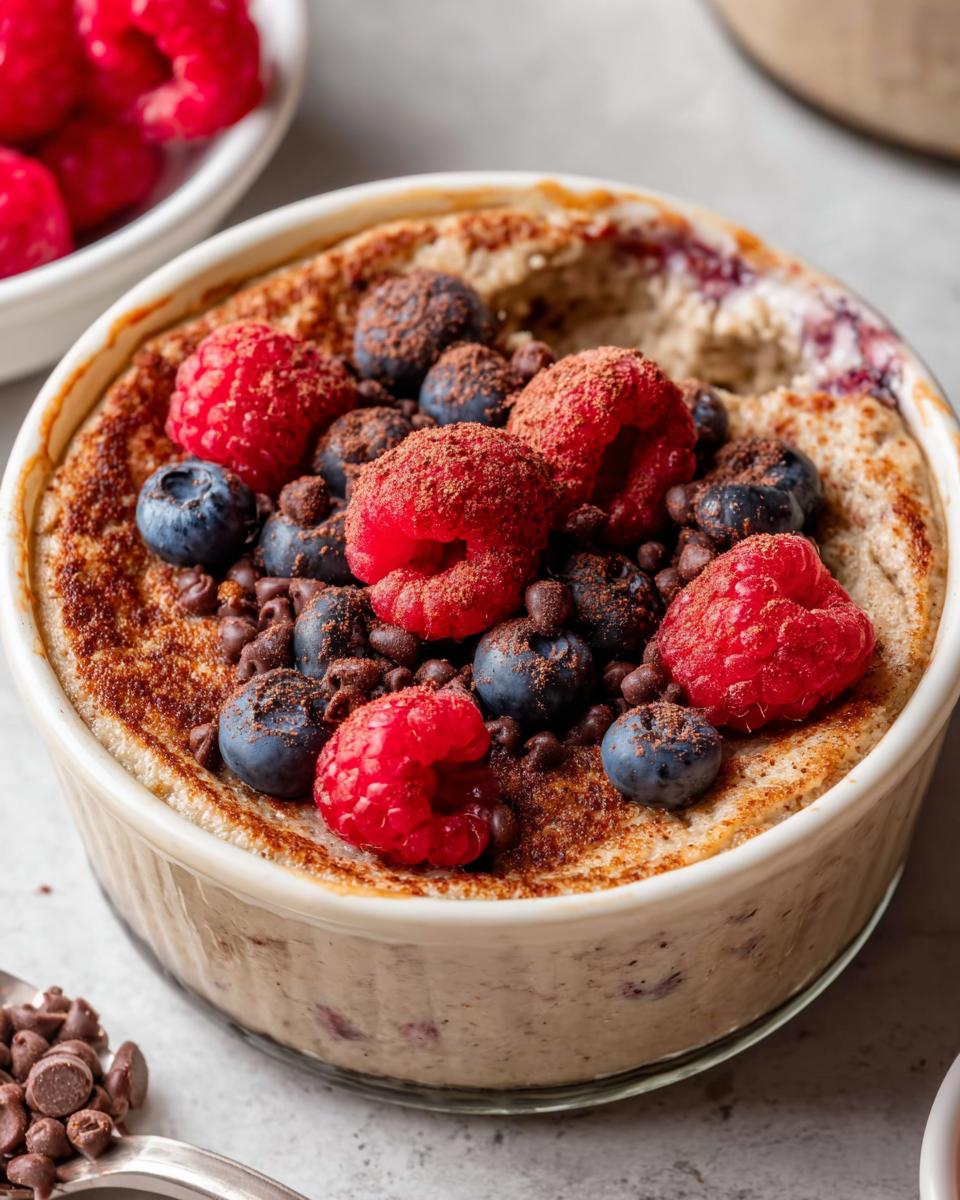
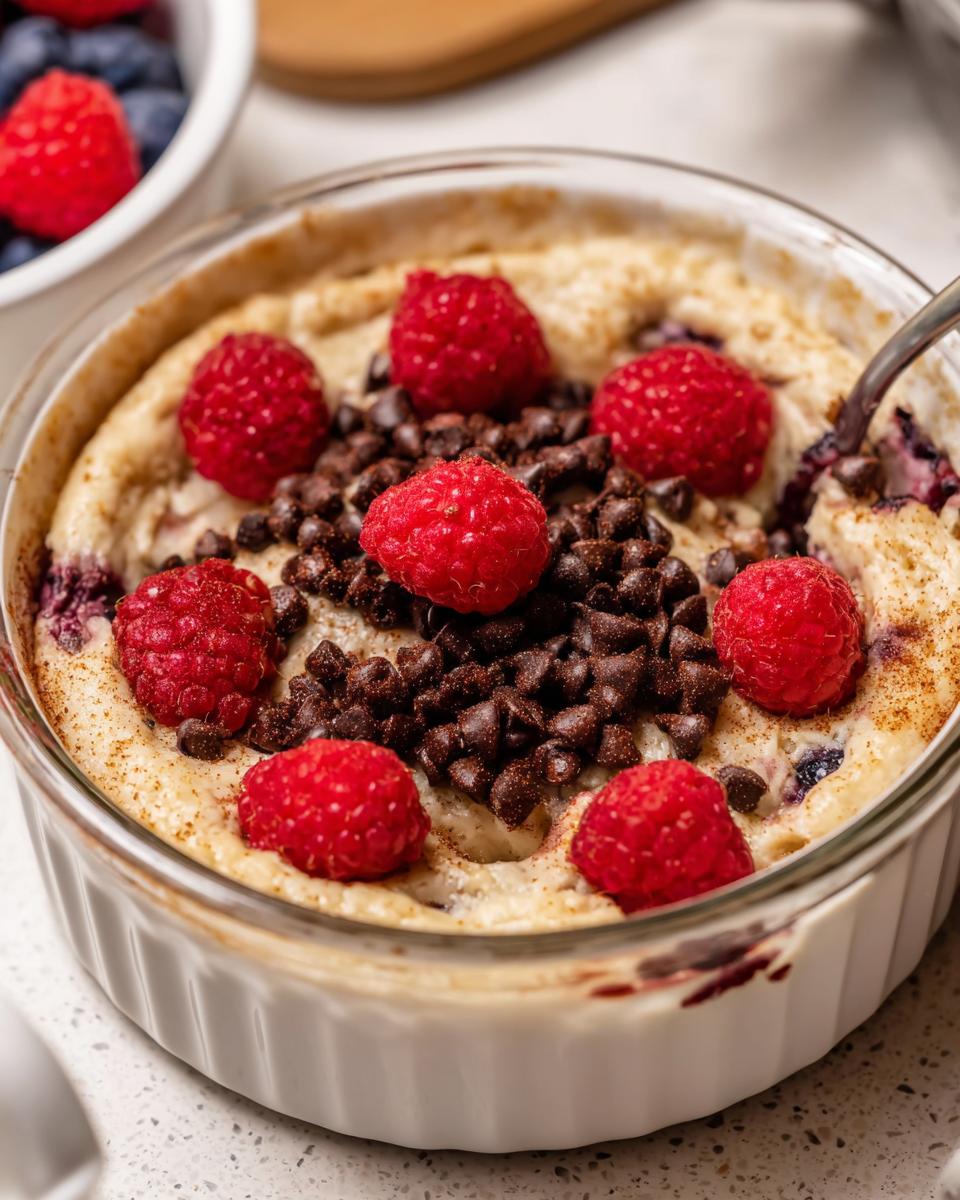
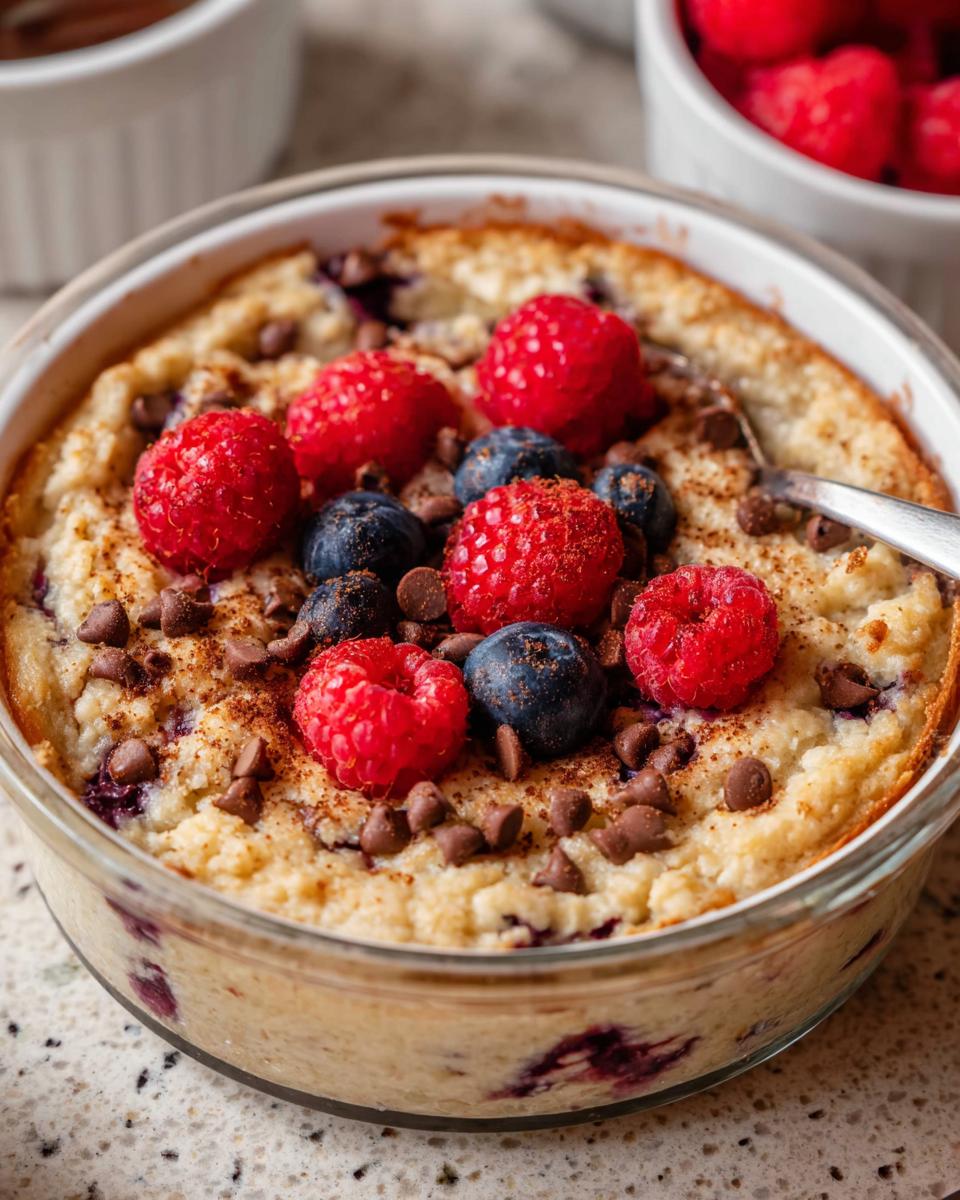
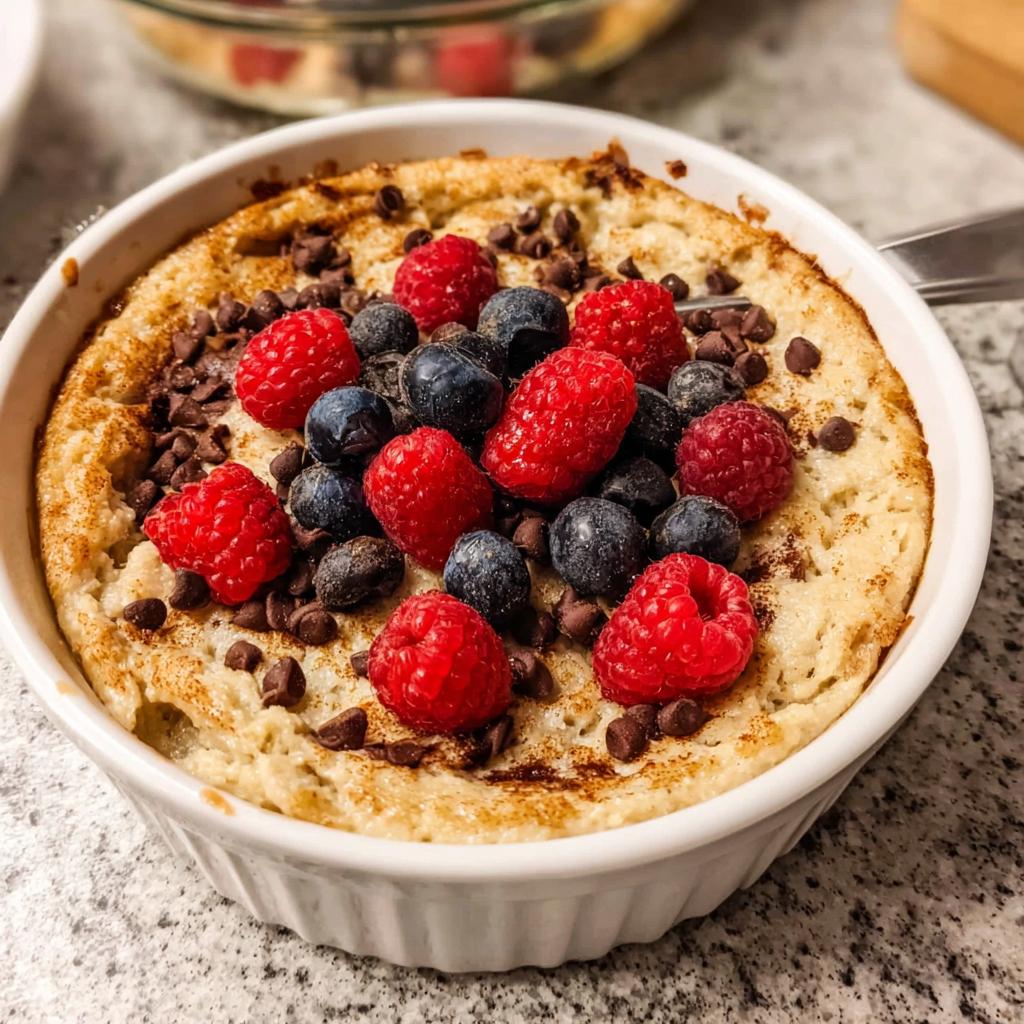
Now for the fun part: the toppings *before* baking! Think fresh berries like raspberries, strawberries, and blueberries, or some chocolate chips. Bananas sliced thin are amazing too. Want more ideas? Check out how they do it over at What Molly Made’s Baked Protein Pancake Bowl for some inspiration. After baking, you can drizzle on some nut butter, a bit more syrup, Greek yogurt, or even some chia jam. So many yummy possibilities!
Mastering the Fluff: How to Prepare These Baked Protein Bowls
Okay, so you’ve got your ingredients ready, and you’re wondering how to get that super fluffy texture that makes these baked protein bowls a total dream. It’s actually pretty simple, and I’ve totally got your back! First things first, preheat your oven to 350°F (that’s 175°C for my friends across the pond!). Grab a 12-14 ounce glass dish or ramekin – you know, the kind that’s oven-safe. Give it a good spray with some non-stick spray so nothing sticks later on. Trust me, nobody wants a protein bowl stuck to the dish!
Now, for the magic part: grab a mixing bowl and just toss *all* the bowl ingredients in there. Yes, everything! The egg, the Greek yogurt, your milk, the flax meal, flour, protein powder, your sweetener, and that all-important baking powder. Give it all a good mix until it’s combined and looks like a nice, smooth batter. Don’t overmix, though – we want fluffy, not tough! Once it’s mixed, arrange your favorite toppings right on top. Think berries, chocolate chips, anything you like!

Pop that delightful concoction into your preheated oven for about 22-25 minutes. You’re looking for the center to be set and the edges to get just a little bit golden brown. To check if it’s done, just gently poke the middle. If it springs back a bit, it’s ready! Let it cool in the dish for about 5-10 minutes before diving in. This little cooling bit is key for letting it set up perfectly. Serve it right there in the dish with any extra toppings you’re craving. Want to see a similar kind of magic in action? Check out my Fluffy Air Fryer Churro Bites for another idea on how to get things light and airy!
Tips for Achieving Maximum Fluffiness in Your Baked Protein Bowls
Okay, so you’ve got the basic recipe down, but you’re REALLY chasing that ultimate fluffy texture? I totally get it! It’s the holy grail of baked protein bowls. My number one tip? Don’t skimp on the baking powder! That little bit of leavening is crucial for giving your bowl that airy lift. Also, make sure your baking powder is fresh – old baking powder loses its power, and nobody wants a dense protein brick!
Another thing is your mixing technique. Make sure you’re not overmixing after you add the dry ingredients. Just mix until *just* combined. Overmixing can develop the gluten too much, resulting in a tougher, less fluffy cake. And, if you whisk your egg a bit before adding it to the wet ingredients, it can help create a lighter base. You can even try giving your batter a really good whisk for about 30 seconds right before you put it in the oven; it’s a trick I use for my easy baked churro bites too, and it really helps create those lovely air bubbles!
Customizing Your Baked Protein Bowls: Topping Ideas and Variations
Part of the fun with these baked protein bowls is making them totally your own! You can add so many yummy things right before baking. I love tossing in some fresh raspberries and blueberries, maybe some chocolate chips, or even thin slices of banana. If you’re feeling adventurous, have you seen my Chocolate Strawberry Yogurt Clusters? They’d be a fun addition mixed in! Once they’re out of the oven, the possibilities are endless. A dollop of nut butter (almond or peanut are my faves!) is always a winner, or a drizzle of extra maple syrup. Feel free to add more Greek yogurt or some chia jam for a fruity kick. Don’t be afraid to get creative, just like with my Banana Bread Brownies – the best meals come from playing around with flavors!
Making Ahead and Storing Your Fluffy Baked Protein Bowls
One of the best things about these fluffy baked protein bowls is how *perfect* they are for meal prep! Seriously, you can whip up a batch on Sunday and have healthy, delicious breakfasts or snacks ready to go all week. After they bake and cool a bit, just pop them into airtight containers. I usually store mine in the fridge for up to 5 days. They’re surprisingly good cold, but if you love them warm, just pop one in the microwave for about 30-60 seconds, or even pop them in a toaster oven for a few minutes. They reheat beautifully! It’s almost as easy as my freezer breakfast burritos – convenient and delicious!
Frequently Asked Questions About Baked Protein Bowls
Got questions about these fluffy baked protein bowls? I’ve got answers! Since I’ve tinkered with this recipe endlessly, I’ve run into a few common hiccups and wanted to share what I’ve learned.
Can I make these vegan?
You sure can! To make these vegan, you’ll need to swap out a couple of things. Use a flax egg (1 tablespoon flax meal + 3 tablespoons water, let it sit for 5 minutes) instead of the regular egg. For the Greek yogurt, use a dairy-free alternative like coconut or almond yogurt. And of course, make sure your protein powder is vegan! It might change the texture just a tiny bit, but they’ll still be delicious and satisfying.
What if I don’t have protein powder?
No protein powder? No problem! While it’s called a “protein bowl” for a reason, you can still make a tasty baked oatmeal bowl without it. You’ll want to add a bit more flour (maybe another tablespoon or two) and perhaps a little more liquid if the batter seems too thick. You could also add some oats for extra body. Honestly, it’ll just be a really delicious baked oatmeal! If you’re okay with a bit more carbs, my cottage cheese flagels are another great option with a different kind of fluffy!
Why aren’t my baked protein bowls fluffy?
Oh no! If yours aren’t fluffy, there are a few culprits. First, check your baking powder – is it fresh? Old baking powder won’t give you much lift. Second, make sure you didn’t overmix the batter, especially after adding the dry ingredients. Overmixing develops gluten, which can make them dense rather than fluffy. Also, ensure you’re using the correct amount of baking powder called for in the recipe. Sometimes, a little extra whisking of the batter right before it goes into the oven can help too, just like I do for my muffin tin egg bites!
Can I use a different type of milk?
Absolutely! I’ve tested this recipe with whole milk, skim milk, almond milk, cashew milk, and oat milk, and they all work wonderfully. The type of milk can slightly affect the richness and how it bakes, but you really can’t go wrong. Just make sure it’s unsweetened if you’re watching your sugar intake, and adjust your sweetener accordingly!
Nutritional Snapshot of These Fluffy Baked Protein Bowls
So you’re curious about the deets? I get it! Keeping track of your macros is super important, especially when you’re focused on fitness. Based on the recipe as written, you’re looking at roughly 476 calories per bowl. That’s packed with about 40 grams of protein! You’ll also get around 48 grams of carbs (thanks, fiber!) and about 13 grams of fat. Remember, these numbers are estimates, and they can totally change depending on the exact type of protein powder you use, the milk you choose, or if you go wild with the toppings after baking. It’s a pretty balanced way to fuel up!
Baked Protein Bowls
Ingredients
Equipment
Method
- Preheat your oven to 350°F. Spray a 12-14 ounce glass dish or ramekin with nonstick spray.
- Add all of the bowl ingredients to a mixing bowl and mix well until combined. Arrange your desired toppings on top.
- Bake in the preheated oven for 22-25 minutes, or until the bowls are set in the middle and slightly golden brown. Cool for 5-10 minutes, then serve in the dish with any additional toppings.