
Entertaining shouldn’t mean being stuck slaving over the stove while your guests are socializing! Believe me, I learned that lesson the hard way. I still remember the first time I brought a tray of stuffed mushrooms to a gathering. It was such a last-minute decision since I had a pack of mushrooms just sitting there in the fridge staring at me. I whipped up a savory filling in a flash, baked them quickly, and the aroma that filled my home as they cooked was just heavenly. When I arrived at the party, those little bites were gone in no time!
That success story really sparked my deep love for make-ahead appetizers, especially because they allow me to actually relax and enjoy time with my friends and family instead of being glued to the kitchen. Now, whenever I host, a tray of Stuffed Mushrooms (Make Ahead) is always on the menu. They deliver that perfect mix of comfort food flavor and a touch of sophistication to any occasion, saving your sanity in the process!
Why These Stuffed Mushrooms (Make Ahead) Are Your New Party Essential
Let’s be honest, hosting can be stressful. But these little bites change everything! When you can rely on a savory, elegant appetizer that’s ready to go, hosting instantly becomes fun again. You just pull them out of the fridge or skip straight to the oven. That’s why this Make Ahead Appetizer recipe is a game-changer for anyone who loves to entertain.
Here is why I swear by these little guys for every party tray I assemble:
- Massive Time Saver: You handle all the chopping and stuffing hours before guests arrive. It’s just grab-and-bake when the doorbell rings!
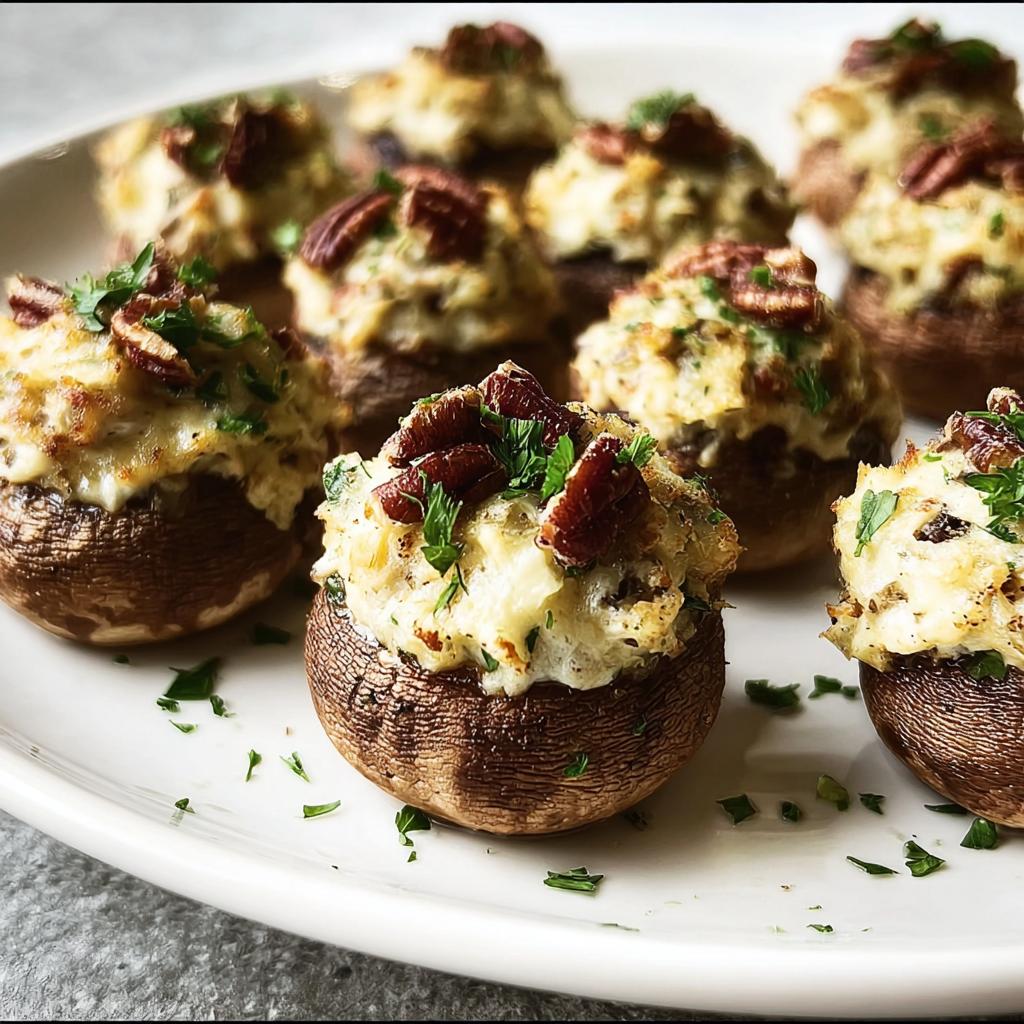
- Looks Fancy, Tastes Better: That rich Cream Cheese Filling topped with Parmesan and pecans just screams gourmet, but it takes about five minutes to mix up.
- Crowd Confidence: Seriously, these disappear first every single time. They are satisfying, savory, and perfectly portioned.
You can prep these beauties today and spend tomorrow focusing on your guests. If you’re looking for more ways to streamline those busy weeknights or prep ahead for big events, check out my guide on meal prep-friendly dinner ideas. Trust me, sanity is the best secret ingredient!
Gathering Ingredients for Your Stuffed Mushrooms (Make Ahead)
Okay, so assembling these ahead of time is the secret weapon, but that means getting your ingredients prepped just right before you mix everything. If you rush the prep work, the final texture of the Cream Cheese Filling suffers, and we can’t have that! I always organize everything into little bowls before I even turn on the stove. It makes mixing so much faster, especially when you’re trying to get a big tray ready for the fridge.
We have two main camps here: the mushroom structure itself and the rich, savory filling that goes inside. Pay attention to those little preparation notes I laid out—they make all the difference between a good mushroom and a spectacular one!
For the Mushrooms
You need sturdy little vessels for this job. I usually grab about 20 baby bell or cremini mushrooms. They bake up beautifully and hold their shape. The absolute most important thing here, and please listen to me on this, is what you do with those stems. Don’t toss them, no way! You need to remove them carefully, and then chop those stems up super finely. They’re going right into the savory base of the filling, and if they’re too chunky, they’ll steam the mushroom caps instead of cooking up nicely.
For the Cream Cheese Filling
This is where the magic happens! Ensure your cream cheese is actually softened—and I mean truly softened, not just room temperature. If it’s cold, your filling will be lumpy, and we want velvety smooth goodness here. For the richness, you’ll need 2 tablespoons of butter melted down with 2 minced cloves of garlic and half a medium onion, diced as small as you can manage. Cook that aroma base down until it’s tender, then let it cool a bit before mixing!
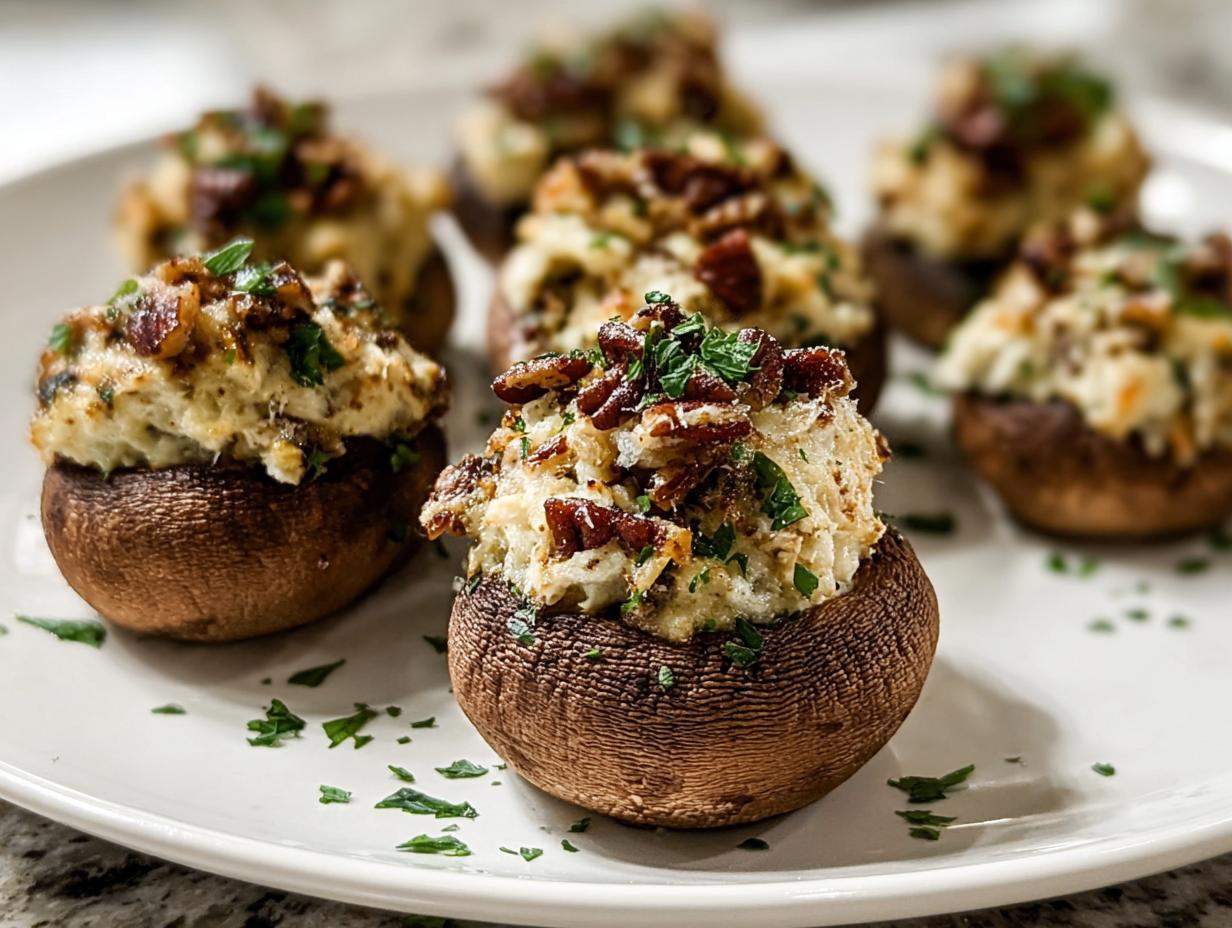
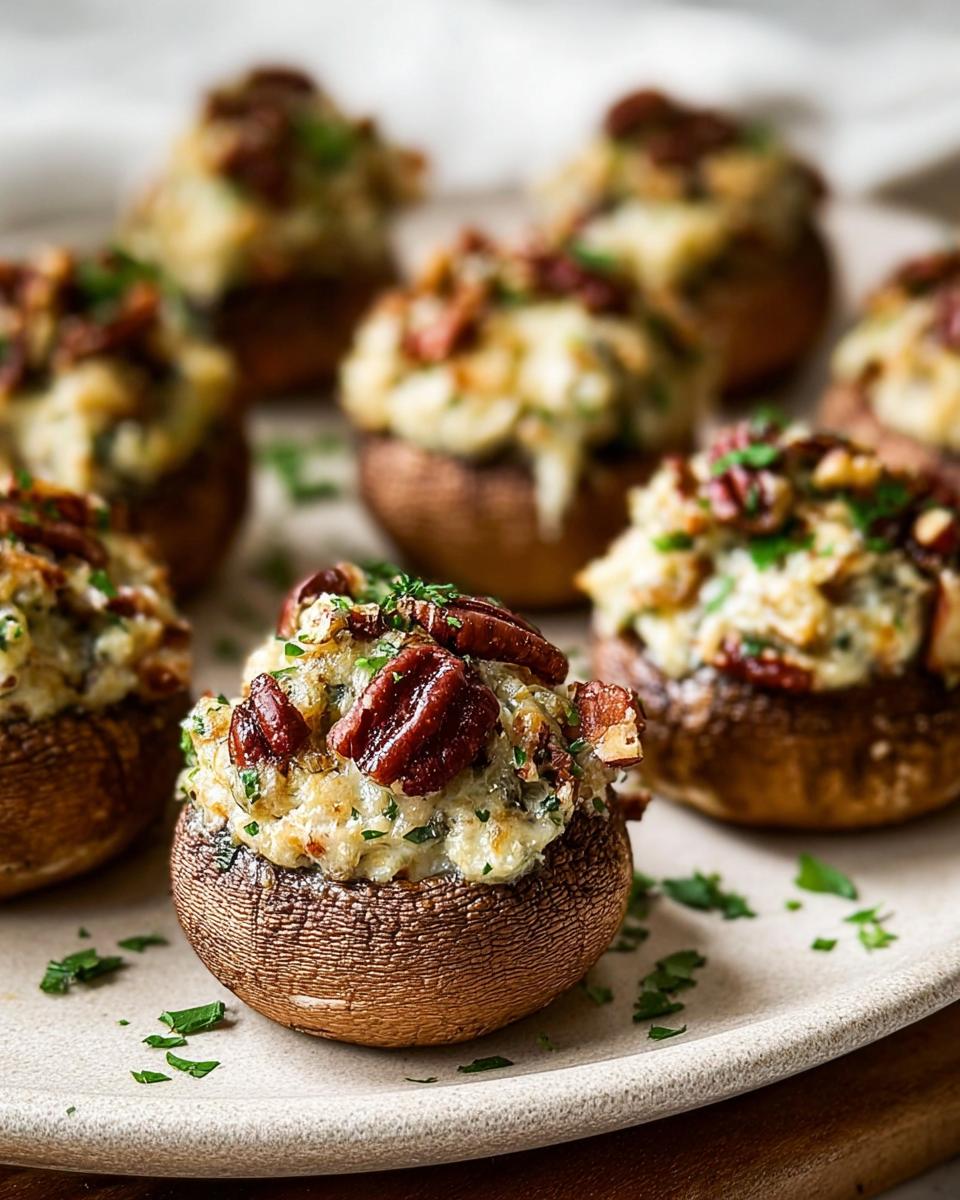
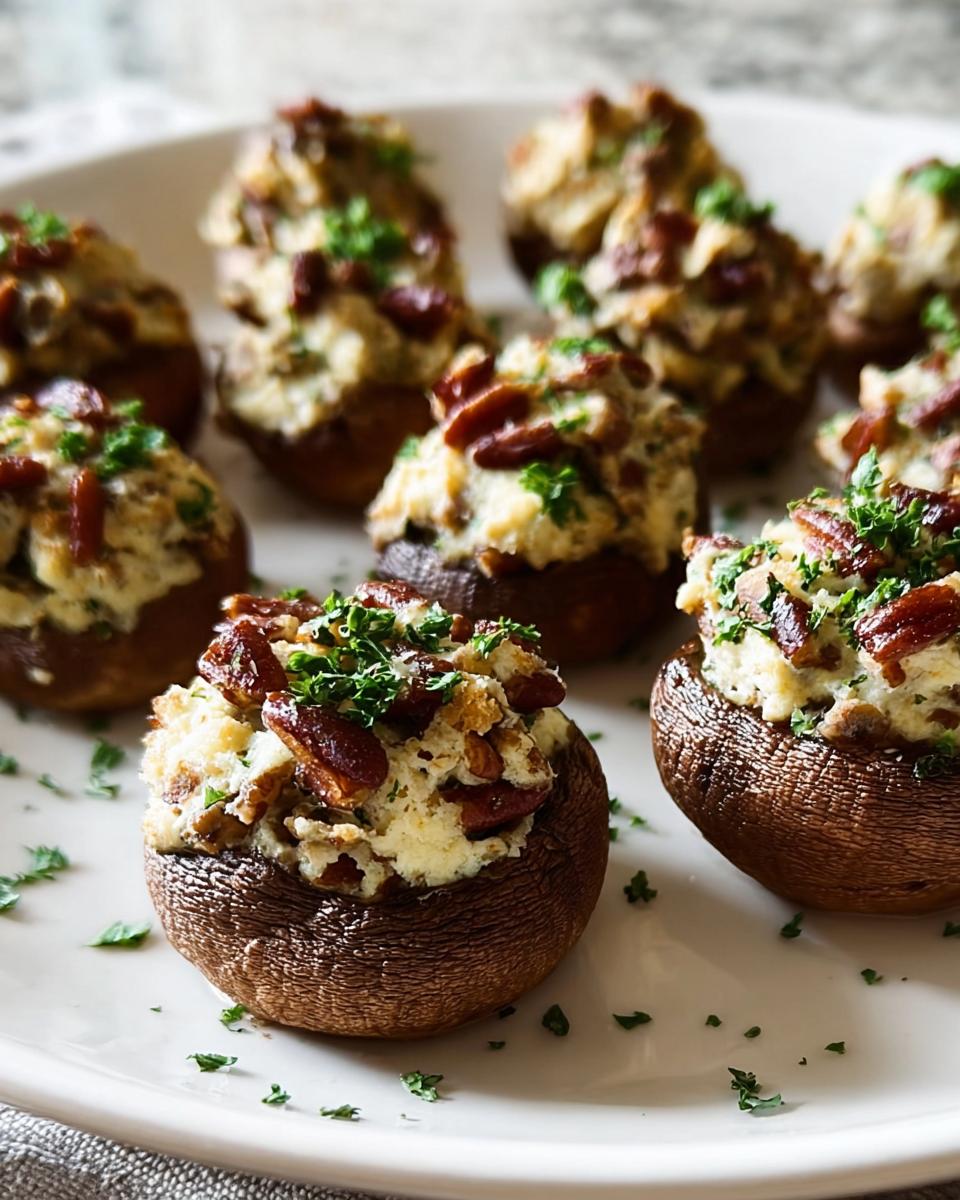
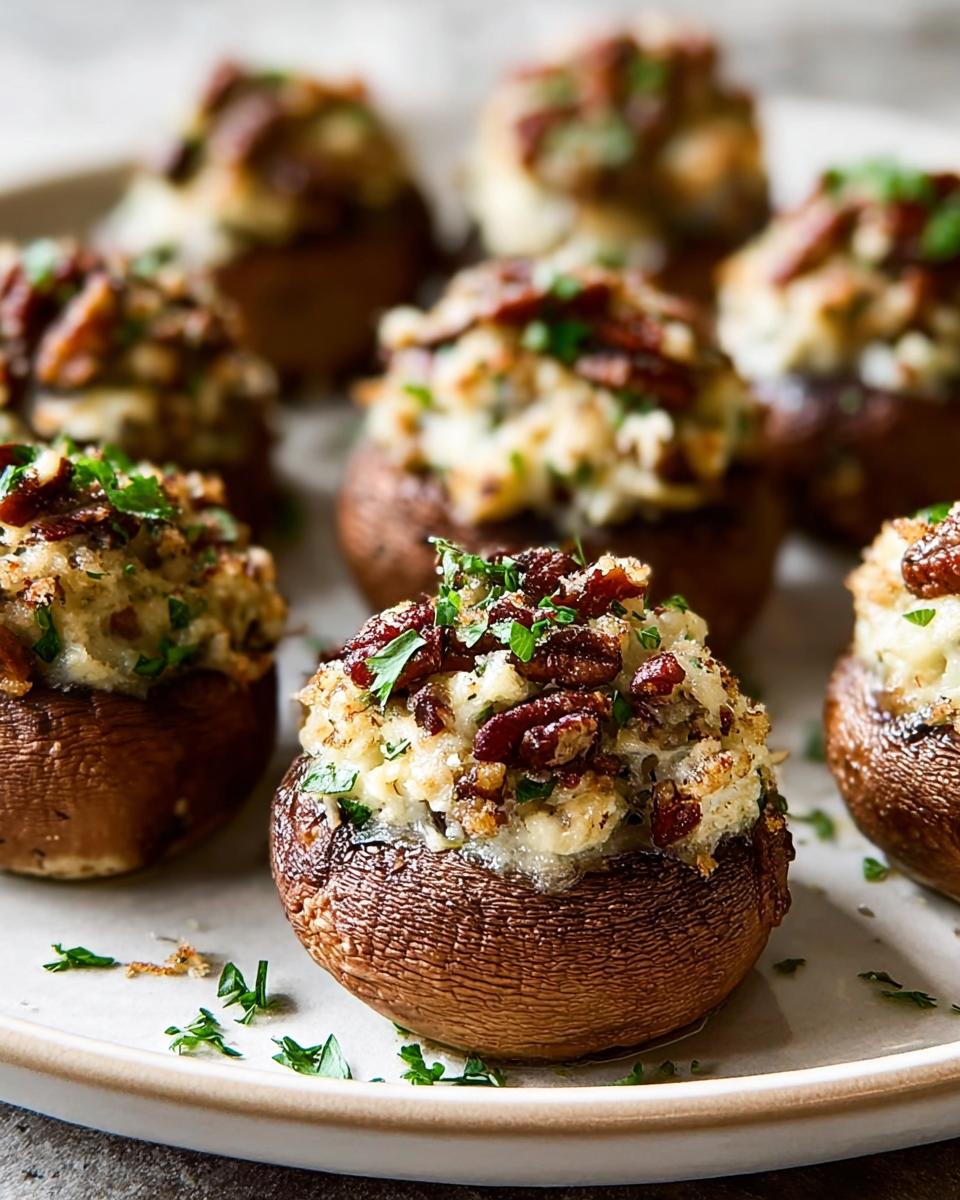
Once cooled, you bring in the stars: 4 ounces of that softened cream cheese, 1/3 cup of freshly grated Parmesan cheese (but save a tablespoon for topping!), 1/3 cup of roughly chopped whole pecans (save a tablespoon of those too!), and 1/4 cup of fresh parsley, finely chopped (you’ll need extra for garnish later). Mix them all until everything is just combined. Don’t overmix once the cheese goes in, or you lose that nice texture we worked so hard to build!
Step-by-Step Guide to Preparing Stuffed Mushrooms (Make Ahead)
Alright, now that we have all our delicious components ready, let’s get these beauties assembled! Remember, the whole point of this Stuffed Mushrooms (Make Ahead) recipe is to make your life easier later, so we are going to move through these assembly steps efficiently. First things first: get your oven warmed up to 400°F (200°C). You’ll want a good baking sheet ready, too. I always give mine a little grease bath with olive oil; it helps the bottoms get a nice little crisp when we finally Bake And Serve them. If you’re looking for some other inspiration, this stuffed mushroom recipe from a friend is also fantastic, but this make-ahead structure is what we are focusing on today!
Sautéing the Base Ingredients
We start on the stovetop! Melt those 2 tablespoons of butter in a skillet over medium heat. Now, toss in those finely chopped mushroom stems we set aside. This is so important: cook them until they look kind of dry—you want most of that mushroom moisture to evaporate out right here. If you skip this, those little caps will get soggy later! Once the stems shrink up a bit, throw in your minced garlic, diced onion, salt, and pepper. Cook just until the onion gets translucent, maybe a minute or two. Then, take the skillet off the heat and dump that cooked mixture into your big mixing bowl. You have to let this cool down a bit, or you’ll melt your lovely cream cheese into soup!
Mixing the Cream Cheese Filling
Once that sauté base is just warm to the touch, time to build the flavor! Add in your 4 ounces of softened cream cheese, the majority of your grated Parmesan (remember to save some!), most of your chopped pecans (saving a little bit too!), and all that beautiful fresh parsley. Mix it all up gently. I mean it—gently! You want this Cream Cheese Filling to be fluffy and spreadable, not totally overworked into a glue. We’re aiming for a rustic texture, not a paste, so stop mixing as soon as everything looks evenly incorporated. If you need a refresher on cooking fundamentals, check out my guide on making dinner ideas foolproof.
Stuffing and Topping the Stuffed Mushrooms (Make Ahead)
This is the fun part! Take your cleaned-out mushroom caps—make sure they are nice and dry—and carefully spoon that rich filling right into the cavities. Don’t be shy, but don’t pile it so high that it’s going to fall off while you move them. Once they are all stuffed, take that reserved Parmesan and sprinkle it over the top of every single mushroom. Then, sprinkle on the reserved chopped pecans. This topping is how we get that gorgeous golden crust when they bake. If you stop here, these are perfect for chilling in the fridge until it’s time to entertain—that’s the real beauty of this method!
Baking Instructions for Perfect Stuffed Mushrooms (Make Ahead)
Okay, you’ve got your beautiful tray of prepped, stuffed beauties sitting on the counter, ready for their glow-up! This is where the ‘Bake And Serve‘ part of the plan comes into play. Remember that 400°F (200°C) preheat we talked about? Now is the time to slide that tray right into that hot oven. If you’ve chilled them for several hours and they are cold going in, don’t panic if they take just a little longer—maybe five extra minutes—but generally, the cooking time stays pretty consistent with the recipe!
You’re looking for a total bake time between 20 and 25 minutes. I always watch for two tell-tale signs that they are done and ready to come out. First, the tops—that beautiful mix of reserved Parmesan and pecans—should be golden brown and look slightly crispy. Second, the mushrooms themselves should look tender and slightly shrunk down. Give one a careful little prod with a fork; it should yield nicely without falling apart completely.
If you notice the tops are browning too quickly but the mushroom bottoms still look a little pale or hard, here’s my little trick: gently tent the whole baking sheet with aluminum foil for the last five minutes. This traps a little steam and heat underneath, ensuring the mushroom gets perfectly cooked through without scorching that delicious, cheesy crust. Once they’re out, resist the urge to grab one immediately—they are mouth-burningly hot! Let them settle for five minutes on the baking sheet so the filling can firm up just a tiny bit before you garnish with that final sprinkle of fresh parsley. Serving them warm is the absolute best way to enjoy these!
Expert Tips for Successful Stuffed Mushrooms (Make Ahead)
Even though these Stuffed Mushrooms (Make Ahead) are super easy once you get the hang of it, the difference between a soggy mushroom and a crisp, delicious one often comes down to little secrets the pros know. Since you’re planning ahead, you want to make sure that flavor is locked in and you aren’t dealing with excess liquid when it finally comes time to bake! You want your final Party Tray to look crisp and golden, not wet!
If you’ve ever worried about the mushrooms weeping juice onto your platter, try resting the caps on a wire rack set inside your greased baking sheet. Don’t skip sautéing those chopped stems thoroughly either; draining off the moisture there is half the battle won!
Ingredient Swaps and Flavor Boosts
I love that with this basic, creamy filling, there’s so much room to play around! Once you understand the base ratio of cream cheese to savory bits, you can totally switch things up based on what you have floating around the fridge. This is where you build your own signature appetizer!
Here are a few things I toss in when I want to jazz things up for a bigger crowd or just feel like getting creative:
- For Crunch: If pecans aren’t your favorite, walnuts work beautifully, or even toasted slivered almonds give a lovely texture. If you’re feeling hearty, add about 1/4 cup of crumbled, cooked bacon! Oh my goodness, bacon makes everything better.
- Herb Power-Up: That parsley is great, but if you have some lovely fresh chives or a little bit of thyme or rosemary, mince a teaspoon of it into the filling. It adds such an earthy, savory depth that pairs perfectly with baked mushrooms.
- A Little Zing: Sometimes I grate a tiny bit of lemon zest right into the cheese mixture. It cuts through the richness of the cream cheese just enough to make the whole thing taste brighter.
When you’re experimenting with flavor, remember to check out my ultimate guide for ingredient tips and temperatures if you ever feel shaky about swapping out ingredients in a recipe. It really helps you cook with confidence!

Make-Ahead and Storage Instructions for Stuffed Mushrooms (Make Ahead)
This is the section that literally saved my holiday hosting life! The whole reason I’m obsessed with this recipe is because these Stuffed Mushrooms (Make Ahead) let you cheat time. You can totally assemble these little flavor bombs hours before your actual party starts, and they hold up beautifully in the fridge. Seriously, you have a window of up to 12 hours where they are perfect.
To prep them for their nap time, just make sure they are stuffed, topped with the reserved Parmesan and pecans, and arranged neatly on your baking sheet. Now, you need an airtight container for storage, or you can cover the whole baking tray tightly with plastic wrap. If you use plastic wrap, make sure it doesn’t stick to the cheese topping, or you’ll ruin your masterpiece when you try to unwrap it later!
Chill them in the refrigerator until you’re ready to bake. The filling is sturdy enough that it won’t slump or lose its shape. This means when your guests arrive and you suddenly realize you need an appetizer in 30 minutes, you are already halfway there! It’s so satisfying knowing that the hard work is done. You can browse through all my favorite recipes and inspiration right here on my main recipe page when you’re planning your prep schedule!
When that baking time finally comes, just treat them like they are fresh—maybe adding a couple of extra minutes since they’re going straight from cold storage to a hot oven. It’s the ultimate stress-free entertaining solution!
Reheating Stuffed Mushrooms (Make Ahead) for Serving
So, you zipped them up in the fridge last night like the smart host you are! Now it’s party time, and you need to know how to safely transition those cold peppers on your Party Tray into something hot and crispy. This is thankfully super easy, but we need to manage that temperature jump correctly so they puff up nicely instead of drying out.
For mushrooms that you fully assembled yesterday and kept chilled, you basically treat this the same way as baking them fresh, but you give them a little extra grace period in the heat. Keep that oven at 400°F (200°C) because that high heat is what crisp-up those topping bits perfectly.
If you are reheating mushrooms that have been chilling in the fridge (up to that 12-hour mark), you will likely need about 25 to 30 minutes in the oven. I find that if the filling feels very firm and cold when you put it in, closer to 30 minutes is the sweet spot. You want to ensure the filling gets nice and molten hot all the way through the center, not just warm on the outside.
If you didn’t assemble them ahead of time—maybe you just had leftovers from last night—you can still reheat them! Place the leftovers on a baking sheet. Since they are already cooked, you can bake them a bit faster, usually around 12 to 15 minutes at 350°F (175°C). Low and slow reheating prevents the cheese from seizing up or the mushroom edges from burning when they are already cooked through once. Either way, they come back to life tasting almost as good as fresh out of the oven the first time. Always check that savory internal temperature before serving, just to be safe!
Frequently Asked Questions About Stuffed Mushrooms
I know that sometimes when you’re trying a new recipe, especially one that involves planning like this great Make Ahead Appetizer, little questions pop up. Don’t worry, I’ve heard them all! Here are the most common things folks ask me when they are preparing their Stuffed Mushrooms tray.
Can I use different types of mushrooms for these Stuffed Mushrooms (Make Ahead)?
Absolutely! Cremini mushrooms, which are sometimes called baby bellas, are my absolute favorite because they have a deeper, earthier flavor than the standard white button mushroom. Both work perfectly well for this recipe. The key is size consistency. You want a mushroom that’s big enough to hold a good scoop of that cheesy filling but small enough that you can pop the whole thing in your mouth in one or two satisfying bites! I would definitely steer clear of really huge portobellos for this one, though. Those large caps tend to hold a lot of water and don’t bake quite as neatly as the smaller ones do.
What is the best way to keep the filling moist when making this Make Ahead Appetizer?
This is such a good question because nobody wants a dry, crumbly topping on their party food! The first line of defense is making sure you don’t overcook them. Stick to that 20 to 25-minute window. That rich, softened cream cheese is really your best friend here; as long as that’s fully incorporated and not under-mixed, it keeps the filling nice and creamy throughout the bake and reheat process. If you follow the step for sautéing the stems until the moisture evaporates, that prevents the filling from getting watery on the bottom, which is another huge factor in keeping the whole thing moist and delicious.
If you’re getting ready to tackle a big cooking day and need quick inspiration, I always have a running list of 5-ingredient dinner ideas that keep things fast but flavorful!
Nutritional Estimates for Stuffed Mushrooms (Make Ahead)
Now, I know some of you are juggling different dietary needs while entertaining, and while I’m purely focused on making things taste amazing here, I always like to give folks a general idea of what’s in these little bites. Since we are using cream cheese and pecans, these are definitely a savory, richer appetizer, but they are portion-controlled since they are served mushroom by mushroom!
Based on the ingredients listed in this recipe for 20 servings, here is the general nutritional breakdown per mushroom. Please remember, this is just an estimate, and it’s based on standard ingredient sizes. If you load up on extra butter or use fattier pecans, these numbers will shift, of course! Always check your specific brands if you are tracking very closely.
For the whole batch, remember you get 20 delicious servings:
- Calories: Roughly 168 calories per mushroom.
- Fat: About 16 grams of fat, including 7 grams of saturated fat. That’s the butter and pecans doing their thing!
- Protein: Around 4 grams.
- Carbohydrates: Just about 5 grams of carbs.
They are pretty low in sugar, which is nice, and they pack a decent little mineral punch, especially in potassium! These are perfect for serving alongside vegetable-heavy dishes or when you need a substantial, savory starter that isn’t filling everyone up too much before the main event. Enjoy them responsibly, but definitely enjoy them!
Share Your Experience Making These Stuffed Mushrooms
I absolutely love hearing how you all take these recipes and make them your own! Trying out a new Make Ahead Appetizer like these Stuffed Mushrooms (Make Ahead) should be fun, not homework, and I hope this guide made preparing for your last gathering completely stress-free.
I’m so curious to know how these turned out for you. Did you manage to chill them overnight, or did you just whip them up and bake them right away? Did the Cream Cheese Filling hold up perfectly when you finally decided to Bake And Serve?
Take a moment to leave a rating below and tell me what you thought! Even better, drop a comment sharing any genius flavor twists you came up with—maybe you used feta instead of Parmesan, or perhaps you added some sun-dried tomatoes into the mix? I’m always looking for new ways to jazz up a classic, especially when hosting a big Party Tray!
If you loved how easy these were to prep in advance, you need to check out my incredibly popular recipe that everyone asks for—it’s another big-time winner for busy entertainers. Happy cooking, and I can’t wait to read your feedback!
Stuffed Mushrooms (Make Ahead)
Ingredients
Equipment
Method
- Preheat your oven to 400°F (200°C). Lightly grease a baking sheet with olive oil. Remove the stems from the mushrooms, chop them finely, and set them aside.
- Melt the butter in a medium skillet over medium heat. Add the chopped mushroom stems and cook for 5 minutes, until most of the moisture has evaporated. Add the onion, garlic, salt, and pepper. Cook for another 1 to 2 minutes, until the onion softens. Transfer this mixture to a mixing bowl and let it cool slightly.
- Add the softened cream cheese, reserved parmesan cheese, chopped pecans, and chopped parsley to the mixing bowl with the mushroom mixture. Stir everything together until well combined.
- Fill the mushroom caps with the cheese mixture. Sprinkle the tops evenly with the reserved parmesan and chopped pecans.
- Bake for 20 to 25 minutes, or until the tops are golden brown and the mushrooms are tender. Garnish with extra parsley before serving.


