
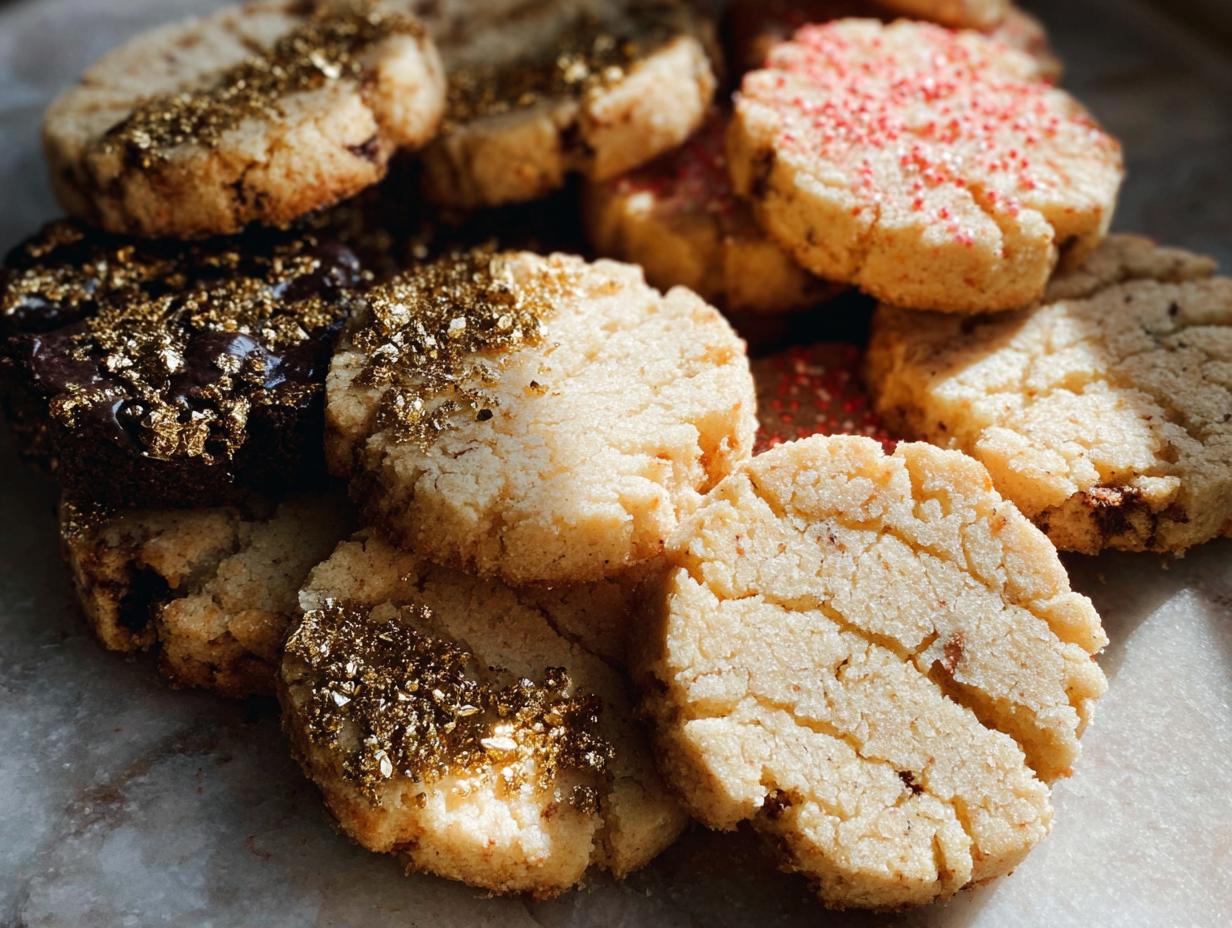
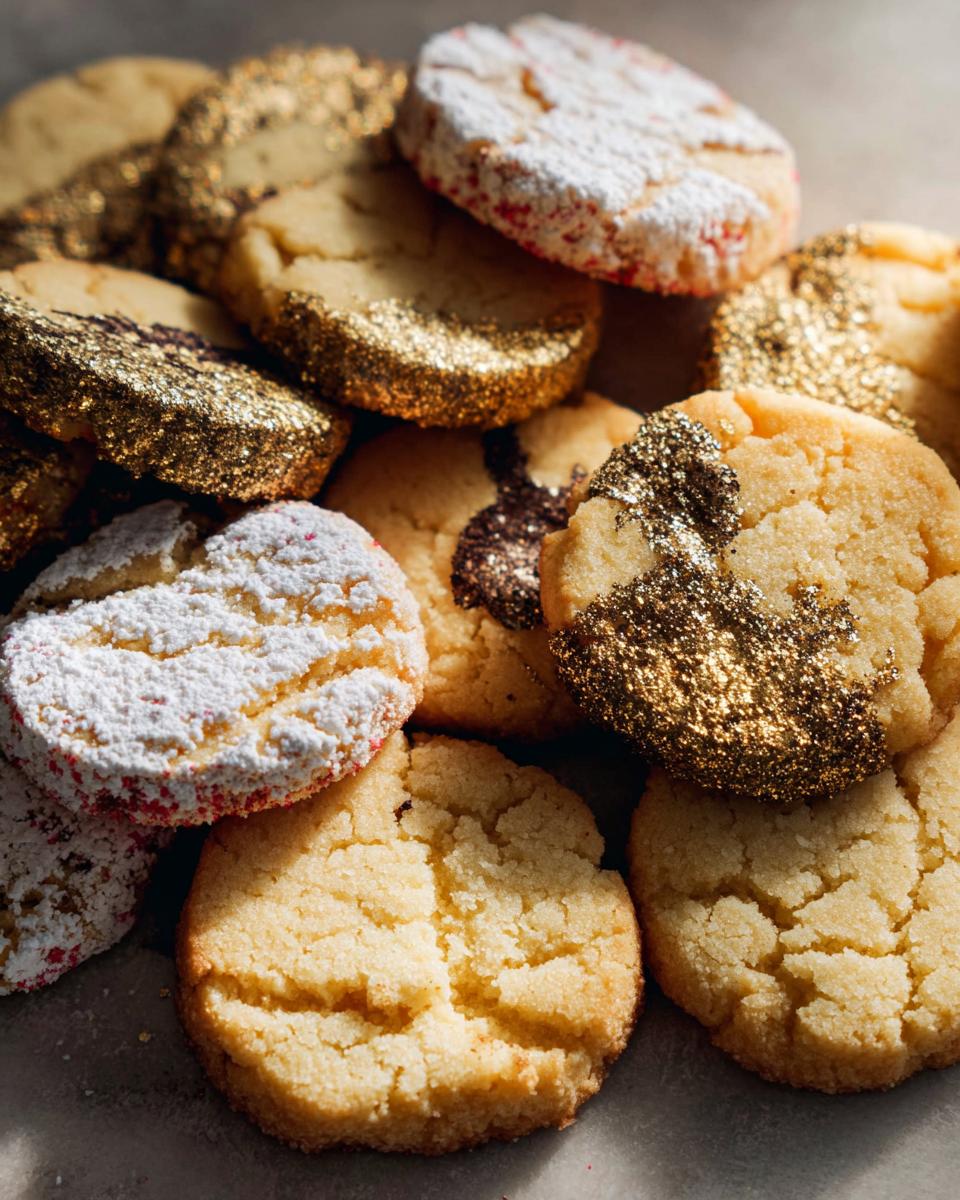
I have a secret to tell you: embracing a low-carb lifestyle doesn’t mean you have to wave goodbye to the truly luxurious treats. Finding that special something that feels indulgent? That’s my absolute favorite part of being The Keto Performance Chef. I’m sharing my absolute pride and joy today: these incredibly buttery, multi-varied Gold-Dusted Shortbread cookies.
We’re talking four distinct flavors here, all starting from a simple, perfect base dough that chills beautifully. They look like something you’d buy at a five-star bakery, but trust me, they are so simple to make.
I still remember the first time I decided to step outside my comfort zone and try my hand at baking keto sweets. The kitchen was filled with the aroma of melting butter and vanilla, and as I mixed my ingredients, I felt a surge of excitement. When I pulled my first batch of Gold-Dusted Shortbread out of the oven, I marveled at how something so simple could look and taste so exquisite. That moment ignited my passion for creating keto desserts that don’t just nourish but also delight the senses. Now, I love sharing those experiences with others, reminding them that dietary restrictions don’t mean sacrificing enjoyment.
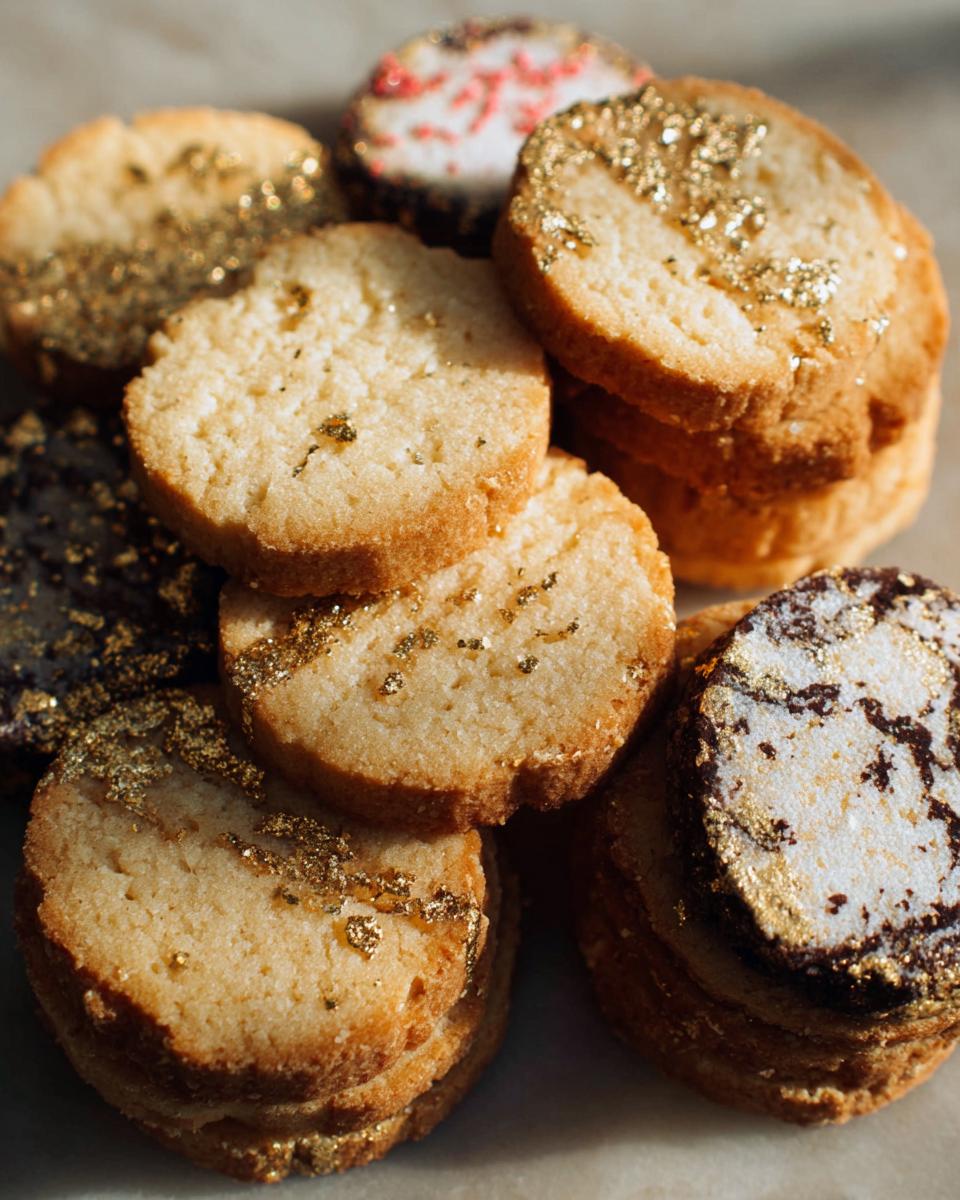
Forget boring treats; these are elegant desserts that shine, literally! They’ve become my go-to for gifting because everyone is always so impressed by the shimmer of the edible gold.
Why You Will Love Making Gold-Dusted Shortbread
Honestly, you’re going to be obsessed with these shortbread cookies. They tick every single box for an amazing keto bake. Here’s the quick rundown on why they’ll become your new favorite:
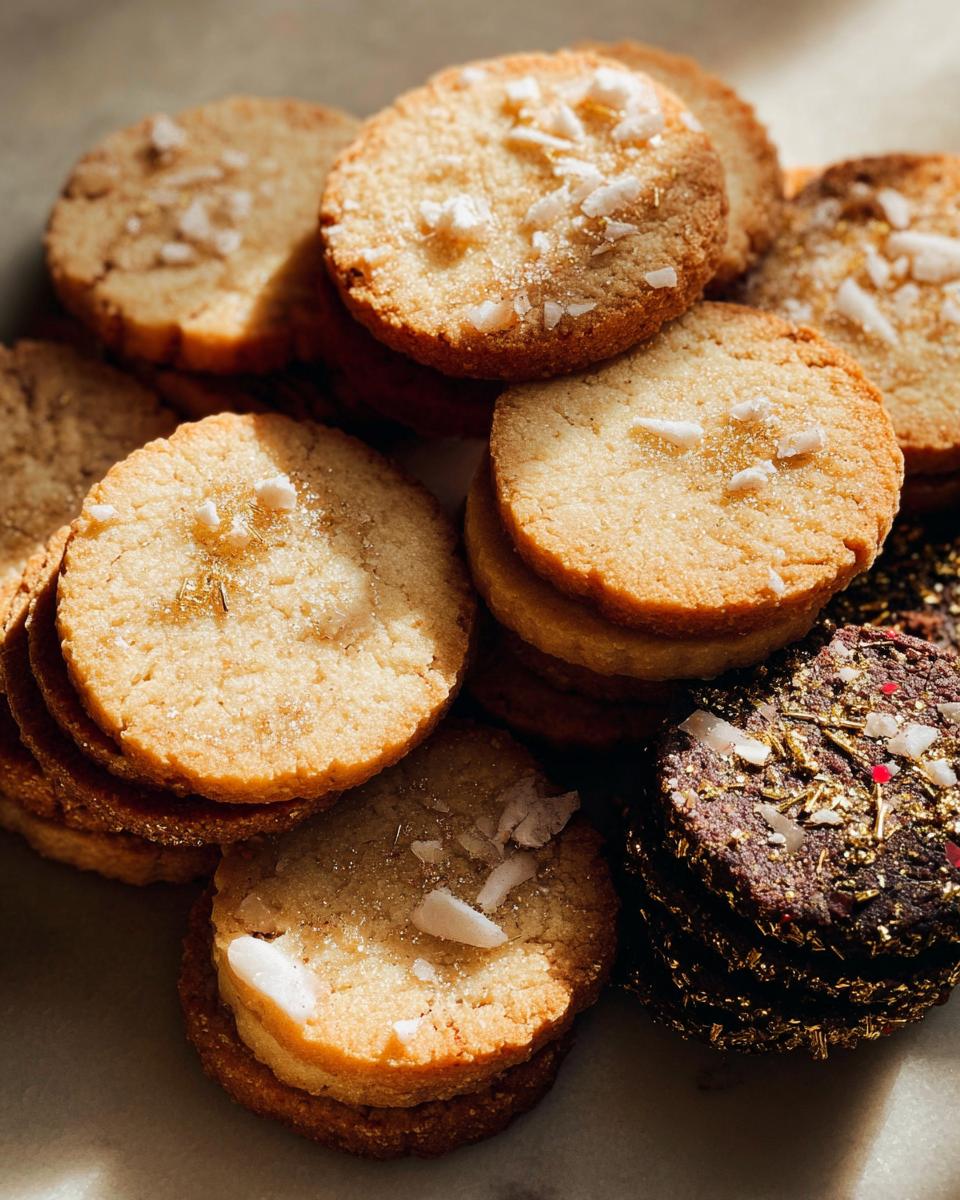
- They have that perfect, melt-in-your-mouth buttery cookie texture—seriously rich!
- Four different flavors come from just two base doughs, so you get maximum variety for your effort.
- They look incredibly fancy thanks to the gold dusting, making them the ultimate elegant dessert for any occasion.
- Because they are slice-and-bake, they are fantastic for making ahead of time!
Essential Equipment for Perfect Gold-Dusted Shortbread
You don’t need a professional bakery setup for these buttery cookies, but having the right tools makes life so much easier! Since we are making these beautiful slice-and-bake shortbread, grab your mixer and some sturdy wrapping materials.
You’ll definitely need a hand mixer or a stand mixer with the paddle attachment. Don’t forget your rubber spatula for scraping down the sides! We rely on sturdy baking sheets lined with parchment paper, a couple of small dishes for coating mixes, and a cooling rack to finish things off.
The Ingredients for Your Gold-Dusted Shortbread Variations
Okay, this is where the magic starts to happen! Since we’re making four different kinds of shortbread cookies, we need to organize the ingredients clearly. We’ll mix up two main bases—the vanilla and the chocolate—and then divide those to add flavor variations. This way, we are maximizing our time and creating less mess!
I’ve linked my favorite guide to keto desserts here if you need more low-carb inspiration after these are done.
Vanilla Dough Base Ingredients
This buttery cookie base is the starting point for our chai-spiced version. You absolutely need the butter to be at room temperature so it creams properly—don’t try to sneak it in cold! Make sure you have 1 cup of unsalted butter ready to go, along with 1/3 cup of packed light brown sugar and 1/2 cup of granulated sugar. For flavor, we need 1 teaspoon of vanilla bean paste (or you can use 2 teaspoons of vanilla extract if that’s what you have handy). Don’t forget the 1/4 teaspoon of salt, and finally, 2 1/4 cups of all-purpose flour to bring it all together.
Chai Spiced Cinnamon Sugar Ingredients
This group is for creating that beautiful, warm swirl inside the vanilla dough and for coating some of the finished logs. For the internal spice swirl, combine 1/2 teaspoon of cinnamon, 1/4 teaspoon of cardamom, 1/4 teaspoon of ginger, and 1/8 teaspoon of allspice. For the outer coating, you’ll need 3 tablespoons of sparkling sugar mixed with 3 tablespoons of regular granulated sugar, plus 2 teaspoons of cinnamon reserved specifically for coating.
Dark Chocolate Cherry Dough Ingredients
For this rich variation that splits off the vanilla base, grab 2 ounces of dark chocolate that you’ve finely chopped—we want it to be bite-sized! We’re also adding 1/2 cup of dried cherries, which should be roughly chopped. For the final coating on this log, you’ll need 1/2 cup of raw sugar. It gives such a nice crackle on top!
Chocolate Dough Base and Flavor Ingredients
Now for the chocolate side! We start with 1 cup of room temperature unsalted butter and 3/4 cup of granulated sugar. Add 1 teaspoon of vanilla bean paste and 1/4 teaspoon of salt. The dry mix for this base requires 1 3/4 cups of all-purpose flour and, importantly, 1/2 cup of unsweetened dark cocoa powder to get that deep chocolate flavor.
To flavor our two chocolate variations, we’ll need 1/2 cup of roughly chopped hazelnuts for the hazelnut log. For the peppermint log, set aside 1/2 cup of white melting chocolate and 2 ounces of chopped dark chocolate for drizzling later, plus 1/2 teaspoon of peppermint extract mixed right into the dough. And for that festive final touch, get 3 crushed candy canes ready to sprinkle on top!
Step-by-Step Instructions for Making Gold-Dusted Shortbread
This recipe shines because it’s totally designed for efficiency! We make two doughs, chill them, swirl in the extras, then slice and bake. It’s the best way to get tons of variety out of one baking afternoon. If you are new to slice-and-bake methods, remember that chilling is what sets the dough so perfectly, preventing spreads, which is super important for those clean gold-dusted edges!
Need a great refresher on keto staples while you wait for the oven to warm up? I talked about some of my essential keto meal prep tips over here if you need a distraction.
Preparing the Vanilla and Chocolate Dough Bases
First up, the vanilla base. You’ll cream your butter and both sugars until it looks light and fluffy—this aeration is key for the final texture. Mix in your vanilla and salt. Then, you must switch to a rubber spatula to fold in the flour by hand. Don’t use the mixer for this part, or you’ll toughen up our buttery cookies!
For the chocolate base, we do the same thing: cream the butter and sugar until fluffy. Then, add the dry stuff—the flour and the cocoa powder—and again, use that spatula to gently bring everything together by hand until *just* combined. We don’t want to develop any gluten here, not even a little bit!
Incorporating Flavor Variations and Chilling the Gold-Dusted Shortbread Dough
Now we divide! Take the vanilla dough and split it. Add the chai spice mix to the larger half and just gently fold it a few times so you get nice spicy ribbons, not a uniform color. Add the dark chocolate and cherries to the smaller half and mix until they are dotted throughout.
The chocolate dough gets split too. Fold the chopped hazelnuts into one half, and mix the peppermint extract and chopped chocolate into the other. Shape all four portions into logs, wrap them *tightly* in plastic wrap—this is vital for keeping that log shape—and tuck them into the fridge for a good, solid chill. You need at least 2 hours, but overnight is even better. That long chill is how we get ready for the slice-and-bake magic, just like how the folks over at Butternut Bakery explain it works so well.
Slicing, Coating, and Baking Your Buttery Cookies
When the dough is firm, it’s coating time! You roll the vanilla chai log in the cinnamon sugar mix, the chocolate cherry log gets rolled in raw sugar, and the chocolate hazelnut goes into the finely chopped nuts. The peppermint log stays bare for now.
Slice the ends off each log square—you’ll want about 12 slices per log, aiming for cookies about 1/2-inch thick. Pop those slices onto a parchment-lined baking sheet, giving them about 2 inches of space. Bake at 350F for about 15 to 18 minutes. You’re looking for the edges to be just barely pale golden brown and the tops to look matte. Transfer them to a cooling rack!
Finishing the Peppermint Gold-Dusted Shortbread
While the others cool, melt your white chocolate in a heat-safe bowl until smooth. Take those baked peppermint shortbread cookies and dunk half of each one right into that melted white chocolate. While the chocolate is still wet—and this is where the gold comes in!—sprinkle them generously with your crushed candy canes. Pop these finished ones back on the rack and let them chill for about 15 minutes so that white coating sets up nice and hard.
Tips for Success When Making Gold-Dusted Shortbread
Baking shortbread can feel delicate, especially when you’re trying to manage different flavors all at once, but I’ve got a few tricks that make sure your buttery cookies turn out perfectly textured every single time. These are the things I learned the hard way!
First, and this is non-negotiable for that wonderful shortbread crumble: Do not overmix the flour! As soon as you see the last streaks of flour disappear, stop stirring. That paddle attachment is great for creaming butter, but it’s brutal on flour and will make your cookies tough instead of tender. We want those crumbly, melt-in-your-mouth results.
Second, respect the chill time. That 2-hour minimum (or overnight if you can manage it!) is crucial. If the dough is too soft when you slice it, the logs warp, and your lovely Gold-Dusted Shortbread comes out misshapen. If you find a log is softening while you’re slicing, just tuck the unwrapped portion back into the fridge for ten minutes. It’s worth the small pause.
Third, when you’re rolling the logs in their coatings—the raw sugar, the hazelnuts, whatever you choose—roll them gently but firmly so the coating adheres, but don’t press so hard you flatten the cylinder shape. This ensures that when you finally bake them, they hold that nice defined edge, which is perfect for when we see them sparkle later.
If you ever get stuck while you’re in the middle of a big keto baking session, I have lots of quick guides and temperature tips ready for you over on my resource page when you need them.
Gold-Dusted Shortbread Gift Ideas and Presentation
These buttery cookies instantly elevate any gift box. Since they look so incredibly elegant—especially with that shimmer from the edible gold—they feel luxurious but are so budget-friendly to make yourself! When packaging these Gold-Dusted Shortbread cookies, presentation is everything.
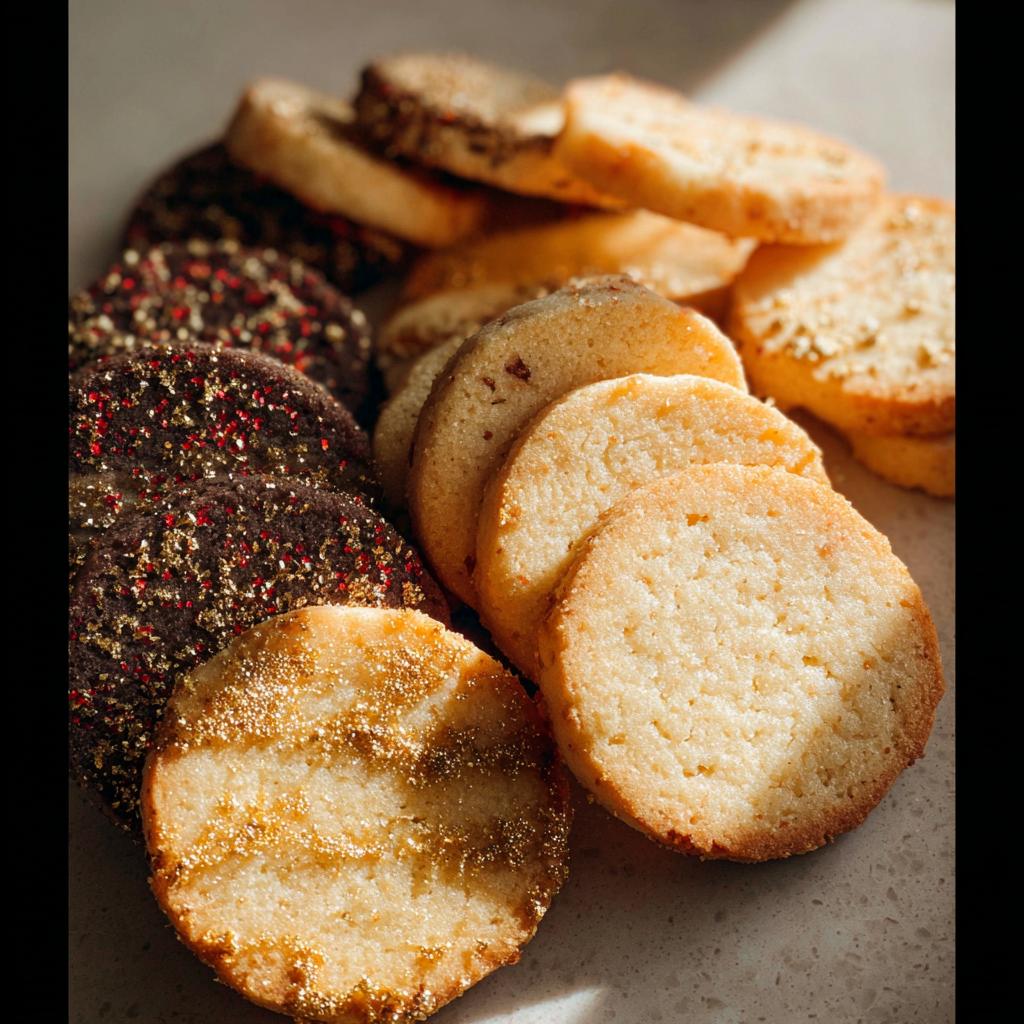
I love filling clear cellophane bags and tying them off with a wide satin ribbon. You can layer the flavors visibly; maybe a row of the dark chocolate cherry next to the bright white peppermint! For extra wow factor, use a dry, soft pastry brush to dab a tiny bit more edible gold right onto the peaks of the hazelnut coating once they are cool.
They look spectacular nestled in small tins, lined with crinkle-cut paper. Honestly, giving a tin of these homemade, elegant dessert shortbreads just feels so much more thoughtful than anything store-bought.
Storage and Make Ahead Instructions for Gold-Dusted Shortbread
One of the best things about these Gold-Dusted Shortbread cookies is how well they handle being made ahead of time. This is a fantastic recipe for busy weeks or when you need to get a jump start on holiday baking! We really took advantage of the slice-and-bake style to make sure you aren’t tied to the kitchen.
For storing the already-baked buttery cookies, I always recommend keeping them in an airtight container at room temperature. They hold up beautifully for at least a week, sometimes longer! You need to be careful to separate the flavor profiles, though. If you mix the peppermint (even without the chocolate coating) next to the chai spice cookies, you’ll have mint flavored everything else!
If you want to prep even further, freezing the dough logs is the way to go. Just wrap those logs super tight in foil—I usually even throw a layer of plastic wrap over the foil just to be safe—and pop them in your freezer. According to my notes, they are good there for up to a month. It’s amazing to know you have gourmet shortbread ready to go!
Now, for baking from frozen, you don’t even need to thaw them completely! You can slice off the cookies while they are still stiff, just let them sit on the counter for about 15 minutes to warm up slightly but not soften too much. Then, add about 2-4 minutes to the standard baking time. It makes that weeknight baking session nearly instant, which is why I love having make ahead strategies in my arsenal. You can check out some of my best meal prep strategies right here for more tips on planning ahead.
Frequently Asked Questions About Gold-Dusted Shortbread
Whenever I share these shortbread cookies, people always have a few quick questions about fitting them into their keto lifestyle or nailing that perfect finish. I’ve pulled out the three most common ones I get asked when people are looking to bake them for the first time!
If you want to dive into more of my keto recipes after mastering this, you can always check out my main recipe page for more ideas!
Are these Gold-Dusted Shortbread cookies truly low-carb?
Yes, they are! The key here is that we are using an almond or coconut flour blend in place of traditional all-purpose flour to keep that carb count down, making them fit perfectly for keto enthusiasts. We’re careful with our sugars, relying on low-carb alternatives (like erythritol or monk fruit blends, depending on your preference!) in the base recipe when creating the buttery cookies, while the main recipe uses less sugar overall and focuses on the richness of the butter itself. Always double-check your specific sweetener substitutions, but the structure is inherently low-carb friendly.
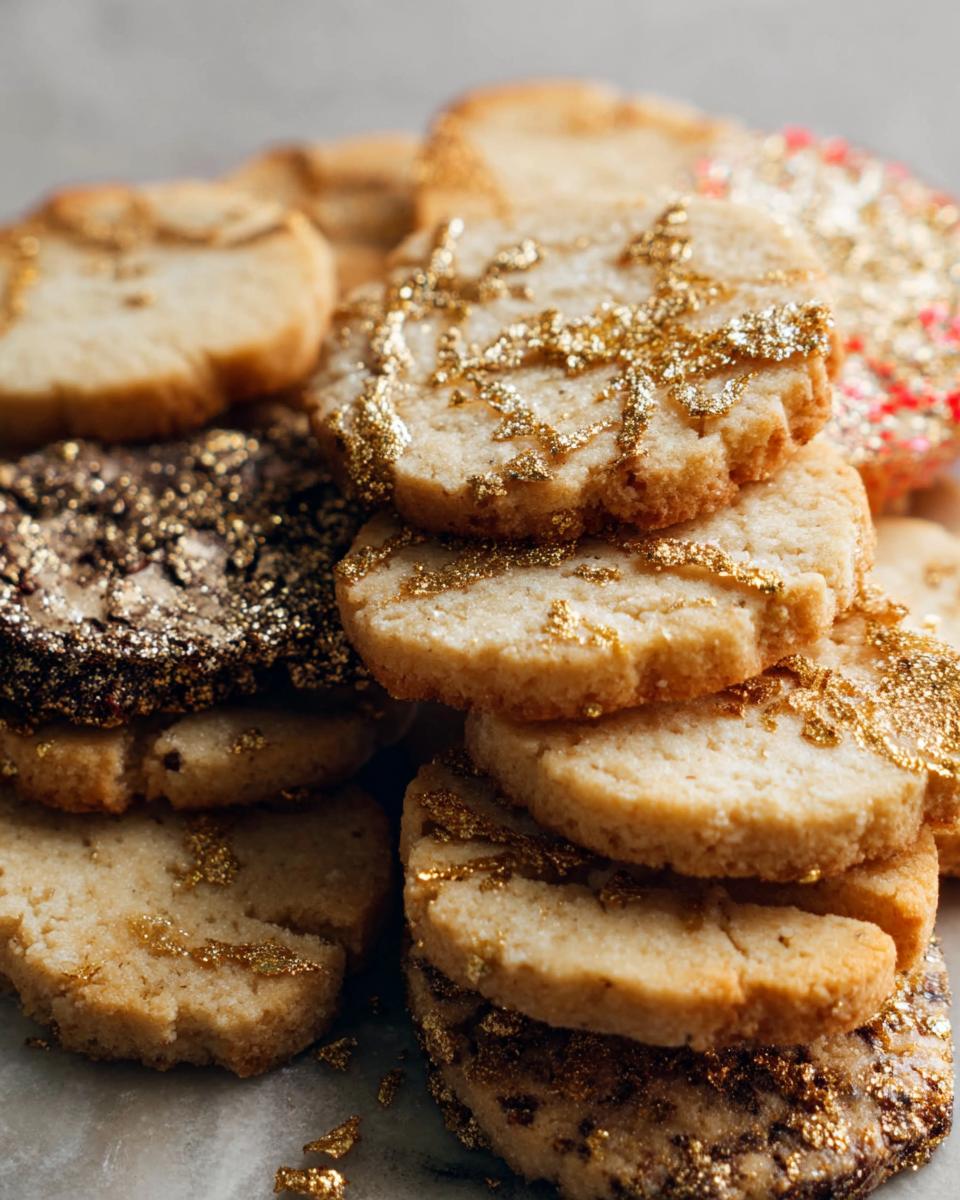
How do I apply the edible gold dust for the best effect?
This is the fun part, right? You don’t want to dissolve the edible gold dust in liquid, because that just turns it into paint, and we want that delicate shimmer! The best technique for that beautiful Gold-Dusted Shortbread finish is using a dry stencil brush, a clean, soft food-grade paintbrush, or even a fluffy makeup brush dedicated just for food. Dip the tip of the brush into the gold dust and gently tap it over the cooled cookies so the powder floats down lightly. For the peppermint cookies, it worked best to brush the dust right onto the slightly tacky white chocolate before the candy canes went on.
Can I substitute the butter in this Buttery Cookies recipe?
Honestly, I wouldn’t recommend it if you are aiming for true shortbread texture. Shortbread relies almost entirely on fat for its signature dense, crumbly structure—it’s why we call them buttery cookies! If you try to swap coconut oil or especially margarine, the structure changes completely. You might end up with a cookie that spreads way too much during baking or one that tastes oily instead of rich. Stick with room temperature, high-quality unsalted butter for the best results here!
Share Your Gold-Dusted Shortbread Creations
And that’s it! You’ve officially mastered the art of the elegant, multi-flavored, slice-and-bake treat. Seriously impressive for a keto dessert, if I do say so myself!
Now I absolutely want to see what you’ve whipped up in your kitchen. Did the Chocolate Hazelnut version win out, or are you obsessed with the warm embrace of the Chai Spiced Cinnamon Sugar?
Please take a moment to leave me a star rating right down below the recipe card. It helps other keto bakers know this is a winner! And if you share a photo on Instagram or Facebook, tag me so I can see your beautiful, gold-dusted masterpieces. Use the hashtag so I can find your amazing work. I can’t wait to see which buttery cookies you loved the most!
Gold-Dusted Shortbread
Ingredients
Equipment
Method
- For the vanilla dough base: In a large mixing bowl, cream together the butter, brown sugar, and granulated sugar until pale and fluffy using a hand or stand mixer with the paddle attachment.
- Mix in the vanilla and salt, then the flour. Switch to a rubber spatula and mix by hand to incorporate all the flour.
- For the chai spiced cinnamon sugar: Split the dough into two portions, with one slightly larger for the chai spiced cookies.
- In a small dish, combine the cinnamon, cardamom, ginger, and allspice. Add this mixture to the larger portion of dough and fold gently a few times to swirl the spices. Do not fully mix them in.
- For the dark chocolate cherry: To the smaller dough portion, add the chopped chocolate and cherries. Mix to combine.
- Lay out two sheets of plastic wrap. Place each dough portion in the center of a sheet and form into logs about 8-9 inches long. Wrap tightly and chill for at least 2 hours or overnight.
- For the chocolate dough base: Scrape the mixing bowl clean. Cream together the butter and sugar until pale and fluffy.
- Mix in the salt and vanilla, followed by the flour and cocoa powder. Use a rubber spatula to mix by hand to ensure all dry ingredients are incorporated.
- For the chocolate hazelnut: Split the dough in half and add one half to a separate bowl. Mix in 1/2 cup roughly chopped hazelnuts.
- For the chocolate peppermint: To the dough remaining in the original bowl, add the peppermint extract and chopped dark chocolate. Mix well.
- Form each half of the chocolate dough into 8-9 inch logs, wrap tightly in plastic wrap, and chill alongside the vanilla dough for at least 2 hours or overnight.
- Once the dough is solid, roll each log in its respective coating. For dark chocolate cherry, roll in raw sugar. For chai spiced, roll in cinnamon sugar. For hazelnut, roll in finely chopped hazelnuts. The peppermint cookies are left plain.
- Slice the ends off each log and then slice each log into approximately 12 cookies. Preheat your oven to 350F and chill the sliced cookies in the refrigerator while the oven heats.
- Line a baking sheet with parchment paper. Place cookies on the sheet, about 2 inches apart. Keep remaining dough chilled. Bake for 15-18 minutes, or until edges are pale golden brown and tops are matte.
- Transfer cookies to a cooling rack and bake the remaining dough. Once cooled, dunk half of each peppermint cookie into melted white chocolate and sprinkle with crushed candy canes. Chill for 15 minutes to set.


