
Okay, friend, let’s talk about how to look like a total baking superstar without spending all day chained to the counter. Parties are amazing, but last-minute chaos? Been there! I remember one time, people were literally pulling up to my place, and I realized I had *nothing* sweet. Panic turned into inspiration thanks to my secret weapon: these incredible Slice-and-Bake Party Cookies. Seriously, they are the ultimate make-ahead cookie! You mix the dough, chill it, and suddenly you’re a party hero. I’m Mark Williams – The Keto Performance Chef – and even though my focus is often on performance food, these simple, fun treats are pure joy. Trust me on this one; these cookies save the day every single time and get rave reviews!
Why You Will Love These Slice-and-Bake Party Cookies
If you’re like me, you want to spend more time laughing with your guests and less time elbow-deep in flour! These cookies are designed for real life. They scream celebration without making you sweat. You get all the fun and flavor with none of the last-minute stress. They’re just perfect!
- They use a phenomenal Make Ahead Dough.
- They are super Freezer-Friendly for whenever you need them.
- Hello, Quick Bake time! Dessert is done in a flash.
Perfect Make Ahead Dough for Stress-Free Parties
This is the real magic trick. You mix up the dough, form those neat little logs, wrap them up, and forget about them until party time. Preparing the log ahead of time means you control the timeline, not the oven! When you know you can whip out fresh, gorgeous Slice-and-Bake Party Cookies with almost no effort on the actual event day, life just gets easier, right?
Quick Bake Time for Instant Gratification
Once that dough has chilled up nicely, you barely need to wait for them to bake. We’re talking about 12 to 14 minutes, people! That’s less time than it takes to put the final touches on your serving platter. You’ll hear the timer ding, pull out warm, golden-edged cookies, and feel like a baking genius. Instant gratification guaranteed!
Essential Ingredients for Perfect Slice-and-Bake Party Cookies
Listen up, for these Slice-and-Bake Party Cookies to hold their perfect shape when you slice them, we have to be a little precise here. The good news is, the ingredient list is super short! But trust me, using softened butter and leveled flour saves you headaches down the line. You want those logs to firm up perfectly in the fridge, right? If you are looking for some other simple cooking hacks, check out my guide on 5-ingredient dinner ideas that never fail—baking is no different!
For the Slice-and-Bake Party Cookies Dough
Grab your ingredients! We need that creamy base of softened butter and brown sugar, the egg, and the flavor boosters. Don’t skip the extracts! While vanilla is standard, that touch of almond extract gives these cookies that little something extra—that’s our secret touch of expertise popping through! Make sure you measure that 2 cups of all-purpose flour by spooning it into the cup and leveling it off; otherwise, the dough gets too stiff.
- Unsalted butter, softened (170g)
- Packed light brown sugar
- One large egg, room temperature
- Pure vanilla extract and that key almond extract
- All-purpose flour (spooned & leveled)
- Salt
- Two-thirds cup of your favorite sprinkles!
Optional Coating Ingredients
If you want that fancy, dipped look, you’ll need the coating. You must coarsely chop the white chocolate! Trying to melt giant chunks is just asking for scorching. And if you want to roll the logs in some coarse sugar before slicing, go for it. That gives the edges a little sparkle!
- White chocolate, coarsely chopped
- Coarse sugar (optional, for rolling)
Step-by-Step Instructions for Slice-and-Bake Party Cookies
Alright, here is where the magic happens! I want this process to feel totally relaxed for you. You’ve got your mixer ready, parchment paper lined up, and all those lovely ingredients measured out. If you’re using a stand mixer, great! If you only have a handheld mixer, it works just as well. Remember that guide I wrote on foolproof dinner ideas? Well, these cookies use that same simple structure!
Mixing the Slice-and-Bake Party Cookies Dough
First things first: cream that softened butter until it’s smooth. Then gradually beat in your brown sugar until the mixture looks fluffy—it should lighten up a bit! Next, drop in your room-temperature egg and the flavor duo: the vanilla and almond extracts. Once that’s happy, slowly add your flour and salt. Once it’s *just* combined, crank the mixer up and beat in those colorful sprinkles until they are evenly distributed throughout. Don’t mix it for too long once the flour is in; we don’t want tough cookies!
Chilling and Shaping the Make Ahead Dough
Time to make the logs! Turn that dough out onto a lightly floured surface. Divide it in two and roll each half into an 8-inch log shape. Wrap those logs *tightly* in plastic wrap. Now for the essential part: chilling! You need to chill these for a minimum of 4 hours, but honestly, up to 5 days in the fridge is perfect for planning ahead. If you need to store them longer, wrap them super tight and toss them in the freezer—these are seriously Freezer-Friendly!
Baking and Cooling Your Party Cookies
Preheat your oven to 350°F (177°C) and make sure those baking sheets are lined with parchment paper. Take your logs out, and if you opted for the coarse sugar, roll the log in it now. Slice them into about 12 rounds each, spacing them well apart on the sheets. Bake them for 12 to 14 minutes. You’re looking for edges that are just getting golden brown. Let them sit on that hot sheet for 5 minutes before gently moving them to a cooling rack. Patience during cooling keeps them from crumbling!
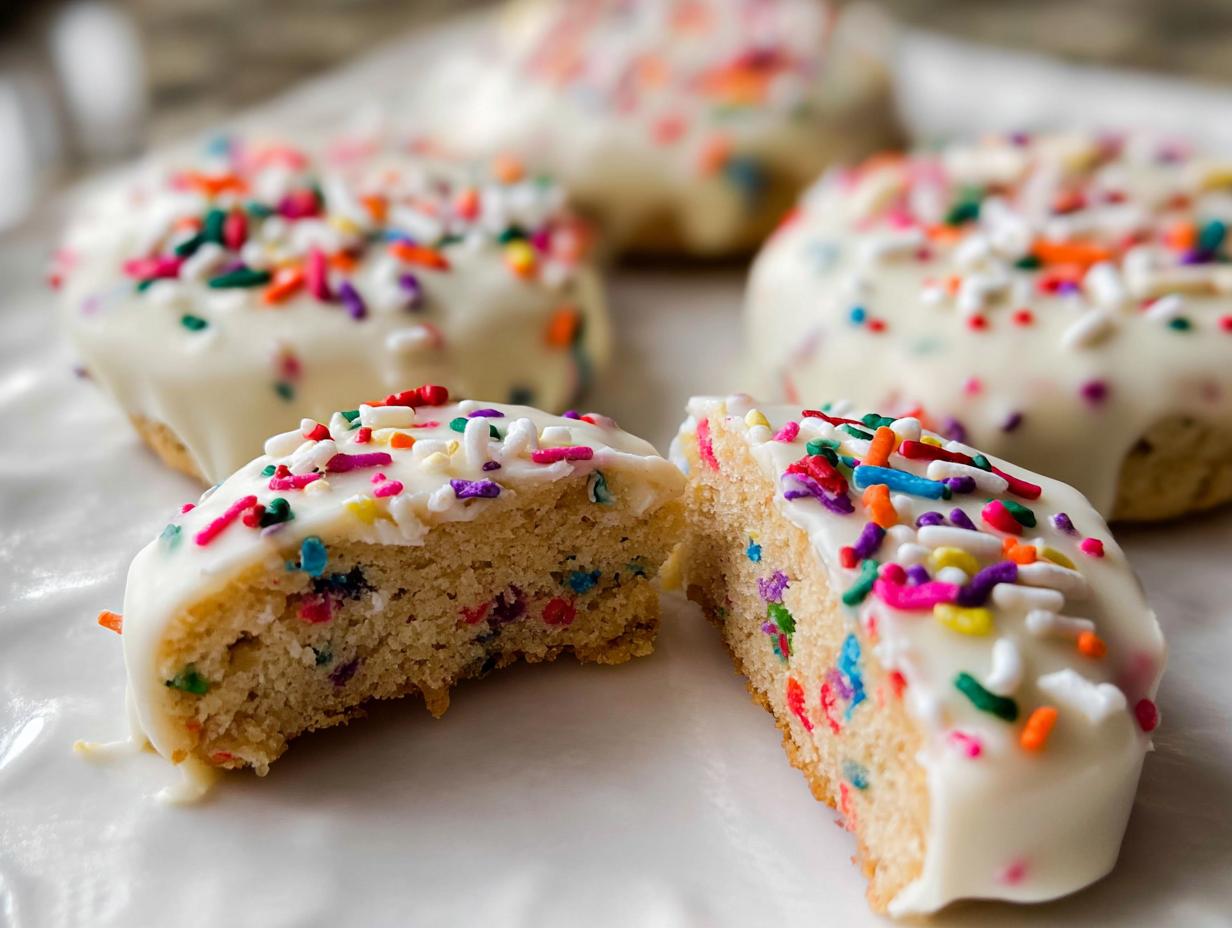
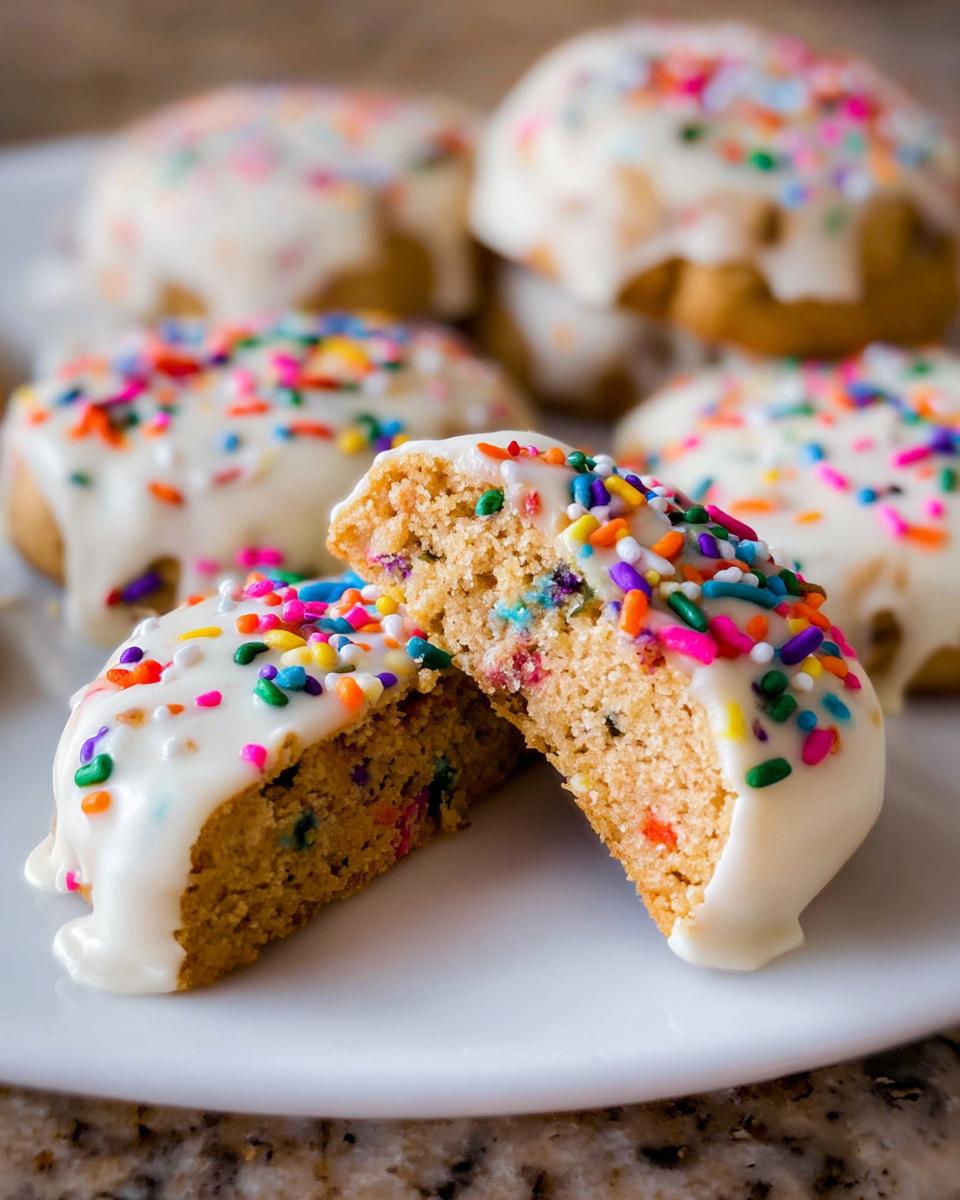
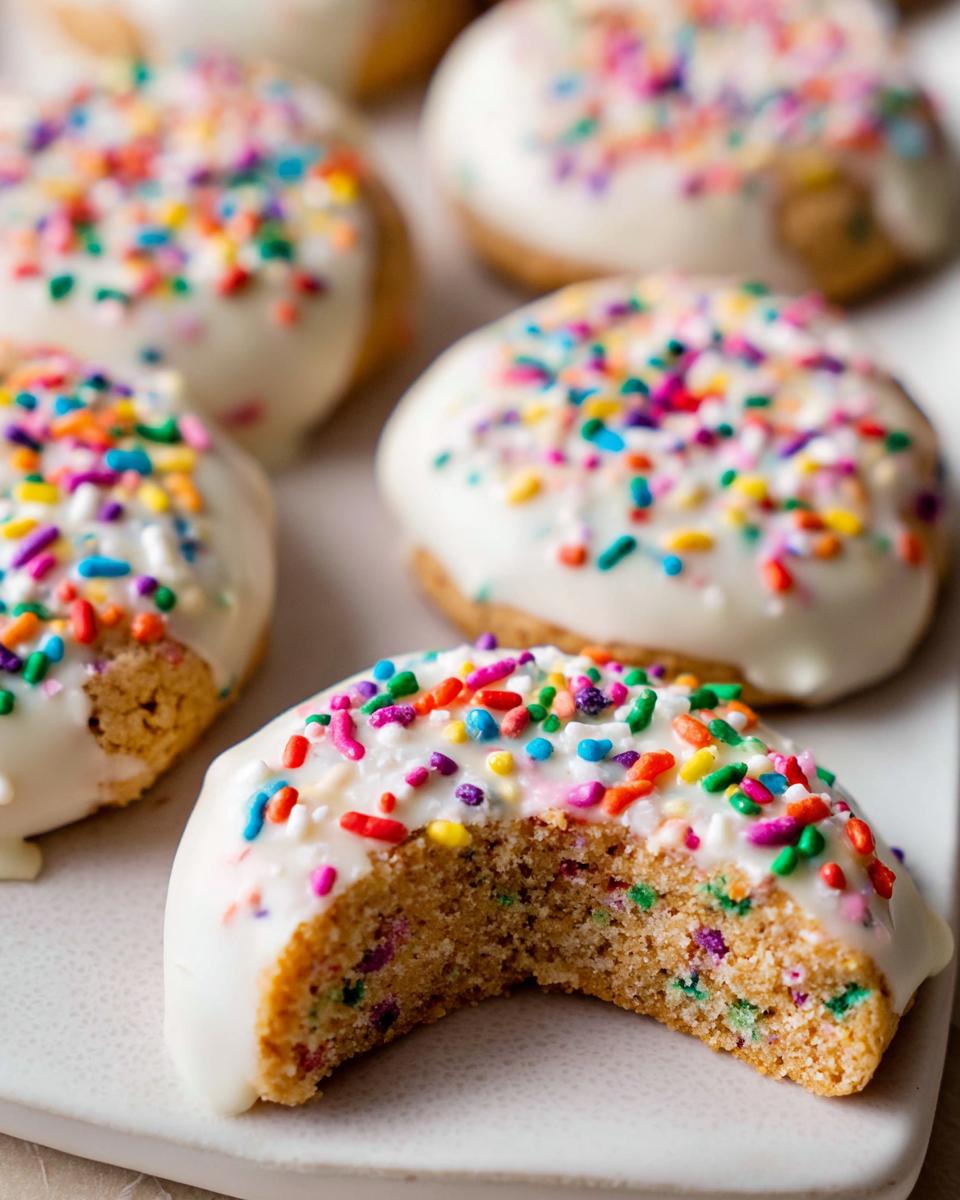
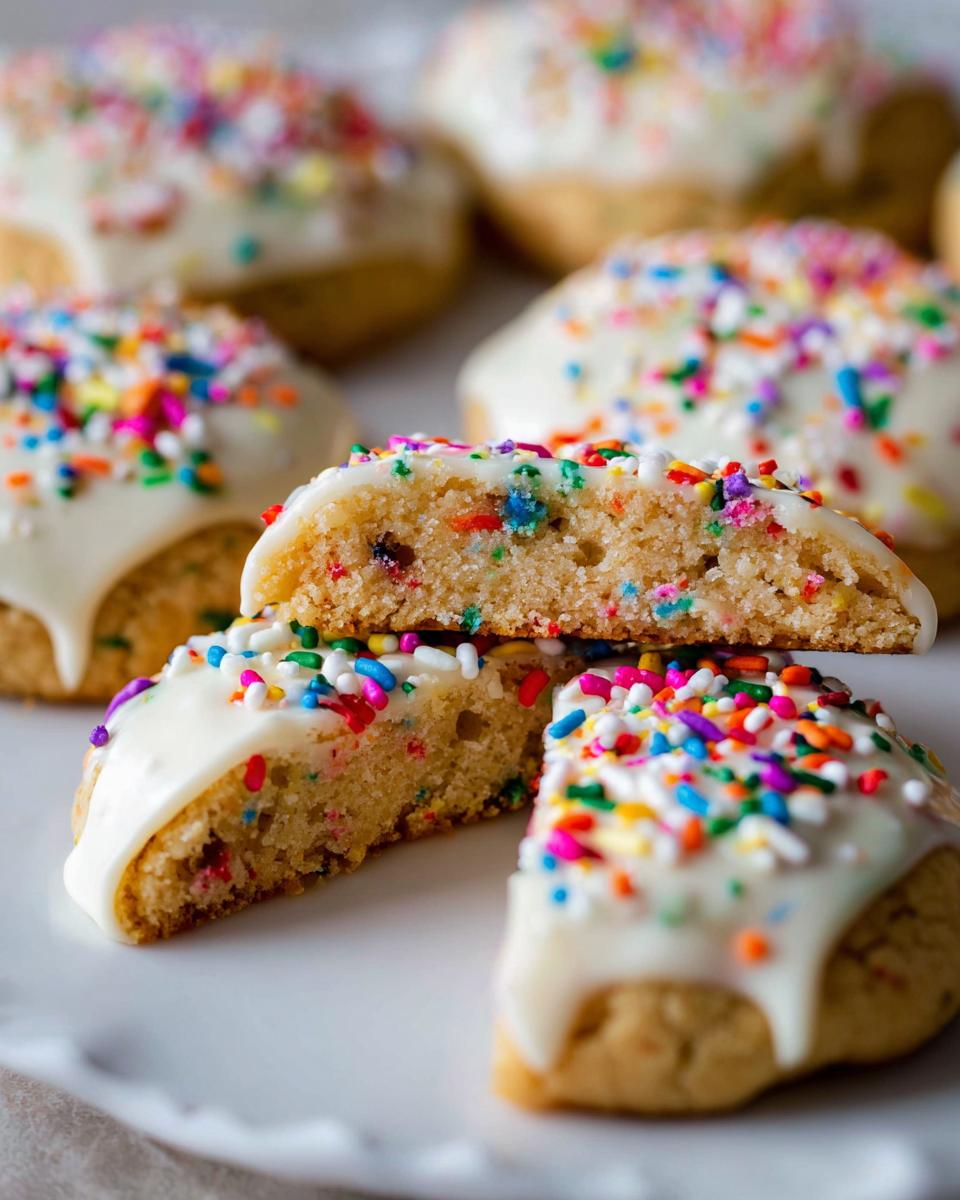
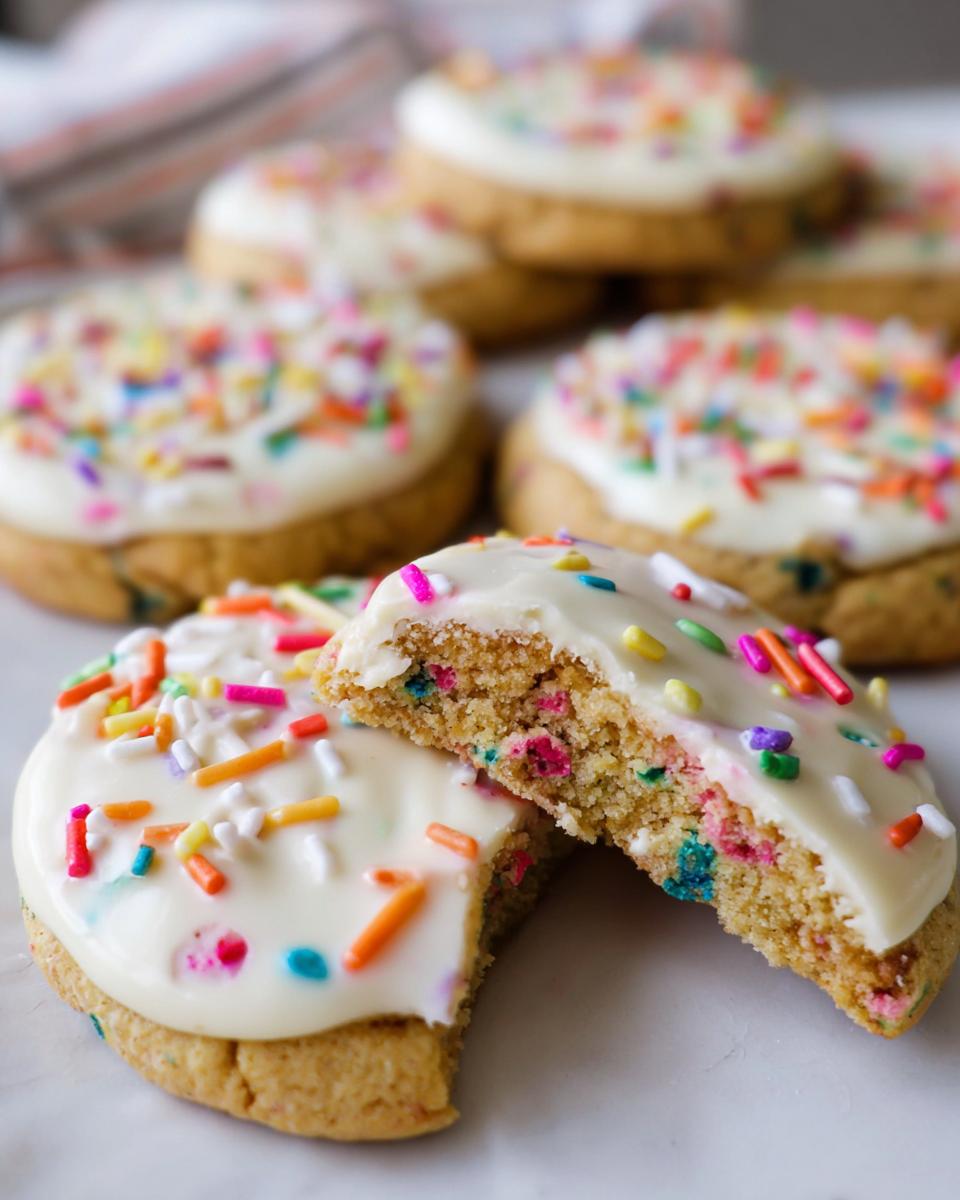
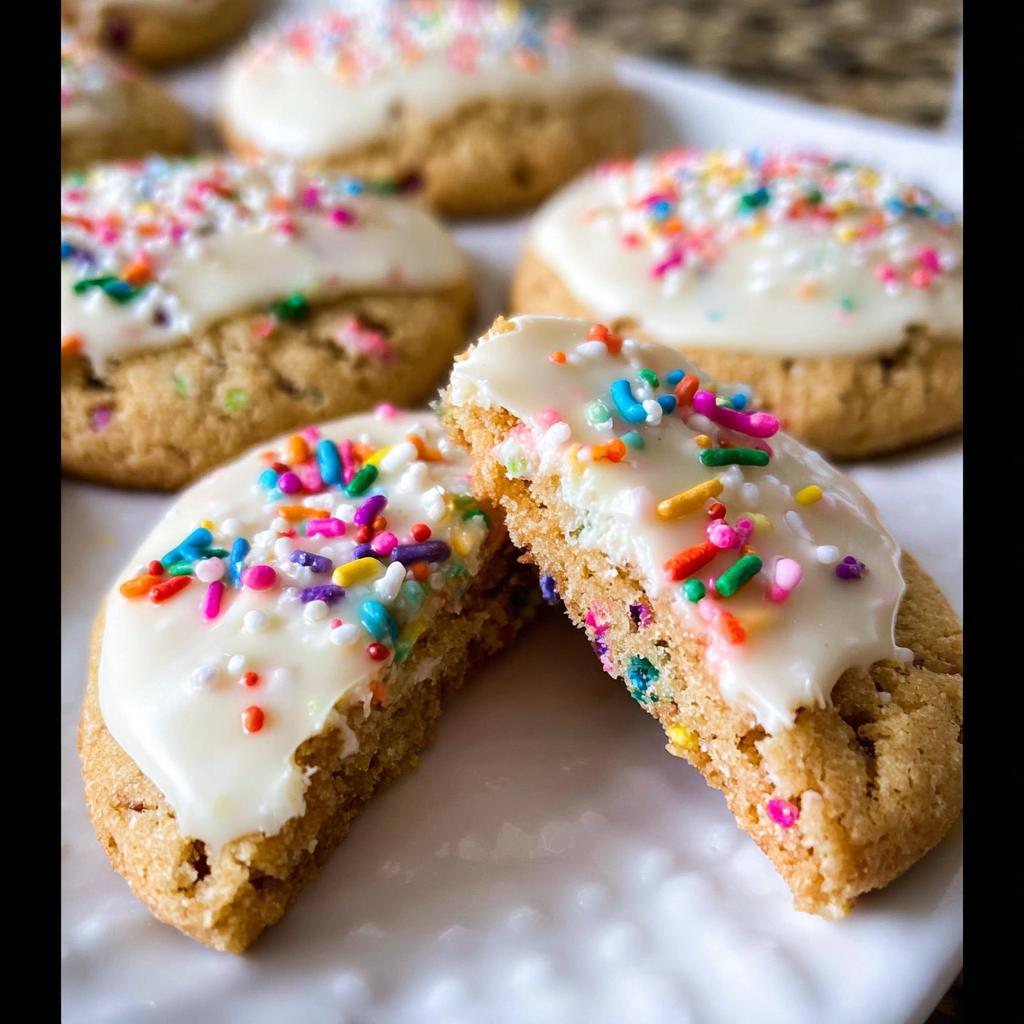
Decorating the Slice-and-Bake Party Cookies
Once cooled completely, it’s decorating time! To melt your white chocolate, use a double boiler if you have one, or if you’re using the microwave, do short 15-second bursts, stirring thoroughly in between each one until it’s silky smooth. Dip half of each cookie—or you can totally dip the whole thing if that’s your style! Then, before the chocolate sets, hit it with a final dusting of sprinkles. Place them back on the parchment-lined sheet and pop them in the fridge to firm up that chocolate coating. Amazing results, thanks to a little inspiration from other great baking guides like this recipe!
Tips for Success with Slice-and-Bake Party Cookies
Even the easiest recipes can trip us up if we rush the details! For these Slice-and-Bake Party Cookies, success really comes down to temperature and honest measuring. Follow my little pointers, and you’ll get that beautiful, consistent look that makes people ask, “Did you buy those?” Trust me, it’s all about handling the dough right before it hits the oven. If you want more tips on getting ingredients just right, check out my big guide on ingredients, temps, and tips!
Achieving Perfectly Uniform Slice-and-Bake Party Cookies
The biggest visual win for these cookies happens before they ever bake. Uniformity! If your logs are all different sizes, your cookies will bake differently, and we don’t want that uneven browning. If you have a kitchen scale, use it for the flour and sugar—it’s the most reliable method, hands down. If you don’t have one, be super honest about leveling that flour!
For shaping the logs, I actually use a piece of string or a ruler to make sure both ends of the dough log are the exact same diameter. When you slice, you want every single cookie to be the same thickness so they bake evenly. Thick slices spread too much, and thin slices burn on the edges. You want them all looking like twins!
Troubleshooting Soft Dough Issues
Sometimes, even after a good chill, dough can feel a little mushy when you pull it out, especially if your kitchen runs warm. If you go to slice the log and the dough squishes or smears instead of cutting cleanly, don’t panic! This happens. Don’t try to fight it.
The fix is simple: just slide that wrapped log back into the fridge for another 30 minutes. That little extra chill time firms everything right up. If you’re in a huge hurry, just use the sharpest, thinnest knife you own and slice quickly. Think swift, decisive cuts rather than sawing!
Make Ahead Dough and Storage for Your Party Cookies
This is truly where the “Party” in Slice-and-Bake Party Cookies shines through! Because this dough is so sturdy and handles chilling so well, it’s my go-to for busy weeks. Having this dough locked away and ready means dessert is just minutes away anytime you need it. It’s the ultimate meal prep, but for fun!
The absolute best part about this Make Ahead Dough is how versatile the storage is. You can plan small gatherings or huge holidays just by deciding how long to keep the dough logs wrapped up in the fridge or tucked away in the freezer.
If you’re planning for the week ahead, you can keep the wrapped logs right in the refrigerator for up to 5 days. Seriously, nearly a full week! When you’re ready to bake, just pull them out. You might need 10 minutes on the counter to soften up slightly for slicing, but that’s it.
For the long haul, these are fantastic Freezer-Friendly cookies. Wrap those logs incredibly tightly in a double layer of plastic wrap first, and then maybe toss them into a freezer bag just to keep freezer burn away. I’ve had dough logs last a good three months this way, and they bake up just as beautifully as the day I made them! It feels like magic. For more ideas on how to stay ahead of the game during busy nights, you should check out my guide on meal prep-friendly dinner ideas; the planning mindset is the same!
When you’re ready to go from freezer to oven, just pull the log out and let it sit on the counter while your oven preheats. No need to thaw it completely, which keeps your Quick Bake schedule totally intact!
Variations on these Fun Slice-and-Bake Party Cookies
While the standard sprinkle version of these Slice-and-Bake Party Cookies is absolutely fantastic—classic for a reason!—I love encouraging everyone to get a little playful in the kitchen. This base dough is so sturdy and reliable that you can totally tweak the flavors and decorations to match whatever party theme you have going on. Think about it: one batch of dough, three different types of cookies!
It starts with those sprinkles, of course. If you’re making these for a themed event, swapping out the rainbow sprinkles for single-color options is a super easy way to match plates or streamers. Did you see my post on general recipe ideas? You can use that same creative energy here!
Switching Up the Sprinkles and Mix-Ins
If you want to skip the sprinkles altogether and go for something a little more sophisticated—or maybe something everyone loves, like nuts—you can definitely adjust. Try folding in finely chopped pecans or walnuts right along with the sprinkles in the final mixing stage. It gives them a wonderful crunch!
Or, for a seasonal twist, use crushed peppermint candies during the winter holidays instead of sprinkles. Just remember to wrap those logs tightly and give them a full chill!
Playing with the Chocolate Coating
The white chocolate coating is just one option, but it really helps those colors pop against the pale cookie base. For a richer look, try melting semi-sweet or dark chocolate chips instead. Remember to use the slow melting method so it stays smooth!
If you don’t want to dip the whole cookie, just lightly drizzle the melted chocolate back and forth over the cooled cookies. That looks really elegant, especially if you dust them with a touch of flaky sea salt right after the drizzle sets. It’s a quick upgrade for your Party Cookies that screams gourmet!
Serving Suggestions for Your Celebration Treats
Even the prettiest cookie needs a great supporting cast, right? Since these flavorful Party Cookies are relatively simple but have that delicious hint of almond and vanilla, they pair beautifully with just about anything bubbly or comforting. I always think about what drinks I’m serving when finalizing dessert. You want something that complements the sweetness without overpowering those sprinkles!
When I hosted that spontaneous party where I first made these, we just had lukewarm coffee and water on hand, but wow, did these cookies elevate even that simple setup! It just goes to show you don’t need a complicated dessert spread.
The Perfect Drink Pairings
For kids (or anyone who loves a classic!), you absolutely cannot go wrong with a tall, ice-cold glass of milk. It balances out the sweetness perfectly, especially if you went heavy on the chocolate dip. My kids treat the dipped edge like a built-in cookie handle for dunking!
If you’re hosting adults, these cookies are fantastic alongside any hot beverage. Think a strong, warm cup of coffee or maybe a nice peppermint tea if you’re going for a holiday vibe. If you’re looking for some easy drink ideas yourself that don’t take all day, check out my guide on Thanksgiving drinks for busy weeknights—the simplicity concept carries over to any party!
Simple Accompaniments for Your Treat Table
Since these Slice-and-Bake Party Cookies are already colorful and decorated, you don’t need much else on the plate, which is another win for the busy host! Keep the table clean by avoiding too many crumbly sides.
If you feel like you absolutely must add something else, keep it light. A small bowl of fresh, sliced strawberries or even some colorful grapes adds a nice, refreshing palette cleanser between bites of rich chocolate and cookie. It keeps the focus on your fabulous, homemade treat without adding unnecessary complexity to your hosting duties!
Frequently Asked Questions About Slice And Bake Cookies
It’s totally normal to have questions when baking something new, even if it’s simple like these cookies! I get asked the same things all the time. Here are the biggest concerns people have when they make their first batch of Slice And Bake Cookies.
Can I skip the chilling step for the cookie dough?
Oh, please don’t try this! Chilling isn’t just a suggestion here; it’s crucial for two big reasons. First, the chilling time allows the flour to fully hydrate, which stops your cookies from being grainy or crumbly. Second, and more important for our look, that cold dough won’t spread out like a puddle when it hits the hot oven. If you skip the chilling, you’ll end up with flat, thin cookies instead of beautiful, thick Party Cookies!
How long can I keep the Slice-and-Bake Party Cookies dough frozen?
This is the best part of the Make Ahead Dough! You can keep these dough logs tucked away in the freezer for a long, long time. I recommend keeping them wrapped twice in plastic wrap and then maybe a layer of foil or a freezer bag. If you do that, they stay perfectly fresh for up to three months! That means you are ready for unexpected guests or sudden cookie cravings anytime.
Can I use different types of sprinkles on these Party Cookies?
Absolutely, you can get so creative here! The recipe calls for standard sprinkles, but feel free to experiment. Sanding sugar works great because it gives a nice, crunchy texture and a beautiful sparkle without dissolving while baking. For a bolder look, try using colored nonpareils—though they can bleed their color slightly onto the cookie edge, which sometimes looks cool!
If you want a more complex flavor, crush up some hard candies or even some pretzels if you want a salty-sweet bite, mixing those in right at the end with the standard sprinkles. Remember to keep the total volume of mix-ins similar so you don’t throw off the dough balance for a perfect Quick Bake!
Sharing Your Delicious Slice-and-Bake Party Cookies
Well, we did it! We made those gorgeous, fun, incredibly easy Slice-and-Bake Party Cookies, and now it’s time for the best part: seeing them disappear at your next gathering. Honestly, making something delicious and watching people enjoy it is why I bake in the first place. If these cookies save your party from a dessert emergency, you absolutely have to tell me about it!
I love hearing stories about how these treats fit into massive celebrations or just quiet Tuesday nights. Did you go for the full chocolate dip, or did you keep them simple with just a sugar roll? Don’t be shy!
Please, jump down into the comments section below and leave a rating! Five stars if you kept your sanity during party prep, right? Your feedback helps others feel confident enough to try this recipe, which thrills me. If you’ve been inspired to create a whole spread of easy, impressive treats, maybe take a peek at my guide on the dinner ideas everyone asks for—the principles of making something memorable quickly still apply to dessert!
And if you snap a picture of your beautiful, colorful cookies—especially if you have them displayed next to a big glass of milk—tag me on social media! I can’t wait to see your colorful creations. Happy baking, and enjoy showing off those amazing Party Cookies!
Slice-and-Bake Party Cookies
Ingredients
Equipment
Method
- In a large bowl, beat the softened butter for 1 minute until smooth. Add the brown sugar and beat until fluffy. Beat in the egg, vanilla extract, and almond extract until fully combined.
- Beat in the flour and salt until combined. Switch to high speed and beat in the sprinkles. Turn the dough onto a floured surface, divide into two, and shape each half into an 8-inch log. Tightly wrap the logs in plastic wrap and chill in the refrigerator for at least 4 hours, or up to 5 days.
- Preheat your oven to 350°F (177°C). Line two large baking sheets with parchment paper or silicone baking mats.
- Remove the chilled logs from the refrigerator. If desired, roll them in coarse sugar. Slice each log into about 12 equally thick cookies. Place the cookies on the prepared baking sheets, about 2 inches apart.
- Bake for 12-14 minutes, or until the edges are golden brown. Let the cookies cool on the baking sheets for 5 minutes before transferring them to a wire rack to cool completely.
- Melt the white chocolate using a double boiler or in the microwave in 15-second increments, stirring after each, until smooth. Dip each cooled cookie halfway into the melted chocolate. Place the dipped cookies onto a parchment-lined baking sheet. Sprinkle with additional sprinkles while the chocolate is wet. Refrigerate the baking sheet to help the chocolate set.


