
When you’re tasked with feeding what feels like half the county at a gathering, the absolute last thing you want is a fussy dessert that requires individual shaping or hours of assembly. Believe me, I’ve been there! I still remember the first time I decided to make bar cookies for a crowd at a family reunion. With so many different tastes to satisfy, I was determined to create a dessert that everyone could enjoy, including those with dietary restrictions. As I experimented with various ingredient swaps—like using almond flour and erythritol for my keto-loving family members—the excitement in the kitchen filled the air.
When I finally pulled those golden, gooey bar cookies from the oven and watched as my loved ones savored each bite, it reinforced my belief that desserts can unite people and make any gathering feel even sweeter. That’s why I’m sharing my absolute favorite recipe for Bar Cookies for a Crowd. They come together on one sheet pan, bake beautifully, and are so easy to transport. Trust me, these are the simple, crowd-pleasing treats that will have people asking for the recipe! I’m Jenny Miller, by the way, Master of Keto Confectionery Arts, and I just love making baking easy and delicious for everyone.
Why These Bar Cookies for a Crowd Are Your New Go-To Dessert
If you’re tired of endless scooping onto baking sheets before a big event, you are going to absolutely adore this method. These aren’t fussy little things; they are robust, flavor-packed bar cookies designed for people who have better things to do than fuss over every single cookie shape.
Here’s why I keep coming back to this recipe every time I bake for a big group. It’s just so incredibly Crowd Friendly:
- They scale up like a dream! You can easily adjust the quantities if you need even more than 24 bars.
- Cleanup is a breeze because you only use one pan—we call that a win for any busy cook.
- They travel amazingly well. Just make sure you let them cool completely before cutting, and they are ready for the potluck table.
This is truly the definition of an Easy Dessert that tastes gourmet. You can find more of my simple, delicious recipes over here at my main recipe index!
Essential Ingredients for Perfect Bar Cookies for a Crowd
When we’re talking about making the best bar cookies for a crowd, we have to focus on the brown butter first. That nutty depth is what makes these taste so incredibly special, and it takes a little planning!
Here’s your list. Notice there’s a slightly larger amount of butter listed than what we actually use in the batter. That’s because we cook some of it down, and we want to ensure we have exactly 110g of that gorgeous golden brown stuff when we get to mixing. We don’t want to run short!
The basic cookie bars need these components:
- For the Cookie Bars: 150g Unsalted butter (cold), 100g Light or dark brown sugar, 60g Granulated sugar, 1 large Egg (about 50g), 1 tsp Vanilla bean paste or vanilla extract, 150g All-purpose flour, 1 tsp Baking powder, 3g Salt.
- And the best part: 220g Dark chocolate, chopped!
Keep that butter cold until you decide to brown it—that’s the secret technique that makes these truly amazing.
Equipment Needed for Making Bar Cookies for a Crowd
Because these Bar Cookies for a Crowd are made all in one go, you don’t need a million gadgets, which keeps the cleanup manageable!
You’ll want to make sure you have these items ready before you even preheat the oven:
- An 8-inch (20cm) baking pan—this gives us the perfect thickness.
- A small saucepan and a whisk for that crucial brown butter step.
- A medium bowl to mix things up in.
- A rubber spatula and an offset spatula for pressing and smoothing.
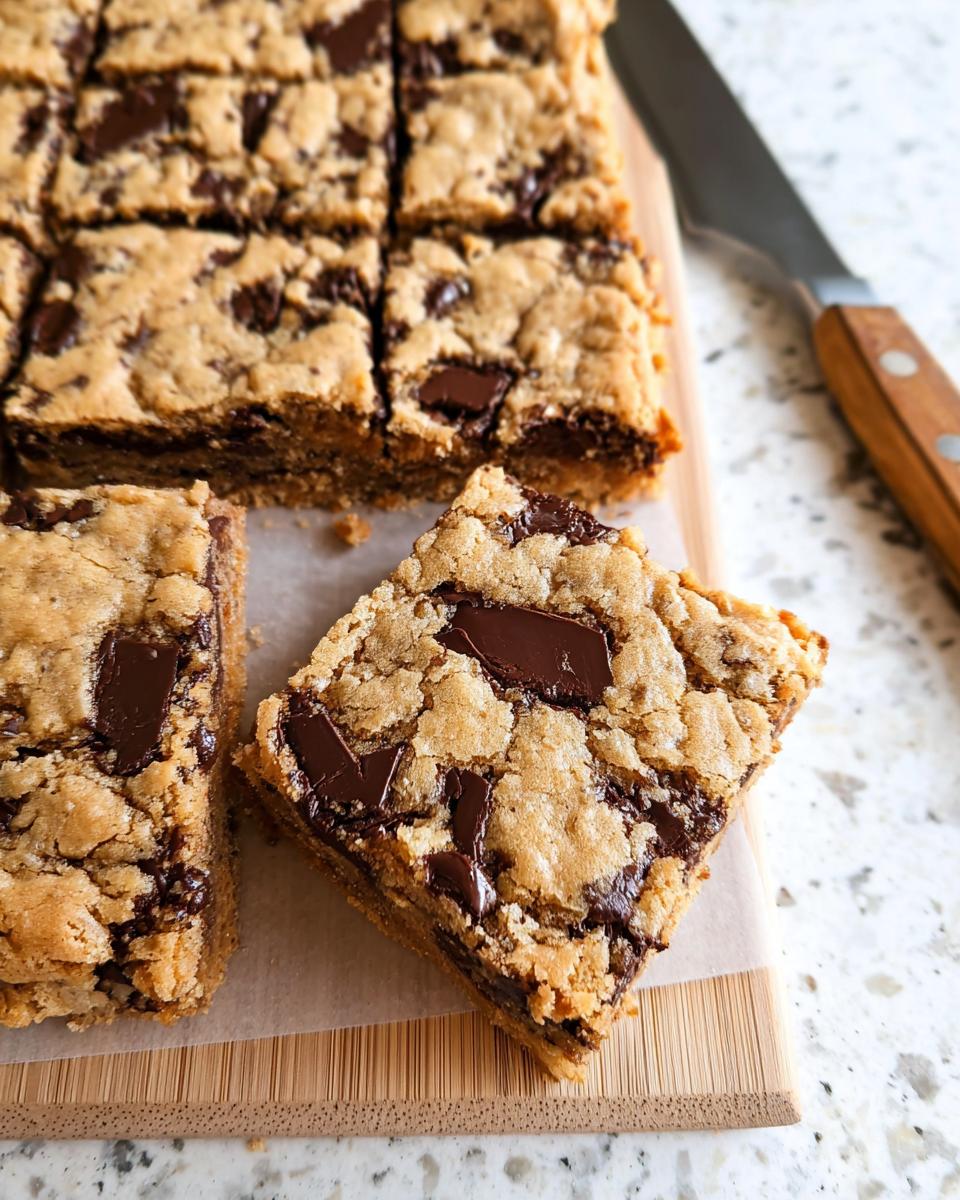
- A wire rack for cooling and a sharp knife for cutting those perfect squares!
Step-by-Step Instructions for Crowd Friendly Bar Cookies for a Crowd
Alright, let’s get baking! Because we are aiming for 24 perfect squares, remember this takes about 62 minutes total—that’s prep, baking, and cool time—so plan accordingly. This is where the magic of the brown butter technique really shines through, giving these Bar Cookies for a Crowd such a rich flavor profile.
Preparing the Pan and Oven for Your Bar Cookies for a Crowd
First things first, crank that oven up to 350°F (180°C). Get your 8-inch non-stick pan ready. You absolutely must grease it well and line it with parchment paper, leaving a good overhang on the sides. I use binder clips sometimes to hold that parchment sling in place—it’s the best trick for lifting these out later!
Mastering the Brown Butter Technique for Flavor
This is the exciting part, so don’t rush it! Melt your butter in that saucepan over medium heat. Keep watching it constantly and swirl the pan. You want it to foam up, then turn a beautiful golden brown at the bottom, smelling wonderfully nutty—like caramel popcorn, almost! Once it hits that perfect spot, immediately stop the heat. Weigh out 110g of that gorgeous brown butter into your medium bowl and just let it cool down for a good 15 to 20 minutes. This step is non-negotiable; if it’s too hot, you’ll scramble your egg, and nobody wants that!
Mixing the Dough and Baking Your Sheet Pan Cookie
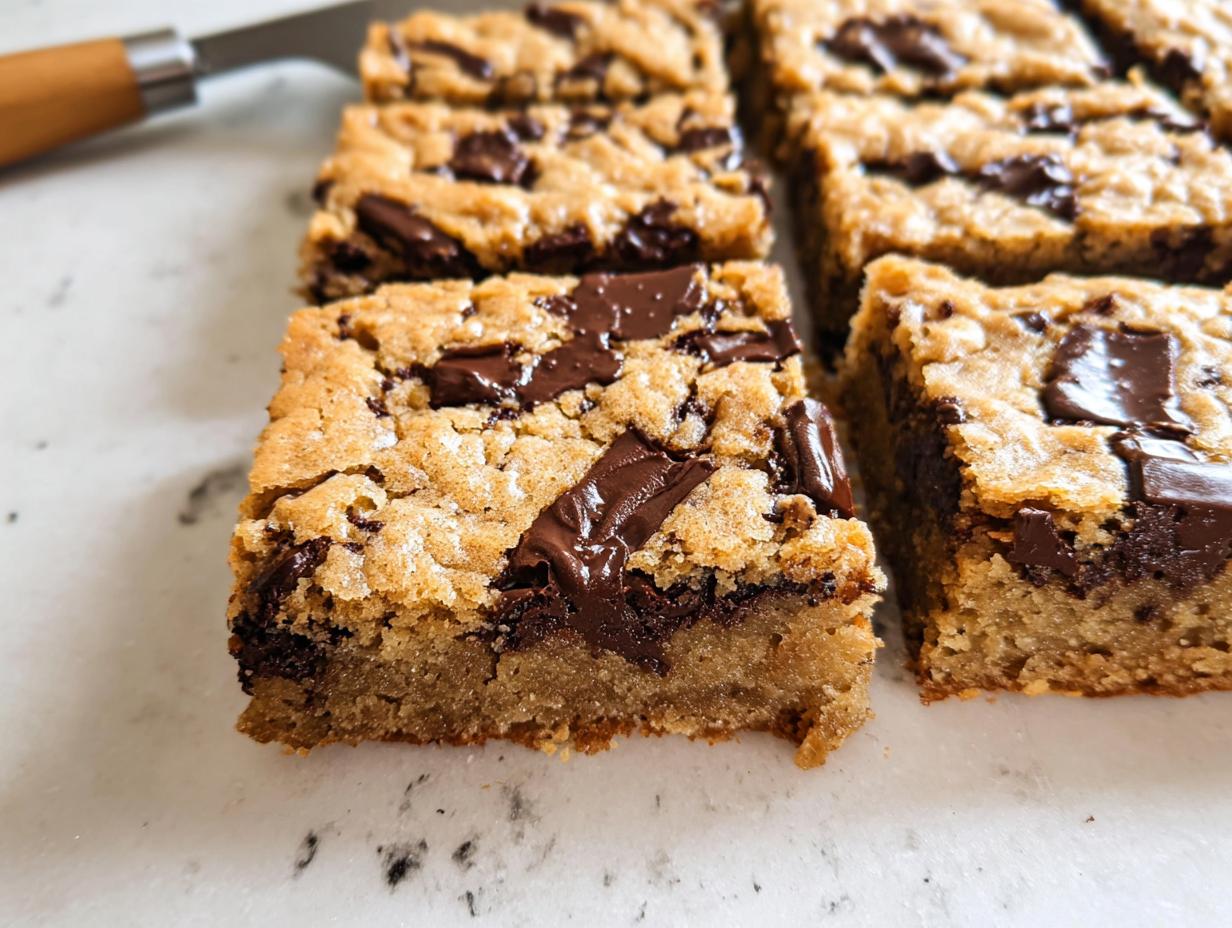
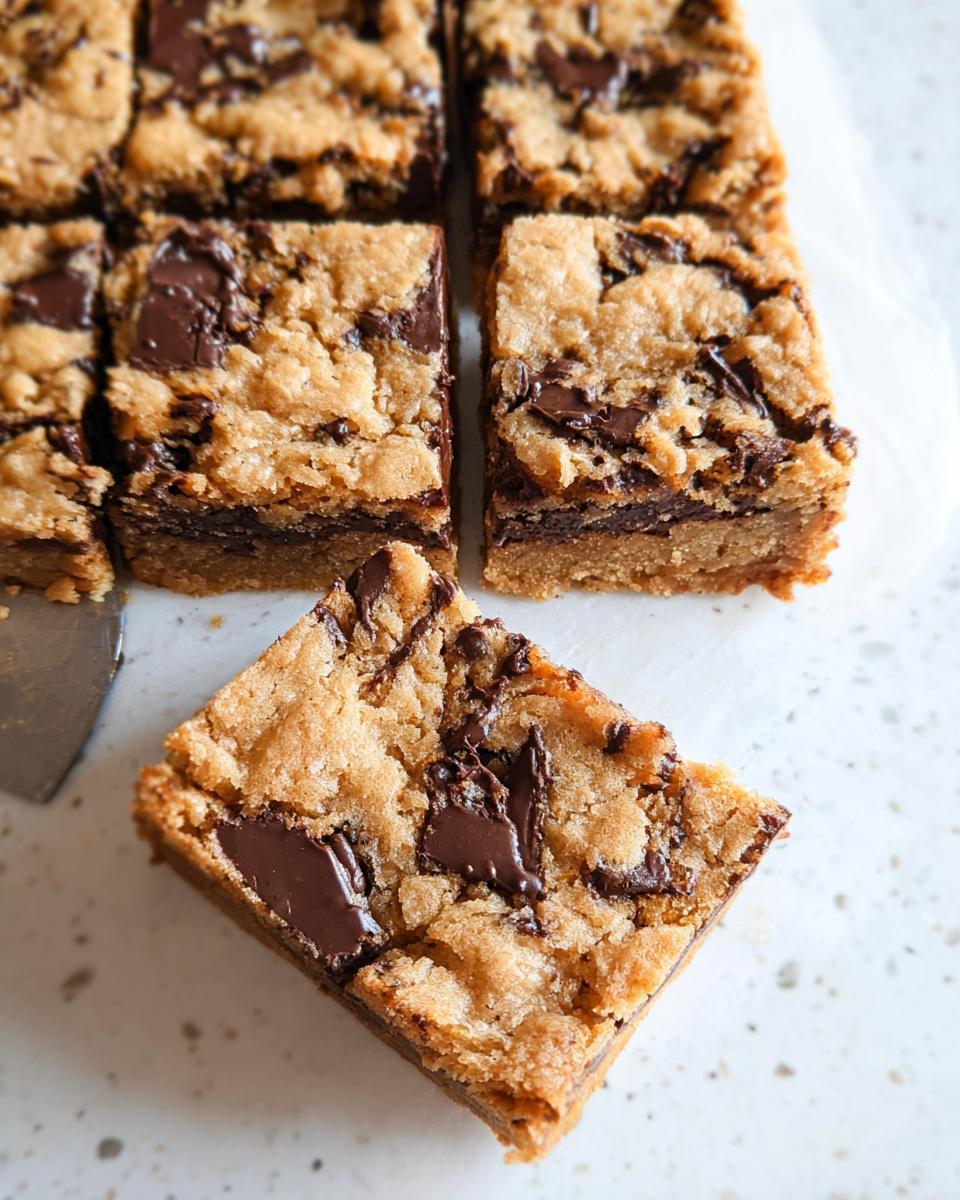
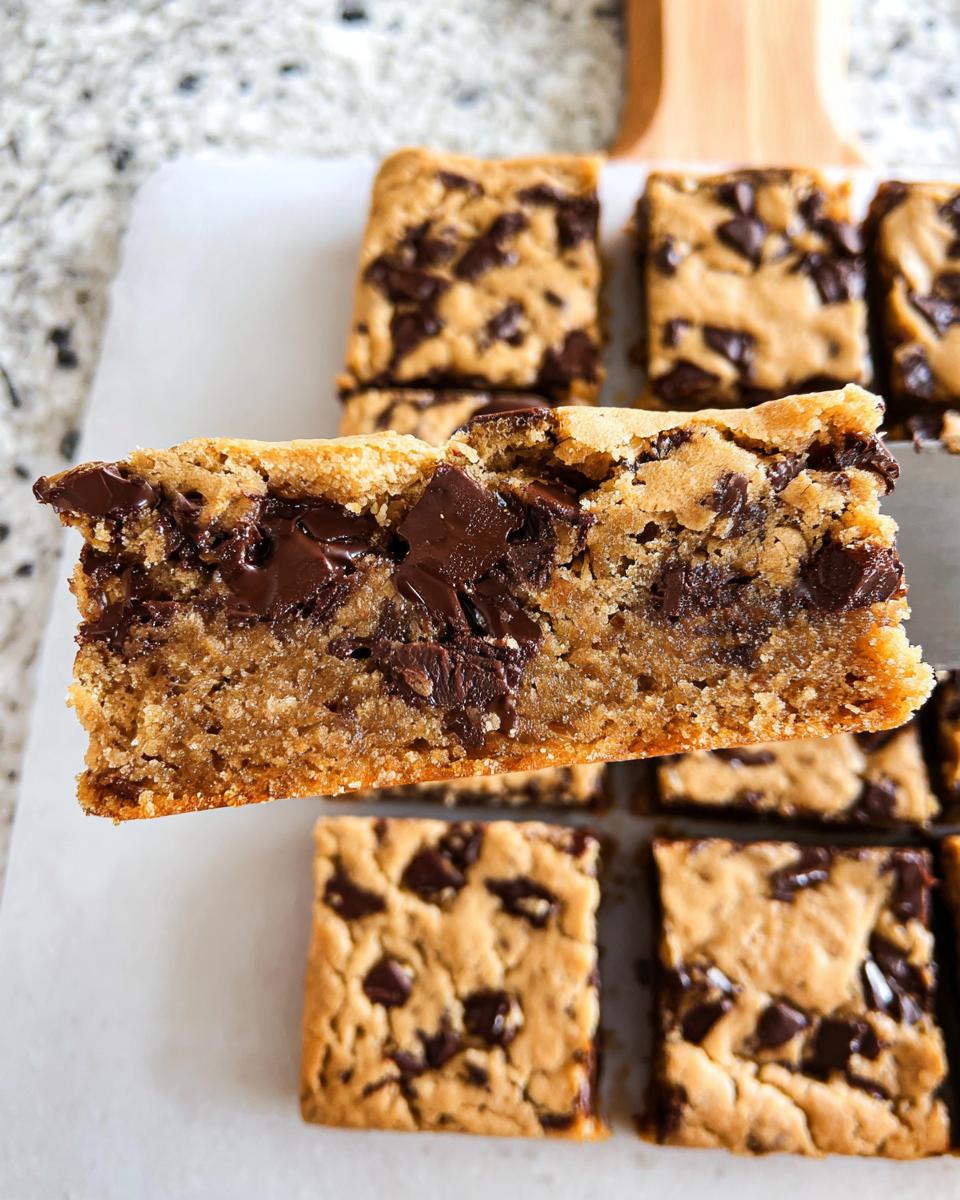
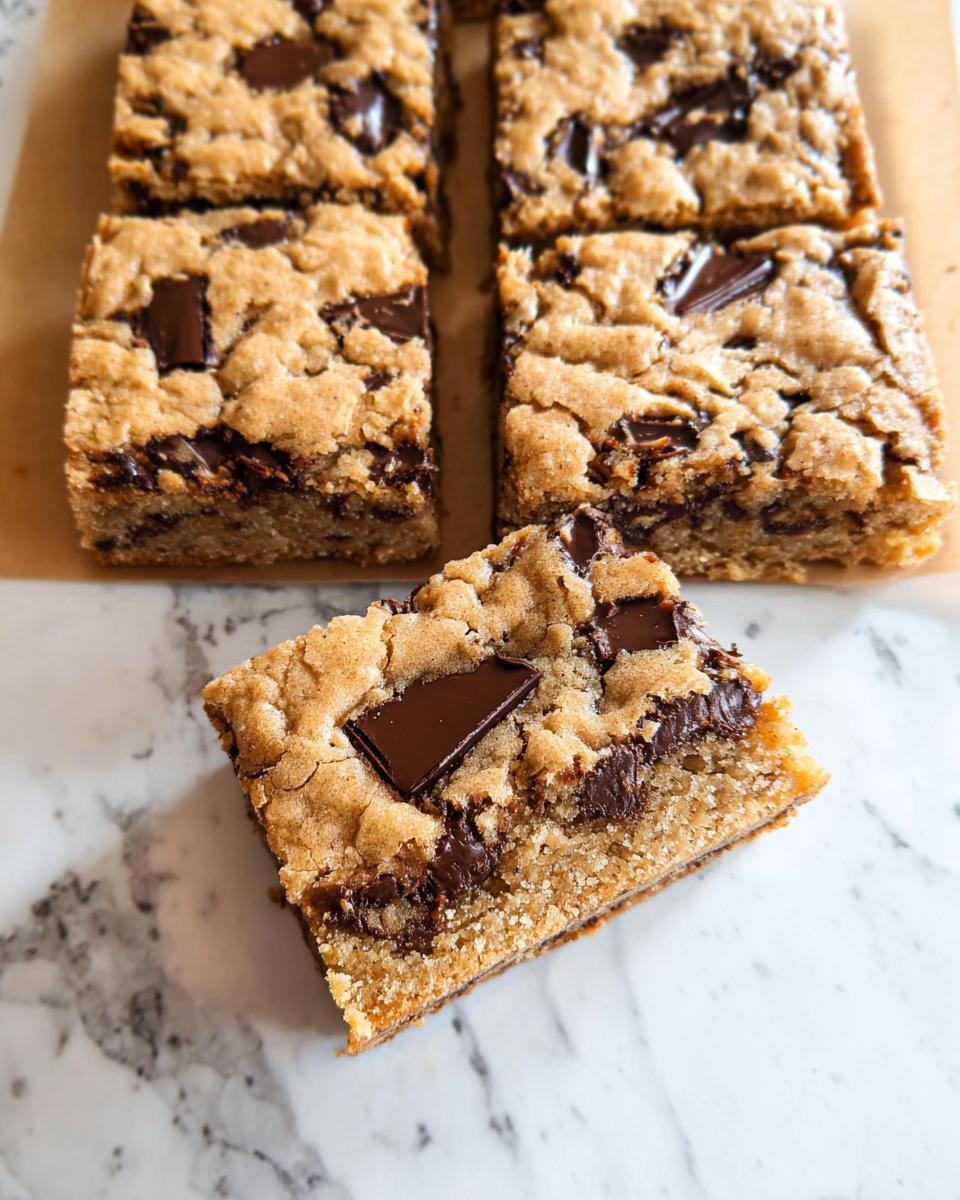
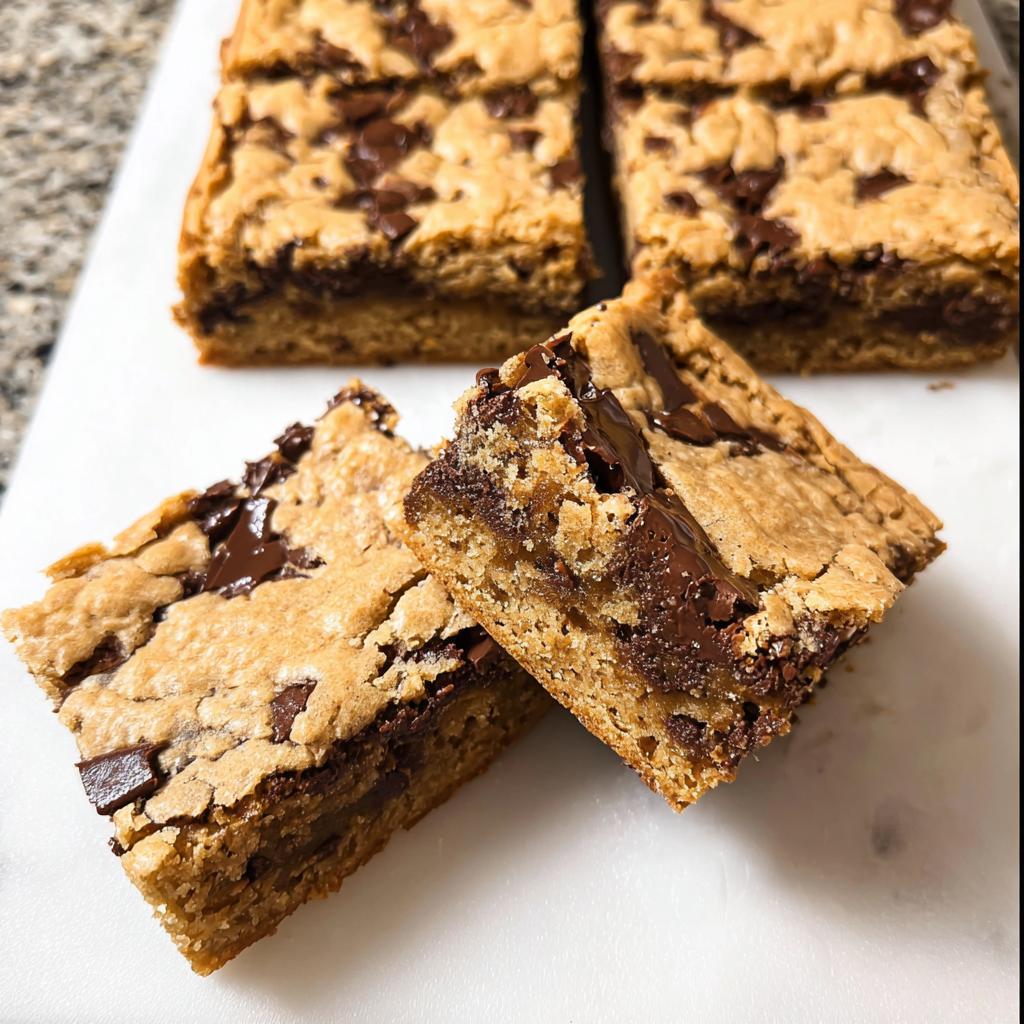
Once the butter is cool enough, whisk in your sugars until they are combined. Then, add the egg and whisk vigorously until the mixture lightens in color and gets slightly thick. Add your vanilla! Now, gently mix in the flour, baking powder, and salt using a spatula—only mix until you see a few flour streaks left. Overmixing is the enemy of a tender Sheet Pan Cookie! Fold in your chopped dark chocolate chunks. Press that dough evenly into your prepared pan. Bake for about 20 to 22 minutes. You’re looking for a golden-brown top and edges that look just set. You can check out a similar flavor profile in chocolate chip cookie bars here: Cloudy Kitchen’s guide! Once they are baked, let them cool completely on a wire rack so they firm up before the final cut.
Ingredient Notes and Substitutions for Bar Cookies for a Crowd
I know some of you are looking at that sugar and flour and thinking, “Jenny, how does this fit into my life?” Even though this exact recipe is a classic, I always keep my low-carb friends in mind! If you are looking to adapt this into something keto-friendly, you’d be looking at swapping out the all-purpose flour for a good almond flour blend and using a zero-carb sweetener like erythritol or monk fruit blend instead of the brown and granulated sugar.
That said, for the best texture in the original recipe, stick to the full-sugar version, but feel free to use vanilla bean paste instead of extract if you have it—it just adds those beautiful little specks of vanilla flavor. If you want to see how I tackle baking without traditional flour and sugar, check out my list of keto-friendly swaps. For everyone else, stick with the recipe and enjoy these incredible bar cookies for a crowd!
Tips for Success When Making Bar Cookies for a Crowd
Listen, even if you follow every instruction precisely, sometimes things go sideways in the kitchen, right? No stress! I’ve got a few little nuggets of wisdom from doing this dozens of times that ensure your Bar Cookies for a Crowd turn out perfectly every time, whether you plan to add a drizzle later or just leave them plain.
My biggest tip, which I repeat everywhere, is about mixing. Seriously, just stop stirring when you add the flour! Overmixing develops gluten, and we want a tender bar, not a chewy brick. Use your spatula and fold gently until you *just* don’t see dry white streaks anymore. That is the magic moment. Check out some of my general baking wisdom on achieving perfect textures here: understanding perfect ratios in baking.
Next up is cooling. This is critical if you want a clean finish. You simply cannot rush the cooling process if you want to properly Frost And Cut your bars later. If you try to slice them warm, they’ll smoosh and stick to your knife; trust me, I’ve ruined a batch that way!
You need them completely cool—let them sit on the wire rack for at least that 20-minute cooling time mentioned, but honestly? An hour is better. Once they are completely cooled, use that parchment sling to lift the whole slab out of the pan onto a cutting board. Use a large, sharp knife, and wipe the blade clean between cuts. This ensures you get 24 beautiful, uniform squares ready for any party platter!
Storing and Transporting Your Bar Cookies for a Crowd
These delicious Bar Cookies for a Crowd are honestly even better the next day, which makes prep for big parties so much easier! Once you have cut them into those perfect little squares, storing them is simple.
Keep them airtight at room temperature. Don’t worry about refrigeration unless your kitchen is super hot; keeping them out ensures they stay nicely chewy. They stay fantastic for about three days that way!
When it comes to transport, I usually lay a piece of parchment paper on the bottom of a sturdy container, stack the bars in a single layer if I can, or overlap them gently if space is tight. If you need to stack them, put another layer of parchment between rows. It makes getting them to the event hassle-free! You can see more of my tips on meal prep and easy transport methods over here at my meal prep guide. They are truly built to travel!
Frequently Asked Questions About Bar Cookies for a Crowd
I get so many questions about making these Bar Cookies for a Crowd, especially since everyone wants to know how to scale them up or how to manage that pesky sticking factor! It’s all about knowing a couple of little kitchen secrets. Here are the things I hear most often!
Can I easily double this recipe for Bar Cookies for a Crowd?
Oh yes, you absolutely can! Doubling is the beauty of a Sheet Pan Cookie format. The original recipe is perfect for an 8-inch square pan, giving you those thick, satisfying bars. If you double everything, you move up to a standard 9×13 inch baking pan. That’s one of the best ways to ensure you have plenty of Easy Dessert for everyone!
Just remember that while the baking time won’t double, it will likely increase slightly because the edges are farther from the heat source. Start checking around the 25-minute mark, even though the recipe calls for 20 to 22 minutes in the smaller pan. You’re aiming for that same set look!
How do I prevent my Cookie Bars from sticking to the pan?
This is the number one question I get, and honestly, if you skip the parchment sling, you are begging for trouble, especially since these are so rich! My method guarantees these Cookie Bars slide right out.
Before you add any butter or flour, grab a piece of parchment paper that is large enough to drape over the two longer sides of your 8-inch pan. Lightly grease the bottom and the sides of the pan first. Then lay your parchment in, pressing it into the corners. You leave the overhang hanging outside the pan like little handles. Once they are completely cool, grab those handles and lift the entire block of bars right out onto your cutting board. Easy peasy!
Are these Easy Dessert bars freezer friendly?
They certainly are! This is why I love them for meal prepping ahead of time, too. You can freeze them both before baking or after cutting. If you freeze them after cutting, make sure they are completely cool first. Wrap the squares tightly in plastic wrap, then place those wrapped batches into a large freezer-safe bag or airtight container. They last beautifully for about two months.
If you want to freeze the whole slab before baking, line your pan as usual, press the dough in, cover it well with plastic wrap, and freeze. When you are ready to bake, just pull it out of the freezer about 30 minutes before you preheat the oven, remove the plastic wrap, and bake as directed. I’ve linked some general tips on efficient timing right over here: my ultimate guide to temperatures and timing in the kitchen.
Estimated Nutritional Information for These Bar Cookies for a Crowd
Okay, so I know many of you are watching macros or counting carbs, just like I do sometimes when experimenting with my 5-ingredient keto ideas. Since this is a classic recipe using traditional sugar and flour, I wanted to give you a rough ballpark for what you’re looking at for each piece of these Bar Cookies for a Crowd, based on dividing the recipe yield by 24 bars.
I must stress, this is just an estimate! The exact type of dark chocolate you use or how much water evaporates when you brown the butter will change these numbers slightly. But this gives you a great guideline for planning your plating!
For one bar (1/24th of the batch), the approximate nutritional breakdown looks something like this:
- Calories: Around 190-210 kcal
- Total Fat: About 11g
- Protein: Roughly 2g
- Total Carbohydrates: Approximately 22g
If you are successfully adapting this recipe (maybe you’re using my Keto swaps mentioned earlier!), your numbers will change drastically, especially carbs! Always plug those specialty ingredients into your tracking app for accuracy. But for the wonderful, gooey, classic version of these Cookie Bars, these figures should serve you well for your party planning!
Share Your Crowd Friendly Baking Success
Now that you have conquered the art of the perfect Sheet Pan Cookie—one that travels beautifully and satisfies every sweet tooth—I really want to hear all about it!
Baking for a crowd is an act of love, and I get such a thrill seeing your creations pop up online. Seriously, tag me when you make these amazing Bar Cookies for a Crowd!
Did you stick to the classic dark chocolate, or did you add a fun swirl of peanut butter or maybe some toasted nuts? Let me know how they hold up the next day, too. Did they even make it to day two?
Please leave a rating for this recipe down below—it helps other busy bakers know that this is a reliable, easy-to-make dessert for their next big event. And hey, if you’re trying to squeeze these treats into a tight weeknight schedule, check out some of my super-fast ideas right here!
Happy baking, everyone. I love sharing these sweet moments with you!
Bar Cookies for a Crowd
Ingredients
Equipment
Method
- Preheat your oven to 350°F (180°C). Grease and line an 8-inch (20cm) non-stick baking pan. Leave the parchment extending over the sides to form a sling. You can secure it with binder clips if you like.
- Place the butter in a medium saucepan over medium heat. Cook until melted, then continue cooking, swirling the pan often and stirring with a whisk, until the butter foams, turns golden brown, and smells nutty. This should take 3-4 minutes.
- Weigh out 110g of the brown butter into a medium bowl. Let it cool for 15-20 minutes so it doesn’t scramble the eggs.
- Add the brown sugar and granulated sugar to the bowl with the brown butter. Mix to combine.
- Add the egg and whisk well for 1-2 minutes, or use an electric mixer, until the mixture lightens in color and thickens.
- Add the vanilla and mix well.
- Add the flour, baking powder, and salt. Mix with a rubber spatula until some flour streaks remain. This prevents overworking the dough.
- Add the chocolate and mix to incorporate with a rubber spatula.
- Press the dough into the prepared pan, smoothing it down with an offset spatula. You can add a few extra chocolate chunks to the top if desired.
- Bake for 20 to 22 minutes, until the top is golden brown and set, and the edges have started to firm up slightly. For crispier edges, bake a little longer.
- Remove the cookie bars from the oven and let them cool in the pan on a wire rack. Use the parchment paper sling to lift them out of the pan. Cut into pieces with a sharp knife.
- Store the cookie bars in an airtight container at room temperature for up to 3 days.


