You know that feeling when you want dessert to be show-stopping—truly luxurious and elegant—but you’re hosting a crazy crowd, or maybe you’re just swamped? Forget the last-minute fretting! I’ve cracked the code on the ultimate Chocolate Mousse (Make-Ahead Dessert). Trust me, this stuff is magic. I remember the first time I served this to my old pastry chef friends; I was so nervous, but the rich, smooth texture just melted in their mouths. The best part? I made the whole thing the day before so I could actually enjoy the party! This recipe lets you serve indulgence without tethering you to the oven.
Why This Chocolate Mousse (Make-Ahead Dessert) Is Your New Go-To
Honestly, this is the secret weapon I pull out right before any big holiday or dinner party. It delivers maximum elegance with laughably low active time. You just mix, fold, and chill! It’s practically foolproof once you nail the folding technique.
Key Benefits for Busy Cooks
- It’s truly a Make Ahead Dessert; the longer it chills, the better the texture gets.
- It looks incredibly fancy, perfect for nailing that Elegant Dessert vibe, especially for something like NYE.
- It scales beautifully, making it fantastic for any Crowd Friendly gathering.
- The active preparation time is unbelievably short—we’re talking less than 30 minutes here!
Essential Equipment for Perfect Chocolate Mousse (Make-Ahead Dessert)
You don’t need a massive professional kitchen for this rich treat! Most of this gear, you probably already have sitting in your drawers. The electric mixer is key for getting those egg whites stiff and airy, which is the *structure* of this mousse. Then, you absolutely must use a rubber spatula when folding everything together. Seriously, don’t try to use a spoon for the folding part! The spatula lets you scrape the bowl and gently incorporate the airy whites without deflating all your hard work. You can check out some other foolproof cooking gear tips here.
Here’s what you’ll need:
- Microwave-proof bowl (for melting that gorgeous chocolate!)
- Whisk
- Rubber spatula (Don’t skimp on technique here!)
- Electric mixer
- Small glasses or pots for setting your individual servings
Ingredients for Your Chocolate Mousse (Make-Ahead Dessert)
Okay, ingredient quality matters huge here, especially since we aren’t cooking anything for long. The success of this Chocolate Mousse (Make-Ahead Dessert) rests on using good bittersweet chocolate and cream that can hold its shape. If you use the wrong cream, you’ll end up with soup instead of peaks, and nobody wants that!
For the Rich Mousse Base
These are the backbone of your dessert—don’t skip the room temperature note for the eggs!
- 3 eggs (separated, and please make sure they are at room temperature for the best volume)
- 125 g dark cooking chocolate (you want bittersweet, about 70% cocoa for that perfect rich flavor)
- 10 g unsalted butter (just a touch for silkiness)
- 1/2 cup cream (It has to be full-fat cream that you know can be whipped up nicely!)
- 3 tbsp caster sugar
Optional Decoration Elements
These are just for making it look extra pretty when you serve it!
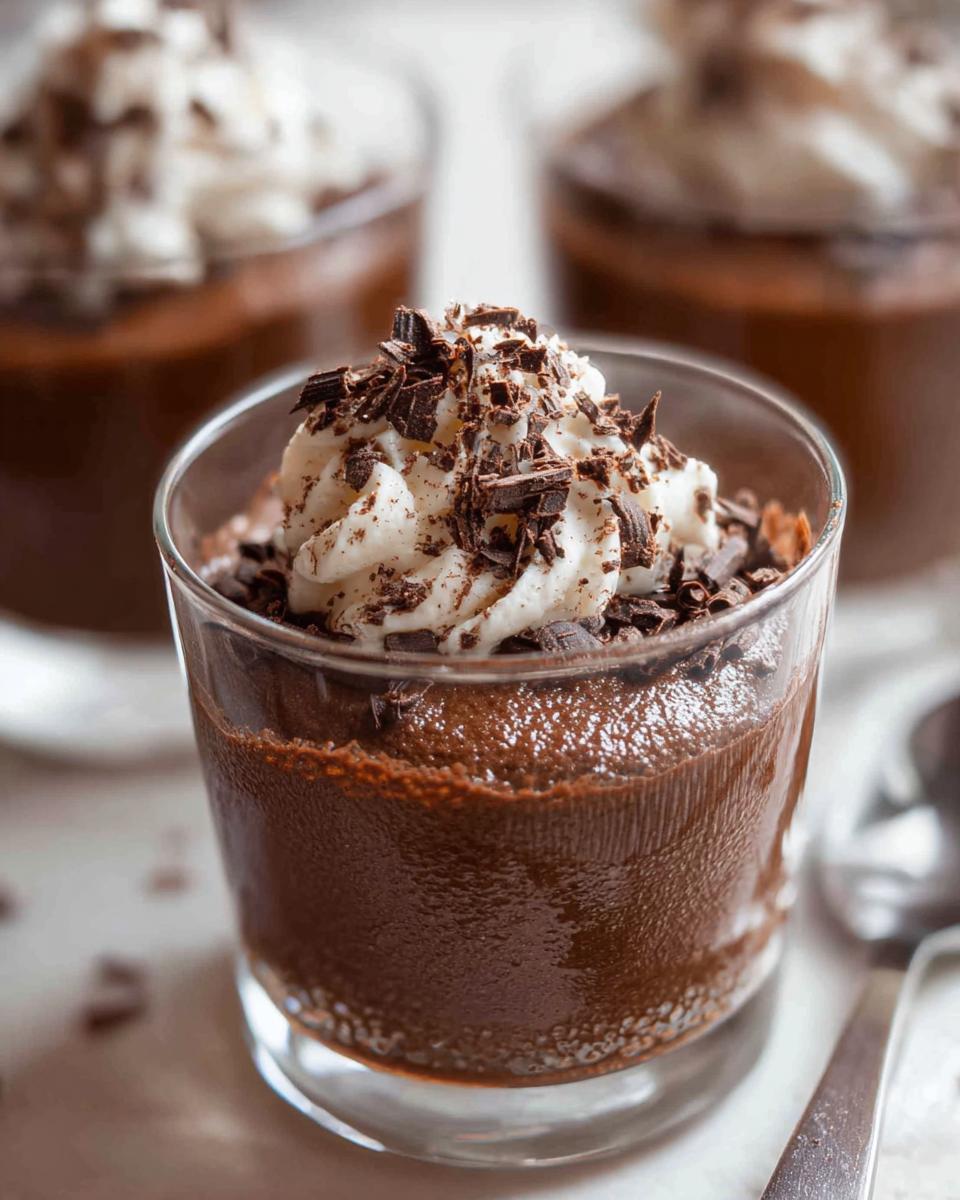
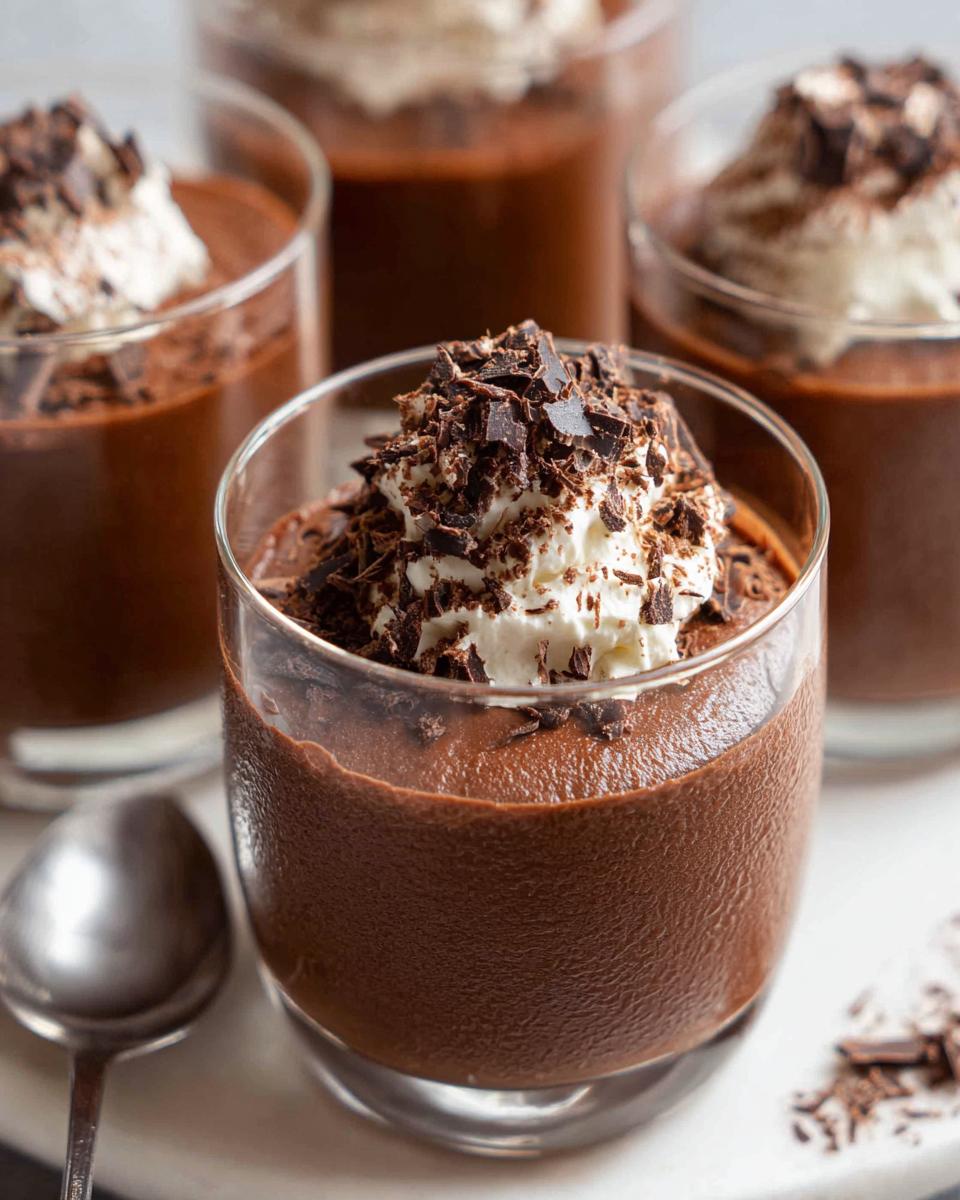
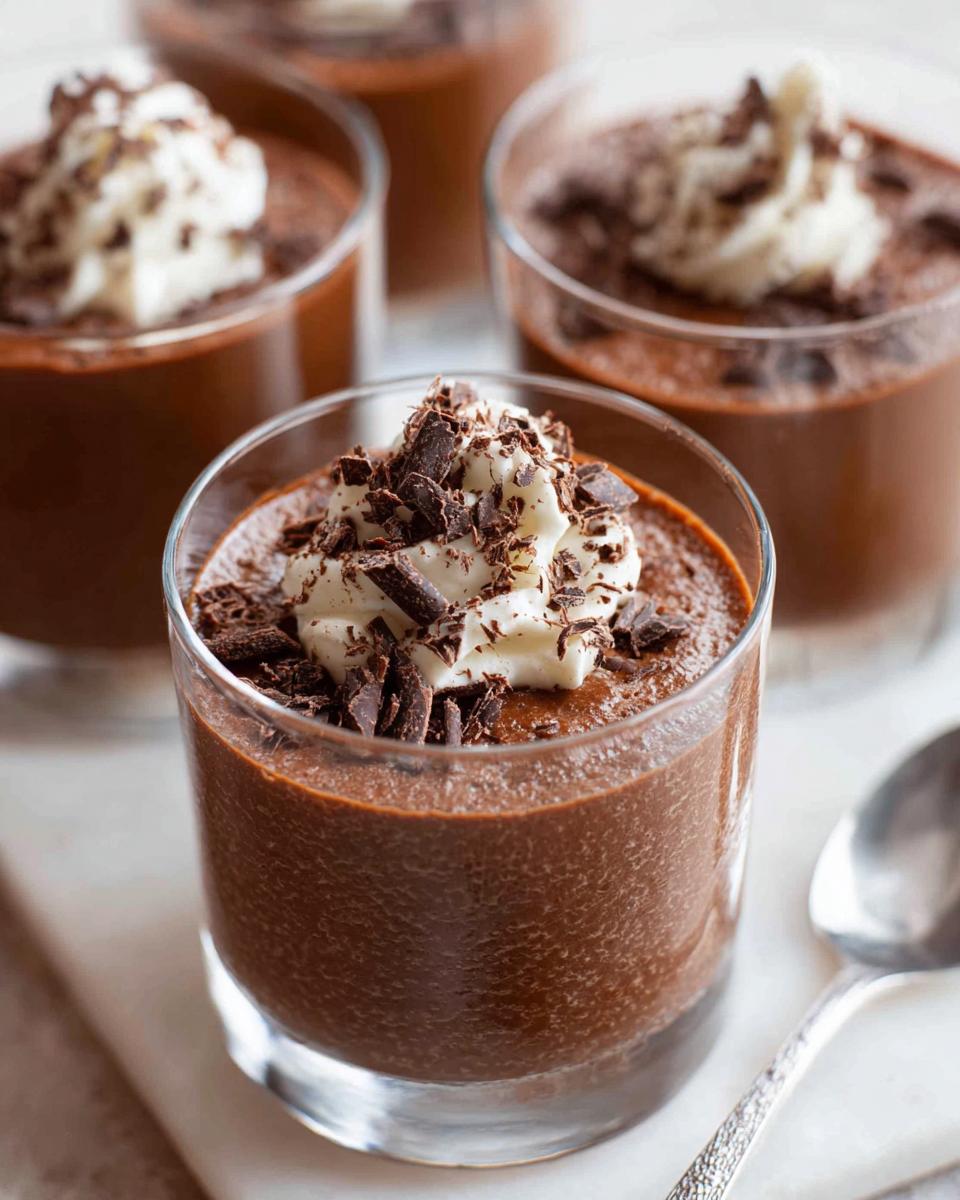
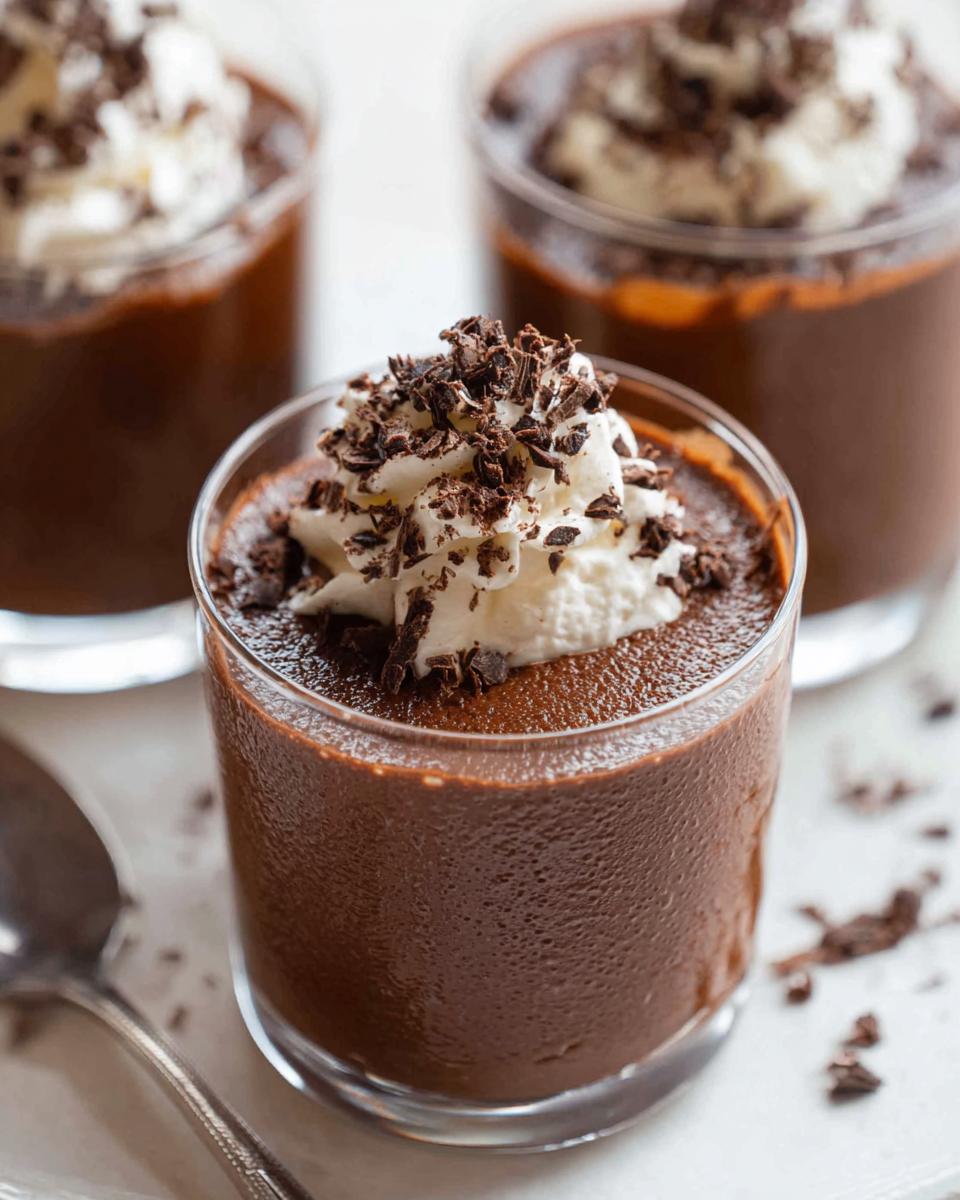
- Optional whipped cream for topping
- Optional chocolate shavings for a little texture contrast
Step-by-Step Instructions for Making Chocolate Mousse (Make-Ahead Dessert)
Alright, this is where we build that incredible airiness! Pay close attention to the folding. If you’re aggressive here, you deflate all the work you did whipping the cream and the whites. We want luxurious lightness, not dense paste, so gentle hands are your best friend!
Preparing the Chocolate and Cream Components
First things first, we separate those eggs while they are cold—it’s easier, trust me—but let those whites come up to room temperature before you whip them! Whisk your yolks until they look smooth and uniform.
- Break up your good quality 70% dark chocolate and pop it in a bowl with that little bit of butter. Melt it slowly in the microwave, stopping every 30 seconds to stir until it’s perfectly smooth and glossy. Let this cool down just a touch.
- Get your full-fat cream going in your mixer until you hit nice, stiff peaks. Don’t walk away, though; over-whipped cream gets grainy real fast!
- Now for the whites: add your caster sugar and beat until they form firm, proud peaks. They should hold their shape when you lift the whisk.
Achieving the Perfect Fold for Chocolate Mousse (Make-Ahead Dessert)
Here’s the delicate dance! First, whisk those yolks right into that barely warm melted chocolate mixture. Then, gently fold your whipped cream into that chocolate base. The rule of thumb here is a maximum of eight folds—some streaks are totally fine.
Now for the whites! This takes a couple of stages to keep the air:
- Take about a quarter of your egg whites and fold them into the heavy chocolate mixture—about 10 folds using a gentle “smear” motion—this lightens the base so it plays nicely with the rest.
- Now, pour that slightly lighter chocolate base into the remaining egg whites. Fold super gently, aiming for no more than 12 folds total, just until those big white patches disappear. Honestly, use a timer if you have to, just don’t overdo it! If you need a visual guide on this folding technique, checking out this site might help you visualize the gentle process.
Setting and Finalizing Your Chocolate Mousse (Make-Ahead Dessert)
Divide that beautiful, airy mixture evenly into your four little serving glasses or pots. You want to get these into the fridge right away.
You have to let this set, and this is where the “Make Ahead Dessert” part comes in handy. We need a minimum of six hours, but honestly, if you leave it overnight, the texture is just phenomenal. It gives the mousse time to stabilize into that unbelievably creamy, yet light, state. See the tips on keeping your kitchen tools organized right here!
Expert Tips for the Best Chocolate Mousse (Make-Ahead Dessert)
Okay, let’s talk secrets because this is what takes it from good to ‘Oh my gosh, who made this?’ The biggest authority tip I can give you is about the chocolate. You absolutely must use proper cooking chocolate—the bittersweet stuff, around 70% cocoa. If you use standard eating chocolate, it’s often too sweet and has stabilizers that stop it from getting that lovely silky finish we want.
Remember I mentioned the eggs? Separate them when they’re cold because they separate cleaner that way, but let the whites warm up on the counter before you start whipping. Room temperature whites whip up way fluffier and hold air better. This is crucial for structure!
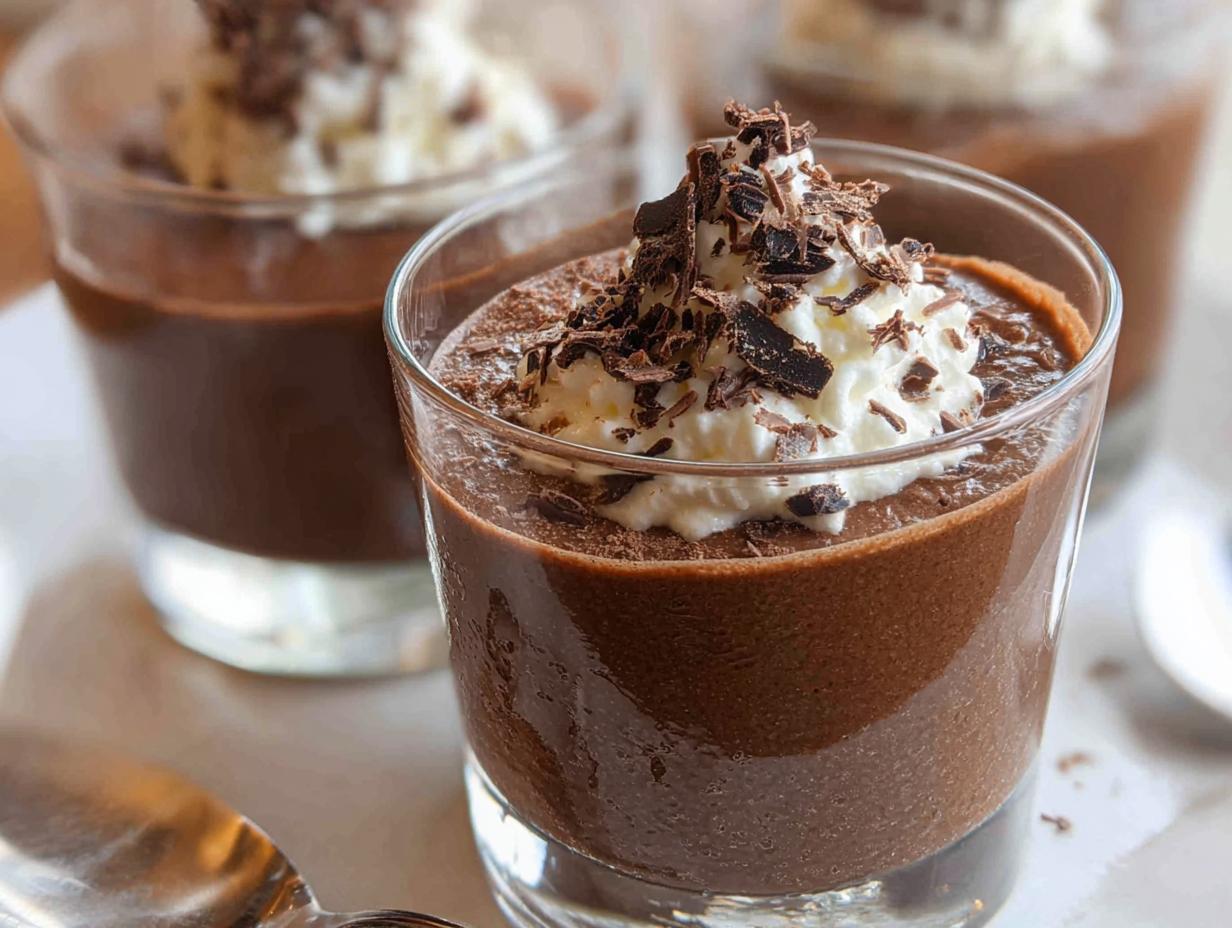
For those fancy little chocolate shavings you see on top, don’t buy the pre-made kind! Just take a good block of room-temperature chocolate and use a vegetable peeler or a knife held low against the side. You get gorgeous, rustic curls in seconds. If you ever want to dig deeper into temperature control for other recipes, I’ve written a ton about that here.
Also, a quick note on flavorings: if you’re tempted to add a shot of liqueur or some orange zest, keep it minimal—no more than a tablespoon total! Too much liquid, even flavored liquid, can mess with how the mousse sets overnight. Keep it simple and rich!
Make-Ahead Dessert Strategies for Your Chocolate Mousse
This is genuinely the best part about this Chocolate Mousse (Make-Ahead Dessert)—it forces you to slow down! I know we all love instant gratification, but for this recipe, patience pays off richly. You absolutely must let it chill for a minimum of six hours. Seriously, set a minimum alarm!
But if you can push it to overnight, you get peak structure and flavor integration. That long, slow chill time is what turns it into the perfect NYE Dessert or anything else that requires you to be mingling, not melting chocolate. Being able to pull this magnificent, Crowd Friendly treat straight from the fridge means you look totally relaxed when your guests arrive. Check out some of my favorite ways to prep meals ahead of time over here!
Ingredient Substitutions for This Chocolate Mousse
While I truly believe this recipe, as written with the 70% dark chocolate, hits the sweet spot of richness and balance, I get it—sometimes you just need to work with what you have on hand. We’re not aiming for my perfect standard, but we want to keep that airy texture, right?
The biggest place you can play around is the chocolate percentage. If you decide to use a slightly sweeter milk chocolate, you *must* reduce the caster sugar by at least half, or you’ll end up with something cloyingly sweet.
Now, let’s talk about the cream situation, because that’s structural. You need cream that whips up firmly. Don’t try using half-and-half or regular milk; it won’t hold the air from your egg whites, and your mousse will collapse into a puddle! If you absolutely cannot find heavy cream, using a high-quality coconut cream (the thick part from a chilled can) can work in a pinch, but honestly, the flavor changes everything, so be prepared for a different, albeit still lovely, dessert.
When it comes to the eggs, there’s no good swap; those yolks give the body and the whites give the lift. If you’re avoiding commercial sugar, you can try substituting the caster sugar with a sweetener that dissolves easily, like powdered monk fruit or fine erythritol, but I’d start with only 1 tablespoon and taste as you go when whipping the whites. It’s all about maintaining that volume!
Serving Suggestions for an Elegant Dessert Presentation
The beauty of this rich Chocolate Mousse is that it only needs a little something extra to look like it came straight from a five-star pastry kitchen. Remember, we are aiming for an Elegant Dessert here, not something slapped together!
Sure, chocolate shavings are classic, but let’s elevate it a touch. Fresh berries are my absolute favorite way to go—raspberries or thin slices of strawberry cut through the richness so beautifully. A tiny pop of color and tartness makes every spoonful exciting.
If you’re not big on berries, try a very light dusting of high-quality unsweetened cocoa powder right before serving. It gives it a gorgeous velvety look. Or, if you used dark chocolate in the base, a single, perfectly placed mint leaf on top of a small dollop of whipped cream makes for a seriously sophisticated finish. It’s all about thoughtful little details!
Frequently Asked Questions About Chocolate Mousse (Make-Ahead Dessert)
Whenever I share this recipe, people always have these brilliant little questions about making sure it turns out just right. Since this is such an important Make Ahead Dessert for planning parties, nailing the details ahead of time is everything! Here are some of the things I get asked most often about perfecting this wonderful Chocolate Mousse.
If you have a question that isn’t covered here, you know where to find me; check out my favorite recipe guides right here!
Can I use milk chocolate instead of dark chocolate in this Chocolate Mousse (Make-Ahead Dessert)?
Oh, I really, really advise against it, sweet friend! The reason this recipe works so well is that the bittersweet chocolate (the 70% kind) has less sugar. That balance is what stops the mousse from tasting overly sweet and lets the deep chocolate flavor shine through.
If you absolutely must use milk chocolate because that’s all you have, you need to cut the caster sugar in the recipe by at least half, maybe even more. If you don’t cut the sugar, the resulting Chocolate Mousse will be way too sweet and might even affect the texture slightly because you’re adding more sugar when you really need that structure from the cocoa solids.
How long can I safely keep the Make Ahead Dessert in the refrigerator?
This is the beauty of a good, rich Make Ahead Dessert! Because we’ve used high-quality chocolate and fat, it holds up incredibly well. The recipe instructions call for a minimum chilling time of six hours to set, but honestly, it tastes best on Day 2. We’ve found that the mousse is absolutely perfect consumed within two days of making it.
That said, due to the egg whites and cream, it’s still very safe to eat if stored properly in sealed individual pots after Day 2, and it will keep for up to a week. However, I find that after day three or four, the texture starts to get just a *tiny* bit denser than that perfect light fluffiness we’re aiming for. If you can, aim to serve within 48 hours for the absolute best results!
Estimated Nutritional Data for Chocolate Mousse (Make-Ahead Dessert)
I always feel slightly cheeky posting nutrition facts for decadent desserts like this, but hey, knowledge is power, right? It’s good to know what you’re getting into when you whip up this glorious Chocolate Mousse (Make-Ahead Dessert). Since we are using high-quality dark chocolate and heavy cream, it is rich, but worth every single bite!
Keep in mind that these numbers are estimates calculated based on the ingredients listed for this recipe, which serves four people. If you’re serving a crowd friendly portion slightly smaller than the recipe suggests, these numbers change, of course!
Here’s the breakdown:
- Calories: Approximately 375 per serving
- Fat: Around 26g (with 18g of that being saturated fat—hello, real butter and cream!)
- Carbohydrates: About 27g
- Protein: Roughly 7g
You can also see higher numbers for cholesterol and fiber, but frankly, when this Elegant Dessert hits the table, nobody is looking at the chart. They will be too busy enjoying that light, airy texture!
Share Your Elegant Dessert Creations
Now that you’ve successfully navigated the gentle art of the fold and secured a stunning Make Ahead Dessert that’s ready in the fridge, I absolutely want to hear about it! Seriously, your feedback means the world to me. Did your former pastry chef friends give you a nod of approval? Did this work perfectly for your NYE Dessert spread?
Don’t be shy! Please leave a rating for this recipe right down in the comments section below. I love reading every single comment about how this Chocolate Mousse (Make-Ahead Dessert) turned out and which garnishes you chose for your presentation.
If you took photos of your finished Elegant Dessert—maybe you went wild with the berries or kept it classic with just shavings—I hope you’ll tag me on social media! Seeing your beautiful efforts as a Crowd Friendly success story truly makes my day.
If you ever have trouble with a step or just want to chat about baking in general, don’t hesitate to send me a note through my Contact Page. Happy baking, and enjoy the look on everyone’s faces when you pull out this incredible, stress-free chocolate mousse!

Chocolate Mousse (Make-Ahead Dessert)
Ingredients
Equipment
Method
- Separate eggs while cold. Place whites in a large bowl and yolks in a small bowl. Set whites aside.
- Whisk the egg yolks until uniform in color.
- Break the dark chocolate into pieces and place in a microwave-proof bowl with the butter. Melt in the microwave in 30-second intervals, stirring between each, until smooth. Set aside to cool slightly.
- Beat the cream until stiff peaks form. Be careful not to over-whip.
- Add the sugar to the egg whites. Beat until firm peaks form.
- Fold the egg yolks into the whipped cream using a rubber spatula, using a maximum of 8 folds. Some streaks are acceptable.
- Check the temperature of the melted chocolate. It should be warm and runny (between 35C/95F and 40C/104F). If too cool, microwave in 5-second bursts until runny.
- Pour the melted chocolate into the cream and yolk mixture. Fold gently until just combined, using a maximum of 8 folds. Some streaks are acceptable.
- Add about one-quarter of the beaten egg whites to the chocolate mixture. Fold them in using about 10 folds, using a “smear” motion with the spatula to incorporate the white lumps.
- Pour the chocolate mixture into the remaining egg whites. Fold gently until no obvious white patches remain, using a maximum of 12 folds.
- Divide the mousse mixture evenly among 4 small glasses or pots.
- Refrigerate for at least 6 hours, or preferably overnight, to set.
- To serve, garnish with additional whipped cream and chocolate shavings, if desired.