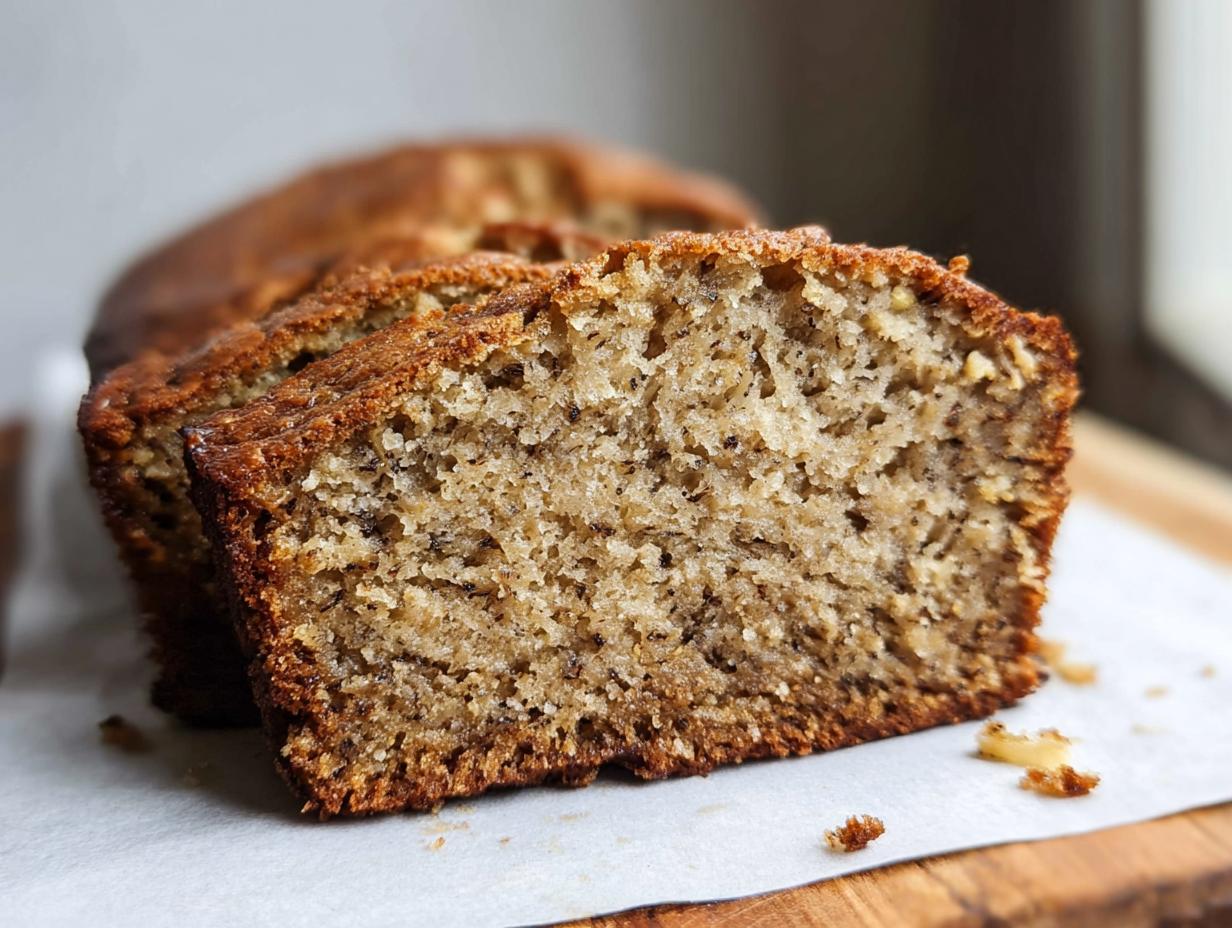
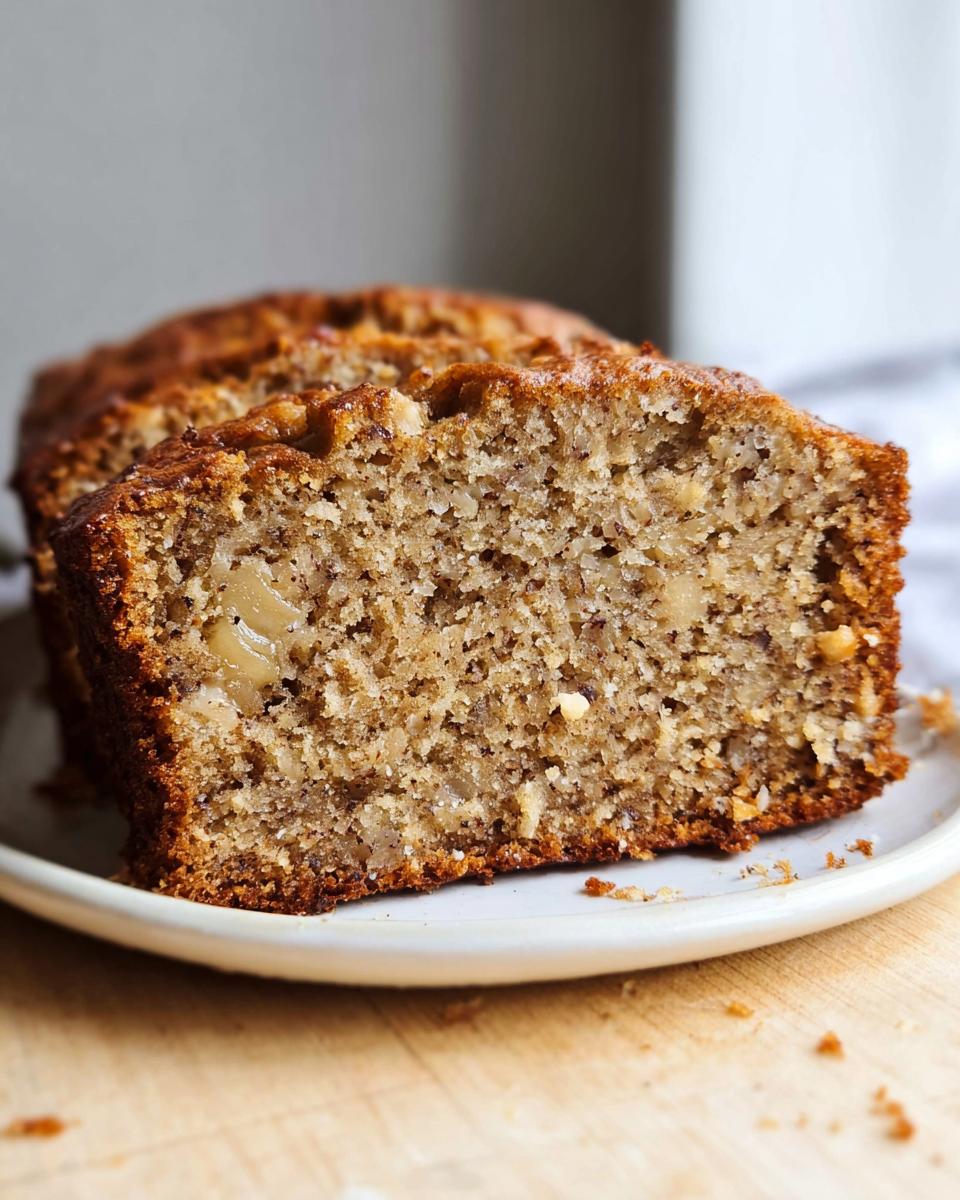
There’s nothing quite like the smell that fills my kitchen when I’m making my **Classic Moist Banana Bread**. It instantly takes me back to rainy Saturdays when I was just learning the ropes in the kitchen. I remember the first time I tried; I was probably a teenager, utterly enchanted by how those overly ripe bananas transformed into something so wonderfully sweet. That golden loaf, warm from the oven, slathered with butter—that’s where my real baking adventure began. This recipe, my friends, isn’t just another quick bread; it’s my most cherished, tried-and-true method for achieving ultimate moisture and that comforting, traditional banana flavor every single time.
Why This Classic Moist Banana Bread Recipe Works (E-E-A-T Focused)
It’s easy to throw ingredients in a bowl and call it banana bread, but if you want that sliceable, deeply flavorful loaf that stays delicious for days, you need to know *why* certain steps matter. My experience in the kitchen has taught me that moisture is king, and it all starts with the fruit. If you aren’t using truly black, spotty, overripe bananas, you’re missing out on half the flavor and all the natural sweetness this recipe relies on!
Here’s what locks in that perfect texture:
- The high ratio of mashed banana to flour ensures a dense but tender crumb.
- We cream the butter and both sugars thoroughly to incorporate air right at the start.
- We use both baking powder and baking soda for a perfect, controlled rise.
The Secret to Truly Moist Classic Moist Banana Bread
When bananas get really ripe, their starches convert into sugars, making them sweeter and much softer. This soft mash acts like a sponge in your batter, holding onto moisture. When that’s combined with the fat from softened butter and the molasses in the brown sugar, you get something truly decadent. It’s a simple chemical reaction that guarantees your classic moist banana bread won’t dry out!
Tips for an Easy Quick Bread Experience
This really is an easy quick bread because it doesn’t need fussy techniques. You don’t need a fancy Dutch oven or slow proofing—just a standard mixer (or even a good whisk and elbow grease!) and a 9×5 loaf pan. I designed this so that even if you’ve never baked before, you have all the tools you need to succeed on your very first try.
Gathering Ingredients for Classic Moist Banana Bread
Okay, let’s talk about the star players here. To get that perfect texture we’ve been raving about, you absolutely have to pay attention to your ingredients. My number one tip for any banana bread recipe is the fruit itself—those bananas should look like they’ve been through a tough month! The mushier and darker they are, the better they perform. Remember, this sweet loaf comes together quickly, so having everything ready to go makes the process so much smoother. It’s all about preparation!
If you’re looking to explore other awesome desserts, you can always check out my full list of recipes right here.
Dry Components for Your Classic Moist Banana Bread
We keep the dry elements super simple, which is part of why this is such a fantastic and easy quick bread. Make sure you spoon your flour into the measuring cup and level it off—don’t just scoop it, or your bread will be dense!
- 2 cups all-purpose flour (spooned & leveled)
- 1 teaspoon baking powder
- 1/2 teaspoon baking soda
- 1/2 teaspoon ground cinnamon
- 1/2 teaspoon salt
Wet Components for Perfect Classic Moist Banana Bread Texture
For the wet side, it’s crucial that your eggs are at room temperature—it helps them blend into that butter and sugar so much better! And that butter? Don’t even think about melting it; it needs to be properly softened so it creams up beautifully.
- 1/2 cup unsalted butter (softened)
- 1/2 cup granulated sugar
- 1/4 cup light brown sugar (packed)
- 2 large eggs (at room temperature)
- 2 teaspoons pure vanilla extract
- 2 cups mashed banana
- 1/2 cup chopped walnuts (optional)
Step-by-Step Instructions for Classic Moist Banana Bread
Watching this come together reminds me of that rainy Saturday when everything clicked. Baking is all about flow, and if you follow these steps precisely, you’ll have zero trouble making this fantastic loaf. Don’t rush the creaming part, but don’t overmix the flour—that’s the real technique here! If you want to see how others are doing, you can check out some great visuals on this topic here, but trust me, you want to follow the physical steps I lay out for you!
Preparing the Pan and Oven for Classic Moist Banana Bread
First things first, we need to get ready! Set your oven heat to 350\u00b0F (177\u00b0C). Now, grab that 9×5 loaf pan. I insist on lining mine with parchment paper—it lets the bread slide right out without fighting you. Spray the pan well first, then lay the parchment so it overhangs the short ends like little handles. This way, you can lift the whole loaf out after it cools a bit. You can see a great example of how I prep my pans over here!
Combining Wet and Dry Mixtures for Classic Moist Banana Bread
In one bowl, give your dry stuff a good whisk—flour, baking powder, soda, and cinnamon—just to make sure they are evenly distributed. In your mixer bowl, beat that softened butter with both sugars until it gets genuinely light and fluffy, which might take four or five minutes. Once that’s pale, pop in those room-temperature eggs one at a time, followed by the vanilla. Then, smash in your two cups of mashed banana.
Now for the crucial part: Slowly add the dry mix to the wet mixture. Mix on low speed, stopping the second you see the last bit of flour disappear. Seriously, stop mixing! Overmixing builds gluten, and we want moist, tender bread, not chewy bricks. Gently fold in those walnuts if you’re using them.
Baking and Cooling Your Classic Moist Banana Bread Loaf
Scoop that gorgeous batter into your ready pan and smooth the top. It goes into the 350\u00b0F oven for about 55 to 65 minutes. If the top starts getting too dark before the center cooks, just drape a piece of aluminum foil over it—it protects the color! You know it’s done when a toothpick inserted right in the center pulls out clean, maybe with a few moist crumbs clinging to it, but no raw batter. Let it hang out in the pan for a solid 20 minutes before you attempt to lift it onto that wire rack to finish cooling down completely.
Tips for Success with Your Banana Bread Recipe
I’ve had so many readers write to me saying their banana bread turned out okay, but not *amazing*. That gap between “okay” and “amazing” is usually just a couple of tiny tweaks in technique! We’re aiming for that perfect, melt-in-your-mouth texture every time you pull out a loaf of this banana bread recipe. Trust me, mastering these little basics moves you right up to expert level on basic baking recipes!
Mastering the Banana Mash for Classic Moist Banana Bread
Let’s have a serious talk about those bananas. If your bananas are yellow with just a few brown spots, they aren’t ready for this job yet. I mean it! You want them actively turning black. Seriously, if the peel looks like it’s been bruised all over and it peels away easily, you’ve hit the jackpot. Those dark spots mean the starches inside have fully converted to sugar, which is why you need fewer scoops of processed sugar later on. Plus, those super mushy bananas break down completely when you mash them, disappearing seamlessly into the batter to deliver pure moisture. Don’t even bother trying with barely yellow fruit!
Essential Equipment for Basic Baking Recipes
While I mentioned this is an easy quick bread, having the right gear helps immensely, especially for that smooth creaming action in the beginning. You absolutely need a good 9×5 loaf pan. If yours is old or dingy, it might stick, so maybe check that out! An electric mixer, whether it’s a stand model or a basic handheld one, is your best friend for whipping the butter and sugar correctly; doing it by hand is wonderful exercise, but it takes so much longer to get that fluffy volume we need for lift.
Variations on Classic Moist Banana Bread
Once you nail this core, *classic moist banana bread* recipe, you’ll want to start playing around, right? That’s the fun part! Since the base texture is so reliable, you can easily toss in other things without worrying about ruining the structure. I usually try something new every third batch because I get bored easily, ha! These additions are super simple and don’t require changing any of the core ratios of flour or liquid—just fold them in at the very end.
Adding Texture and Flavor to Your Classic Moist Banana Bread
If you’re looking to elevate this loaf from excellent to absolutely addictive, texture is where you win. My absolute favorite add-in is chocolate, obviously! I prefer semi-sweet mini chips, but large chunks of dark chocolate are amazing too. Use about one cup, and make sure you toss them lightly in a spoon of flour before adding them to the batter—that keeps them from sinking straight to the bottom of the pan.
If you want to keep it spice-forward, don’t stop at the half teaspoon of cinnamon I call for. Double down on the warmth! Try swapping out that original cinnamon for a mix: maybe half a teaspoon of cinnamon paired with a quarter teaspoon of freshly grated nutmeg or even a dash of cloves. It gives the loaf that deeper, almost holiday-like feeling, even if it’s a random Tuesday afternoon. It turns this simple banana bread recipe into something truly special!
Another quick switch I love is swapping out the walnuts for pecans. Pecans bake up a little softer, and I think their flavor pairs just a touch better with brown sugar. Whatever you choose, remember to fold those additions in gently with a rubber spatula so you don’t deflate all the beautiful air we worked so hard to incorporate!
Storage and Reheating Instructions for Classic Moist Banana Bread
This bread is so moist that keeping it fresh isn’t hard, but you do have to treat it right! Once it’s completely cool—and I mean totally cool off that wire rack—wrap the entire loaf tightly in plastic wrap first. This traps all that wonderful moisture inside. At room temperature, wrapped up well, it’ll be perfect for about three or four days. If you really want to save some for later (and who could blame you?), just slice it first, then wrap the slices tightly in foil before popping them into a freezer bag. It freezes beautifully for up to three months!
Frequently Asked Questions About Classic Moist Banana Bread
You know, when I answer recipe questions, I always find that most issues come down to one or two small execution errors. It’s so common for people to write in asking about texture when they are really just worried about their loaf sinking or ending up dry. We’ve covered the best ingredients, but let’s tackle a few common worries that come up when tackling any banana bread recipe!
If you have more questions after trying this out, feel free to check out my author page here, or just drop a comment below!
Can I use yellow bananas instead of overripe bananas for this banana bread recipe?
Oh, I get this one all the time! Look, you *can* technically use a banana that’s still yellow or just starting to spot, but I really advise against it. Why? Because those yellow bananas haven’t fully converted their starches into sugar yet. In this banana bread recipe, those sugars are doing heavy lifting for flavor and moisture. If you use underripe fruit, your bread will taste significantly less sweet, and you’ll end up with a drier loaf no matter what else you do. For the genuinely classic, moist results we are aiming for, only the nearly-black, squashy overripe bananas will do the trick!
How do I prevent my easy quick bread from sinking in the middle?
Sinking is the absolute worst! It’s usually one of two things that happens in the oven that causes this issue with an easy quick bread like this. First, make sure your oven temperature is accurate. If your oven is running cool, the outside sets before the inside is cooked through, and when you take it out, the soft center collapses as it cools. Second, check the toothpick test! If you pull it out too early—say, at 50 minutes when the guide says 55-65—it hasn’t stabilized yet. Make sure that toothpick comes out truly clean or with just moist crumbs clinging to it, not wet batter. Stick to that back-of-the-oven spot for the most consistent heating, too!
Serving Suggestions for Your Classic Moist Banana Bread
The best part about pulling this beautiful, fragrant loaf out of the oven is that it needs almost nothing to be perfect. Honestly, a slice eaten standing right over the sink works just fine in my book! But if you’re sitting down to enjoy it—maybe with a cup of coffee on a quiet Sunday morning—you need the right partner for that slice of classic moist banana bread.
My absolute go-to, the pairing I remember from childhood, is simple, good quality salted butter. You want that butter slightly softened so it melts into the warm crumb, adding a beautiful salty balance to the banana’s sweetness. Don’t even bother with substitutes here; real butter makes the difference.
If you want something a little richer, though, you can’t beat a thin layer of cream cheese. Not the sticky frosting, mind you—just smooth, slightly tangy cream cheese spread thinly on a room-temperature slice. It brings a lovely, professional bakery touch to this basic baking recipe. Or, for something really decadent, try a drizzle of honey or a quick maple glaze if you have any leftover from pancakes! It’s always best when enjoyed warm, so don’t forget to give that slice 15 seconds in the microwave if it’s fully cooled down!
Share Your Classic Moist Banana Bread Results
Now you’ve got the secret to the most perfectly structured, unbelievably moist loaf. I’m so excited for you to try this! Baking should always be shared, and I absolutely love hearing back from everyone who tries my recipes. Did it transport you back to your own childhood kitchen memories?
Please, don’t be shy! Hop down to the comments section below and let me know how your loaf turned out. Did you add chocolate chips, or did you stick to the classic? I read every single comment, and honestly, your feedback helps me know that these traditional recipes are still bringing comfort to new bakers!
If you made this classic moist banana bread and loved it, if it became your new favorite easy quick bread, please consider giving it a rating right underneath the comment section. It truly helps other home bakers find this recipe! Also, if you snap a picture of that golden-brown beauty on your cooling rack, tag me on social media! You can always drop me a line directly through my contact page if you have a burning question that the guide didn’t cover. Happy baking, friends!
Classic Moist Banana Bread
Ingredients
Equipment
Method
- Preheat your oven to 350°F (177°C). Spray a 9×5 loaf pan with nonstick cooking spray, line the pan with parchment paper, and set it aside.
- In a large mixing bowl, whisk together the flour, baking powder, baking soda, cinnamon, and salt.
- In the bowl of a stand mixer fitted with the paddle attachment, or in a large mixing bowl using an electric mixer, mix together the butter, granulated sugar, and brown sugar for 4-5 minutes or until light and fluffy.
- Mix in the eggs and vanilla, making sure to mix well after each addition. Stop and scrape down the sides of the bowl, then add the mashed banana and mix until fully combined.
- Add the dry ingredients to the wet ingredients and mix until just combined. Do not overmix the batter. Gently stir in the chopped walnuts.
- Scoop the batter into the prepared loaf pan and spread it around into one even layer.
- Bake at 350°F (177°C) for 55-65 minutes or until a toothpick inserted into the center comes out clean. Tent with aluminum foil to prevent excess browning if needed.
- Remove the bread from the oven and allow it to cool in the loaf pan for 20 minutes. Carefully remove the bread from the loaf pan and transfer it to a wire rack to cool completely.