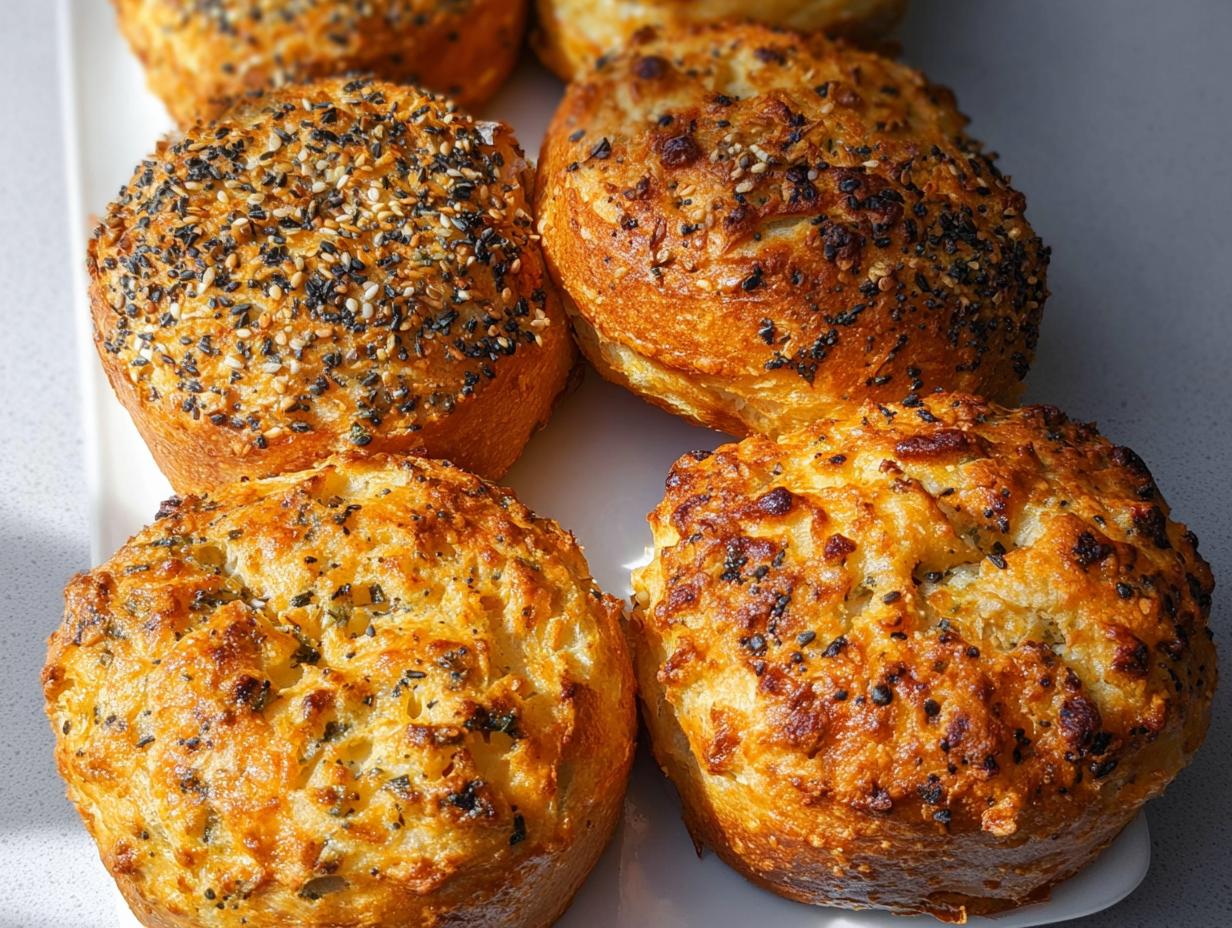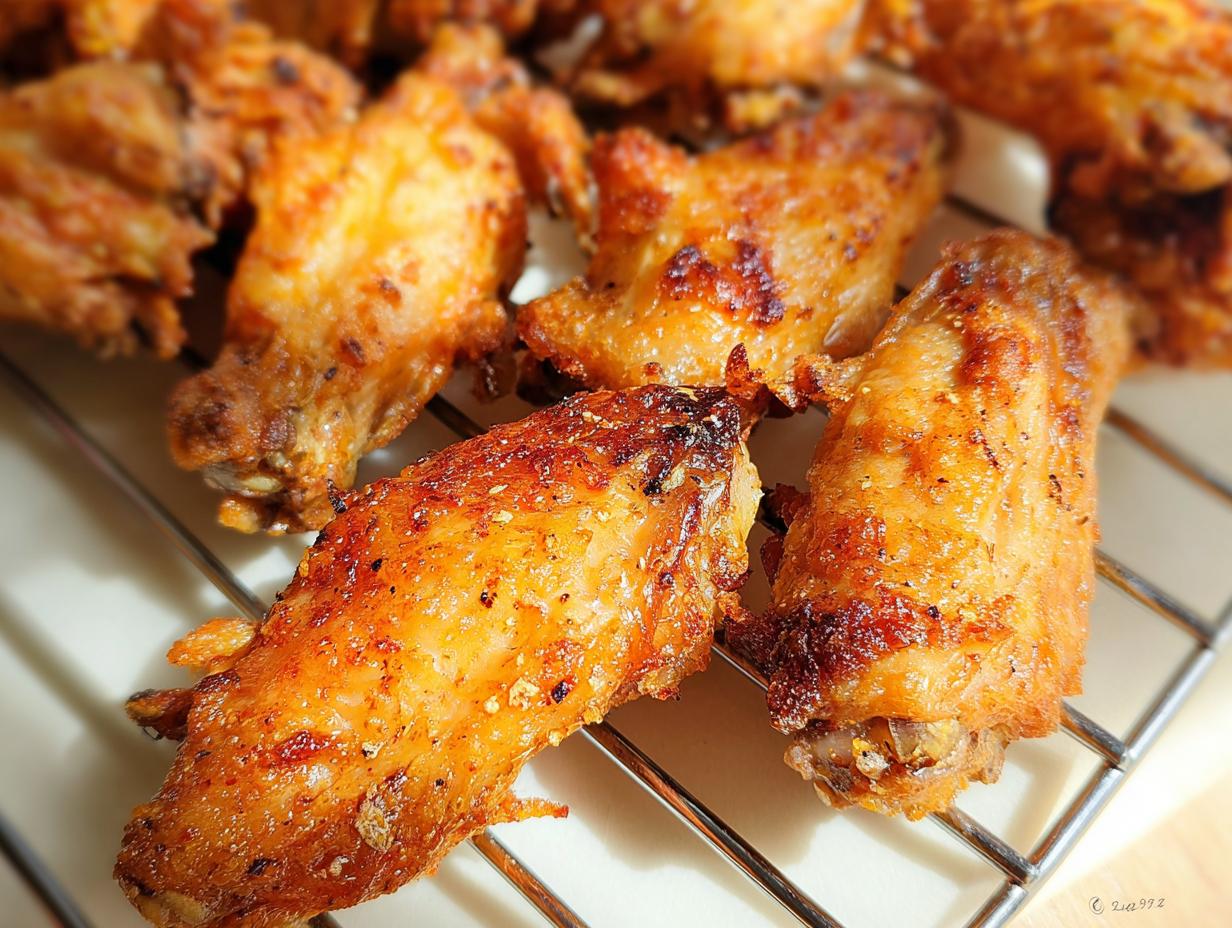
Oh, listen to me when I tell you something critical: you absolutely do not need deep-fryers or tons of oil to get that satisfying, shatteringly crisp crunch we all crave from our favorite Chicken Wings! I was always nervous about frying, especially when I started adapting my diet years ago, but I promised my friends the best wings for Game Day. I was aiming for the ultimate Crispy Baked Chicken Wings, and wow, did I crack the code.
I still remember that night—the aroma filling my kitchen, everyone sniffing the air suspiciously because I hadn’t pulled out the deep fryer! When those golden brown beauties came out, they vanished in minutes. It was incredible validation. This recipe is proof that you can nail that perfect crunch while keeping things way healthier. Trust me; these are hands-down the best Baked Not Fried wings you will ever make.
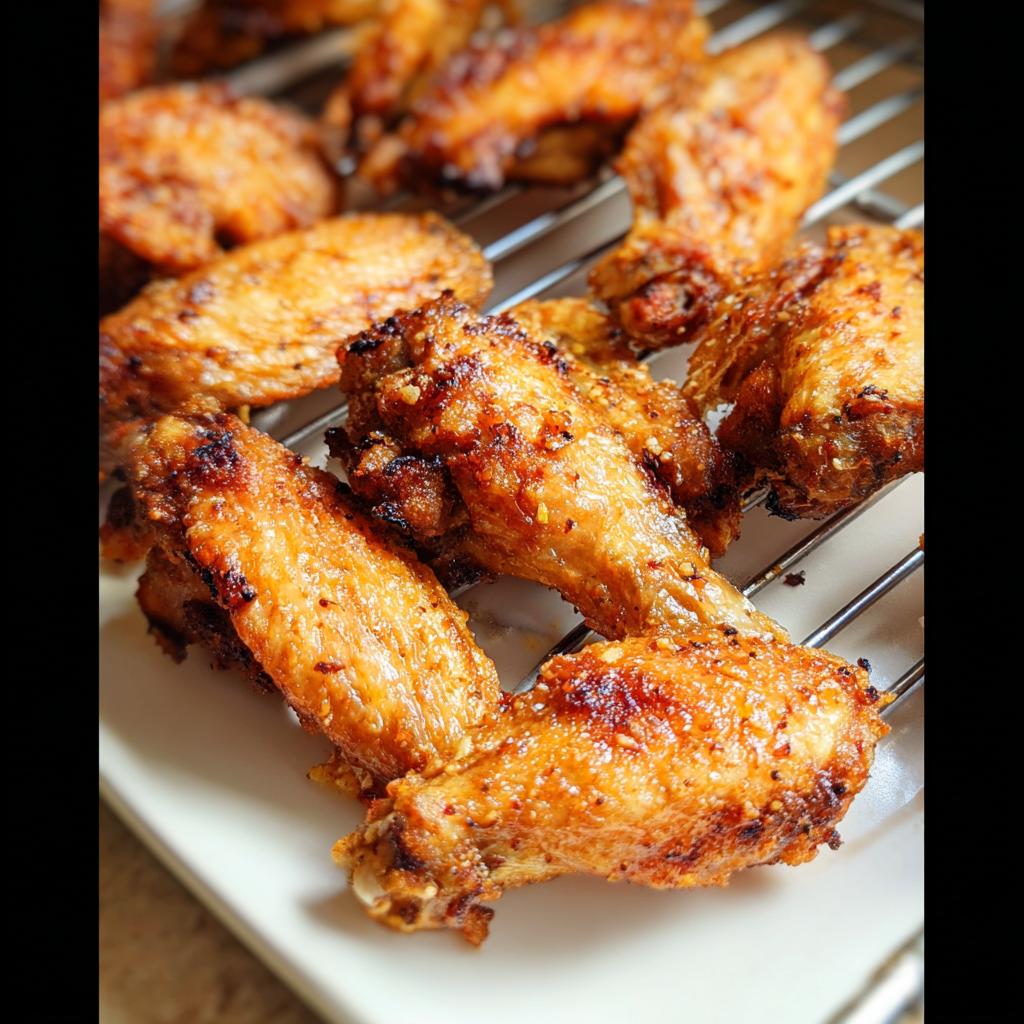
Why You Will Love These Crispy Baked Chicken Wings
Honestly, these wings aren’t just good—they are a game-changer for parties, snacks, or whenever that intense craving hits. I’ve made so many batches since that first night, and they never fail to impress the crowd! You’re going to hit that perfect texture without all the mess and extra oil.
- Incredible Crispy Skin: We’re talking legit crunch here! Thanks to a little secret ingredient (which you’ll meet soon!), the skin gets unbelievably crisp, just like you want it to.
- Healthier Than Frying: These are totally Baked Not Fried, meaning you get all the flavor payoff with a massive reduction in guilt. Perfect for keeping things light!
- Simple Prep Work: Seriously, most of the time is hands-off oven time. You toss a few things together, get them set up, and let the oven do the heavy lifting.
- Total Crowd Pleaser: Whether it’s Game Day appetizers or a weeknight feast, these disappear fast. If you take these to a potluck, be prepared to share the recipe!
- Perfect for Saucing: Because the skin gets so sturdy, they hold up beautifully under a thick coating of your favorite sauce—no more soggy wings here!
- Minimal Mess: Since we skip the oil splatter, cleanup is a breeze. Just a little foil and a rack, and you’re practically done!
Essential Equipment for Perfect Crispy Baked Chicken Wings
You don’t need complicated gear for these babies, which is another win! Having the right setup ensures you get that lovely air circulation needed for true Crispy Skin. Make sure you have your large bowl ready for tossing—that’s where the magic starts.
Here is what you absolutely need on hand for this recipe:
- A big bowl for seasoning everything up.
- A smaller bowl just for mixing your dry spices.
- A sturdy baking sheet.
- Aluminum foil—it saves cleanup time later, trust me.
- A wire rack that fits snugly on your baking sheet.
Ingredients Needed for Crispy Baked Chicken Wings
Getting the ingredients right is step one for achieving true crispiness, especially when we are aiming for Baked Not Fried perfection! Don’t even think about skipping the drying step, which actually happens once you bring the wings out of the fridge right before we season them. These quantities are perfect for a gathering of about six hungry folks, making this a fantastic Crowd Pleaser.
Speaking of ingredients, if you ever want a deep dive into oven temperatures or alternative baking methods, I put together a big guide over on my main site about ingredient guides and cooking temperatures. Now, let’s get this list nailed down!
- 3 lbs of top-quality chicken wings. Remember, I only use drummettes and flats separated—try to avoid the really tiny ones; they dry out too fast!
- 2 tbsp of baking powder. Yes, baking powder! This is the secret agent that helps wick away moisture for that amazing Crispy Skin. Don’t swap this out!
- 2 tsp of kosher salt. This is for our seasoning base.
- 1.5 tsp of white pepper. I prefer white pepper here to keep the seasoning looking clean, but black pepper works if that’s what you have.
- 2 tsp of a neutral oil. Something like canola or avocado oil works perfectly to help the seasonings adhere to the skin before baking.
Step-by-Step Instructions for Crispy Baked Chicken Wings
Okay, this is where we stop dreaming and start making the best Crispy Baked Chicken Wings you’ve ever had! Remember that game night? This is the exact process I used. We’re focusing on getting a super dry surface because moisture is the enemy of crunch. If you’re looking for a foolproof way to stop messing up simple baked meals, you should definitely check out my guide on how to make dinner ideas foolproof before we start!
Preparing the Chicken Wings for Maximum Crispiness
First things first: drying! Get those 3 pounds of wings out and pat them down until they are bone dry. Seriously, use paper towels until you think you can’t possibly dry them anymore—then dry them again! Moisture prevents the skin from achieving that beautiful texture we want. Once they are dry, toss them right into your large bowl and drizzle on that neutral oil. Get them lovingly coated.
Seasoning Mix for Flavorful Crispy Baked Chicken Wings
Now for the secret sauce to a crackly finish! Grab your small bowl. Mix your kosher salt, white pepper, and that crucial baking powder together until it looks uniform. The baking powder is what reacts with the heat to create those lovely little bubbles on the surface, turning into amazing Crispy Skin. Sprinkle half of this seasoning mix over the oily wings and toss them really well. Then, add the rest and make sure every single piece is speckled evenly. Don’t leave any dry spots!
Setting Up Your Pan for Perfect Baking
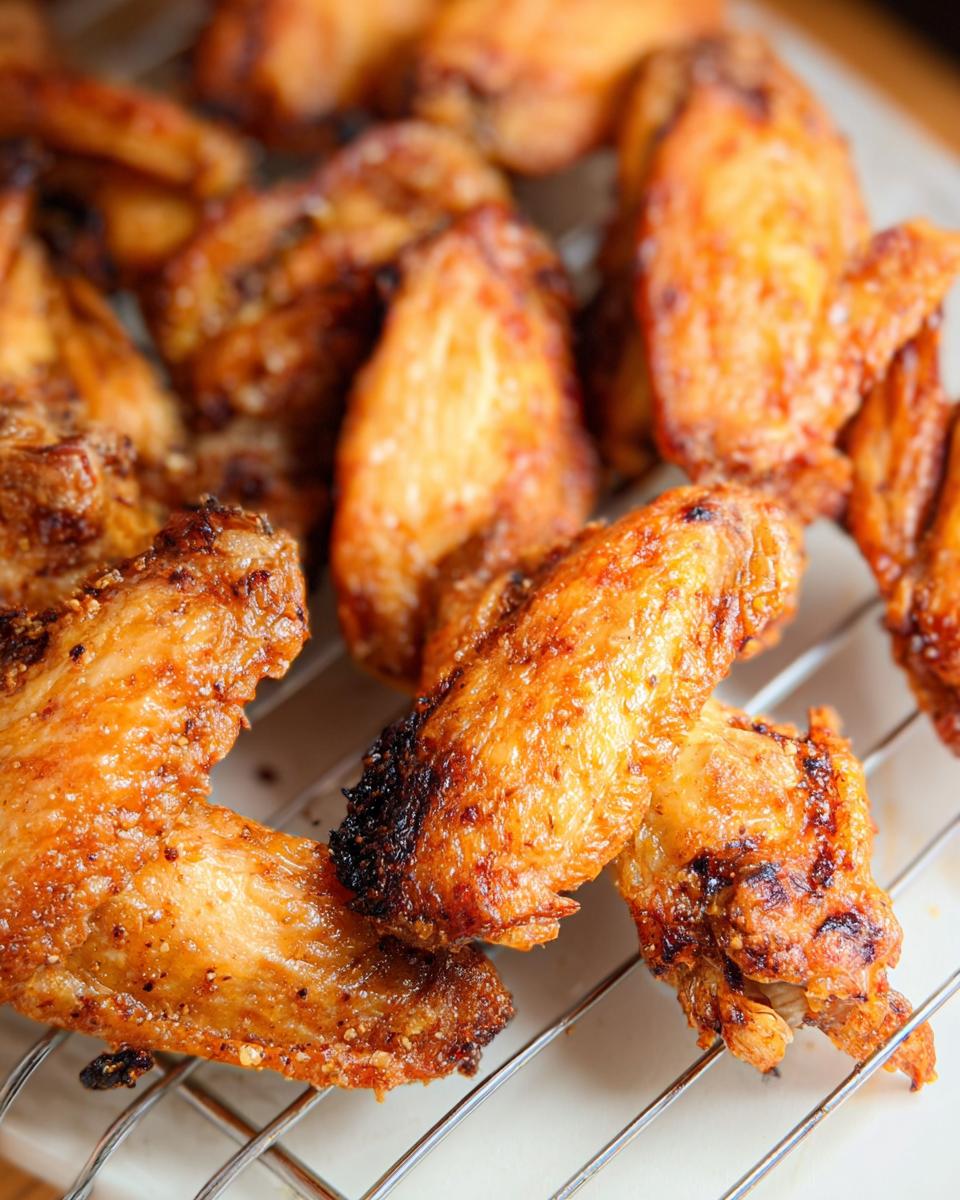
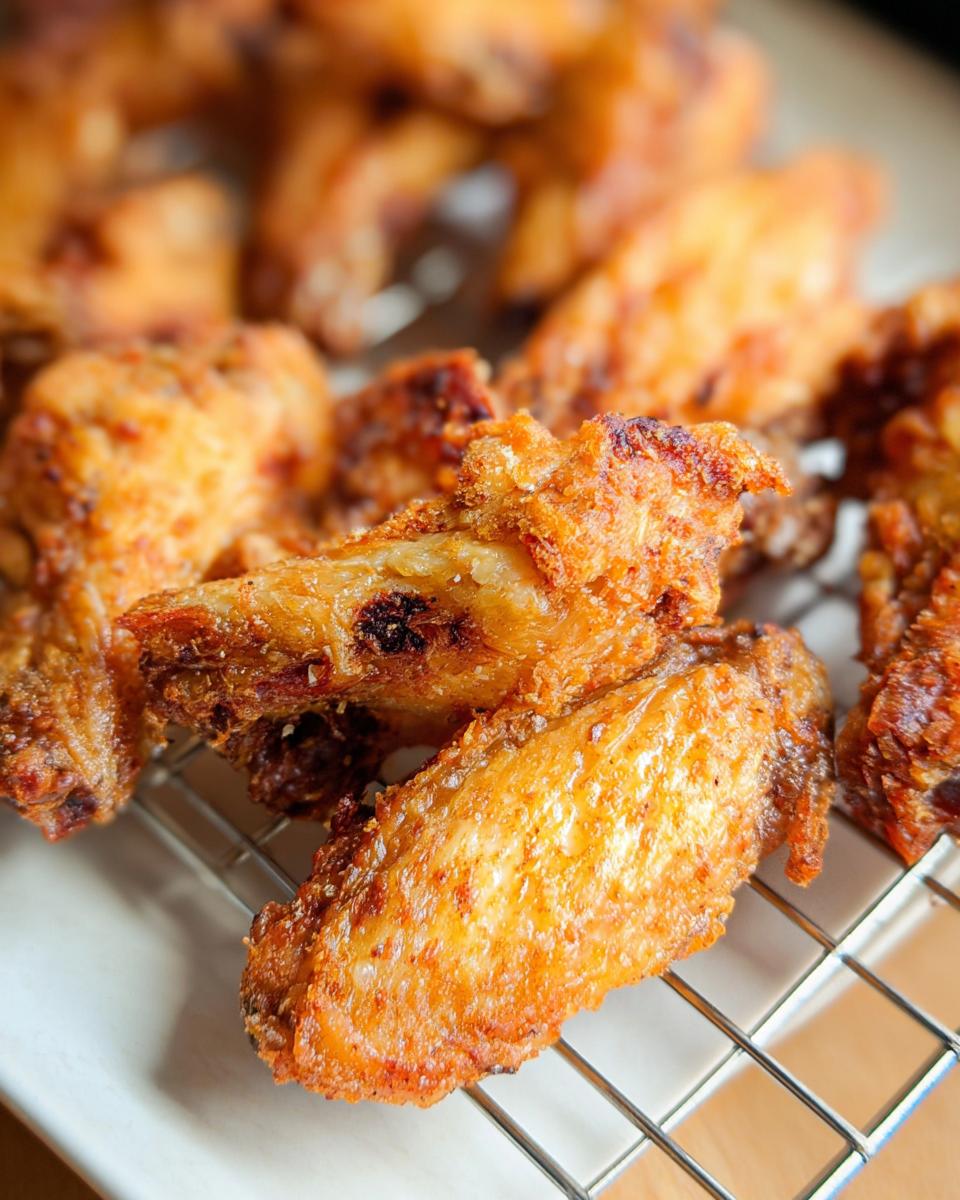
We need elevation here! Lay down that foil on your baking sheet—this catches the drips so cleanup isn’t miserable later. Then, place your wire rack right on top of the foil. You have to use the rack so the bottoms of the wings aren’t sitting in their own juices. That means they bake, not steam! Arrange your seasoned chicken wings on that rack, making sure there’s space between every piece. They should not be touching at all. If they are crowded, they steam, and we hate steamed wings!
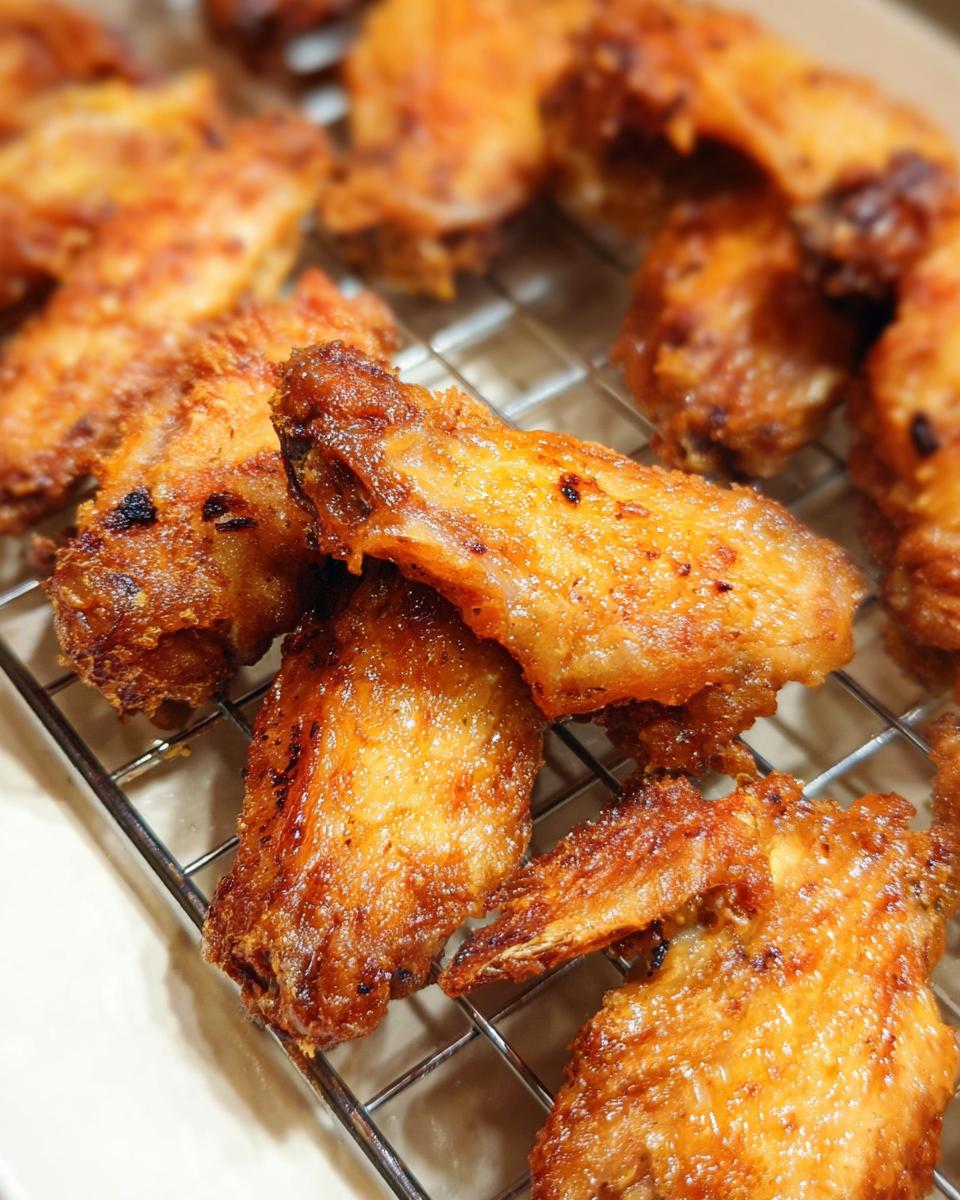
Baking Time and Flipping for Golden Crispy Baked Chicken Wings
Time for the heat! Slide that sheet pan into an oven preheated to 450°F. If your oven has a convection setting, use it! Convection helps circulate that dry heat for faster browning. Bake them for a solid 30 minutes just like that. Then, using tongs, carefully flip every single wing over. Put them back in for another 20 to 25 minutes. Once they are deeply golden brown and look perfectly crisp, you’re golden! You can peek at other great baking ideas for comparison, but trust the timing here.
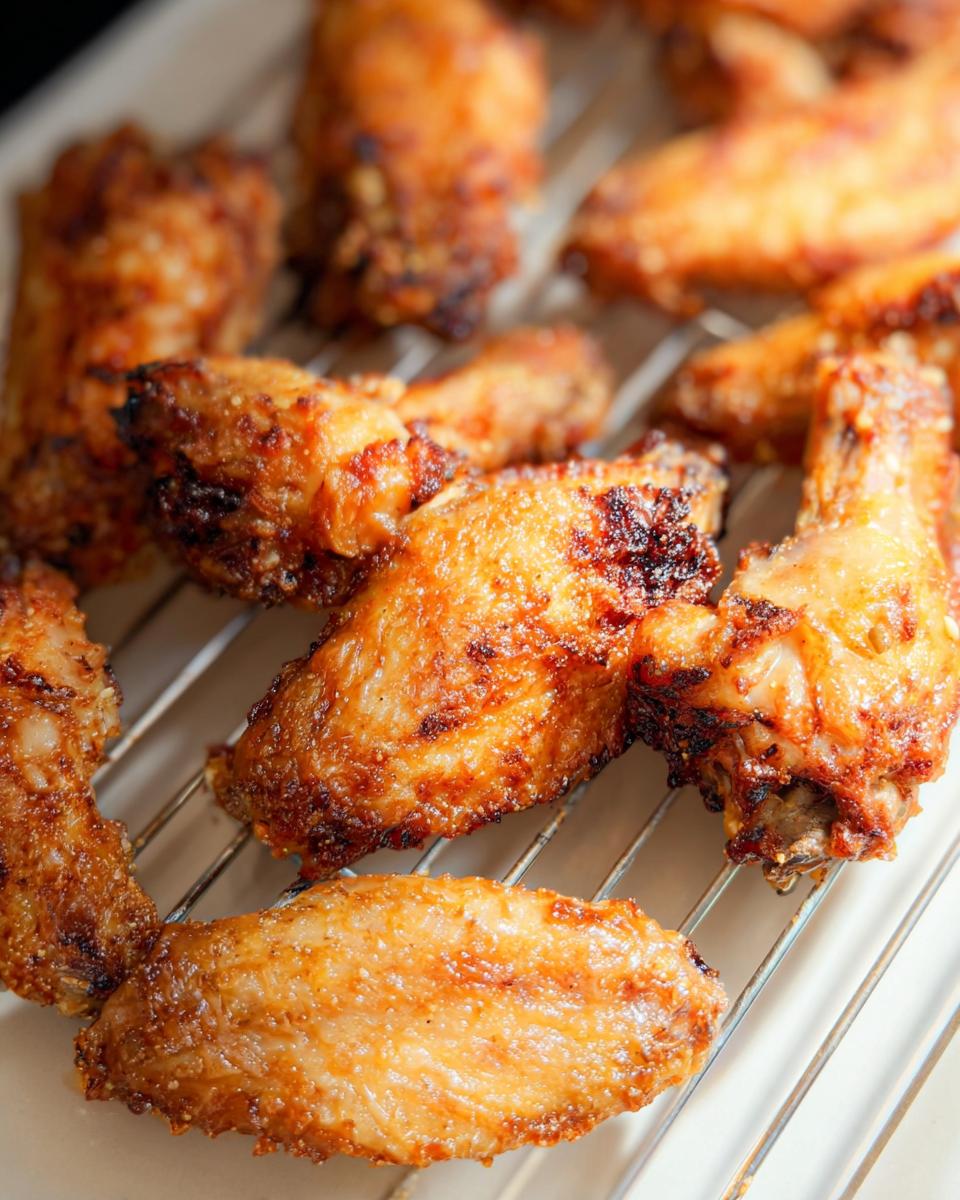
Finally, pull them out, toss them in your favorite dry rub or sauce right away, and get them to the table. You did it—perfectly Baked Not Fried wings!
Expert Tips for Achieving Ultimate Crispy Skin on Crispy Baked Chicken Wings
I’ve made these a million times now, and while the basic recipe gets you fantastic results, these few extra steps are my personal secret weapons for that truly professional, shatteringly Crispy Skin. If you want wings that you swear just came out of a fryer, listen up! These little tweaks make all the difference when you’re aiming for truly crunchy Chicken Wings.
The foundation of great crispiness starts before the oven is even preheated. I always make sure my baking sheets are cold! Putting the wings onto a room-temperature or warm sheet means the heat transfer starts too slowly on the bottom. Baking on a cold surface helps solidify the fat slightly before the intense heat begins rendering, which is actually great for getting that crisp bottom layer without needing to flip quite so often.
Here are my top tips for dialing in that perfect texture:
- The Convection Power Surge: If your oven has a convection setting, use it! It circulates air continuously, drying the outside surface of the wing very quickly. If you use convection, you might shave off about 5 to 7 minutes from the total time, but keep an eye on them so they don’t burn.
- Maximize Airflow Via Rack Placement: I know I said not to crowd them, but I want to double down on the rack. If you have a very large batch, maybe use two racks instead of loading one sheet pan too heavily. Good airflow around every single side of the wing is non-negotiable for true Crispy Skin.
- The Mid-Bake Temperature Boost: After the initial 30 minutes (before you flip), if the tops look pale but you know they need more time, crank that heat up to 475°F for the final 15 minutes. This blast of high heat is fantastic for caramelizing and crisping up any remaining softness. Just watch them like a hawk once you raise the temp!
- Don’t Sauce Too Early: Seriously, if you’re planning to sauce them, toss them in the sauce *immediately* after they come out of the oven, while they are piping hot, but serve them right away. If you let them sit around already sauced, that moisture from the sauce will immediately start softening your hard-earned crust.
If you want to dive deeper into how different temperatures affect texture, I cover a lot of this science over in my guide to ingredient guides, temperatures, and cooking tips. Getting these temperatures right is how we achieve that amazing crunch without frying!
Ingredient Notes and Substitutions for Crispy Baked Chicken Wings
Baking powder is the absolute superhero here! I need you to hear me loud and clear: for these Crispy Baked Chicken Wings to truly deliver that amazing crunch we are aiming for in a Baked Not Fried scenario, you cannot skip the baking powder. It’s what creates those tiny air pockets that dry out the surface and give you that lovely shatter. Any other changes are minor fussing, but baking powder—that’s the foundation of this texture!
When it comes to other ingredients, you have a little wiggle room, but consistency in drying the wings is still key. Let’s talk through a couple of swaps you might be considering for your pantry situation.
What about the salt? Kosher salt is my pick because the flakes are larger and distribute nicely, but if you only have regular table salt, just use a bit less. Table salt is stronger, so use about 1.5 teaspoons instead of the full 2 teaspoons, just to be safe on the seasoning level. We don’t want to need to apologize for salty Chicken Wings!
And that neutral oil? We need something that has a high smoke point since we are baking these guys at 450°F. If you forgot the avocado or canola oil, peanut oil is a fantastic substitute. Vegetable shortening or lard won’t work well here because they are too solid at room temperature, and they won’t toss evenly with the spices. Stick to a liquid oil for that initial coating.
If you wanted to make a dry rub version down the road, you could certainly skip the saucing step mentioned later in the instructions, but make sure to increase the white pepper or add a pinch of smoked paprika right into that baking powder mix. But remember, for this specific process to work its magic and deliver Crispy Skin, baking powder is our non-negotiable friend!
Serving Suggestions for Your Crowd Pleaser Crispy Baked Chicken Wings
You’ve pulled off the impossible: perfectly crisp, healthy Chicken Wings! Now comes the best part—deciding what to serve them with. Because these are such a guaranteed Crowd Pleaser, you want sides that match that easy, fun vibe without weighing everyone down. Since I tend to lean toward lower-carb options at my gatherings, I have a few go-to pairings that keep the focus right where it belongs: on that perfect crunch!
The first thing to secure is the right dip. You absolutely need something cooling to balance the spice, especially if you’re tossing them in a hot sauce. A creamy ranch dressing is always the first to disappear. My homemade garlic herb ranch is amazing, but any quality store-bought version works in a pinch. Blue cheese dip is another classic winner; you can’t really argue with tradition!
If you’re looking to bulk this up into a real dinner, rather than just an appetizer, here are a few simple, balanced supper ideas—you can find more details on creating simple balanced suppers on my site too:
- Crispy Celery and Carrot Sticks: Okay, I know carrots are in the wings, but sticks on the side are essential for dipping and provide that fresh crunch. Just keep the carrot ratio low if you’re watching carbs closely!
- Creamy Coleslaw: Skip the sugary dressings! A creamy, tangy vinegar-based slaw made with mayonnaise, vinegar, and a touch of sweetener is fantastic against the salty skin. It’s cool, crunchy, and so refreshing.
- Cucumber Bites: Instead of heavy sides, slice thick rounds of cucumber, dollop them with a little cream cheese schmear, and sprinkle with everything bagel seasoning. It sounds fancy, but it takes two minutes, and the coolness is perfect next to hot wings.
- Spicy Pickled Okra or Jalapeños: If you want more heat and tang, a small bowl of vinegary pickled items cuts right through the richness of the chicken fat beautifully.
Serve these Crispy Baked Chicken Wings right on the sheet pan (with a clean liner!) or pile them high on a platter. I promise, no one will even ask if they were fried once they hear that first crispy bite!
Storage and Reheating Instructions for Leftover Crispy Baked Chicken Wings
Oh man, if you end up with leftovers—which, let’s be honest, rarely happens in my house—the biggest hurdle is keeping that glorious Crispy Skin intact! When you store them, the residual heat and moisture are trapped, and that leads straight to soggy disappointment. We absolutely cannot have soggy wings after all that hard work making them perfectly.
First, make sure the wings are completely cool before you tuck them away. Don’t seal up a hot container of wings; that pure steam bath turns the skin soft right away! Once they are totally cooled down to room temperature, grab an airtight container. I don’t recommend stacking them too tightly if you can help it. If you must stack, maybe put a little piece of parchment paper between layers if you’re filling a deep container. They should last fine in the fridge for about three to four days.
Now, the reheating process is where most people mess up, so pay attention! The microwave is your sworn enemy here. It heats the moisture inside the chicken, which steams the skin from the inside out. Terrible idea for Crispy Baked Chicken Wings.
Here’s how we bring them back to life:
- The Oven is Your Friend: Preheat your oven back up to a healthy 375°F. Set the wings right back on a wire rack over a baking sheet (just like you cooked them!). Give them about 8 to 10 minutes. This medium-high heat works to drive out that trapped moisture and re-crisp the skin beautifully. They come out almost as good as new!
- The Air Fryer Miracle: If you have an air fryer—use it! This is the fastest way to revive that crunch. Set it to 375°F for just 4 to 6 minutes. Shake the basket halfway through. This gives you that ‘freshly fried’ texture in record time.
Just reheat them until they are piping hot throughout, and get them on the table immediately! These Chicken Wings are at their absolute peak right after they are crisped up the second time.
Frequently Asked Questions About Crispy Baked Chicken Wings
I know you might have some lingering questions now that you’ve seen the magic behind getting that ultimate crunch without all the oil. That’s totally normal! After all, achieving great Crispy Skin on Baked Not Fried wings feels a little like cheating, right? I’ve gathered the questions I get most often, especially when people are planning their big Game Day menu!
Can I make these Crispy Baked Chicken Wings without baking powder?
Oh, sweetie, I really, really wish you could easily skip it, but honestly, nope! If you want that crackly, crunchy exterior that makes these Crispy Baked Chicken Wings so special, you have to use the baking powder. It raises the pH level of the skin slightly, which helps break down the proteins and dry out the surface faster in the oven. Without it, you’re just going to end up with baked chicken that’s slightly rubbery rather than shatteringly crisp. Keep that baking powder front and center!
Are these wings healthier than fried Chicken Wings?
Absolutely! That’s one of the biggest reasons I developed this recipe; I wanted the flavor without the heavy deep-fry oil. Since we are relying on the heat of the 450°F oven and the drying power of the baking powder, we use only a tiny bit of neutral oil just to help the seasonings stick. So yes, these are definitely a much healthier option than traditional deep-fried Chicken Wings. It’s the ultimate way to enjoy them Baked Not Fried!
What is the best way to reheat Crispy Baked Chicken Wings to keep them crispy?
If you have leftovers—kudos to you for having willpower!—do yourself a favor and avoid the microwave at all costs. The microwave is guaranteed to turn your beautiful Crispy Skin into sad, steamed leather. The best reheat method, hands down, is setting the wings back on a wire rack on a baking sheet and popping them into an oven preheated around 375°F for about 8 to 10 minutes. If you have an air fryer, even five minutes at that temperature sets them right back to perfection!
If you have more questions about the process or just want to leave a note about how your Game Day party went, feel free to reach out over on my contact page. I love hearing from you all!
Estimated Nutritional Information for Crispy Baked Chicken Wings
Nutrition talk! Even though these are much healthier because they are Baked Not Fried, it’s still smart to know what you are putting into your body, especially if you are tracking macros or watching calories for a big event. Since we are making something that is supposed to be hearty fuel for Game Day, these are packed with protein!
I ran the numbers based only on the wings, the oil, and the seasoning mix—so remember, this estimate does NOT include any heavy barbecue sauce, wing dips, or sugary dressings you might want to slather on later. Those extras can hike up the calories and carbs really fast, so keep an eye on your final additions!
I compiled this quick chart based on 6 servings total. If you are serving lighter appetizers, you might want to account for fewer servings per person. For more in-depth guidance on keeping your recipes light and balanced, check out my post on calorie-smart recipes!
Here is a general look at the numbers per serving (about 1/6th of the total batch, without sauce):
- Estimated Calories: Roughly 350-400 kcal
- Total Fat: Around 25-28 grams (This is mostly good fat from the chicken skin rendered during baking.)
- Protein: A whopping 28-32 grams! These are fantastic for staying full.
- Total Carbohydrates: Less than 2 grams. Yes, you read that right! Thanks to the baking powder trick, the carb count stays incredibly low, making these perfect if you’re sticking to low-carb or keto guidelines.
A Quick, Important Disclaimer!
These figures are just estimates based on standard raw chicken wing weight and the small amount of oil used in the seasoning step. The actual content could change depending on how much fat renders out during baking and, perhaps most importantly, what kind of sauce you decide on afterwards. For instance, smothering them in a thick, honey-based sauce will certainly change the carb count significantly compared to just eating them plain or with a dry rub. Always measure carefully if exact counts are important to your diet plan!
Share Your Game Day Success with These Crispy Baked Chicken Wings
Well, you’ve made it to the end, and I hope you are already picturing that massive bowl of perfectly crunchy, golden Chicken Wings! If you followed these steps, you didn’t just make wings; you mastered the art of making them truly crispy Baked Not Fried. Seriously, that first bite when you hear the shatter—there’s nothing better!
I poured my heart into making sure this recipe delivers on the crunch, especially since it’s such a beloved Game Day ritual at my house. Now that you’ve tried them, I desperately want to hear what you think! Did you achieve that legendary Crispy Skin? Were they the hit of your party?
Please, take a moment and let me know in the comments below! Rate the recipe right there on the page—your feedback helps other home cooks know they are in good hands with this method. Did you try a specific sauce that paired exceptionally well? Tell me everything!
If you snapped a picture of your beautiful platter of wings—maybe next to your favorite dip or surrounded by cheering friends—please tag me on social media! Seeing your successes reminds me why I love sharing these recipes so much. It’s all about making those favorite comfort foods accessible and delicious, whether it’s a quiet Tuesday or the biggest Game Day ever.
For more fun and easy recipes that are guaranteed to be a Crowd Pleaser, you can check out some of my other family favorites over at recipes everyone asks for. Happy cooking, and enjoy those amazing, non-fried wings!
Crispy Baked Chicken Wings
Ingredients
Equipment
Method
- Pat chicken wings completely dry and add the wings to a large bowl. Add the neutral oil to the wings.
- In a small bowl, mix kosher salt, ground white pepper and baking powder until combined. Pour half of the seasoning over the wings, mix, then add the rest of the seasonings to ensure all wings are evenly coated.
- Take a large baking sheet and line it with foil. Place a wire rack on top of the baking sheet and lay the wings on the wire rack with space between each wing so they are not touching each other.
- Bake at 450F for 30 minutes (use convection if possible). Flip and bake for another 20-25 minutes until the skin is crispy.
- Toss in your favorite sauce or eat plain and enjoy!