Oh, listen to me—if you think you know comfort food, you haven’t truly met the right potato yet! There’s nothing quite like the crunch of a perfectly rendered exterior giving way to the softest, cloud-like center. That’s the secret sauce, folks, and with my method for **Crispy Smash Potatoes**, we nail that texture every single time. I discovered this trick one dreary, rainy Sunday when I was craving something deeply satisfying to go with a roast, but trying to keep things keto-friendly. Talk about a moment of clarity! Bashing those boiled little tubers until they spread out, then roasting them until they turn golden brown? Instant kitchen magic. Trust me when I say these aren’t just potatoes; they are a guaranteed party favorite, and I, Jenny Miller—Master of Keto Confectionery Arts—am thrilled to share this absolute game-changer with you. If you’re looking for more amazing dishes, definitely check out my full collection of keto recipes!
Why You Will Love These Crispy Smash Potatoes
Honestly, I don’t know anyone who hasn’t gone completely wild over these potatoes. They hit every single satisfaction note you want in a side dish, and they require barely any babysitting once they get into the oven. You just can’t go wrong!
- That Crunch: We’re talking about unparalleled crispy edges; that’s the main event here.
- They Are So Easy: Forget intensive mashing or precise scooping—this is truly an easy side dish requiring minimal effort.
- Crowd-Pleaser Status: If you need a guaranteed party favorite that pleases everyone (even the picky eaters), this is it.
- Perfect Pairing: They work with everything from a simple roast chicken to heavy holiday meals.
Seriously, give them a try. You won’t go back to boring boiled potatoes, I promise!
The Best Potatoes For Crispy Smash Potatoes
Okay, this is where we separate the good smash from the absolutely incredible smash. You asked what the best potatoes are, and honestly, you can use almost anything! But if you want that perfect marriage of crispy shell and fluffy middle, you need to pay attention to the starch level.
High-starch potatoes, like Russets, will break down beautifully and give you that light, almost crumbly interior after cooking. Waxy potatoes, like those tiny red ones, are creamier but they hold their shape better, so you get a tighter, denser smash.
For this recipe, using smaller potatoes—think golf ball size—is fantastic because you get way more surface area for those heavenly crispy edges. If you use medium ones, they end up fluffier inside, which is still amazing, just a slightly different experience. For all my deep dives on ingredients and techniques, you should take a peek at my guide on ultimate dinner ideas guide!
Gathering Ingredients for Crispy Smash Potatoes
Alright, let’s get our mise en place ready! Making these **Crispy Smash Potatoes** requires just a few core things, but paying attention to how we prep them—especially the fat—is half the battle won. I’ve broken down exactly what you need below. Having your ingredients ready before that oven starts preheating makes the whole process feel like such a breeze. You’ll see we have groups; that’s just how I keep my kitchen organized!
Potatoes Selection
When you gather your potatoes, make sure you have about 12 to 14 small ones if you want crispy finger food, or 6 to 8 medium ones if you prefer a thicker, fluffier center. Remember, the type matters slightly, but the size you choose determines the final smash thickness!
For Cooking and Seasoning Your Crispy Smash Potatoes
The fats are crucial here because they are what turns golden brown in that hot oven. Make sure you melt that butter first! For the seasoning part, don’t skip the salt for boiling; these potatoes soak it up while they boil, which seasons them from the inside out. And yes, fresh parsley is totally optional, but wow, does it make them look fancy at the end!
Step-by-Step Instructions for Perfect Crispy Smash Potatoes
Okay, here is where the real magic happens. Achieving those incredible textures relies entirely on two main things: making sure the potatoes are perfectly tender when they go into the oven, and then giving them all the space they need to dry out a bit so they crisp up instead of steaming! Follow these steps exactly—we’re aiming for a total time of about 75 minutes, including the drying—and you’ll have the best **Smashed Potatoes** ever.
Boiling and Initial Drying of Smashed Potatoes
First things first, boil them! Get a big pot of water going and toss in your full tablespoon of salt—we need that flavor deep inside. Cook the potatoes until they are super-tender. For those smaller ones, expect about 20 to 25 minutes, but the medium ones might need closer to 30 minutes. When they’re ready, drain them really well in a colander. Then, here’s the first secret you need: let them sit there and air dry for about 5 minutes! This quiet time, what I call my Drying Time segment, is mandatory for good crispiness later on.
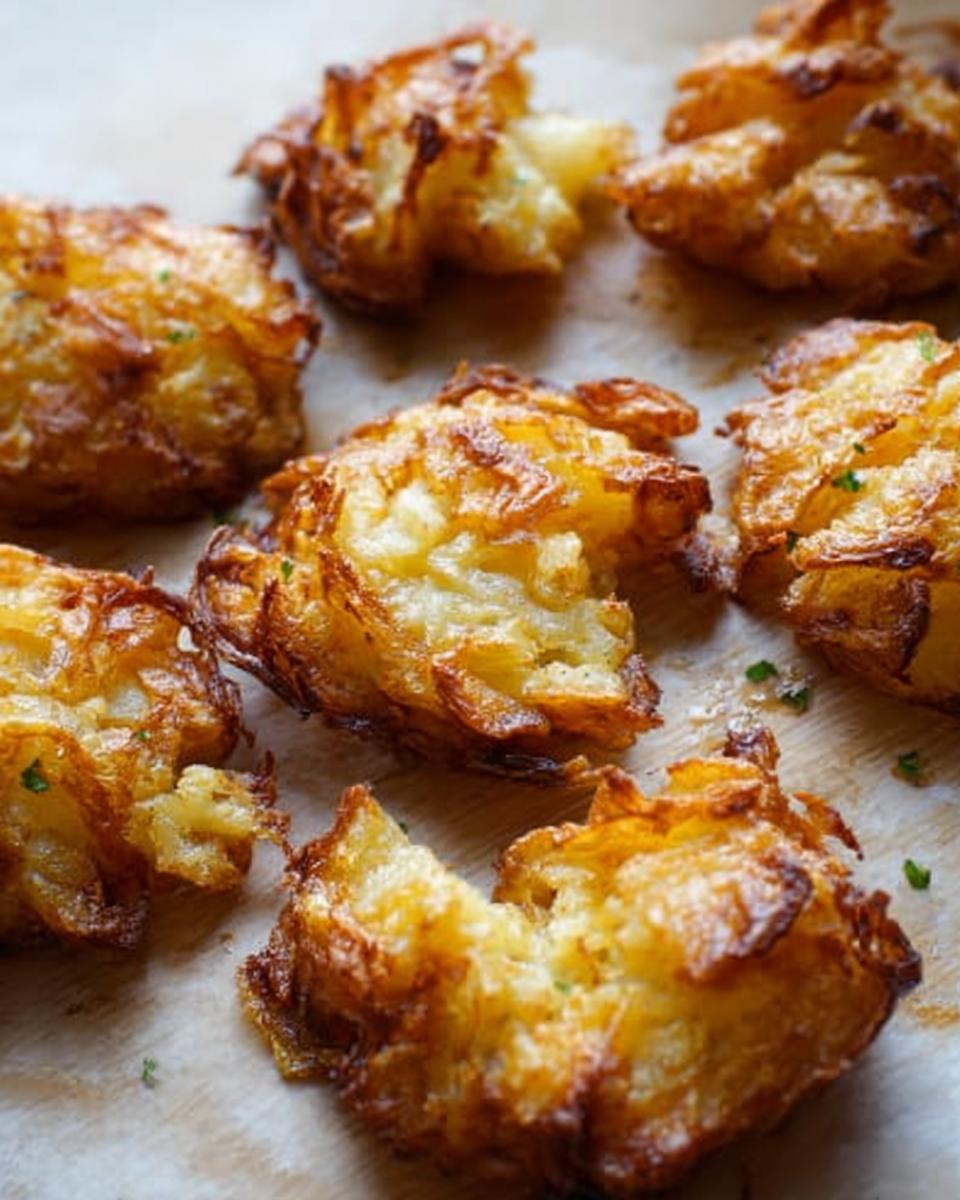
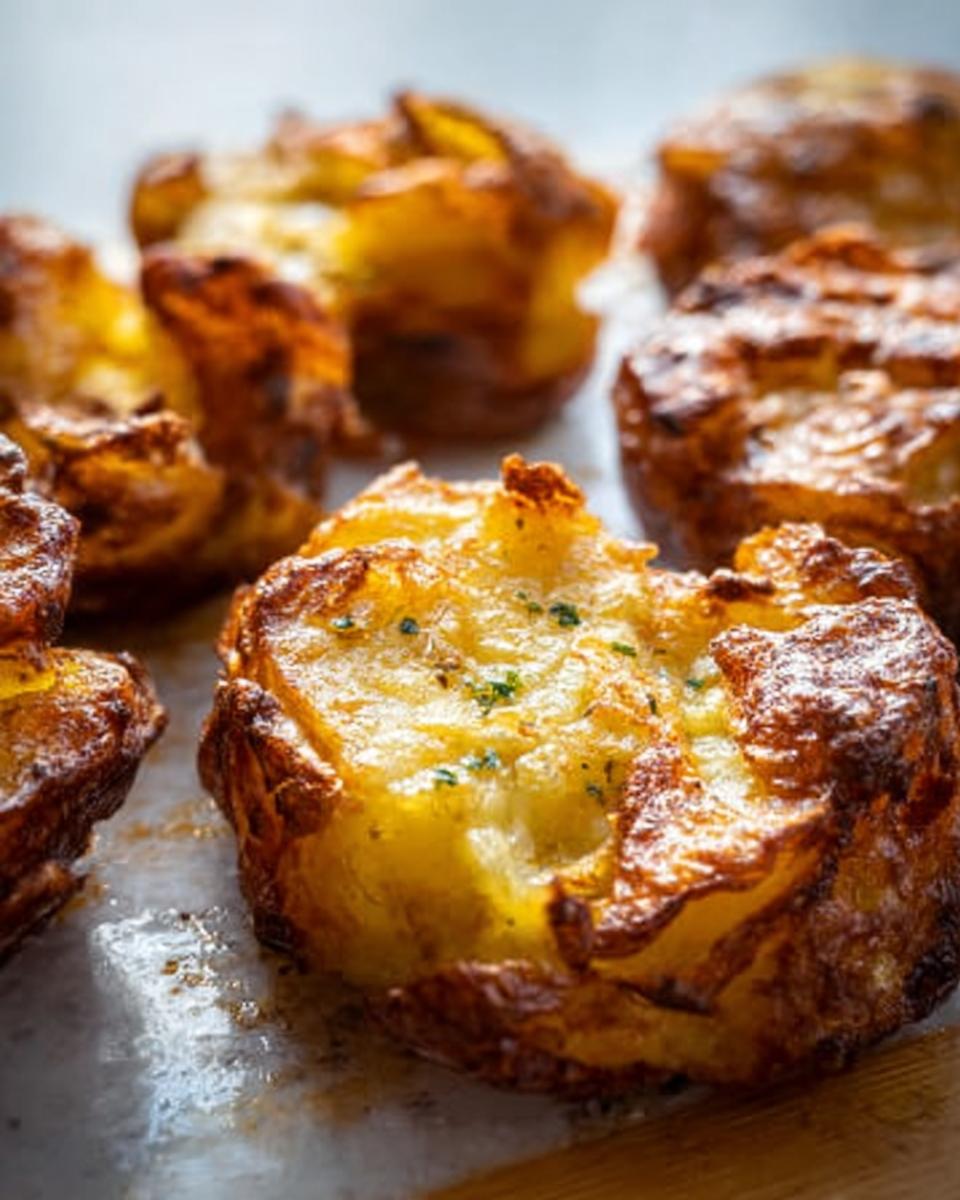
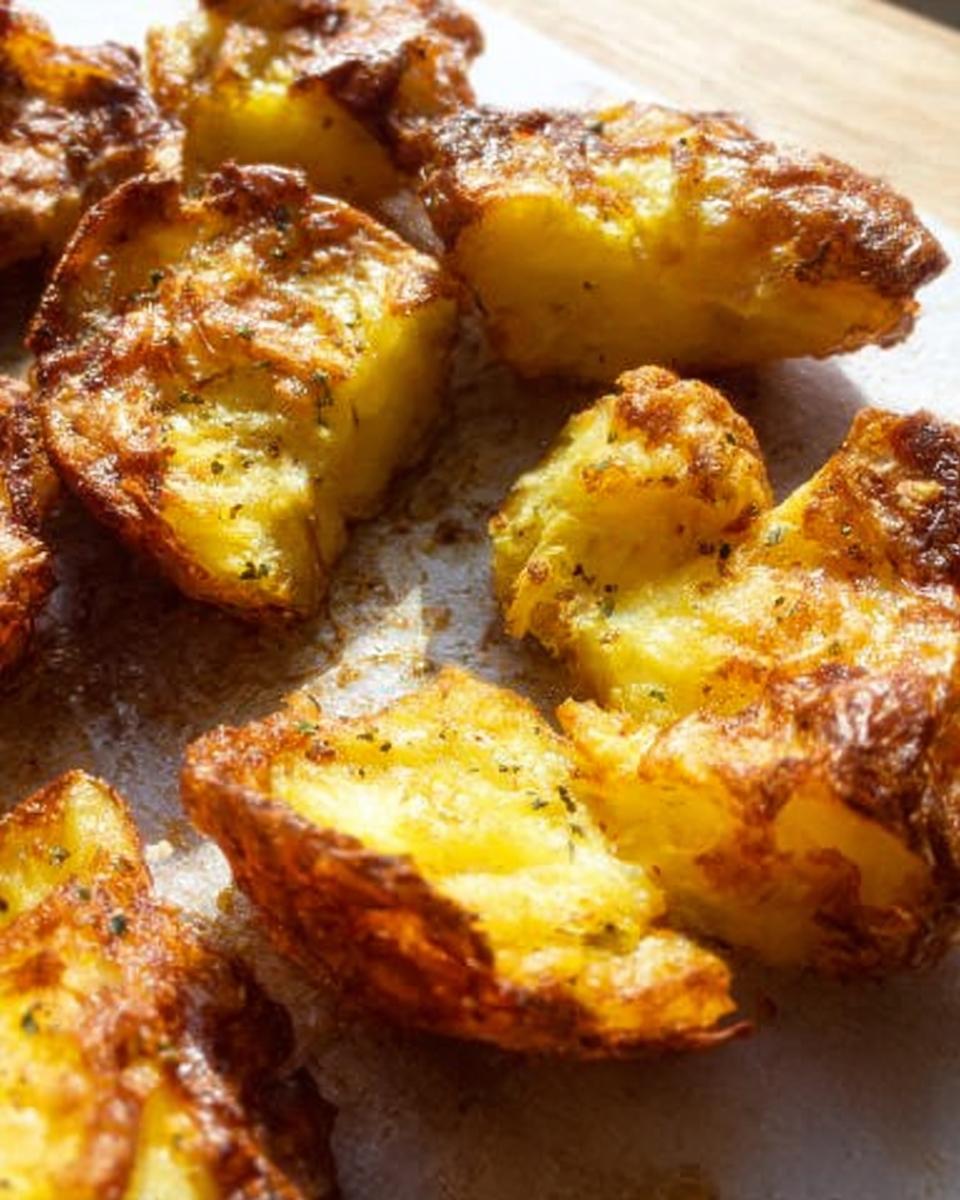
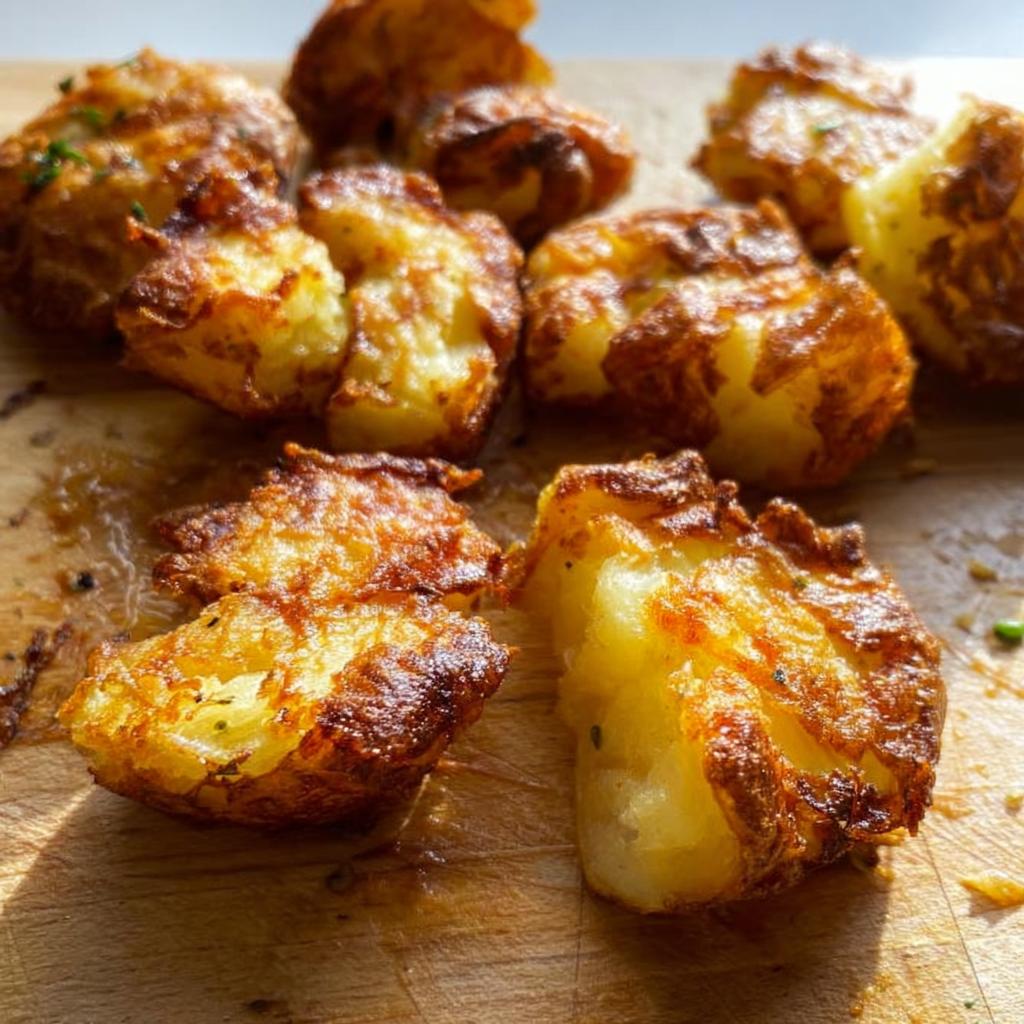
Achieving Maximum Crisp Edges by Smashing
Once they’ve rested, spread your dry potatoes out on your baking sheet. Now, grab a sturdy fork or a masher, and gently press down on each potato. Don’t crush them into oblivion! You want to squish them until they are thin—maybe half an inch thick—but try to keep the smash mostly in one piece. The raggedy, uneven edges you create are exactly what catches the heat and turns wonderfully golden brown. Immediately after smashing, let them sit on the open sheet for another 5 minutes. Yes, another drying spell! This second bit of passive steaming ensures the insides are set before they hit the high heat.
Baking and Seasoning Your Crispy Smash Potatoes
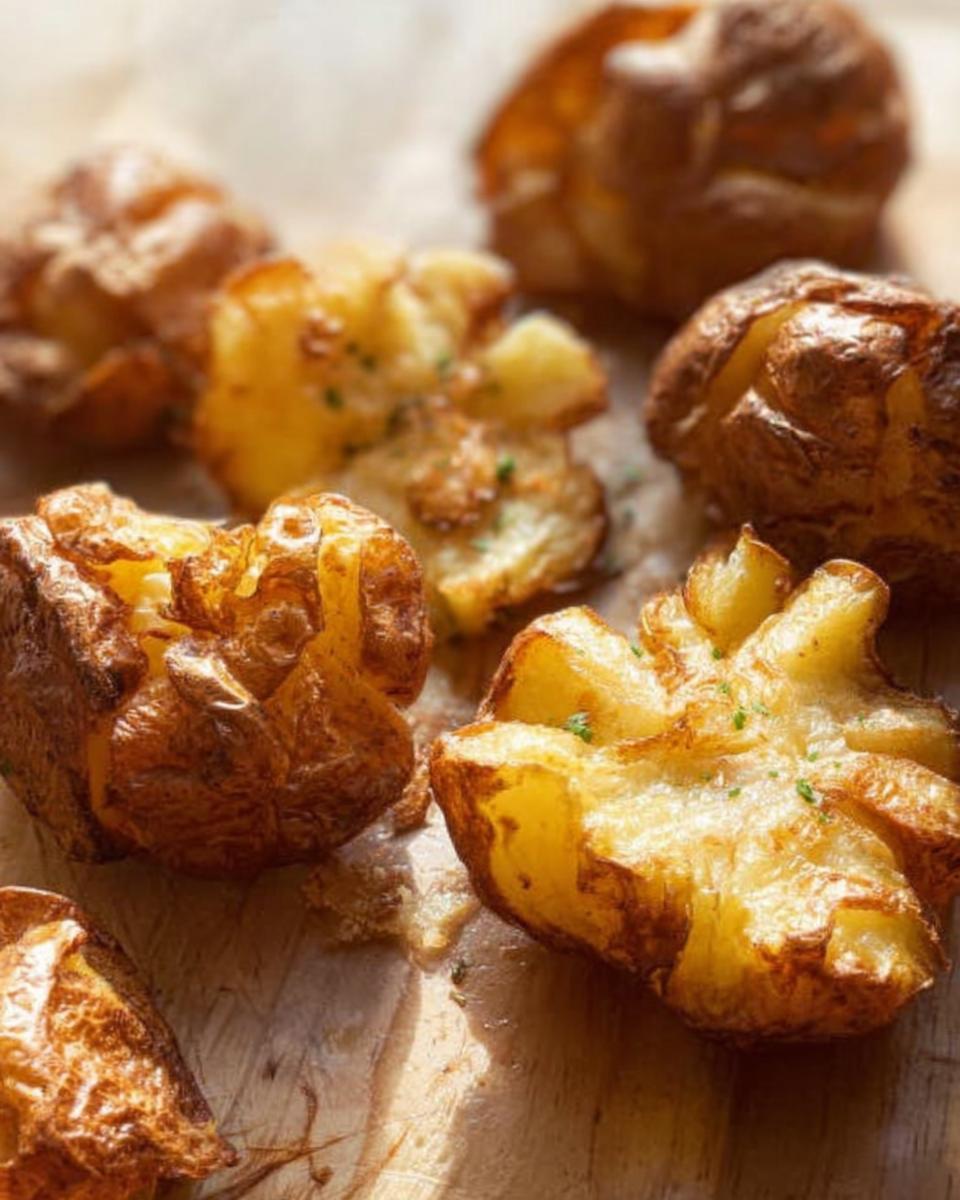
Time to dress them up! Drizzle everything evenly with your melted butter and then your olive oil. Sprinkle generously with your salt and pepper. Now, pop them into a preheated oven set to a nice hot 200°C (390°F). Listen closely: Do NOT flip these things until it’s time to serve! Flipping them messes up the perfect crust forming on the bottom. Bake them for 45 minutes for small potatoes, or plan on 55 minutes if you went with the larger ones, until the edges are deep golden brown and truly crispy. If you want to see a great example of roasting techniques, check out this resource on roasting!
Tips for Success with Crispy Smash Potatoes
So, you’ve followed the boiling and smashing, but you want that foolproof guarantee? I’ve got a couple of extra tricks up my sleeve that my mom taught me years ago. The most important thing, honestly, besides the double-drying period, is making sure your baking sheet is hot before those potatoes even land on it. If you have time, put the sheet in the oven while it preheats!
Also, let’s talk about flavor infusion. If you want a serious garlic kick without worrying about burning the garlic bits, melt your butter with the garlic cloves first—just let them infuse gently, then scoop the cooked garlic bits out! That gorgeous, seasoned fat is what gives you that incredible flavor. For more on making sure your recipe ideas always turn out perfectly, check out my thoughts on what makes perfect dinner ideas.
Finally, give them space! Don’t overcrowd that pan. If the potatoes are touching, they steam instead of crisping. If you have too many, use two baking sheets. Seeing those separated little golden nuggets is the key to amazing **Crispy Edges**!
Toppings and Seasonings Ideas for Your Crispy Smash Potatoes
Now that you have achieved crispy perfection, the next thrilling step is deciding how to dress these beauties up! Because these **Crispy Smash Potatoes** are savory and incredibly crunchy, they handle heavy toppings really well. Don’t feel like you have to stick to just salt and pepper, even though that’s utterly delicious on its own!
If you’re looking to dial up the flavor profile, I always suggest a little smoked paprika mixed right in with your butter drizzle—it gives them this gorgeous reddish hue and a smoky depth that mimics outdoor grilling. Another winner is a simple garlic powder and onion powder blend dusted on right after they come out of the oven.
For those of us watching carbs, skip the traditional sour cream and pile on some full-fat Greek yogurt mixed with fresh dill and chives. It gives you that cool tang without the sugar hit. For even more fast flavor ideas that won’t take all day, check out my list of 5 ingredient dinner ideas!
Honestly, once they are this crispy, they barely need anything, but a little extra love never hurt anybody!
Storage and Reheating Instructions for Crispy Smash Potatoes
It feels like a tragedy when you have leftovers of something this perfectly crisp, but don’t worry! We absolutely can save these babies for another day. The absolute number one mistake people make when storing potatoes is popping them straight into an airtight plastic container while they are still warm—you’re basically guaranteeing a soggy mess, and nobody wants that tragedy.
If you have any leftover **Crispy Smash Potatoes**, let them cool completely on a wire rack first. This lets any residual steam escape rather than getting trapped against that beautiful, crunchy skin. Once totally cool, store them in a regular loosely covered container in the fridge for up to three days. Don’t seal it tight, okay?
Now, for the crucial reheating part! You CANNOT use the microwave. Seriously, don’t even try it—it turns them into mushy blobs. The secret to bringing back that fantastic crunch that makes them such an easy side dish is high, dry heat. Pull them out of the fridge about 15 minutes before you plan to reheat.
Set your oven to about 400°F (200°C). Lay the potatoes out on a baking sheet again—they shouldn’t be touching, just like the first time! Pop them in for about 8 to 10 minutes.
If you happen to have an air fryer, that is your absolute best friend for revitalization. Toss them in the basket (in batches, if necessary) at 375°F for about 5 minutes. They come out practically flash-fried and perfectly crisp again! This meal prep trick makes them a wonderful option even on busy weeknights. For more tips on making your favorite meals work for busy schedules, check out my guide on meal prep-friendly dinner ideas!
Frequently Asked Questions About Crispy Smash Potatoes
Whenever I share this recipe, people always have the same few burning questions about getting that perfect texture! It’s totally normal—achieving peak crispiness takes just a tiny bit of technical know-how, but once you know the trick, you’re golden. These **Smashed Potatoes** really are so versatile, but let’s tackle those common hurdles right now!
How do I guarantee maximum crispy edges on my Smashed Potatoes?
If you want those incredible **Crispy Edges**, you simply cannot skip my two drying steps! You must let them steam dry after boiling for 5 minutes, and then again for 5 minutes right after you smash them. Also, make sure your oven is screaming hot—the higher the temperature, the faster those edges crisp up instead of steaming. Don’t be shy with the oil and butter on the surface either; that is your crisping agent!
Are Crispy Smash Potatoes suitable as an Easy Side Dish for weeknights?
Believe it or not, yes! While the total time is about 75 minutes, most of that is hands-off baking time. The prep is super quick—maybe 10 minutes of boiling and 5 minutes of smashing. If you boil the potatoes right after work, you’ve got a spectacular **Easy Side Dish** on the table in under an hour. They make weeknights feel way fancier than they really are!
Can I use a different cooking method besides Oven Baked for these potatoes?
You absolutely can experiment! While this recipe is perfected for the **Oven Baked** method because an open sheet gives you maximum surface crisping, the air fryer is a very close second. If you use the air fryer, remember to cook them in smaller batches so they aren’t touching. They cook a bit faster in the air fryer than in the oven, so watch them closely! For more quick solutions, always check out my guide on quick weeknight dinners!
Do you have a variation that works great for you? Let me know in the comments!
Share Your Crispy Smash Potatoes Experience
Well, friends, that’s it! You now have the absolute secrets to making those stunning **Crispy Smash Potatoes**. Seriously, they are my go-to comfort fix, especially when I need something super satisfying but straightforward.
Now that you’ve tried the technique—remembering that delicate smash and those crucial drying periods—I need to hear all about it! Did your edges get extra golden? Did your family devour them faster than you could plate them up? Please, don’t be shy!
Head down to the comments below and leave a little rating for me. Tell me how they turned out, and if you tried any amazing toppings—maybe you invented a new keto-friendly dust I haven’t thought of yet! Sharing tips is what makes our cooking community so special. I love seeing your beautiful results. For more incredibly crispy and juicy ideas for your next night, you absolutely have to check out my best dinner ideas for 2025!
Happy smashing, and thank you so much for cooking with me!
Crispy Smash Potatoes
Ingredients
Equipment
Method
- Boil the potatoes: Bring a large pot of water to a boil. Add 1 tablespoon of salt. Cook the potatoes until they are soft. Small potatoes will take about 20 to 25 minutes, and medium potatoes may take around 30 minutes. The skin may split, which is okay.
- Preheat your oven to 200°C (390°F), or 180°C (350°F) for fan ovens.
- Drain and dry the potatoes: Drain the cooked potatoes in a colander and let them air dry for about 5 minutes.
- Smash the potatoes: Place the dried potatoes on a baking sheet. Use a large fork or a potato masher to gently squish each potato, trying to keep them in one piece. Aim for thinness for crispier results or slightly thicker for fluffier insides. A more uneven surface will create better crunch.
- Steam dry again: Leave the smashed potatoes on the baking sheet to steam dry for another 5 minutes. This step helps them become crispier.
- Add fat and seasoning: Drizzle the potatoes with melted butter, then with olive oil. Sprinkle evenly with salt and pepper.
- Bake until golden: Bake for 45 minutes for small potatoes or 55 minutes for medium potatoes, or until they are deep golden brown and crispy. Do not flip them during baking.
- Serve: Serve the crispy smash potatoes hot. Sprinkle with chopped parsley if desired.