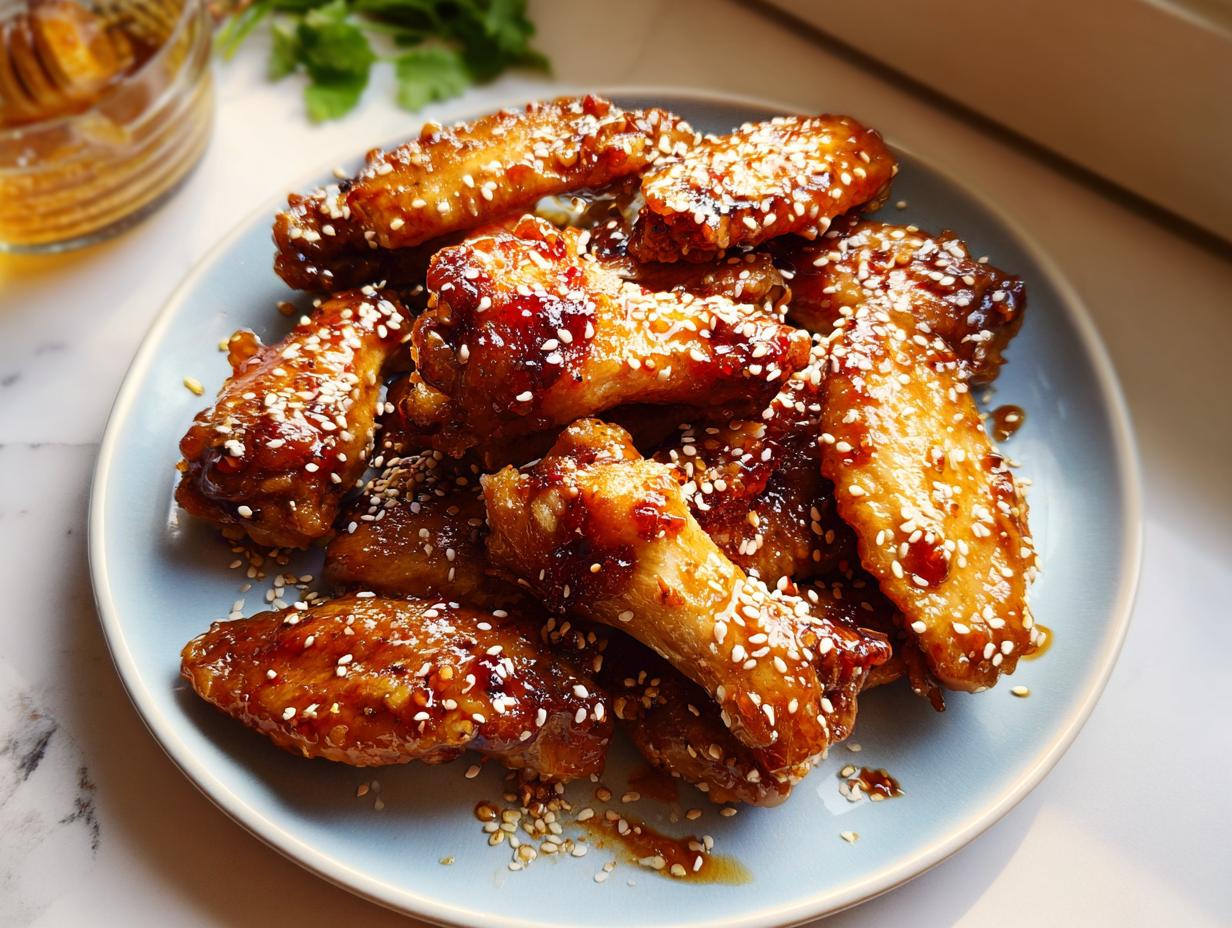
If you need a dish that tastes like pure indulgence but is surprisingly easy to pull off, stop looking right now. We’re talking about the ultimate Honey Garlic Sticky Chicken Wings. These aren’t your weak, watery wings; these are coated in a thick, super glossy, perfectly balanced sauce that screams crowd-pleasing appetizers. I still remember the first time I made these for a family get-together. I was nervous about keeping things keto-friendly, but watching everyone grab seconds—that sticky glaze coating their fingers—I realized joy and healthy eating can totally hang out together!
Trust me, after you taste this sweet and savory perfection, you’ll be making them weekly. I’m Mark Williams, The Keto Performance Chef, and this recipe is a weeknight winner. Ready to get sticky?
Why You Will Love These Honey Garlic Sticky Chicken Wings
Honestly, these wings shoot straight to the top of my favorite recipes list every single time. It’s not just about the taste, though that sticky wing sauce is killer! Here’s why you absolutely need these in your rotation:
- They are pure, unadulterated comfort food made simple. Seriously, the prep time is nothing!
- That flavor hits all the right spots—perfectly balanced sweet and savory goodness in every single bite.
- They are designed to be crowd pleasing appetizers; people grab these first at any party!
- We use a simple flour dust that helps these wings get genuinely crispy in the oven, no deep fryer required.
- The recipe is super flexible, making it easy to scale up if you have a massive game day crowd showing up.
- It’s a low-stress recipe! Once they’re baking, you just focus on making that amazing sauce. You can check out more of my go-to recipes right here.Click here for more awesome eats!
Essential Ingredients for Perfect Honey Garlic Sticky Chicken Wings
The best part about this recipe being a huge hit is that you probably have most of this stuff sitting in your pantry already! There’s nothing fussy here, which is exactly how I like my best crowd pleasing appetizers to be. We organize them into three quick groups: the wings themselves, the star of the show (that sticky wing sauce!), and the little extras for flair.
For the Chicken Wings
Getting the wings right at the start is crucial. Remember what I said about crispy? That starts here. Make sure those wings are bone dry before they see any flour!
- 2 1/2 Pounds Chicken Wings (That’s about 24 pieces, give or take!)
- 1/4 Cup Flour or Gluten-Free Flour (Your choice here, it just helps grab the crisp!)
- Sea Salt, to taste
- Black Pepper, to taste
- Olive Oil or Avocado Oil Spray (Gotta give them a light coat!)
For the Sticky Wing Sauce
This is where the magic for the sweet and savory happens. That little bit of starch at the end is super important—it turns runny liquid into that glorious, thick coating that sticks right to the wing and doesn’t drip everywhere!
- 1/2 Cup Honey
- 1/3 Cup Soy Sauce or Coconut Aminos (Use coconut aminos if you need a lower-carb option!)
- 4 Cloves Garlic, mashed until it’s practically paste
- 2 Tablespoons Ginger, grated fresh is always best for that zing
- 1 Tablespoon Tapioca Flour, Arrowroot Starch, or Corn Starch (This thickens the amazing sticky wing sauce!)
- 1/2 Teaspoon Crushed Red Pepper Flakes (Just enough heat to cut the sweetness.)
For Garnishing
These are purely for looks, but wow, they make a difference when you put them on the platter. Totally optional, but hey, why not make them look restaurant-worthy?
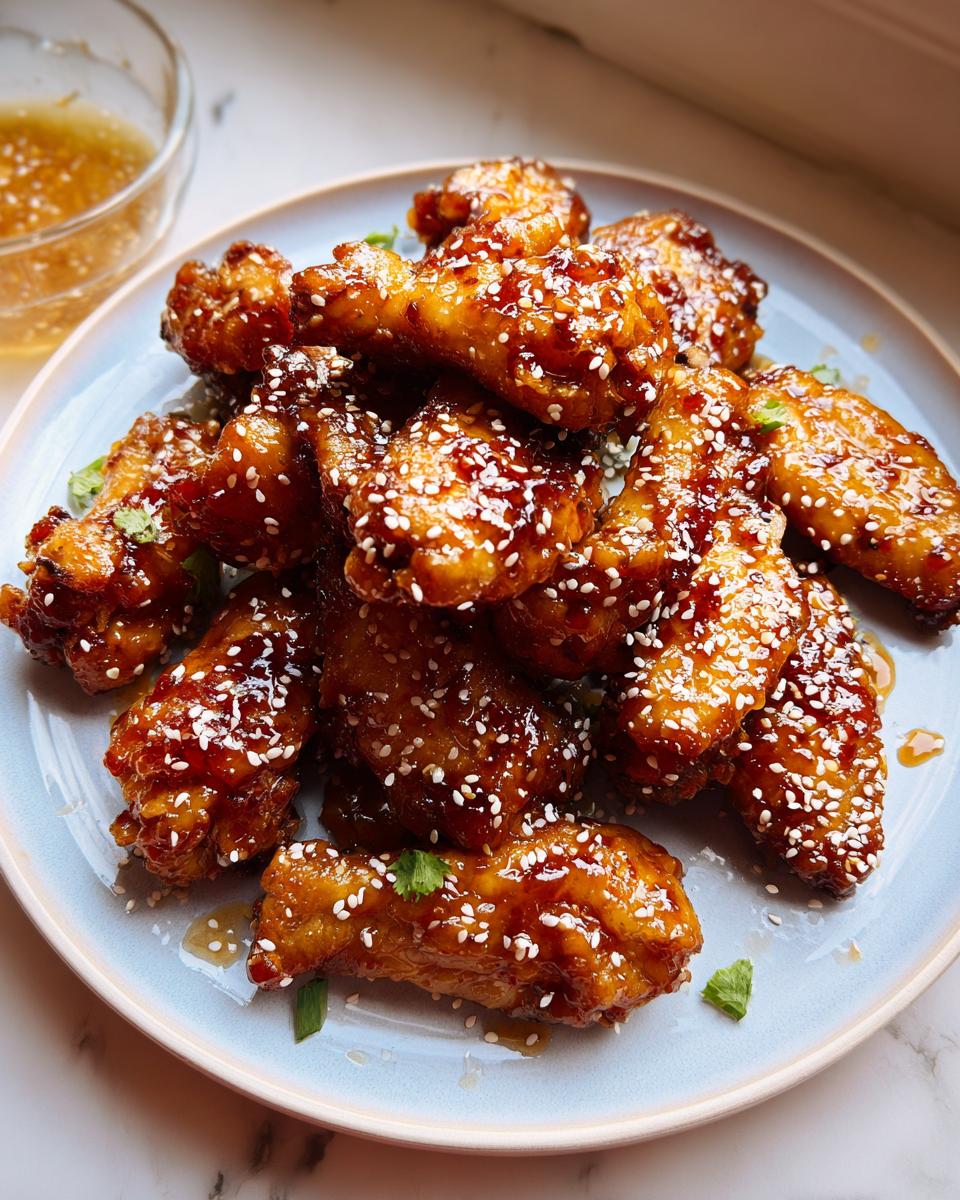
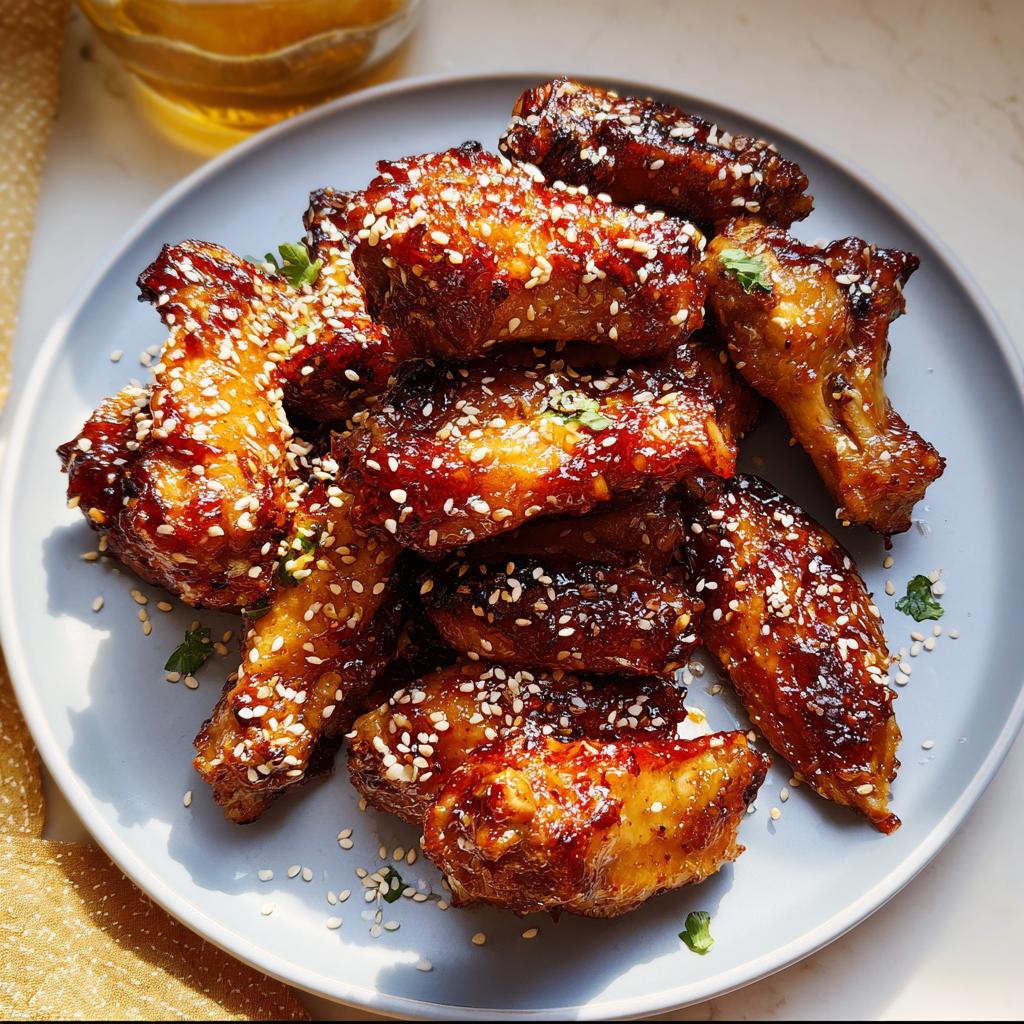
- 1 Tablespoon Sesame Seeds (optional)
Expert Tips for Crispy Honey Garlic Sticky Chicken Wings
Listen, achieving that beautifully crispy skin without deep frying takes a couple of little secrets, but they are so easy to master. I want your honey garlic wings to have that perfect snap before they get smothered in the sticky wing sauce. These are the things I learned hanging over the oven, tweaking the settings until I got it just right.
Drying is Non-Negotiable for Crispiness
If you take one thing away from my entire blog, let it be this: Wet chicken wings steam, and steamed wings never get crispy. Before you even think about tossing them in flour, grab a huge pile of paper towels and pat every single wing until it feels dry to the touch. I mean it—get them bone dry. Doing this makes sure that little bit of flour actually adheres and creates that slight barrier that crisps up beautifully in the heat.
The Power of the Double Bake and Broil
We use a two-part heat strategy here. First, that slow bake time at 425°F gets all the internal fat rendered out slowly so the meat cooks perfectly. Then, we introduce the broiler. This is the secret weapon! You only want 2 minutes under the broiler, but you have to stand right there. Seriously, don’t walk away, or you’ll go from perfectly browned to charcoal real fast. That blast of top heat gives the skin that final, coveted texture. If you want to dive deeper into general crispy wing methods, I wrote a whole guide on baking wings until they squeak!
Baking Sheet Setup Matters
Don’t overcrowd your baking sheets! This prevents air from circulating around the wings, which means they steam again instead of crisping. If you have to use two sheets, use a second rack position, or just bake in batches. I always line my sheets with foil first for easy cleanup, and then parchment paper or a wire rack on top. A wire rack allows heat to hit the bottom of the wing, giving you crust all the way around. For an interesting take on timing, check out this external resource on wing baking.Look here for more wing inspiration!
Step-by-Step Instructions for Honey Garlic Sticky Chicken Wings
Alright, let’s get cooking! This process is broken down into three main parts: prepping the wings, making that unbelievably good sauce, and then bringing them together for the final sticky finish. Don’t let the steps intimidate you; it’s truly straightforward once you get moving. Grab your baking sheet and that saucepan, because we’re turning simple ingredients into the best honey garlic wings you’ve ever had!
Preparing and Baking the Chicken Wings
First things first, get that oven heated up. We need it screaming hot at 425 F to start drying out the skin proper. Remember that patting them dry tip? Do that now! Then, get a big bowl. Toss those dry wings with your flour, salt, and pepper until every single piece is lightly dusted. Shake off any major clumps—we want coating, not blobs!
Spread them out on your lined baking sheet. Make sure there’s some space between them so we don’t steam them! Give them a light spray with oil—just enough to help that coating brown up. Into the oven they go for 30 minutes. After that time, flip every wing gently, spray again if they look dry, and bake for another 20 minutes. The wings should be golden by the time this initial bake is done.
Making the Sweet and Savory Sticky Wing Sauce
While the wings are doing their thing in the oven, we whip up that famous sticky wing sauce on the stovetop. I use a small saucepan over medium heat. Just dump in the honey, soy sauce, the mashed garlic, grated ginger, your choice of thickener (starch!), and those red pepper flakes. Give it a solid whisk!
You need to keep stirring this for about 6 to 7 minutes. Watch it closely! You’ll see it start to bubble, and then it will visibly thicken up. Once it coats the back of a spoon nicely, yank it right off the heat. If you leave it cooking too long, it will seize up later, so trust me here—take it off when it’s thick, then set it aside to wait for the wings.
Finishing Your Honey Garlic Sticky Chicken Wings
This is the grand finale! While your wings are in their last 20 minutes of baking, go ahead and turn on the broiler. Once those wings come out looking golden brown, slide them right under that broiler element for just 2 minutes. I mean it, 2 minutes! Watch constantly; they’ll brown up fast. Immediately pull them out.
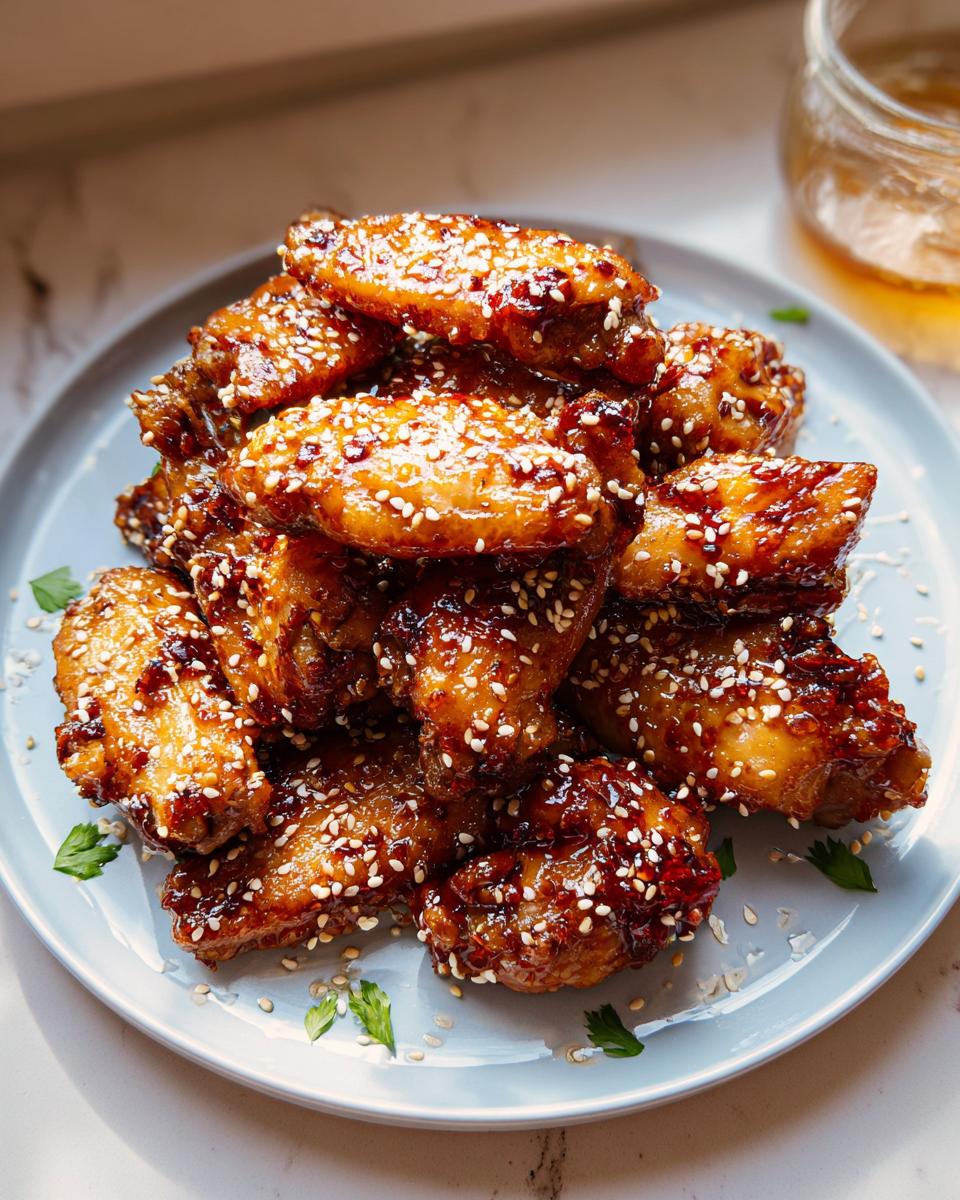
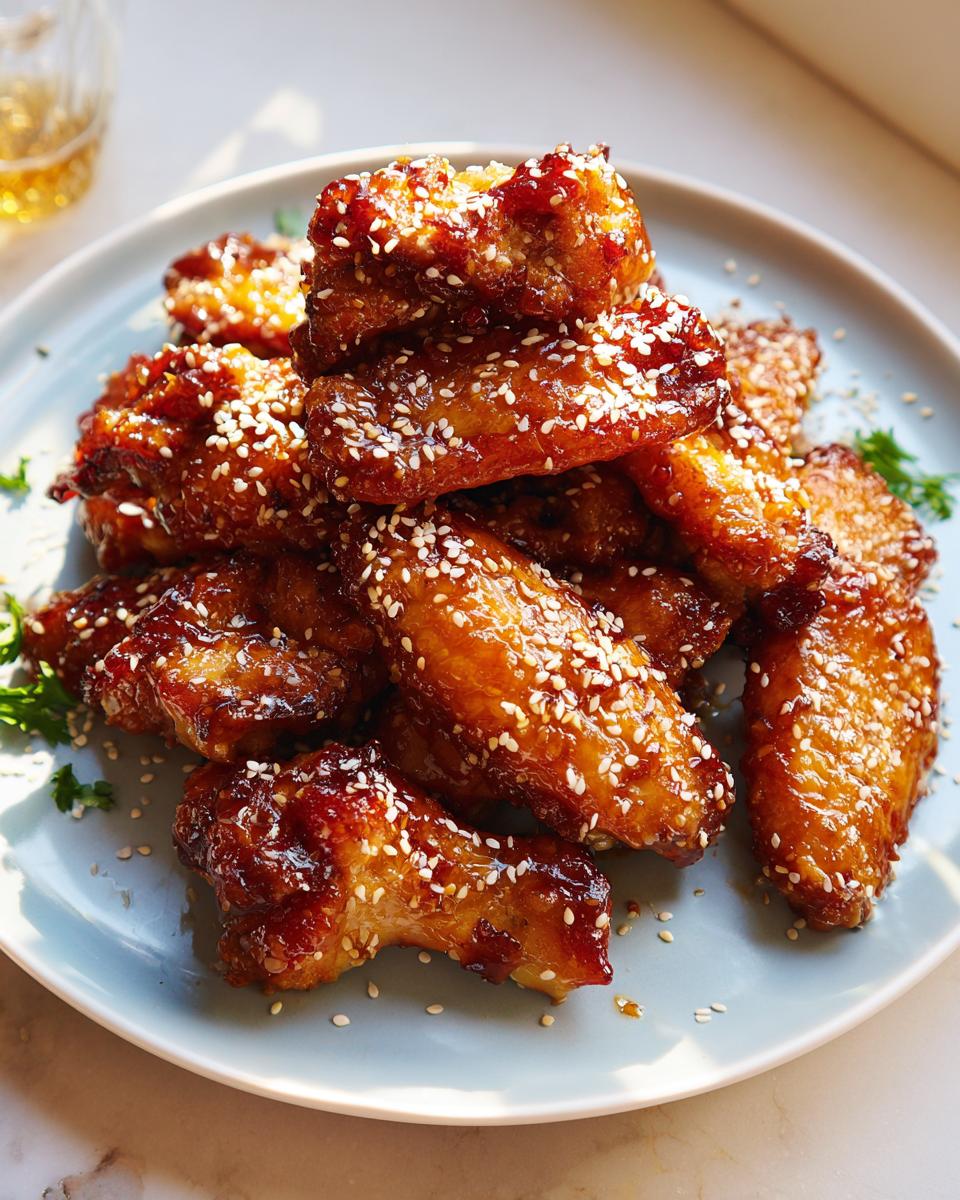
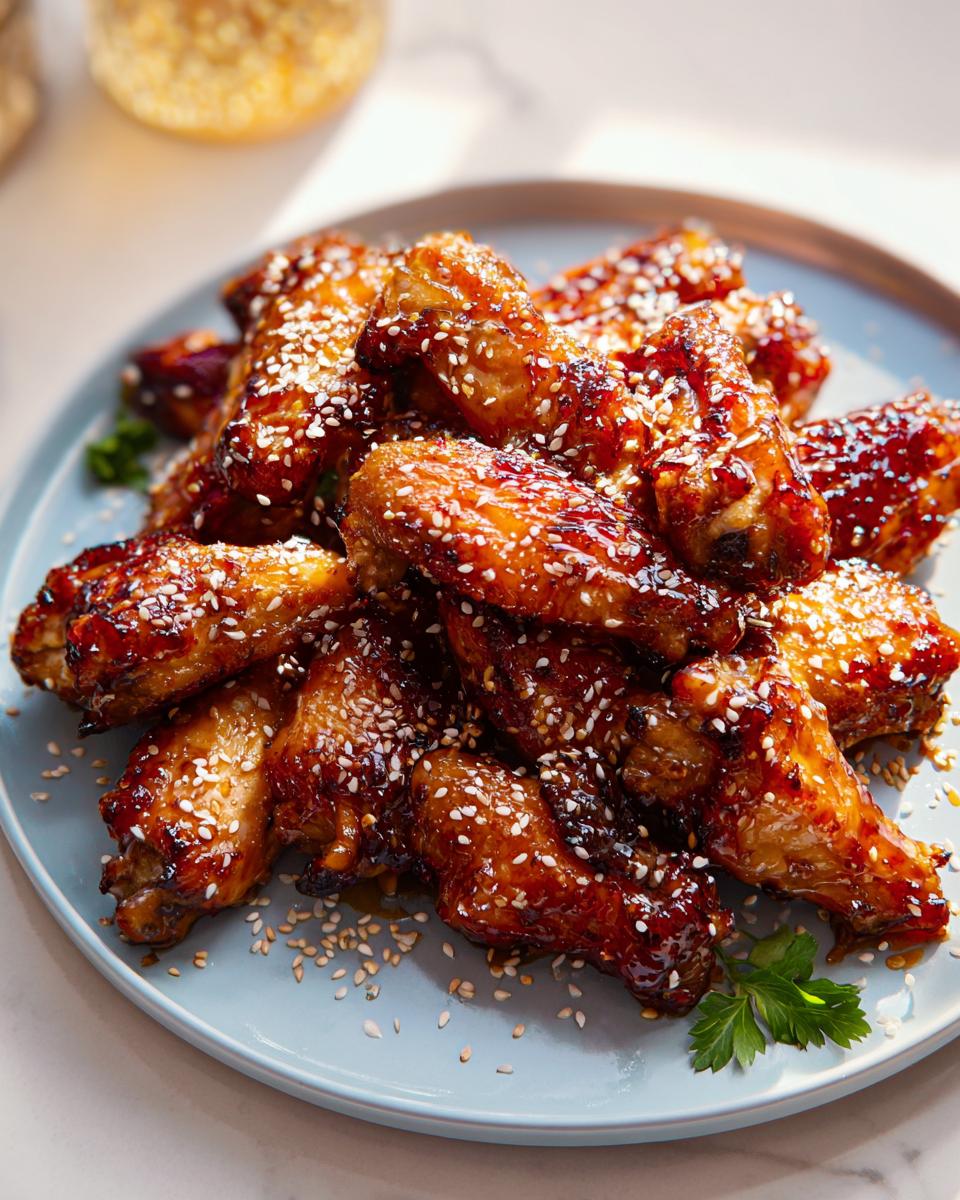
Now, work fast! Take your hot wings and drop them right into a large bowl. Pour that gorgeous, thick, sticky wing sauce right over the top. Use tongs or even clean hands to toss everything until every morsel is coated. If you’re feeling fancy, sprinkle those sesame seeds over the top before plating. Serve ‘em hot while they’re messy and delicious!
Ingredient Notes and Substitutions for Honey Garlic Sticky Chicken Wings
I know sometimes you hit the pantry and realize you’re missing one tiny thing. Don’t panic! That’s the beauty of cooking at home—you can usually swap things out, especially in a sauce. I’ve adjusted this recipe a few times when I’ve been in a pinch, and they still turn out amazing. The integrity of these honey garlic wings relies on a couple of key components staying true, but we have wiggle room elsewhere.
Thickening Agents: Starch is Your Friend
When we talk about getting that sticky texture, the starch is doing all the heavy lifting in the sauce. You’ll notice I listed three options: tapioca flour, arrowroot starch, or corn starch. They are pretty interchangeable here, but there’s a subtle difference.
- If you use Corn Starch, it gives you a really clear, glossy finish, which looks great under light.
- Arrowroot Starch is often my go-to for a slightly softer set, and it’s a great choice if you’re worried about too much chewiness.
- Tapioca Flour works really well for me, especially since I often make this recipe while trying to keep things relatively low-carb—it tends to thicken just a tad faster than the others.
Whichever you choose, use that 1 tablespoon measurement. Using too much, and your sauce becomes gluey; too little, and you just have sweet syrup instead of a proper sticky wing sauce!
The Soy Sauce Swap: Coconut Aminos Explained
Since I’m focused on keto-friendly eating most days, the sugar content in standard thick soy sauce can sometimes be a concern. If you are watching carbs or just prefer something less salty, swapping the soy sauce out for Coconut Aminos is a fantastic move. They have a very similar salty/umami profile, but they contain less sodium and generally less sugar than regular soy sauce.
If you use coconut aminos, you might notice the sauce is slightly sweeter than if you used regular soy sauce. That’s why I always keep the honey measurement exact. If you use regular soy sauce, you get a deeper, saltier punch, and if you use the aminos, you get something a little brighter. Both make perfect honey garlic wings!
Handling the Honey Measurement
Okay, this is the one thing I rarely mess with! Honey is essential for that classic flavor profile. If you absolutely must cut back on the sugar content, you could try cutting the honey down to 1/3 cup and adding a teaspoon of a keto-friendly liquid sweetener that measures like honey (like monk fruit blend). However, you lose that unique floral note that only real honey provides. Honestly, for a dish meant to be indulgent like these sticky wing sauce covered wings, I say use the honey!
Serving Suggestions for Honey Garlic Sticky Chicken Wings
You’ve mastered the bake, you nailed the sticky wing sauce, and now you have this incredible mountain of honey garlic sticky chicken wings. What do you serve them with? Since these wings are already the star of the show—and they are truly excellent crowd pleasing appetizers all on their own—you want sides that complement the intense sweet and savory flavor without competing too hard. When I serve these up, especially keeping it low-carb, I lean on things that offer a nice crunch or a bit of cooling contrast.
Keto-Friendly Vegetable Pairings
When you’re dealing with finger food this rich and saucy, you need something green and fresh on the plate to cut through it all! I always try to get some healthy veggies roasted up. Roasted broccoli tossed simply with a little salt and pepper works wonderfully because it gets slightly charred, matching the char on the wings.
If you want something equally fantastic but a bit brighter, try roasting up some asparagus. That little bit of earthy flavor paired under a sprinkle of Parmesan cheese is the perfect counterpoint to the sweet honey. I have a fantastic, quick recipe for that perfect roasted asparagus right here—it takes about 15 minutes total!
Cooling Sides for Balance
If you’re serving these wings as a main meal, a refreshing salad balances out the heaviness of the sticky coating. A simple mix of crisp romaine, cucumbers, and celery sticks works big time. You can dress it lightly with a vinegar-based dressing to keep things bright.
Another surprisingly great pairing? A creamy, cool dip! Think about a side of homemade ranch or blue cheese dressing. It’s perfect both for dipping the wings when you want extra richness, or for drizzling lightly over a side salad to cool down your palate. It’s fantastic for dipping carrot sticks or crunchy bell pepper strips if you’re looking for extra veg delivery systems!
Making Them the Centerpiece
If you are making these for a party, don’t stress about full sides! Just place those glorious honey garlic sticky chicken wings on a big platter, maybe scatter some extra green onions and those sesame seeds over the top, and watch them disappear. They really shine best when they are the main event, surrounded by simple things to grab, like a bowl of olives or some cubed cheese.
Storage and Reheating Honey Garlic Sticky Chicken Wings
It happens every time—you make a massive batch of these sticky wing sauce beauties for game day, and suddenly, you’re staring at a full container of leftovers meant for lunch tomorrow. Don’t toss them! Even though these are best fresh out of the oven with that crispy skin, we can bring them back to life. The main thing to remember is that the sauce will always taste spectacular, but the texture might soften a little bit after refrigeration, and that’s okay!
Storing Leftover Sticky Wings Properly
The secret to saving your honey garlic wings is making sure they are fully cooled down before sealing them up. If you put warm wings into an airtight container, the steam gets trapped, and you end up with soggy wings immediately. Let them sit out on the counter for about 30 minutes until they hit room temperature.
Then, transfer them into a good quality airtight container. You can put a paper towel on the bottom layer if you want, but honestly, in the fridge, they’ll be great for about three or four days. If you stack them too tightly, you risk smashing some of that sauce off, so try to layer them in a single layer if your container is big enough. Don’t even dream about leaving them out on the counter overnight—safety first!
Reheating Methods: Getting That Flavor Back
Okay, let’s talk about the ritual of reheating. You have a few paths you can take, depending on how much you care about trying to restore that original crispness versus just warming them up fast for a quick snack.
My absolute first choice, if I really want flavor without too much fuss, is the oven or air fryer. Pop them on a baking sheet—you might want to add a new piece of parchment paper if the old one has too much residual sauce goo—and heat them up around 350 F. An oven will take about 8 to 10 minutes, but the air fryer is faster, usually 5 or 6 minutes!
If you only have a microwave handy, you can use it, but I won’t pretend it’s the best choice for texture. The microwave heats them fast, and they’ll be piping hot, which is great if you’re starving, but you’re going to lose any remaining crispness. They will still be loaded with that incredible sweet and savory honey garlic flavor, though, and sometimes that’s all that matters!
Frequently Asked Questions About Honey Garlic Wings
I get so many fantastic questions about these wings, and honestly, I love hearing how people are adapting them for their own kitchens. Since these are meant to be such fuss-free, crowd pleasing appetizers, people want to know the shortcuts! Here are some of the most common things readers ask me about achieving that perfect sticky wing sauce and keeping things on track.
How do I make these honey garlic wings extra sticky?
If you want them ridiculously sticky, the secret is less about the sauce ingredients and more about what you do right at the end! You already added the thickener, which is step one for a good sticky wing sauce. For extra stickiness, make sure the sauce is simmering for the full 7 minutes until it’s thick but not hard. When you toss the baked wings in the sauce, do it immediately while both are hot. Then, run them under the broiler for just a minute or so *after* they are sauced—this caramelizes that sugar just a bit more, making it tacky and gorgeously glossy. That final blast of heat really locks in the stickiness!
Can I air fry these honey garlic wings instead of baking?
Yes, absolutely! Air frying is a fantastic shortcut, especially when you’re looking for speed. If you’re doing that, skip the flour toss for a moment. Just pat the wings dry, toss them lightly in a teaspoon of oil, salt, and pepper, and pop them into your air fryer basket. Cook them at 390 F for about 18–20 minutes, shaking halfway through. Once they look crispy, bring them out! Then, you treat them exactly as you would the baked wings: toss them in that amazing sauce, and you’re done. The air fryer is fantastic for getting that crunch!
Are these good keto honey garlic wings if I use coconut aminos?
Great question, because this is important for my performance chef crowd! Yes, these are absolutely wonderful as keto honey garlic wings, provided you make one key adjustment: You must swap the 1/2 cup of regular honey for a keto-friendly substitute that measures volumetrically like honey—about 1/3 cup of a liquid monk fruit or allulose blend works perfectly for me. Keep the soy sauce/coconut aminos the same, and use the corn starch/arrowroot for thickening.
If you keep the regular honey, they aren’t strictly keto, obviously, but they are definitely sweet and savory! I find the overall experience is still amazing, but if you’re tracking macros strictly, substitute that honey amount.
My sauce seems too thin after I take it off the heat! What happened?
Don’t worry, this is super common! When your sticky wing sauce is hot, it’s going to look looser than you want. As soon as it cools down even slightly, the starch you added starts setting up, and it thickens significantly. If you took it off the heat and it was way too runny, try putting it back on for just one more minute of gentle simmering. You want it coating a spoon, but still easy to pour. If it’s already sitting for 5 minutes and it’s just water, you can always mix 1 teaspoon of starch with 1 teaspoon of cold water (make a slurry!) and whisk that right into the warm sauce on low heat until it tightens up. That little trick is a lifesaver!
How many wings should I plan to buy if I need snacks for a big game (25 people)?
For party planning, I always tell people to budget for at least 6 to 8 wings per person if they are the main appetizer where people are really hungry, like for the Super Bowl! If you have a ton of other snacks available, you can probably stick closer to 5 per person. For 25 people, I’d calculate for 200 total surface area pieces to be safe, so you’ll definitely want to double or even triple this recipe, depending on what else you are serving. If you need ideas for dozens of other snacks that disappear fast, check out my list of 25 Best Crowd Pleasing Appetizers!
Share Your Honey Garlic Sticky Chicken Wings Experience
Well, that’s it! You’ve conquered the oven, you’ve mastered that thick, fabulous sticky wing sauce, and now you have a platter overflowing with the best honey garlic wings around. I truly hope you loved watching your family or friends devour every last one of these sweet and savory beauties.
This recipe means a lot to me because it proves that satisfying, indulgent food like this can absolutely fit into a healthy eating plan. It brings me so much joy to know I’ve shared something that can become a staple in your household for game days or just a Tuesday when you need a win!
Now, I want to hear from you! Did they come out crispy? Did you use corn starch or arrowroot for your sauce? How many times did you have to stop yourself from eating them all before the guests arrived?
Don’t be shy! Please drop a star rating below and leave me a comment telling me all about your experience making these. If you snap a picture of your masterpiece—all saucy and shining—tag me on social media! I love seeing my recipes out in the wild. Happy flapping!
Honey Garlic Sticky Chicken Wings
Ingredients
Equipment
Method
- Preheat your oven to 425 F.
- Dry the chicken wings well using a paper towel. This helps make them crispy.
- Add the dried wings to a bowl with the flour, sea salt, and black pepper. Toss each wing until it is fully coated in the flour mixture.
- Transfer the coated wings to a baking sheet lined with foil or parchment paper. You can layer foil first, then parchment paper. You might need multiple baking sheets depending on wing size.
- Spray the coated wings with oil. Bake them in the oven for 30 minutes. Flip the wings and bake for an additional 20 minutes.
- While the wings bake, prepare the sauce. Add all sauce ingredients to a small saucepan or pot on the stove.
- Heat the sauce mixture over medium heat, stirring for 6-7 minutes until the sauce thickens. Remove it from the heat and set it aside.
- After the wings have baked for 20 minutes, turn the broiler on for 2 minutes to get a brown color. Watch the wings carefully to prevent burning.
- Remove the wings from the oven when they are done.
- Pour the sauce over the wings. Use tongs or your hands to coat the wings evenly in the sauce.
- Top with sesame seeds if you want them, then serve.