If you think going hard on your low-carb journey means saying goodbye to rich, creamy desserts forever, think again! I’m Sarah Johnson, and trust me, the struggle to find satisfying treats is real. That’s why I’m so thrilled to share my absolute favorite go-to recipe: these incredibly easy Mini Cheesecake Bites with Berry Topping. They are perfectly portion-controlled, heavenly on the palate, and completely fit into a healthy lifestyle!
I still remember the day I hosted my first keto-friendly gathering after I transitioned to a low-carb lifestyle. As I prepared these mini cheesecake bites with berry topping, I was a mix of excitement and nervousness. Would my friends enjoy these treats as much as their traditional counterparts? To my delight, as I watched them savor each bite, their smiles revealed that deliciousness doesn’t have to compromise health. That moment not only reinforced my passion for creating satisfying keto recipes but also showed me how food can bring people together, proving that dessert can be both delightful and diet-friendly. You won’t believe how simple these individual treats are to whip up!
Why You Will Love These Mini Cheesecake Bites with Berry Topping
Honestly, when I first started testing these, I thought I’d have to sacrifice half the flavor to make them keto-friendly, but boy, was I wrong! These little guys are everything cheesecake should be: creamy, tangy, and just perfect. Trust me on this one; they are going to become a staple for your party dessert platters.
- They are genuinely portion-controlled! You get that full cheesecake hit without worrying about slicing up a huge 9-inch pan. Hello, bite sized desserts!
- No wrestling with slicing! Since these are individual individual treats, they are ready to go straight from the chiller to a plate.
- The texture in the filling is unreal—so smooth and dreamy, thanks to using room-temperature cream cheese.
- Preparation is so fast! Honestly, between the crust and the batter, you’re mostly just mixing, which I love on a busy day.
- They are amazing for making ahead. You bake them, chill them, and forget about them until you need them.
- The tangy berry topping cuts through the richness of the cream cheese perfectly. It’s balanced bliss!
Essential Equipment for Perfect Mini Cheesecake Bites with Berry Topping
Look, you don’t need a dozen fancy tools for these mini cheesecakes, but having the right basics makes everything cleaner. I use a standard 12-count muffin pan, obviously, and I always line it with paper liners—it saves so much scrubbing time later! You’ll need a mixer, a roasting pan for the water bath, and a cooling rack. That’s truly it for this bake!
Ingredients for the Crust and Filling of Your Mini Cheesecake Bites with Berry Topping
Okay, let’s talk ingredients! The amazing thing about these individual treats is that they use basic pantry staples. The secret to avoiding clumps or cracks often comes down to making sure your dairy is ready to go. Seriously, don’t rush the softening stage!
For the Crust
You only need three things here, and they come together in about two seconds. Grab 1 cup of graham cracker crumbs—that’s usually about eight full sheets, crushed up fine. Mix that with 2 tablespoons of granulated sugar and 3 tablespoons of unsalted butter that you’ve melted down. That’s it for the base!
For the Filling
This is where we create the magic! You absolutely must start with 16 ounces of full-fat brick cream cheese that has been softened completely to room temperature. We mix that with 1/2 cup of granulated sugar. Then, we add 1/4 cup of full-fat sour cream that is also at room temperature, 1 teaspoon of pure vanilla extract, and 1 teaspoon of freshly squeezed lemon juice for that perfect tang. Finally, gently mix in 2 large eggs, making sure they are also at room temperature!
Step-by-Step Instructions for Making Mini Cheesecake Bites with Berry Topping
This is where the magic happens! Don’t let the water bath part scare you; it’s just a little steam bath to make your mini cheesecakes super smooth. We are marching through this step-by-step, and you’ll have perfect little treats ready in no time. Remember, we are aiming for creamy perfection here!
Preparing the Crust Base
First things first, turn your oven up to 350°F (177°C). Get your 12-count muffin pan lined with liners—this is non-negotiable for easy removal! Then, just mix those crust ingredients until they look sandy. Scoop out a heaping tablespoon for each liner and press it down firmly with the back of a spoon. You need to compact it tight! Pop those crusts into the oven for 6 minutes just to set them up.
Creating the Creamy Filling
In your mixing bowl, beat that room-temperature cream cheese and the sugar together. You need to beat it hard on medium-high until it is just totally smooth—no lumps allowed! Then we add the cold stuff: sour cream, vanilla, and lemon juice. Mix until that’s combined. Now, the eggs go in one at a time. I mean it: one egg, mix just until it disappears, then the next one. If you beat too much air in here, that is how you get cracks!
Baking the Mini Cheesecake Bites with Berry Topping
Time for that steam! My little secret for success is setting up a water bath. Set a big roasting pan on the bottom rack first. Boil a kettle of water, then place your muffin pan on the center rack. Slowly pour that hot water into the bottom pan until it’s about an inch deep. Bake for about 20 minutes. You want the edges set, but the middle should have a tiny little wobble when you gently tap the pan. They will firm up as they cool, promise!
Cooling and Chilling
This is crucial! Don’t rush them out of the oven. Let the pan cool on the counter for a good 45 minutes. After that, you transfer them to the refrigerator to chill for at least 2 hours—or honestly, overnight is even better for that classic cheesecake texture. Need them fast? Pop them in the freezer for one hour, and they’ll be perfectly chilled and ready for topping!
Expert Tips for Perfect Mini Cheesecake Bites with Berry Topping
Even the best recipes can hit a little snag, right? Don’t stress if your tops sink a tiny bit after baking—it happens! That’s totally normal, even with the water bath, so don’t let it shake your confidence. The good news is that sinks make the perfect little valley for holding your berry topping!
My biggest piece of advice for getting that ultra-smooth texture, especially when making these bite sized desserts, is to use my mixer rule. Only mix the eggs until they are *just* combined. Over-beating the eggs is what introduces too much air, and that air rushes out while cooling, causing massive dips and cracks.
Also, make sure your ingredients are 100% room temperature. Seriously, this helps everything blend into a cohesive, velvety filling. If your cream cheese is cold when you start, you’ll spend three extra minutes scraping the bowl trying to smooth out impossible lumps. Be patient on the softening step!
Serving Suggestions for Your Mini Cheesecake Bites with Berry Topping
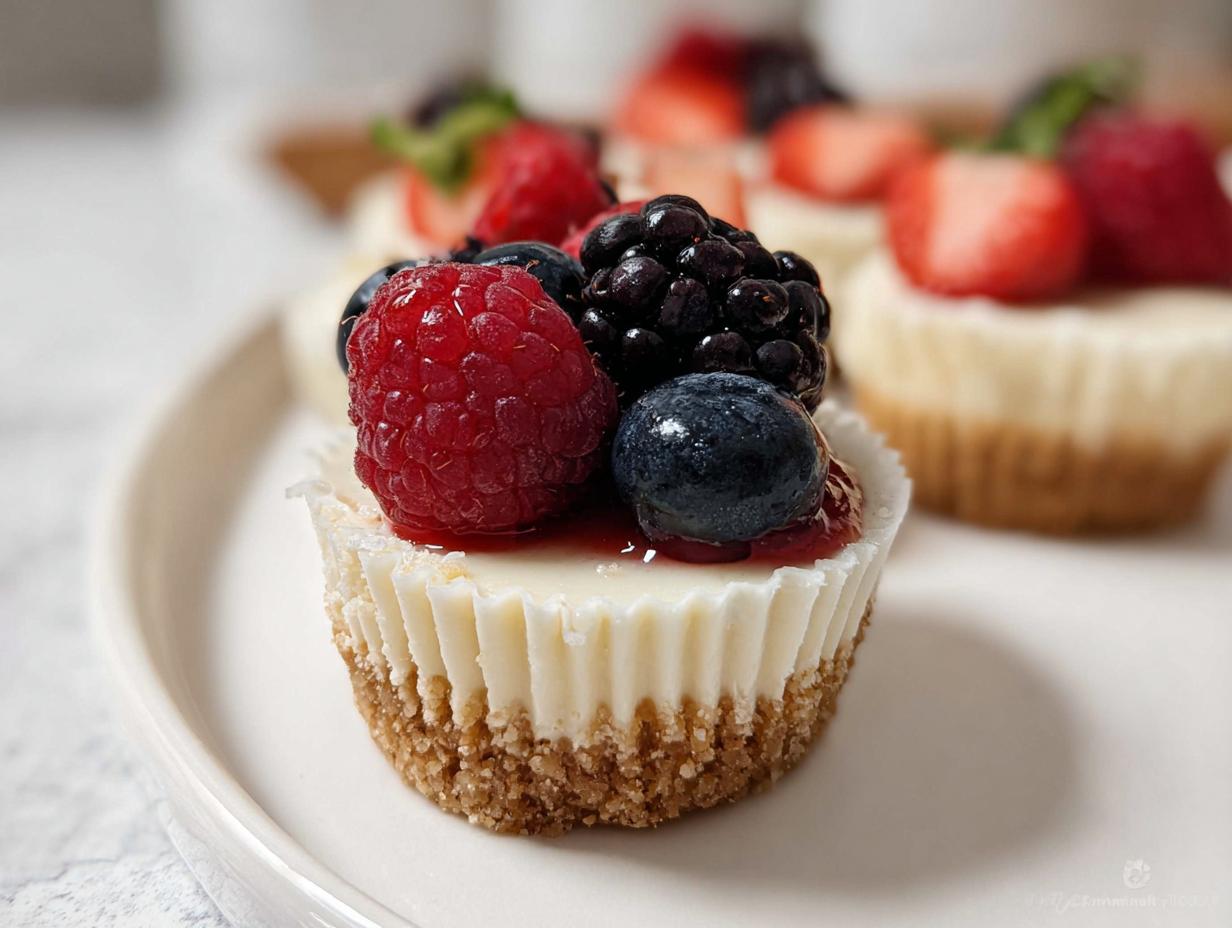
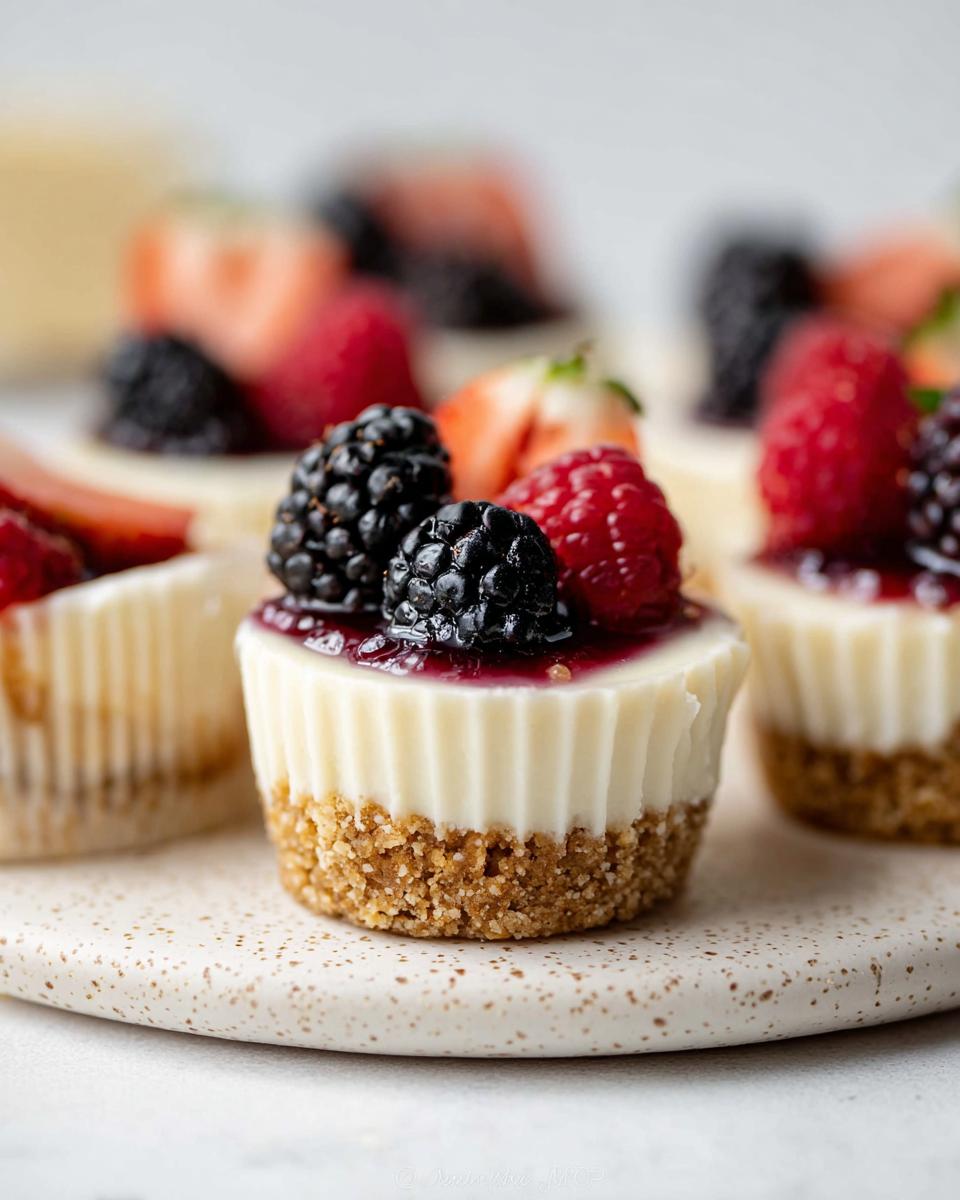
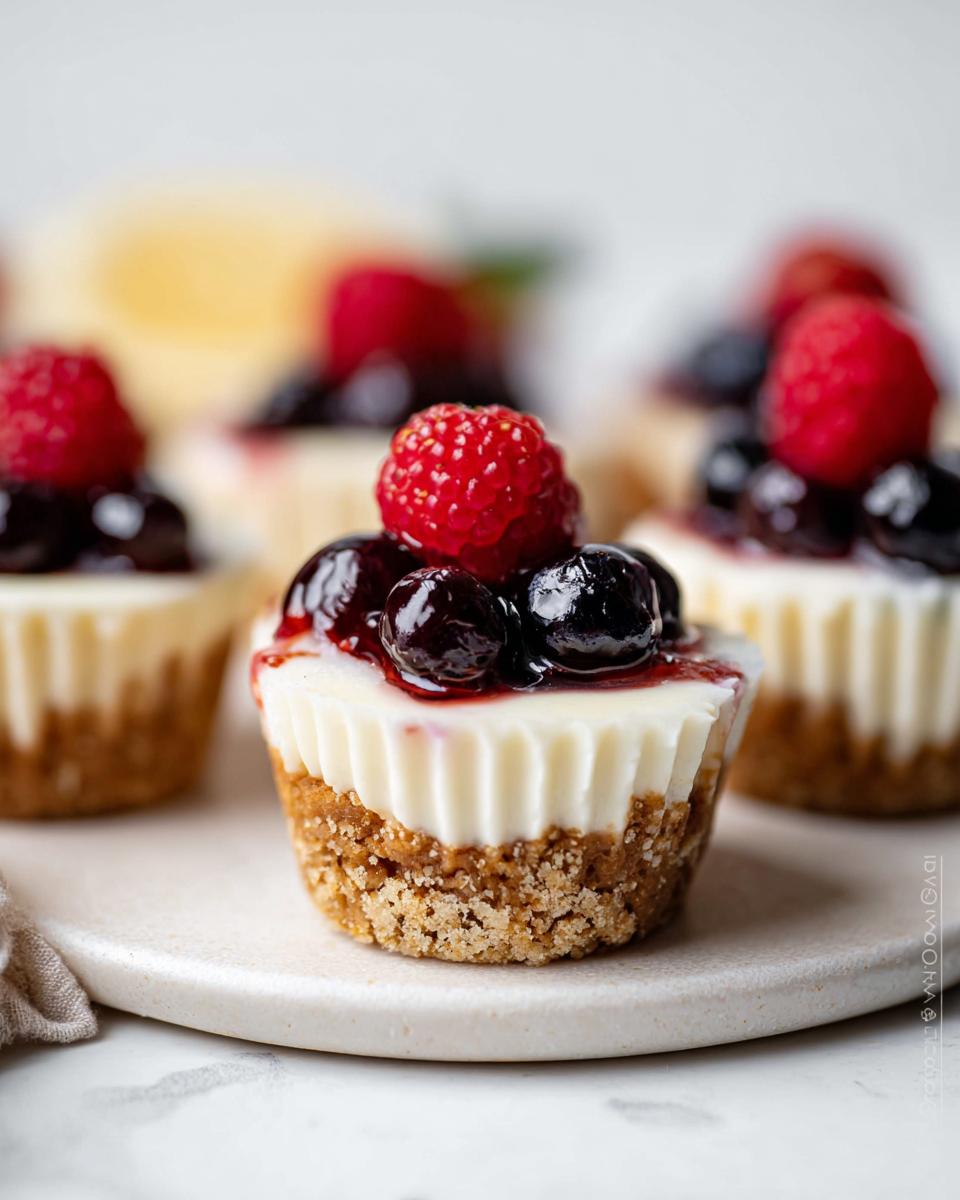
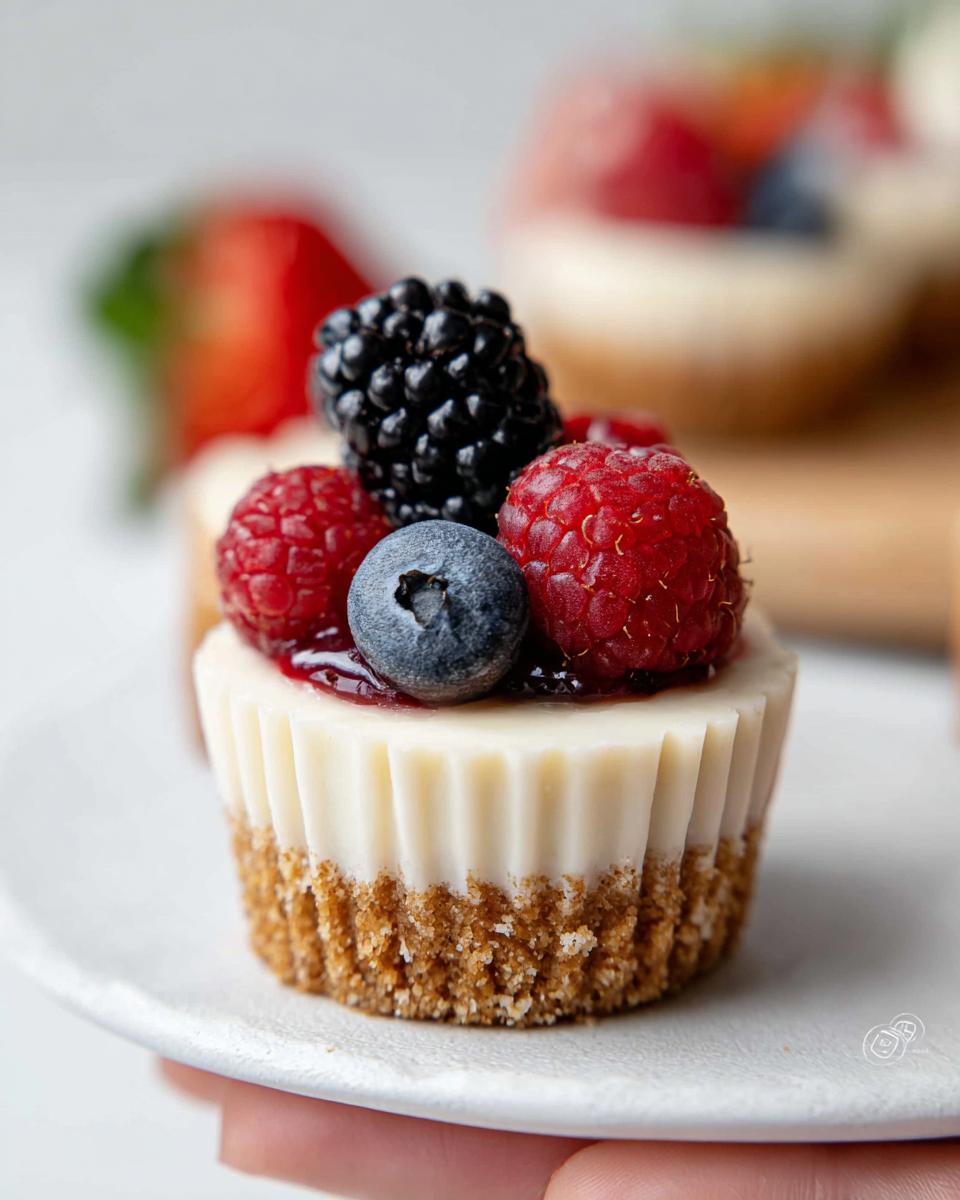
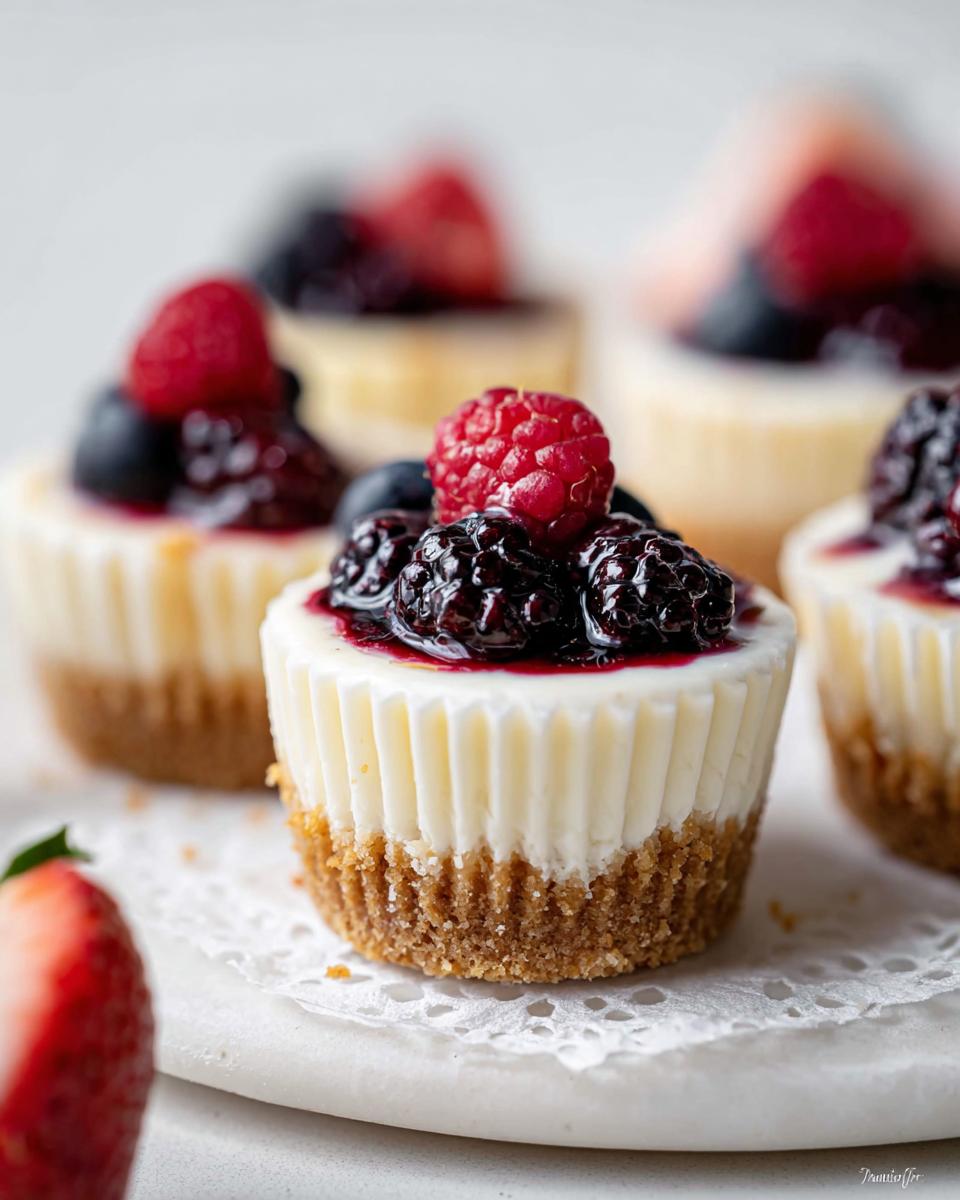
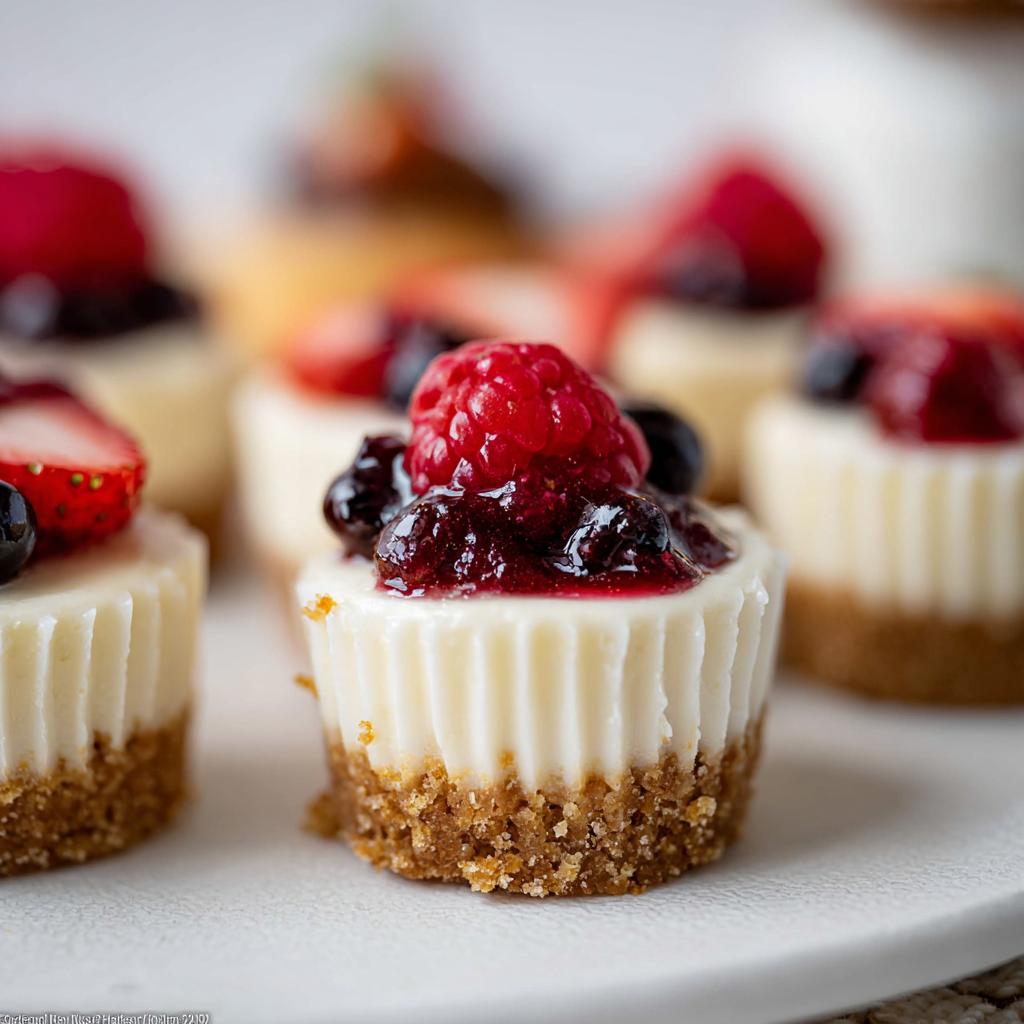
Okay, they are chilled, they are set, and now we make them gorgeous! This is when they transform from great individual treats into showstoppers. Once they are fully chilled, you can dollop on some piped whipped cream right in the center—it holds its shape beautifully!
Then, you absolutely need that berry topping. A simple swirl of mixed fresh berries, maybe a little mint leaf for color, and bam! They look professionally made. These look absolutely stunning when arranged on a tiered platter. Seriously, they elevate any party dessert platters instantly. They disappear fast, so make extra!
Storage and Make-Ahead Options for Mini Cheesecake Bites with Berry Topping
One of the best parts about these individual treats is that they are fantastic for ahead-of-time prepping! You can totally make the plain, un-topped cheesecakes and keep them covered tightly in the refrigerator for up to 5 days. That makes party prep so much easier!
If you plan on using whipped cream—which you totally should—I recommend piping that topping on the day you plan to serve them. Whipped cream is fine for 24 hours, but if you need longer storage, just keep the plain mini cheesecakes chilled, and top them right before your guests arrive. Easy peasy!
Frequently Asked Questions About Mini Cheesecakes
It’s so normal to have questions when you start baking something new, especially when you’re aiming for that perfect keto texture! These little mini cheesecakes are simple, but sometimes technique makes all the difference. Here are the questions I get asked most often about making sure these treats turn out stellar every single time.
Can I skip the water bath when making Mini Cheesecake Bites with Berry Topping?
You *can* skip the water bath, but I seriously wouldn’t recommend it if you want truly professional-looking results! The water bath creates a humid environment which bakes the cheesecake evenly and gently. Without it, the tops are much more likely to crack or sink dramatically as they cool down, which is frustrating! If you skip it, bake them a few minutes less, and be extra careful not to over-mix your eggs.
Are these mini cheesecakes truly low-carb or keto-friendly?
Oh yes, they totally are! When I developed this recipe, my goal was making sure my keto-loving friends could enjoy classic favorites without the sugar bomb. While our standard crust uses graham cracker crumbs and a bit of sugar, remember, this recipe is targeted toward those looking for satisfying individual treats that fit a generally lower-carb dessert mindset. If you need 100% strict keto, you’d swap the crust ingredients (like using almond flour and a keto sweetener), but the rich, creamy filling itself is definitely keto-friendly!
What is the best way to achieve a smooth filling for these individual treats?
This comes down to two big things: temperature and patience! First, your cream cheese, eggs, and sour cream must be at true room temperature. Cold dairy doesn’t blend smoothly, period. Second, when you add the eggs, just mix until they disappear—no more! Over-beating those eggs is the #1 cause of lumpy or cracked mini cheesecakes. Slow and steady wins the race for that perfect, velvety texture!
Estimated Nutritional Information for Mini Cheesecake Bites with Berry Topping
I know when you’re trying to eat smart, you want to keep an eye on the numbers, and I totally get that! Since these calorie smart recipes can change slightly based on your exact ingredients—especially if you decide to use a specific low-carb sweetener in the crust—these figures are just my best estimates for one single mini cheesecake bite *before* you top it with the berry mixture.
Keep in mind, these are rich little treats, so the fat content is up there, which is perfect for keeping you satisfied!
- Calories: Approximately 180-200 kcal
- Total Fat: About 16g
- Protein: Around 3g
- Total Carbohydrates: About 7g
It’s really important to remember that the berry topping you choose—and how much sugar substitute you use in it or the crust—will shift these numbers. If you swap out the graham crackers for almond flour, you’ll see a huge drop in carbs right away! Always verify if you are counting against very strict macro goals. Enjoy them knowing you’ve made a delicious, satisfying choice!
Share Your Delicious Mini Cheesecake Bites with Berry Topping
I really, truly hope you enjoyed making these little bites as much as I love baking them for my own crew! Now that you’ve got those creamy, perfect mini cheesecakes ready to go, I’d absolutely love for you to tell me what you think!
Did they come out perfectly smooth? Did your friends even guess they were low-carb? Don’t be shy! Head down to the comments section and leave me a rating—five stars if you loved them, even if you had a tiny mishap with the water bath; we all learn together here!
And please, if you snap a picture when you’ve adorned them with your beautiful berries, share it on social media! Tag me so I can see your gorgeous individual treats. Seeing your kitchen successes is seriously what keeps my passion for keto baking going strong! Happy snacking!
Mini Cheesecake Bites with Berry Topping
Ingredients
Equipment
Method
- Preheat your oven to 350°F (177°C). Line a standard 12-count muffin pan with cupcake liners.
- Combine all of the crust ingredients in a medium bowl. The mixture will be sandy. Firmly press a heaping Tablespoon of crust mixture into each liner. Bake the crusts for 6 minutes.
- Beat the cream cheese and granulated sugar together on medium-high speed in a large bowl until the mixture is completely smooth and creamy, about 2 minutes. Add the sour cream, lemon juice, and vanilla extract, and beat until fully combined. With the mixer running on medium speed, add the eggs 1 at a time, beating just until combined before adding the next. Do not over-mix. Divide the batter among the liners, filling each all the way to the top.
- For an optional water bath to prevent sinking: Boil a pot of water. Place a large metal baking or roasting pan (like a 9×13-inch pan) on the bottom oven rack of the preheated oven. Pour boiling water into the pan, about 1 inch deep. Immediately place the muffin pan on the center rack. Close the oven door to trap the steam inside.
- Bake until the edges are set and the centers slightly jiggle when you tap the pan, about 20 minutes.
- Set the pan on a cooling rack and allow cheesecakes to cool at room temperature for 45 minutes. Then transfer them to the refrigerator and chill for at least 2 hours and up to 24 hours. If you need to speed this up, place them in the freezer for 1 hour.
- Top the cheesecakes. You can pipe whipped cream on top and garnish with berries, mint, or other toppings. Refrigerate decorated cheesecakes until you are ready to serve them.
- Cover and store leftover cheesecakes in the refrigerator for up to 5 days.