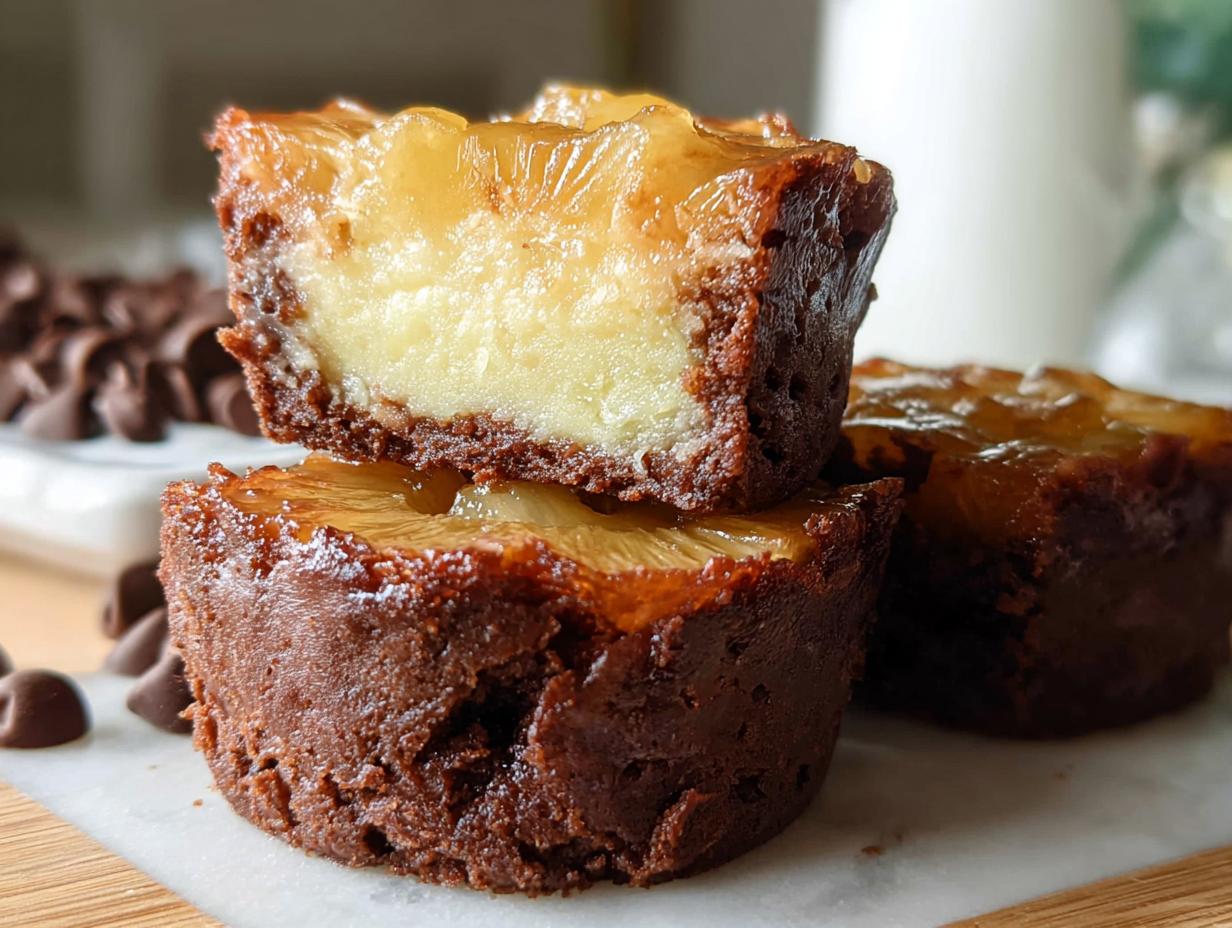
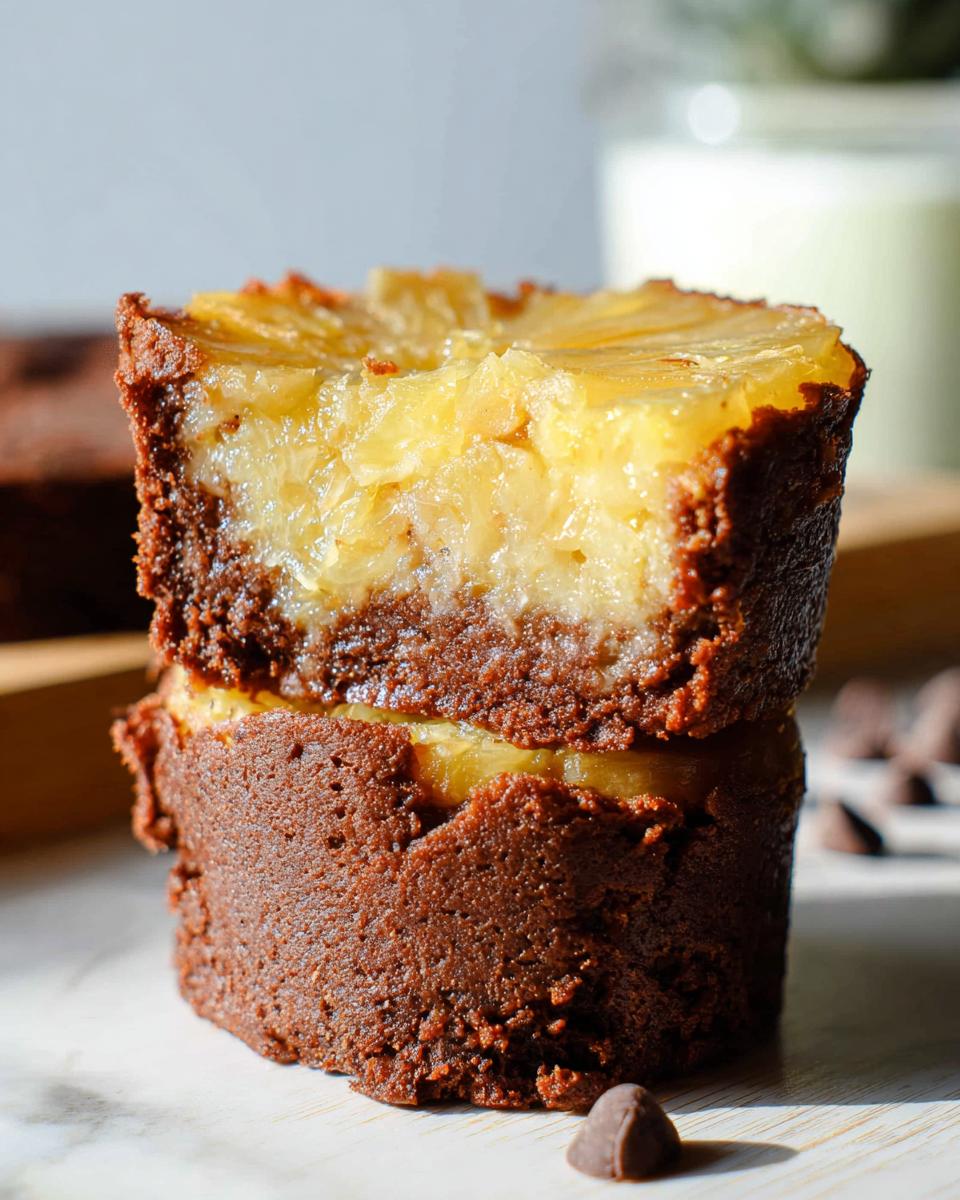
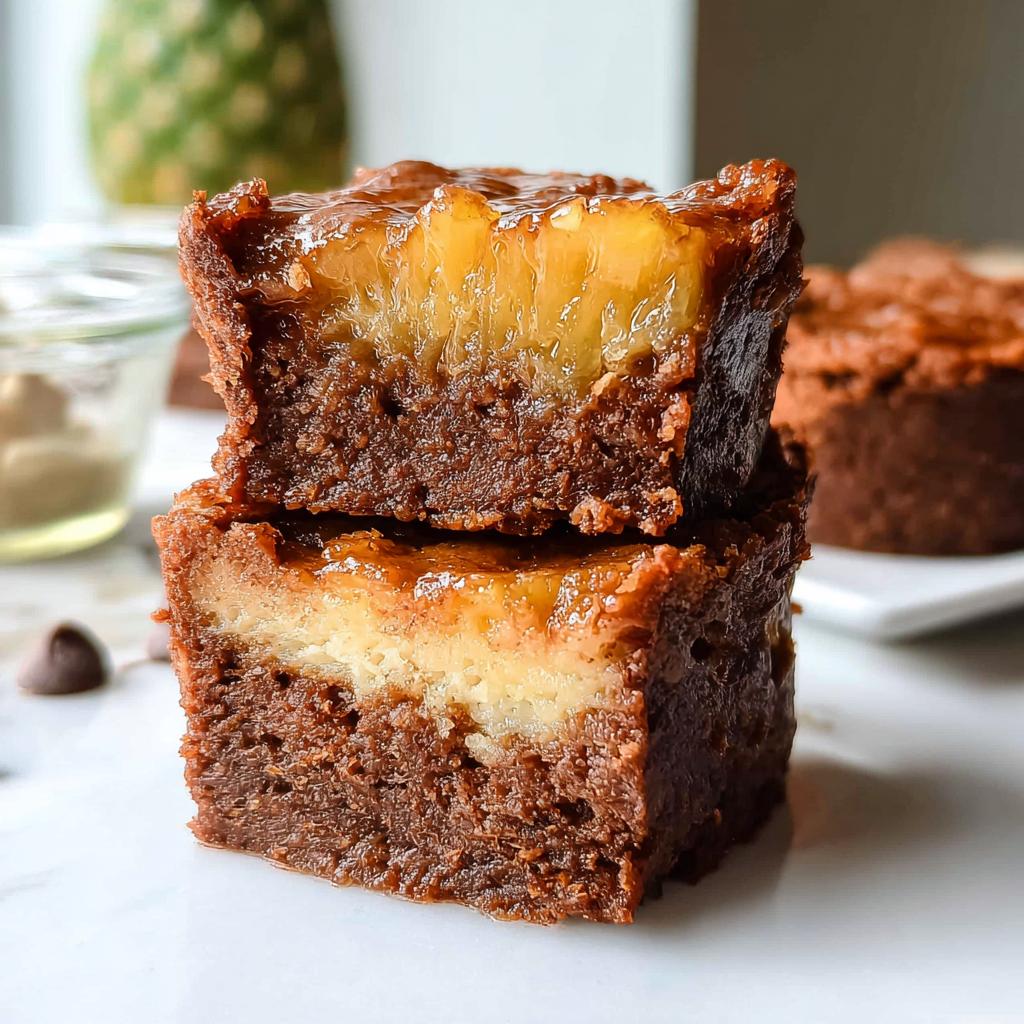
Oh, get ready for a treat that’s going to make your taste buds sing! I remember the first time I tinkered with these Mini Pineapple Upside-Down Cheesecakes in my kitchen. It was one of those cozy, rainy afternoons where nostalgia just hits you, you know? I wanted to bring back that classic dessert my grandma used to make, but, of course, with a keto-friendly twist.
As I mixed that creamy filling and layered it over a buttery almond crust, the kitchen filled with this amazing aroma of caramelized pineapple. It was like a delicious time capsule, instantly transporting me back to family gatherings, full of laughter and love. And when I finally took that first bite? Pure magic! It’s proof positive that you can totally have your cake and eat it too, especially when you’re embracing healthier choices. I’m Jenny Miller, by the way, and after years playing around with keto desserts, I’m thrilled to share these little gems with you. Trust me, these Mini Pineapple Upside-Down Cheesecakes are a game-changer!
Why You’ll Love These Mini Pineapple Upside-Down Cheesecakes
Seriously, you’re going to adore these little bites of happiness. They’re just pure joy in mini form! Here’s why:
- That Classic Flavor Combo: You get the sweet, tangy pineapple paired with that rich, creamy cheesecake. It’s a match made in dessert heaven!
- A Healthier Indulgence: We’re talking low-carb and keto-friendly, so you can totally satisfy that sweet craving without derailing your goals. Guilt-free deliciousness? Yes, please!
- Perfectly Portioned: Each little cheesecake is just the right size. No need to cut a whole pan; these are ready to go!
- Super Easy to Make: Even if you’re not a seasoned baker, these are a breeze. Minimal fuss, maximum deliciousness.
- Party Perfect: They look so cute and festive, making them ideal for any special occasion, holiday get-together, or just a fun weekend treat.
Ingredients for Mini Pineapple Upside-Down Cheesecakes
Alright, let’s talk about what you’ll need to whip up these delightful Mini Pineapple Upside-Down Cheesecakes. I’ve tried to keep things pretty straightforward, but always remember you can tweak things a bit if needed!
For the Brownie Base:
- 1/4 cup oat flour (or almond flour if you prefer!)
- 1/4 cup unsweetened cocoa powder (the good stuff makes a difference!)
- 1/4 teaspoon sea salt
- 4 oz semisweet chocolate, chopped
- 2 Tablespoons salted butter, melted (or coconut oil works too!)
- 1/2 cup granulated sugar
- 3/4 cup Vanilla Greek yogurt (this adds such a lovely creaminess!)
- 2 large eggs
- 1 teaspoon vanilla extract
- 1/2 cup chocolate chips (because, why not add more chocolate?!)
For the Ganache Topping:
- 4 ounces semisweet chocolate, chopped
- 1/2 cup heavy cream (or coconut cream if that’s more your style)
- 1/2 teaspoon vanilla extract
Crafting Your Mini Pineapple Upside-Down Cheesecakes: Step-by-Step
Alright, let’s get down to business and make these dreamy little cheesecakes! It’s really not complicated, I promise. Just follow along, and you’ll have a masterpiece in no time.
Preparing the Brownie Batter
First things first, preheat that oven to 350°F (177°C) and get your 9×9 inch pan ready with a good grease. In a small bowl, whisk together your oat flour (or almond flour!), cocoa powder, and sea salt. In a separate, larger bowl, melt your semisweet chocolate with the butter – pop it in the microwave for a minute, stir it up until smooth. Now, whisk in that sugar, Greek yogurt, vanilla, and your eggs until everything is nicely combined and smooth looking. Dump in those dry ingredients and stir until they’re *just* mixed in. Don’t go crazy overmixing here; we want tender brownies! Lastly, fold in those yummy chocolate chips.
Baking the Brownie Base
Pour that luscious batter into your prepared pan, spreading it out evenly. Pop it into the preheated oven and bake for about 20 to 25 minutes. You’re looking for the top to be just barely set, with the edges starting to pull away a tiny bit from the sides. If you’re like me and prefer a gooier brownie, pull them out around the 20-minute mark. Once they’re done, place the pan on a wire rack to cool a bit. Patience is key here!
Making the Ganache
While the brownies are doing their thing (or cooling), let’s whip up that decadent ganache. Grab a small saucepan and pour in your heavy cream (or coconut cream – it works great too!). Heat it over medium-high heat until you see just a few bubbles starting to form around the edges. Don’t let it boil, okay? Turn off the heat and immediately whisk in your chopped semisweet chocolate and vanilla extract. Keep stirring until it’s all smooth, glossy, and looks like rich chocolate heaven.
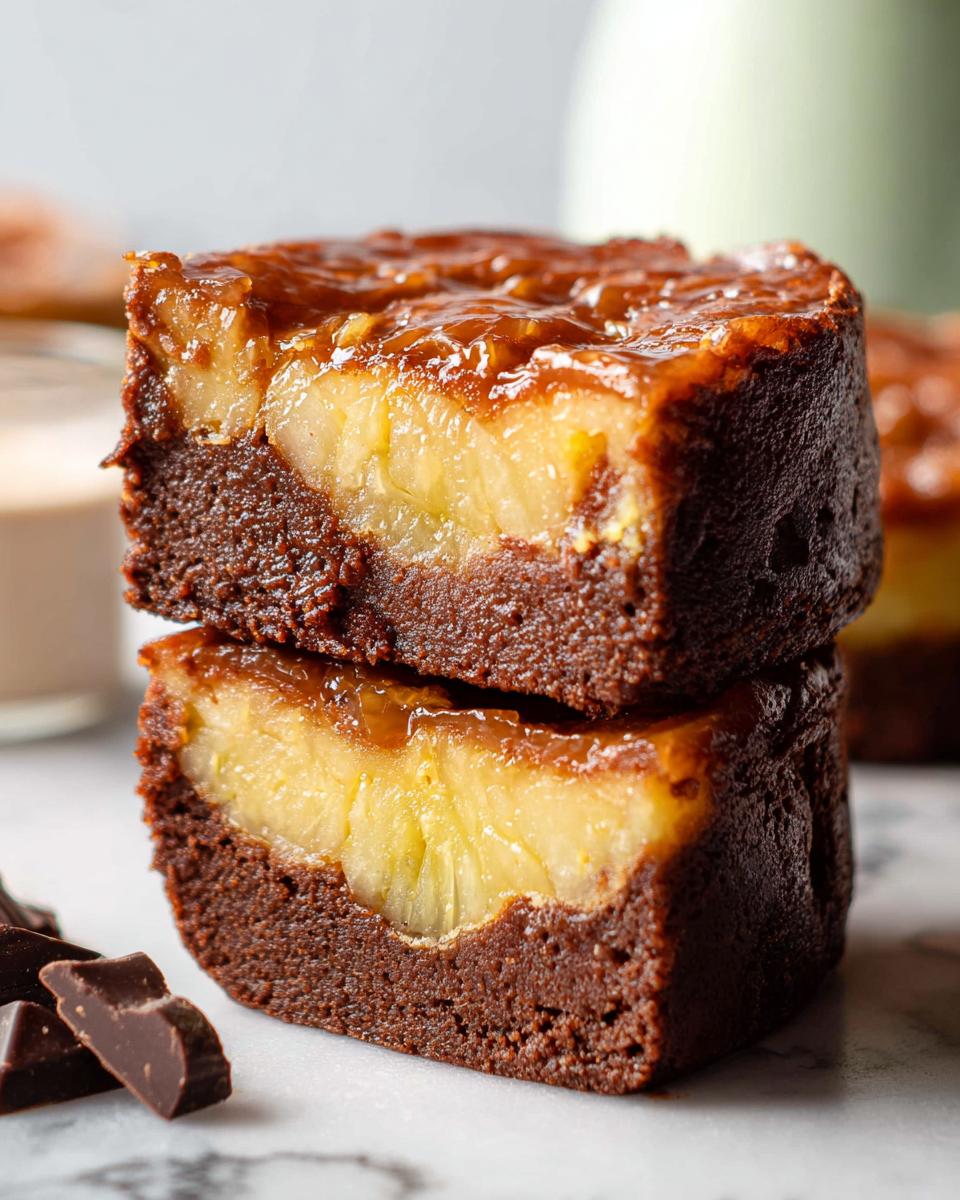
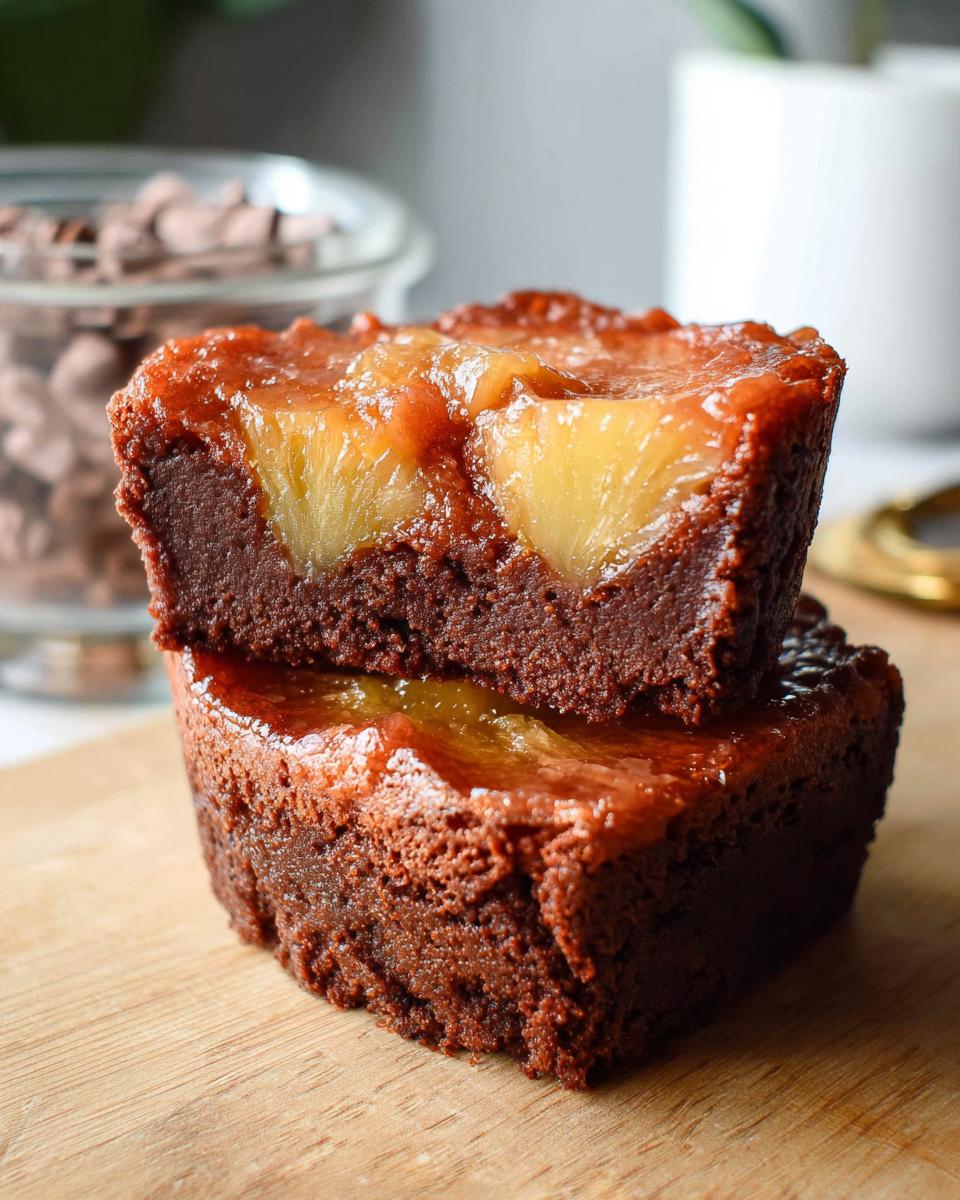
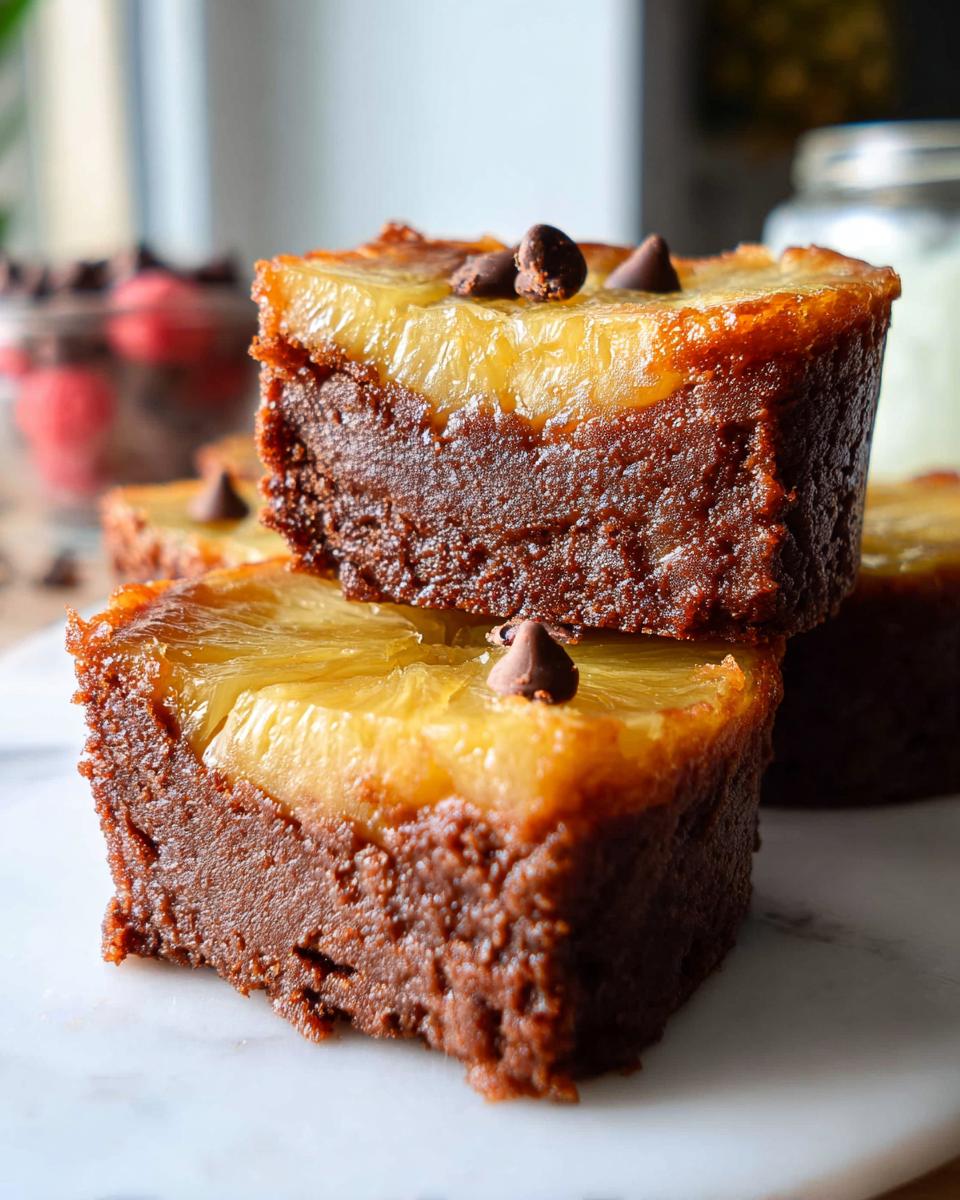
Assembling and Finishing Your Mini Pineapple Upside-Down Cheesecakes
Once your brownies have cooled down a bit and the ganache has also cooled slightly – you want it pourable but not piping hot – evenly pour that gorgeous ganache over the top of the brownies. Gently spread it out to cover everything. Now, you’ve got two options: let the ganache firm up at room temperature, which usually takes about an hour, or pop the whole pan into the fridge for a faster set. Once it’s firmed up, carefully cut your amazing Mini Pineapple Upside-Down Cheesecakes into squares. You can serve them right away, or let them come to room temperature for an even more decadent experience!
Tips for Perfect Mini Pineapple Upside-Down Cheesecakes
Making these little delights is pretty straightforward, but a few tricks can make them absolutely spectacular! Trust me, I’ve learned a thing or two.
First off, use good quality ingredients! For your Mini Pineapple Upside-Down Cheesecakes, that means decent chocolate and fresh cocoa powder. Also, double-check your oven temperature; ovens can be a little finicky, and the right temp is key for baking them just right. When mixing your batter, remember – don’t overdo it! Mix until *just* combined. Overmixing can lead to tough brownies, and nobody wants that.
Cooling is super important too. Let them cool completely on a wire rack before you even *think* about adding that ganache. This stops the ganache from melting into a puddle. Speaking of ganache, if it seems too thick, a quick gentle warm-up usually does the trick. Too thin? Let it sit on the counter a bit longer; it’ll thicken as it cools. These little tips will really elevate your Mini Pineapple Upside-Down Cheesecakes from good to absolutely unforgettable!
Ingredient Notes and Substitutions
Let’s chat about some of these ingredients, shall we? Sometimes you might not have exactly what’s listed, or maybe you just want to tweak things. That’s totally okay! For the oat flour, if you can’t find it or want to go fully keto, almond flour is a fantastic swap. It gives a lovely texture to the brownie base. And for that rich ganache, if heavy cream isn’t your go-to, full-fat coconut cream from a can works like a charm. It gives a wonderfully creamy texture without any coconutty flavor if you use the thick part! These little swaps help make these Mini Pineapple Upside-Down Cheesecakes work for just about anyone!
Serving and Storing Your Mini Pineapple Upside-Down Cheesecakes
Okay, so you’ve made these gorgeous Mini Pineapple Upside-Down Cheesecakes, and now you’re wondering how to enjoy them best! For the ultimate creamy, rich experience, I love serving them at room temperature. Let them sit out for about 20-30 minutes after chilling, or just don’t chill them at all if you’re impatient like me!
Got leftovers? Lucky you! Just pop them into an airtight container and they’ll keep beautifully in the fridge for about 5 to 7 days. Honestly, they might even taste better the next day! If you want to freeze them for later, just make sure they’re snug in a container or freezer bag. They’ll be good for up to two months. Thaw them on the counter or pop them in the fridge overnight.
Frequently Asked Questions About Mini Pineapple Upside-Down Cheesecakes
Got some burning questions about these delightful Mini Pineapple Upside-Down Cheesecakes? I totally get it! Here are a few things people often ask, and I’m happy to help clear them up.
Can I make these ahead of time?
Absolutely! These Mini Pineapple Upside-Down Cheesecakes are fantastic for making ahead. In fact, I think they taste even better the next day after the flavors have had a chance to really meld together. Just store them in an airtight container in the fridge!
What if I don’t have pineapple?
Oh, a classic question! While pineapple is key to the “upside-down” part of these Mini Pineapple Upside-Down Cheesecakes, you could get creative. You could try thinly sliced peaches or even some tart berries for a different twist. Just be sure to account for any extra moisture they might add!
Can I use a different type of chocolate?
Yes, definitely! While semisweet chocolate gives a lovely balance, feel free to experiment with milk chocolate or even dark chocolate if you prefer a richer flavor in your Mini Pineapple Upside-Down Cheesecakes. Just keep in mind that different chocolates have varying sugar content, which might slightly alter the taste.
Why is my ganache not thickening?
Don’t worry, this is usually an easy fix! If your ganache for the Mini Pineapple Upside-Down Cheesecakes seems too thin, it most likely just needs more time to cool and set. Pop it in the fridge for 15-20 minutes at a time, stirring occasionally, until it reaches your desired consistency. Patience is your friend here!
Nutritional Information (Estimated)
Just a heads-up, these numbers are estimates for your Mini Pineapple Upside-Down Cheesecakes and can totally vary based on the exact ingredients you use. But generally, you’re looking at around 173.5 calories per piece, with about 9.3g of fat, 2.7g of protein, and 22.2g of carbohydrates. These also have roughly 19.3g of sugar. Enjoy!
Mini Pineapple Upside-Down Cheesecakes
Ingredients
Equipment
Method
- Preheat your oven to 350 degrees Fahrenheit (177 degrees Celsius). Grease a 9×9 inch baking pan and set it aside.
- In a small bowl, mix the oat flour, cocoa powder, and sea salt. Set this aside.
- Melt the chocolate and butter (or coconut oil) together in the microwave. Stir until completely melted.
- Whisk in the sugar, Greek yogurt, vanilla extract, and eggs until the mixture is smooth.
- Add the dry ingredients to the wet ingredients and whisk until just combined.
- Stir in the chocolate chips.
- Pour the batter into the prepared pan. Bake for 20 to 25 minutes, or until the top is just barely set and the edges are slightly pulling away from the sides of the pan. (Baking for 20 minutes will result in gooier brownies).
- When the brownies are finished baking, place the pan on a wire rack to cool.
- While the brownies are baking, prepare the ganache. Add the heavy cream to a small saucepan and warm it over medium-high heat until it just begins to bubble. Do not let it boil.
- Turn off the heat and whisk in the chopped chocolate and vanilla extract until the mixture is dark and smooth.
- Remove the saucepan from the warm burner and let the ganache cool slightly. It will thicken as it cools.
- Once the ganache has cooled slightly, pour it over your cooling brownies.
- Allow the ganache to firm up at room temperature, or place the pan in the refrigerator to speed up the process.
- Remove from the refrigerator, cut, and serve at room temperature, or serve cold.