Oh my gosh, if you’re anything like me, sometimes you just need something sweet *right now*—but you don’t want that sugar crash later! That’s why these No Bake Chocolate Peanut Butter Oat Bars have become my absolute go-to; they satisfy every single craving you can imagine, and they’re ready in minutes.
I still remember the late-night kitchen experiment that led to my first batch. It was a whirlwind of chocolate melting and peanut butter mixing, all while trying to create a treat my husband could enjoy without worry. As I tasted that first crumbly, chocolatey piece, a wave of satisfaction washed over me—I had transformed a typically sugary dessert into something both wholesome and joyfully satisfying.
Seriously, these bars are the perfect answer for busy people who still care about what goes into their treats. Every bite feels like a small victory in our quest for healthier sweets, and ever since, these bars have been a staple in our home.
Why You Will Love These No Bake Chocolate Peanut Butter Oat Bars
Honestly, what’s not to love about a dessert that practically makes itself? If time is short but your sweet tooth is loud, these bars are going to save your whole week. They truly hit that perfect balance every time.
- They are genuinely no bake! Zero need to preheat the oven, which saves energy and keeps the kitchen cool.
- We’re talking about 15 minutes of hands-on time, tops. Mix it, press it, chill it—done!
- They satisfy those intense chocolate and peanut butter cravings the instant they hit, without any fuss.
- These are fantastic freezer snacks; you just pull one out whenever you need a quick hit of something delicious.
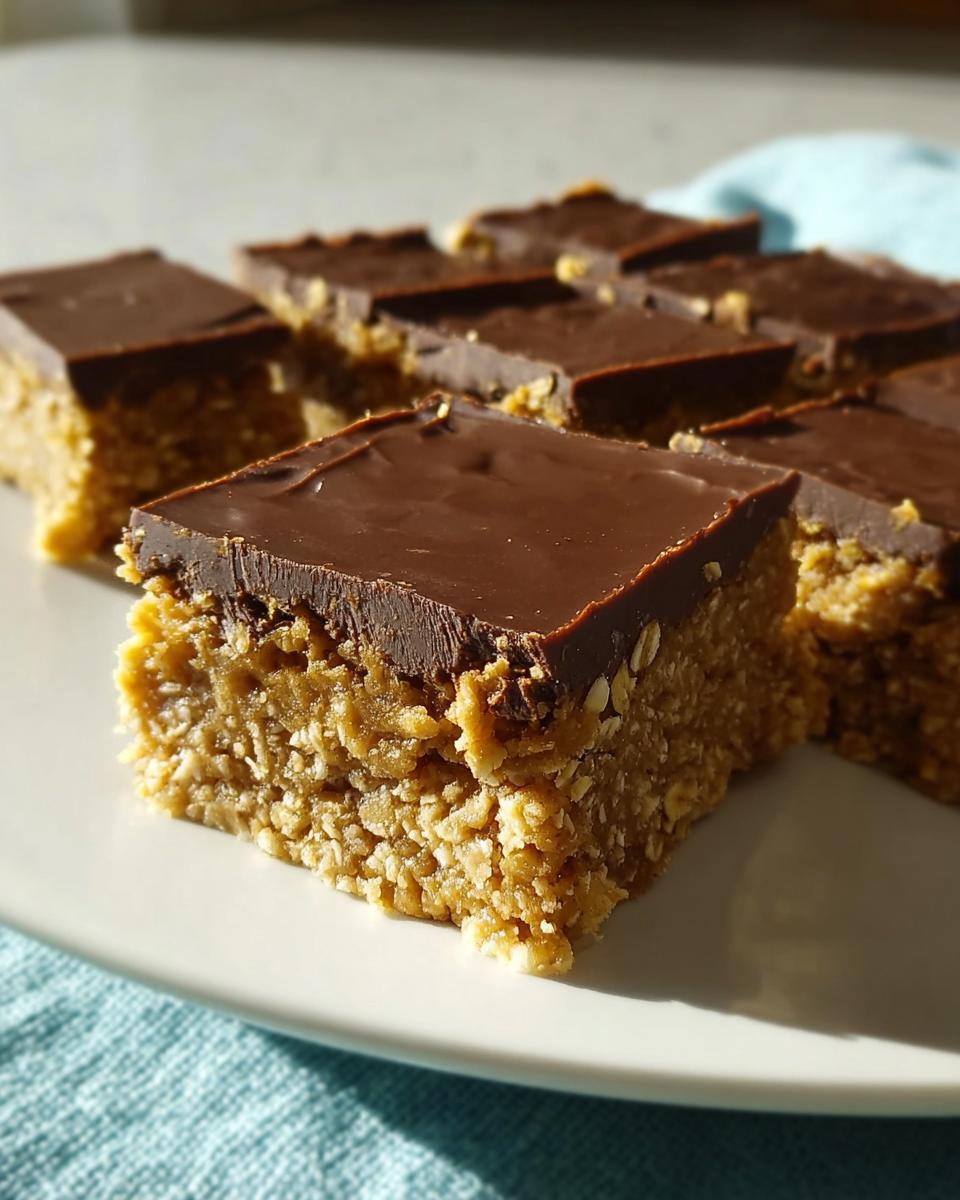
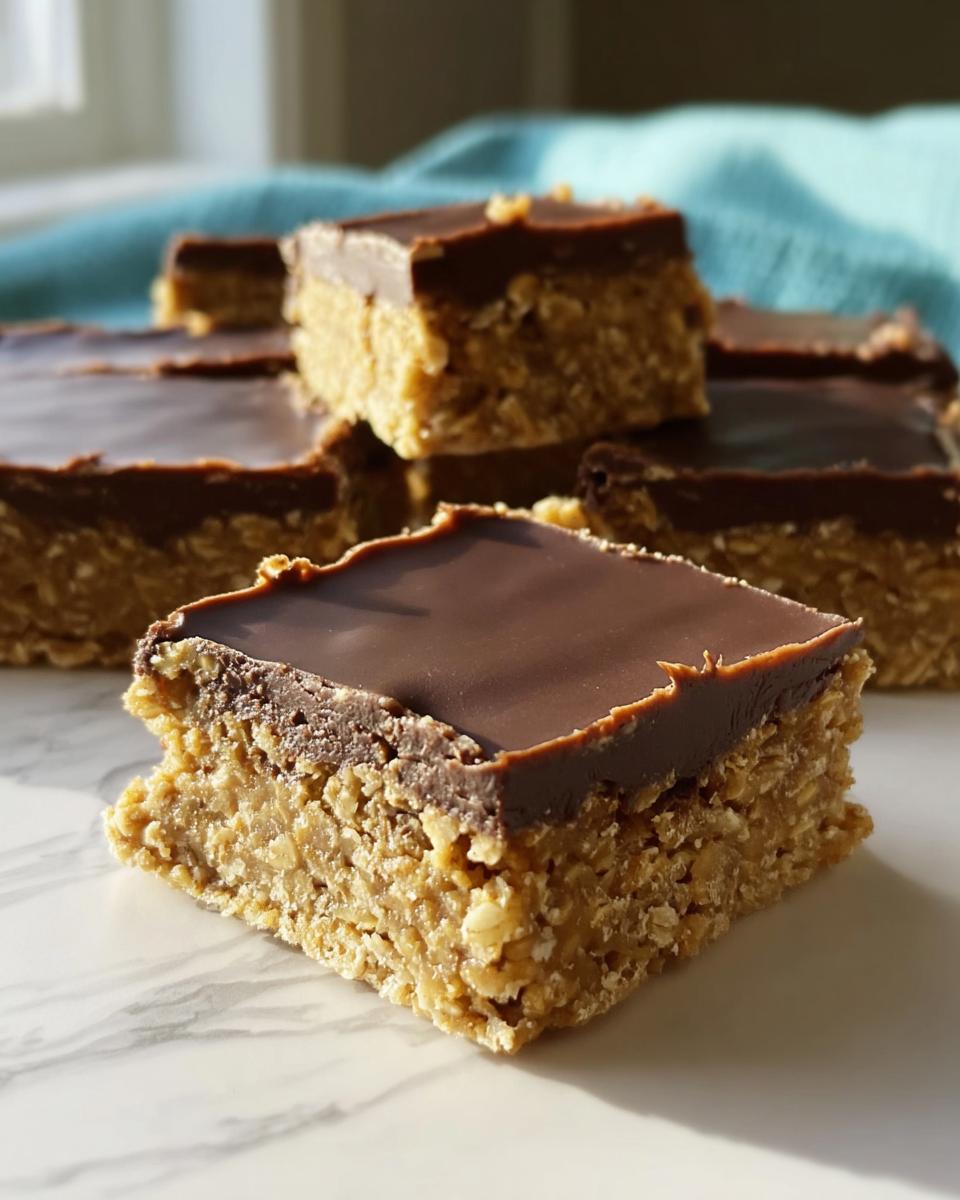
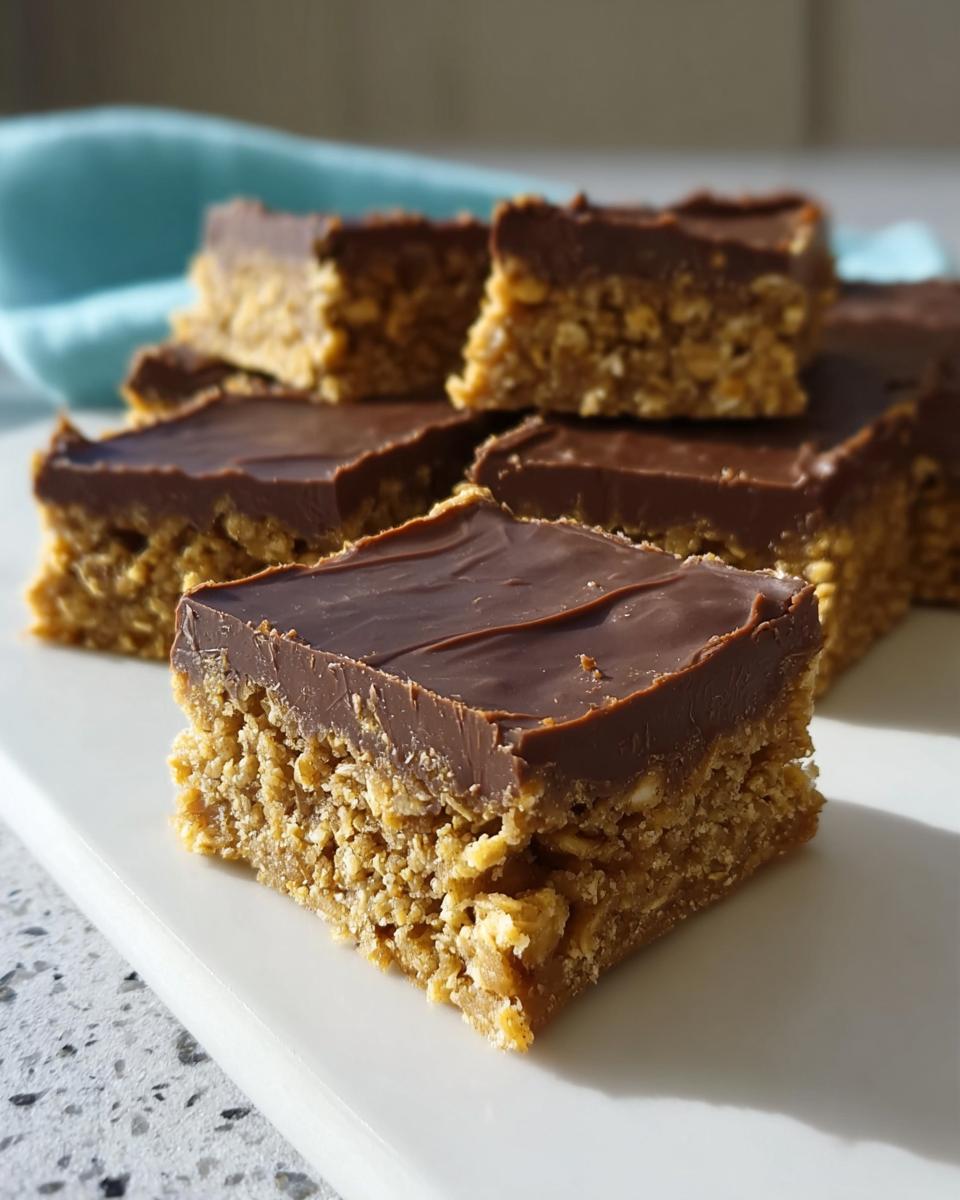
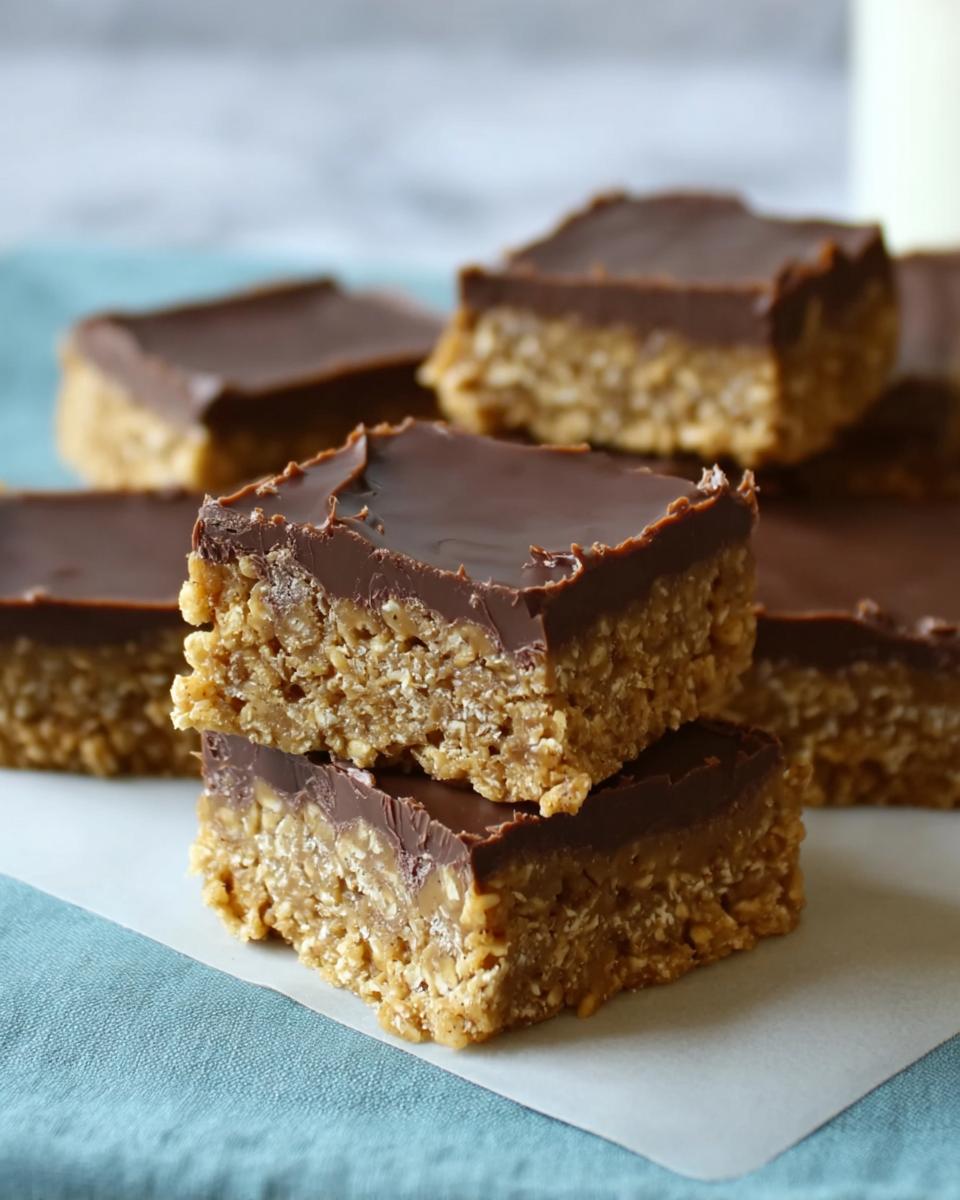
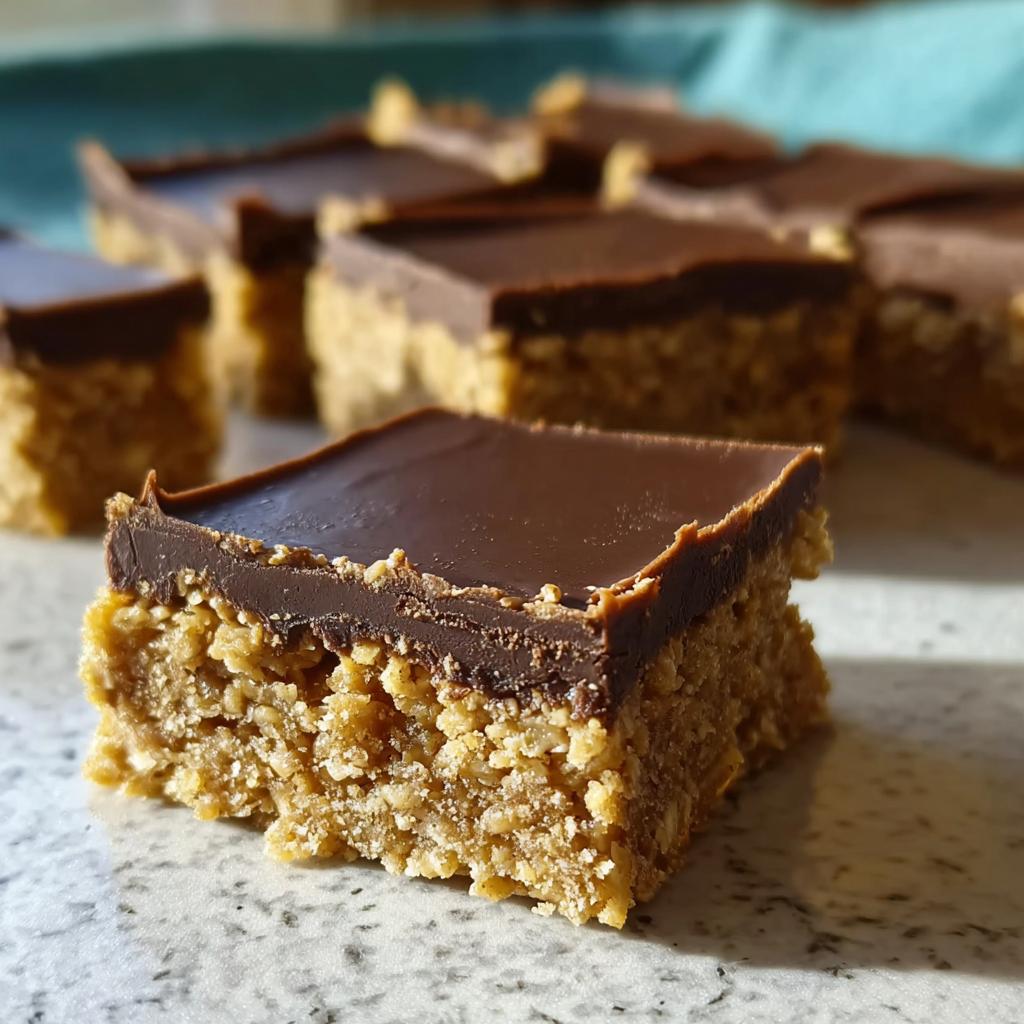
- The texture is the best part—slightly chewy from the oats but perfectly firm because of that cool chocolate top.
- Because they use simple ingredients, you probably already have everything you need hiding in your pantry right now.
Essential Equipment for Perfect No Bake Chocolate Peanut Butter Oat Bars
When you’re making something quick, you don’t want to pull out every single gadget you own. Thankfully, for these no bake desserts, we only need a few trusty items. Seriously, keep these things handy, and you are halfway to having delicious peanut butter bars!
Since these peanut butter bars don’t see an oven, cleanup is a dream, too. You mostly just need things for melting and mixing. Here’s what you’ll want to grab before you start:
- A good sturdy saucepan is essential for melting down that butter and sugar base. Medium size is perfect.
- Grab your biggest mixing bowl for tossing in all those lovely oats and getting everything coated properly.
- You absolutely need a 9×13 inch baking pan. This gives us the right thickness for the bars.
- Don’t forget the parchment paper! This is non-negotiable, trust me. It lets you lift the whole thing out like a giant candy bar later.
Gathering Ingredients for Your No Bake Chocolate Peanut Butter Oat Bars
Alright, the fun part! Since these are no bake desserts, we don’t have tricky rising agents weighing us down. We just need quality components that melt beautifully together. Before you even think about firing up the stove, make sure you have everything laid out. Seriously, prepping your ingredients first makes the whole 15 minutes fly by!
I’ve linked a great baseline version of a similar recipe right here if you need a quick reference point while you shop, though mine always tastes better because of my little tweaks (wink!). Check out this reference recipe!
Ingredients for the Oat Base
This foundation is what gives us that satisfying chew and bulk. You want to measure these out precisely so the bars set up correctly and don’t get too crumbly later on.
- You’ll need 1 cup of butter. I usually just leave mine on the counter for 30 minutes until it’s softened, but melting it completely is fine too!
- Grab 1/2 cup of packed brown sugar. Make sure it’s packed in there—that molasses flavor is key to the richness.
- One teaspoon of vanilla extract. Don’t skimp on the vanilla; it wakes up the chocolate flavor later.
- And, of course, 3 cups of quick cooking oats. These cook fast and blend into the binder texture perfectly.
Ingredients for the Chocolate Topping
This is where the magic happens, creating that gorgeous shell layer that hardens up in the fridge. You really only need two stars here:
- 1 cup of semisweet chocolate chips. I prefer a good quality chip because it melts smoother.
- 1/2 cup of creamy peanut butter. I use regular creamy peanut butter here—no need for the natural drippy kind, as that can sometimes mess with the setting process since it has less stabilizers.
Step-by-Step Instructions to Make No Bake Chocolate Peanut Butter Oat Bars
Okay, deep breath! These are perhaps the easiest no bake desserts you will ever make, but timing is everything for getting that perfect snap when you bite into them. Remember, we aren’t baking anything, so “setting” is our main goal, not cooking! Follow these steps exactly, and you’ll end up with beautiful, structured peanut butter bars every single time.
Preparing the Pan and Cooking the Base Mixture
First things first, you need your pan ready to go. Line that 9×13 inch pan with parchment paper, making sure you leave a generous overhang on the sides—this is your handle for later! Now, grab your saucepan. Over medium heat, melt your butter. Once it’s liquid, stir in the packed brown sugar. Keep stirring until you see it bubble up nicely and the sugar completely dissolves. You’re looking for about two minutes of gentle bubbling here. Don’t walk away, but you don’t need to stir frantically either!
Combining Oats and Pressing the Base
Take that hot sugar mixture right off the heat immediately. Toss in your vanilla extract—you’ll smell that wonderful aroma as soon as it hits the pan! Then, dump in all three cups of quick cooking oats. Mix it vigorously until every single oat is coated in that syrupy goodness. Transfer this whole base into your prepared pan. This is crucial: use the back of a spoon or a flat measuring cup to press this mixture down *firmly*. We want a dense, solid layer here so the bars don’t crumble when we slice them later.
Creating and Spreading the Chocolate Peanut Butter Topping
For the topping, we’re using the microwave because who wants another sticky saucepan? Combine your peanut butter and chocolate chips in a microwave-safe bowl. Start microwaving in short bursts—30 seconds at a time. After each 30 seconds, pull it out and stir well. Keep repeating this until it’s mostly melted, then just stir until the residual heat makes it totally smooth. Pour this luxurious chocolate blanket right over your pressed oat base. Use an offset spatula or the back of a spoon to spread it evenly to the edges. You want a consistent layer across the top!
Chilling and Cutting Your No Bake Chocolate Peanut Butter Oat Bars
This patience part is the hardest, but totally worth it! Get that pan into the refrigerator and leave it alone for a minimum of two hours. If you try to cut them earlier, you’ll just end up with chocolate goo everywhere. Once the top is totally firm to the touch, use those parchment paper handles you made earlier to lift the entire slab out onto a cutting board.
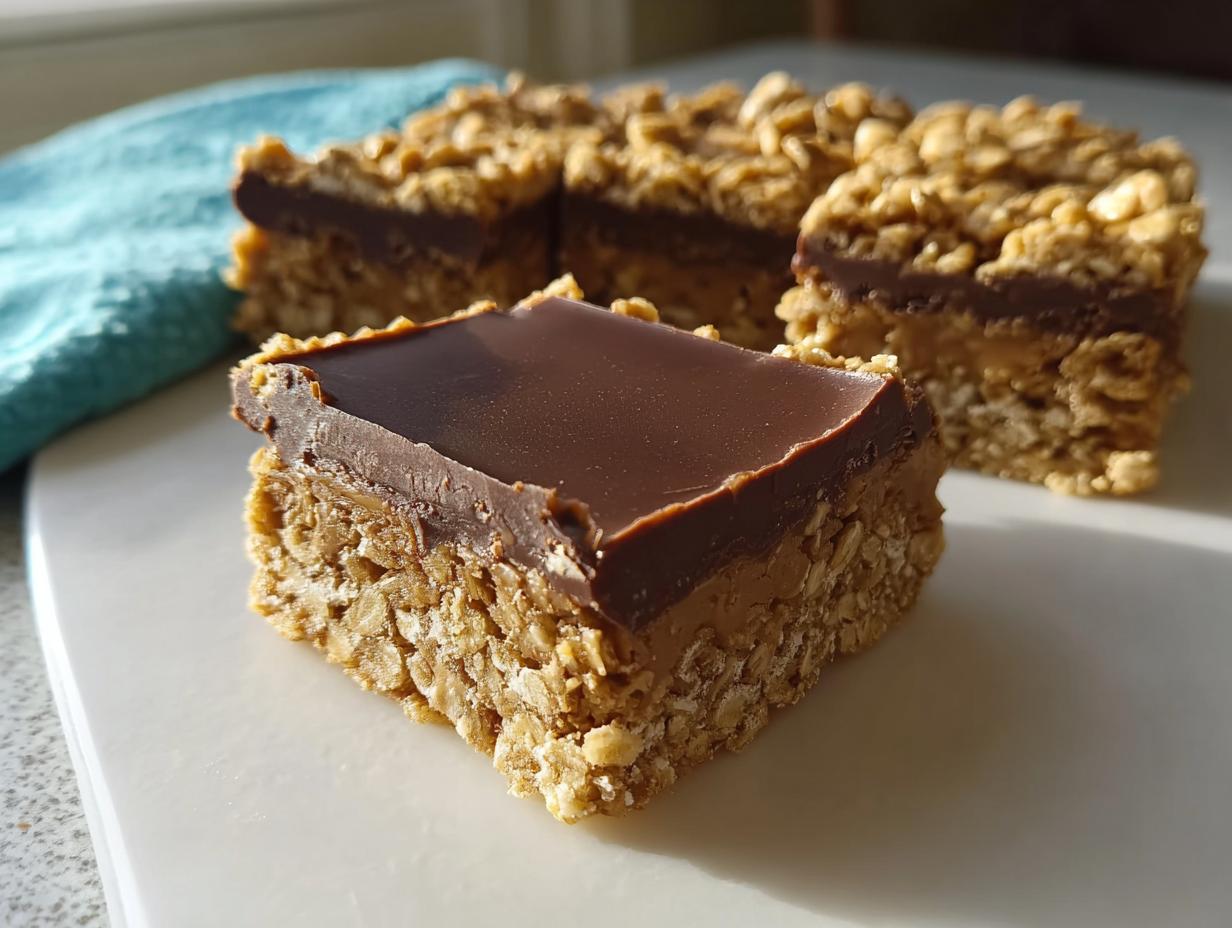
Using a sharp knife, cut it into 32 squares for perfect servings. See? That wasn’t hard at all, and you’ve got a beautiful, satisfying batch of no bake desserts ready to go!
Tips for Perfect No Bake Chocolate Peanut Butter Oat Bars
When you’re making something with this little effort, you want it to be perfect, right? After years of tweaking these peanut butter bars, I’ve learned a few tricks that ensure they set up beautifully and taste amazing every single time. I call these my ‘Jenny Miller Master Class’ tips!
First off, let’s talk about that base mixture. Pay attention to the temperature when you’re melting the butter and brown sugar. You really want that sugar to dissolve completely. If you rush it, that sugar crystalizes, and your base ends up gritty instead of smooth and chewy. Keep it on medium-low heat, watch it bubble for those two minutes, and you’ll get that perfect sticky binder. Don’t skip that dissolution step!
Next up is pressing that oat mixture. This is where people often mess up when making no bake desserts. Use a sturdy spatula or the flat bottom of a measuring cup and press down hard! I mean, put your weight into it! If the base is loose, your chocolate topping will just crack through it when you cut it, and then you just have a mess instead of lovely bars.
For that glorious chocolate topping, the secret to smoothness is keeping moisture far, far away when you’re microwaving. Even one tiny drop of water can cause the chocolate to seize up and turn grainy. That’s why I always dry my bowl thoroughly before mixing the chips and peanut butter. Use short intervals and stir completely between each one. When you think it’s melted, stir it one more time off the heat. That residual warmth finishes the job, leaving you with that shiny, perfect coating for the best freezer snacks.
Finally, be patient with the chill time. I know, I know, waiting two hours when you want to eat them right now is torture! But rushing this step means you slice soft bars that stick to the knife. Stick to two hours in the fridge, or even pop them into the freezer for 45 minutes if you’re desperate. The colder they are when you cut them, the cleaner your squares will be!
Ingredient Substitutions for Your Simple Sweet Recipes
I know when you’re looking for simple sweet recipes that fit into a specific lifestyle, you often need to make a few swaps. Since my goal is always to make this recipe work for *you*, let’s talk about making changes to the base ingredients. Now, remember, these are no bakes, so the structure relies heavily on that melted fat and sugar binding everything. But we can definitely tweak things!
If you are trying to reduce the sugar load, swapping out the brown sugar is the first place people look. You can use a granular sugar substitute that measures 1:1 with brown sugar in baking. Just be warned: because sugar also helps with the setting texture, you might find your bars are just slightly softer in the middle. It still works beautifully, but you might need that extra 30 minutes in the fridge!
What about the butter? For the sake of structure and that rich flavor, real butter is my number one pick. However, if you need to swap it out, you can often use an equal amount of coconut oil. Just make sure the coconut oil is melted before you mix it with the sugar. It will firm up beautifully when chilled, giving you that necessary stiffness for these peanut butter bars.
Regarding the oats, although I swear by quick-cooking oats for that smooth, slightly dense texture, you can certainly use old-fashioned rolled oats if that’s what you have on hand. However, I mentioned this in the FAQs too—rolled oats will lead to a chewier, more textured base. It’s still delicious, but it won’t be quite as uniform as the classic version. For my family, we stick to quick oats to keep them firmly categorized as one of our favorite no bake desserts!
If you need a completely nut-free version—and this is important for schools or family gatherings—you can substitute Sunflower Seed Butter for the peanut butter in the topping. It melts and sets almost identically, though you will get a slightly earthier flavor profile. Keep in mind the color will be a bit greener, but the taste is totally addictive!
Storage & Freezer Snacks: Keeping Your No Bake Chocolate Peanut Butter Oat Bars Fresh
One heck of a secret weapon these bars have is that they are basically designed for making ahead of time! Since they are no bake desserts, they basically last forever, provided you keep that chocolate top nice and protected. This is really key, especially for stocking up ahead of time for busy weeks; they are absolutely perfect freezer snacks.
If you plan on eating them within, say, a week, the refrigerator is your best friend. Just make sure you put them in a solid, airtight container. I line my container with a little piece of parchment paper first, then put the bars in a single layer, maybe with another piece of parchment between layers if I have to stack them—otherwise, that lovely chocolate top can sometimes stick to the oat base underneath.
They seriously last a full week stored like this in the fridge because of the low moisture content and the sugar in that chocolate layer. I always cut mine right before storing them, though. Trying to cut them when they are rock hard and cold from the fridge is a recipe for messy crumbs!
Now, for long-term stockpiling, which is what I do when I see a big sale on peanut butter—we freeze them! You can totally freeze these peanut butter bars up to three months. Place your cut squares into a freezer-safe Ziploc bag, squeeze out as much air as you possibly can, and tuck them away. They freeze beautifully; the texture doesn’t change one bit.
When you need a quick fix for an after-school treat or a last-minute dessert when guests show up unexpectedly, just pull out however many bars you need. They only take about 10 to 15 minutes to thaw on the counter, or you can eat them straight from the freezer for a super cold, almost fudge-like experience. See? These are the ultimate convenience food!
Frequently Asked Questions About Peanut Butter Bars
I get so many great questions about these bars! They are so simple that people sometimes wonder if they missed a trick, or if they can tweak the recipe to fit a certain pantry item they have on hand. Let’s clear up any confusion about making these perfect peanut butter bars!
Can I use rolled oats instead of quick oats in these no bake desserts?
Yes, you absolutely can, but I must warn you: the texture will change! Quick oats are steamed and rolled thinner, so when they mix with the hot butter and sugar, they soften up beautifully, giving you that classic, slightly smooth, chewy base for our no bake desserts. Rolled oats, or old-fashioned oats, are much heartier. If you use them, your base will be denser, chewier, and you’ll definitely taste the oat more prominently. Crucially, it won’t affect the setting time much because they absorb the binder just fine, but expect a more rustic texture!
How do I prevent my chocolate topping from seizing?
This is a classic melted chocolate panic moment, and it’s usually all about water! Chocolate hates water. If you get even a tiny drop of steam or liquid into your melting mixture of chocolate chips and peanut butter, the chocolate will think it’s going to freeze up and turn into a gritty mess—that’s called seizing. My best tip is to make sure your microwave bowl is bone dry. Also, clean your stirring utensil thoroughly between dips into the microwave. If it starts to seize, add about a teaspoon of hot water or neutral oil (like canola) and stir like crazy; that sometimes shocks it back into submission, but prevention is always easier!
Are these peanut butter bars suitable for meal prepping?
Oh, my goodness, yes! These are tailor-made for meal prepping! Since they require no baking and actually get better after they’ve had time to chill and firm up in that cold environment, they are perfect for making a giant batch on Sunday to last the whole week. Just make sure you follow my storage tips from earlier: cut them only when they are fully chilled, store them layered with parchment in an airtight container, and they will stay fantastic in the fridge for seven days. They are truly the ultimate make-ahead sweet treat for busy folks!
Share Your Experience Making No Bake Chocolate Peanut Butter Oat Bars
Now that you’ve whipped up a batch of these unbelievably easy and satisfying no bake desserts, I truly want to hear all about it!
Did these peanut butter bars save you from a late-night craving disaster? Did you try my tip about using coconut oil instead of butter, or did you stick with the classic, rich flavor? Don’t be shy!
The best motivation for me to keep sharing these quick kitchen adventures is seeing your amazing results. Drop a comment below and let me know what you thought—maybe even give the recipe a star rating so other busy folks know just how simple and delicious these freezer snacks turned out for you. And if you snapped a photo of your perfectly set bars, tag me on social media! Happy eating, friends!
No Bake Chocolate Peanut Butter Oat Bars
Ingredients
Equipment
Method
- Line a 9×13 inch pan with parchment paper, leaving an overhang for easy removal later.
- In a saucepan over medium heat, melt the butter. Stir in the brown sugar until it dissolves and the mixture bubbles slightly, about 2 minutes.
- Remove the saucepan from the heat. Stir in the vanilla extract and the quick cooking oats until everything is well combined.
- Press the oat mixture firmly and evenly into the prepared pan.
- In a separate microwave-safe bowl, combine the chocolate chips and peanut butter. Microwave in 30-second intervals, stirring well after each interval, until the mixture is smooth and fully melted.
- Pour the melted chocolate mixture over the oat base and spread it evenly to cover the entire surface.
- Place the pan in the refrigerator for at least 2 hours, or until the chocolate topping is firm. Once set, use the parchment paper overhang to lift the bars out of the pan. Cut into 32 squares before serving.