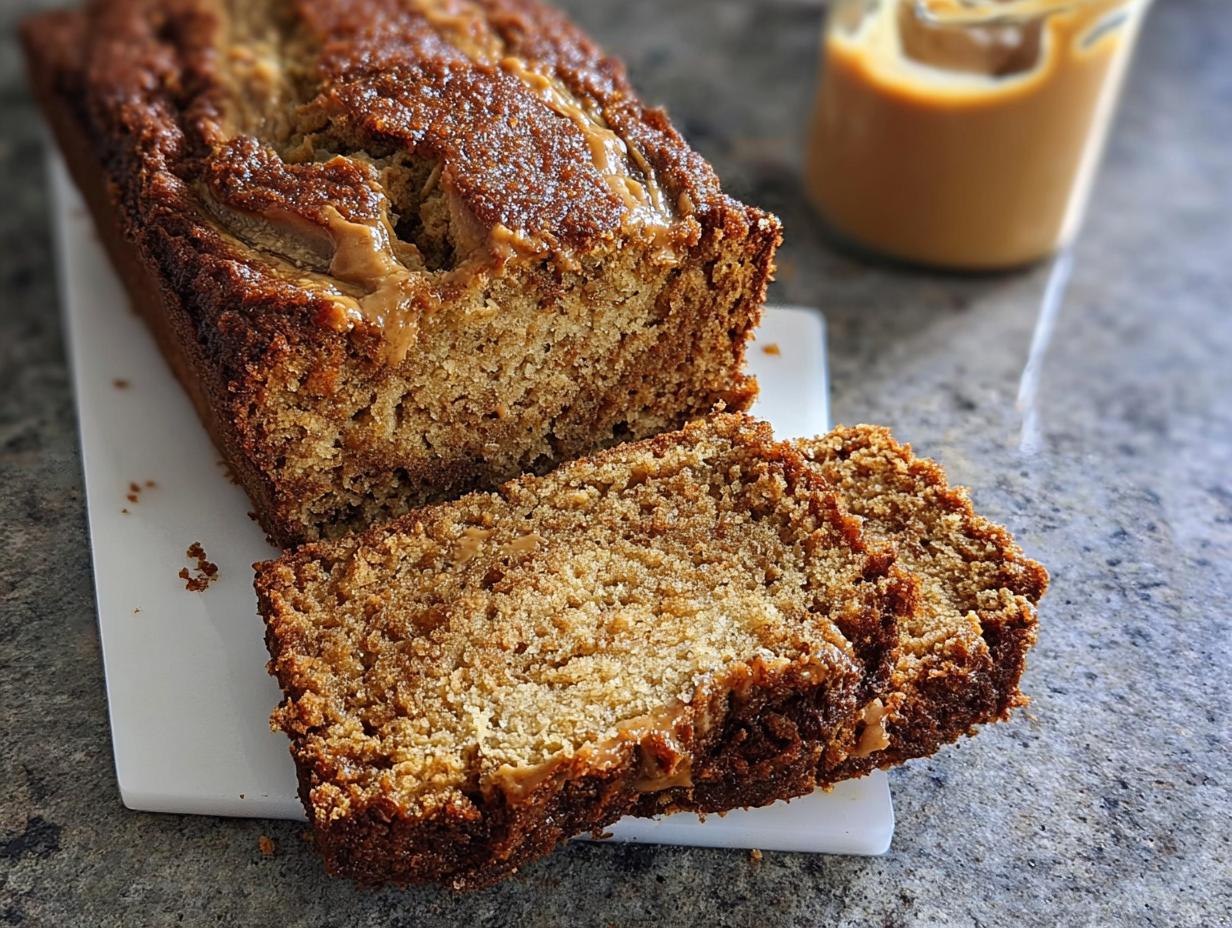
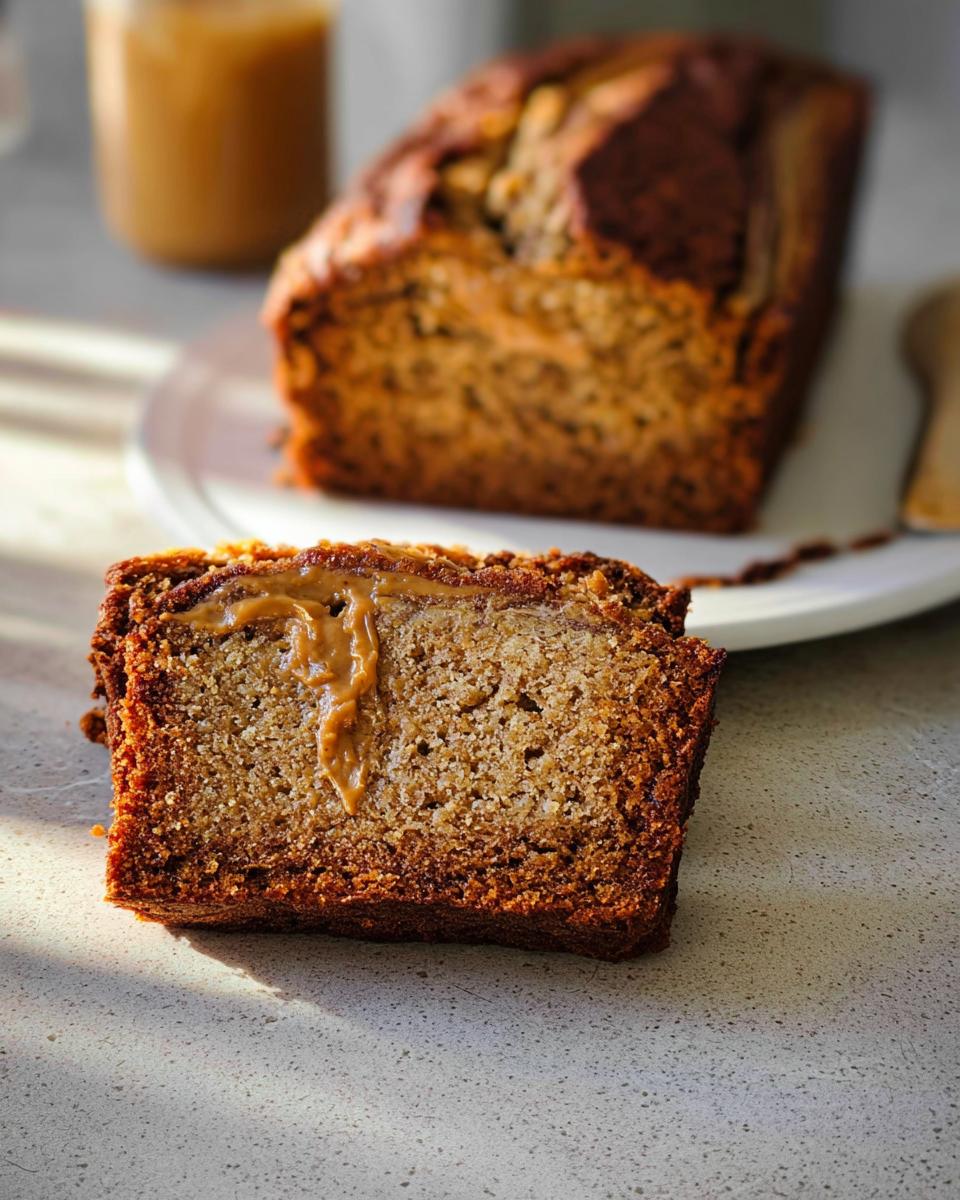
Oh my gosh, are you ready for a serious hug in loaf form? We all crave that old-school comfort food now and then, right? But when you’re trying to keep things cleaner, finding that perfect balance feels impossible. Well, I’m Sarah Johnson, The Keto Performance Chef, and I’m here to tell you that classic banana bread just got a major, delicious upgrade. This Peanut Butter Banana Bread isn’t just a nostalgic treat; it’s packed with the flavor I grew up loving, but tailored for how we eat today.
I remember one rainy afternoon, I was seriously missing my childhood favorites. As a former athlete, I learned to lean into peanut butter for that satisfying boost, and bam! I started tweaking my mom’s old recipe. After a few tries—trust me, I made some bricks along the way—I finally found the sweet spot. It gives you that satisfying, rich taste but doubles as a nutritious staple for my weekly meal prep. Enjoying this healthier version of Peanut Butter Banana Bread? That’s pure satisfaction, folks!
Why This Peanut Butter Banana Bread is Your New Favorite Comfort Bake
If you’re juggling work, family, or fitness goals, you need food that works as hard as you do. This loaf isn’t just delicious; it’s smart baking! We’re talking about serious flavor without the fuss.
- It packs a wonderful Protein Boost, making it feel like a real meal, not just empty calories.
- It’s the perfect grab-and-go Snack Bread for your afternoon slump.
Quick Prep for Busy Weeknights
Seriously, you only need about 15 minutes to get this into the oven. Hands-on time is minimal! That’s why I rely on it when I know the evening is going to get chaotic. Set it, forget it, and enjoy the incredible smell later.
Flavor Twist on a Classic
Banana bread is already a winner, but adding that salty, rich peanut butter gives it a huge Flavor Twist! It cuts through the sweetness just right. Every bite tastes incredibly decadent, but you know you’re fueling up properly.
Gathering Ingredients for Perfect Peanut Butter Banana Bread
Alright, let’s talk supplies! For this loaf to be the perfect Peanut Butter Banana Bread, we need to treat our ingredients well. Quality really matters here, which is why I get fussy about a couple of things.
You need the basics: flour, baking soda, and salt. But the stars, honestly, are the bananas, the peanut butter, and that rich brown sugar. Don’t skimp on the butter, either—it needs to be melted and just slightly cooled before we mix it in.
Ingredient Notes and Substitutions
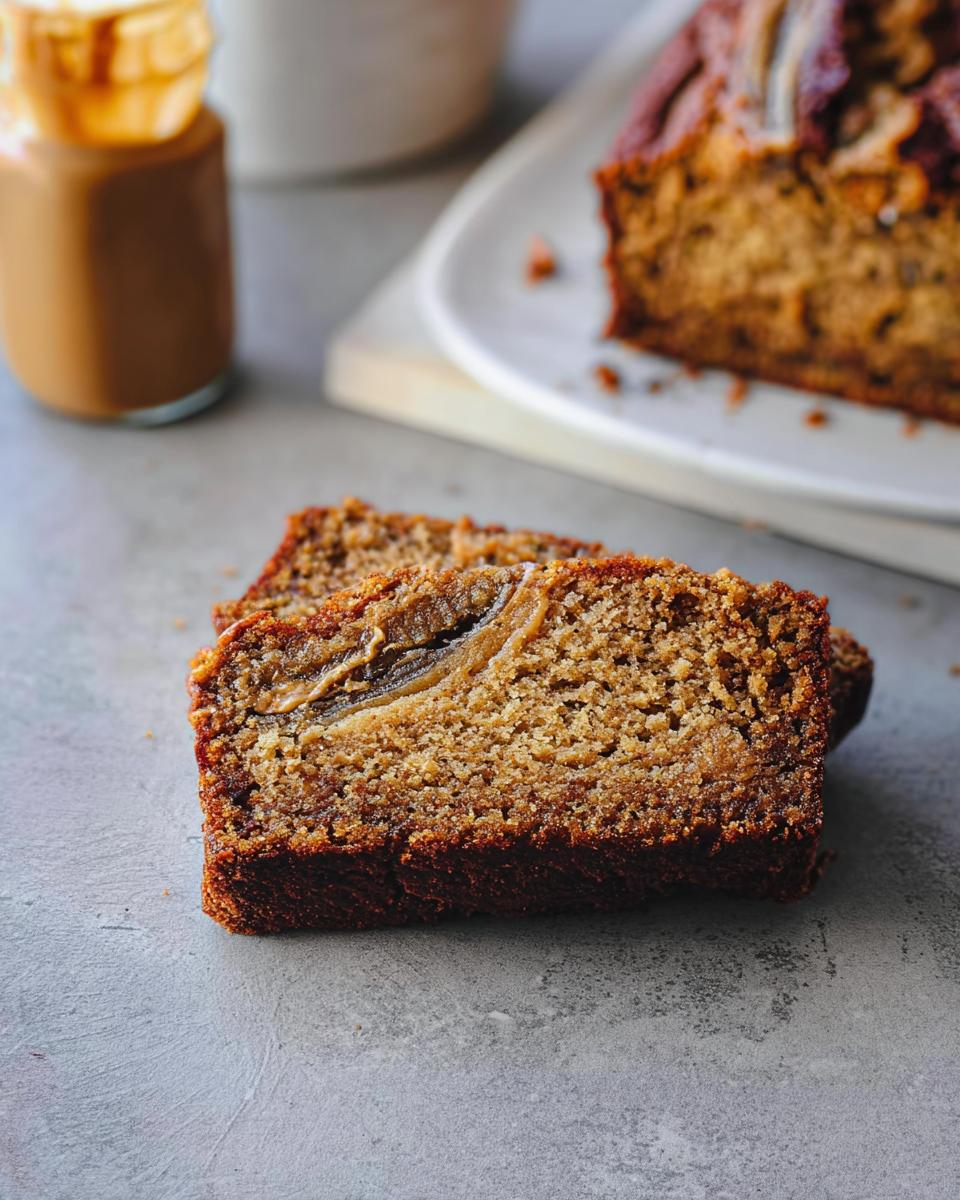
Here’s the real secret sauce on ingredient selection. Listen up: your bananas absolutely have to be brown, almost spotted! We need that extra sweetness and that mushy texture to carry the flavor. You’ll need about three really large, sad-looking brown bananas to get the required one cup of mashed goodness.
For the peanut butter, use your favorite creamy style! It doesn’t need to be fancy, just something that melts nicely. And hey, while I prefer creamy for this recipe’s texture, if you want to try crunchy for chunks, go for it! Just keep that classic peanut butter flavor profile strong.
Step-by-Step Instructions for Your Peanut Butter Banana Bread
Okay, time for the fun part! This process moves fast once you have your ingredients ready, so make sure you have your 9×5-inch loaf pan greased and ready to go. First things first: crank that oven up to 350ºF. Don’t wait until the batter is mixed! Once it’s hot, we can get started. If you’re new to baking loaf breads, remember that getting your oven temperature right is critical—it’s like learning the right temps for your skillet dinners, you can check out some general tips over at my dinner ideas guide; it applies to baking stability too!
We start by separating our duties. You need one medium bowl just for the dry stuff—the flour, baking soda, and salt. Give that a quick whisk so everything is acquainted. In your biggest bowl, which is where the magic happens, you’ll mash those brown bananas until they’re pretty smooth. Then, dump in the peanut butter, the melted butter (make sure it’s not hot!), brown sugar, egg, and vanilla. Whisk that wet mix until it looks cohesive—nice and uniform!
Mixing the Dry and Wet Components
This part is non-negotiable, listeners! You need to add the dry ingredients to the wet ingredients, and here’s the golden rule for any good loaf: do not overmix! Honestly, when you mix too much, you activate all that gluten in the flour, and suddenly, your lovely, tender Peanut Butter Banana Bread turns into something chewy that could probably stop a door. Just stir until you see the flour streaks disappearing. A few little lumps are totally fine, I promise.
Baking and Achieving the Perfect Center
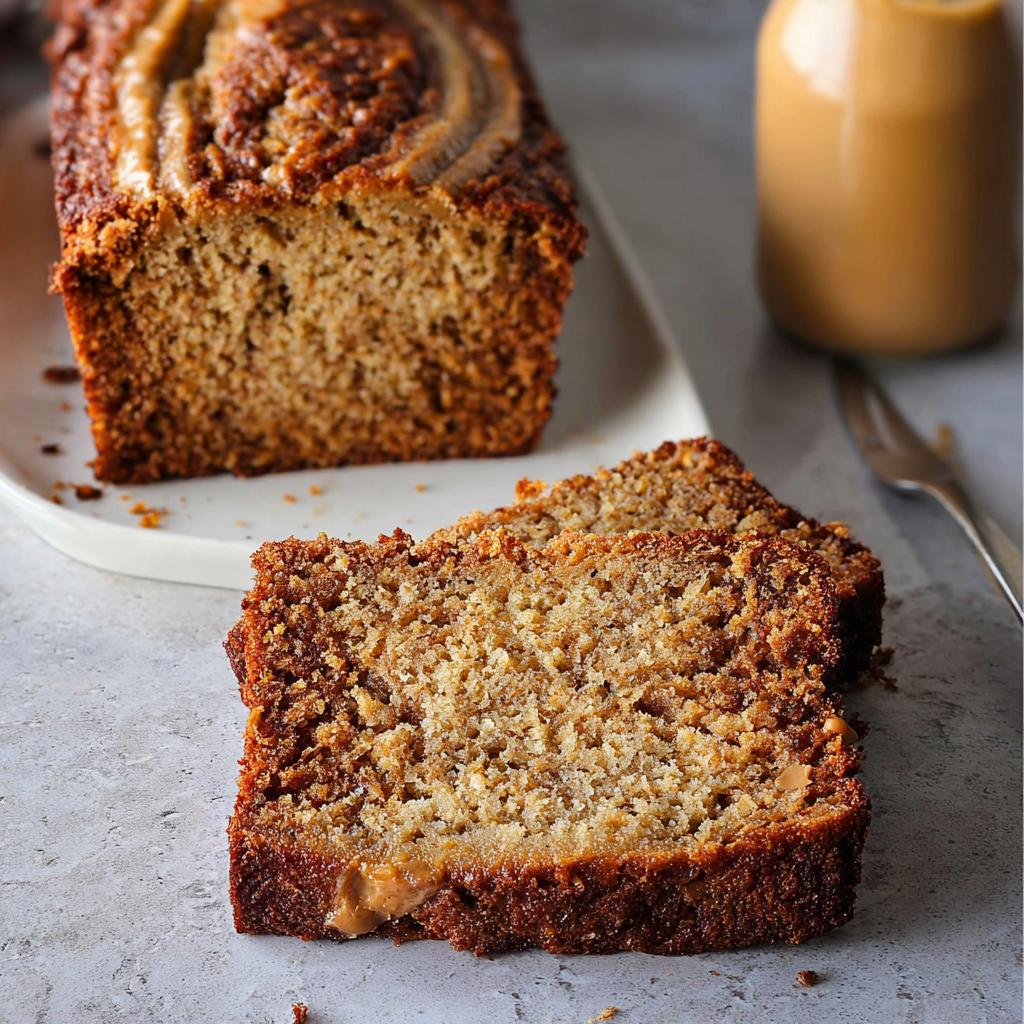
Scrape that batter into your waiting loaf pan. Pop it into your preheated 350ºF oven. Now, timing is tricky because every oven is its own universe, right? Start checking around the 50-minute mark, but anticipate needing closer to 65 minutes for a perfect bake. The most important visual cue is when the edges start to pull away just a tiny bit from the pan sides.
When you think it’s done, test it! Stick a toothpick right into the middle. If it comes out clean—or maybe with just a few moist, sticky crumbs clinging to it—you nailed it. If it’s wet batter, give it another five minutes and check again. Patience here guarantees that satisfying texture we’re aiming for!
Expert Tips for Success with Peanut Butter Banana Bread
You’ve got the ingredients, you know the steps, but sometimes, bread just needs that little extra nudge to go from good to absolutely legendary. Since you’re here learning from me, The Keto Performance Chef, I want to share a few insider tricks that I use every single time I make this Peanut Butter Banana Bread.
These little tweaks are what separate a standard loaf from that show-stopping, perfect-texture result. Don’t skip these!
First tip: If you want that beautiful, rustic crack across the top—you know, the one that looks like it took hours longer to make—here’s what you do. Once you pour the batter into the greased pan, grab a knife and gently score the top of the batter, lengthwise, right down the center. Don’t cut deep, just cut maybe a quarter of an inch down. This gives the heat a pre-determined weak spot to burst through, resulting in that gorgeous bakery look!
My second tip focuses on the flavor payoff. Instead of using regular peanut butter straight from the jar, give it a quick zap in the microwave—maybe 15 seconds. It makes it super pourable and helps it incorporate seamlessly into the wet ingredients. It really ensures that deep peanut flavor is present in every single bite of this Peanut Butter Banana Bread without any dense pockets.
Finally, let’s talk about cooling. I know you’re eager to slice into it—who isn’t?—but resist! If you try to remove that hot loaf from the pan too soon, the soft structure will collapse, and trust me, your beautiful bake will stick to the bottom. Stick to those 10 minutes in the pan, always. That slight cooling period firms up the edges just enough to release cleanly onto the rack. It’s worth the wait, I promise!
Serving Suggestions for Your Snack Bread
So, you’ve baked this incredible loaf, and the aroma filling your house is making you slightly crazy. Now what? While this Peanut Butter Banana Bread is fantastic all on its own—truly, it stands up perfectly—that’s not how I always eat it! We need to think about how this fits into your day, whether you’re a busy parent needing a quick win or an athlete needing solid fuel.
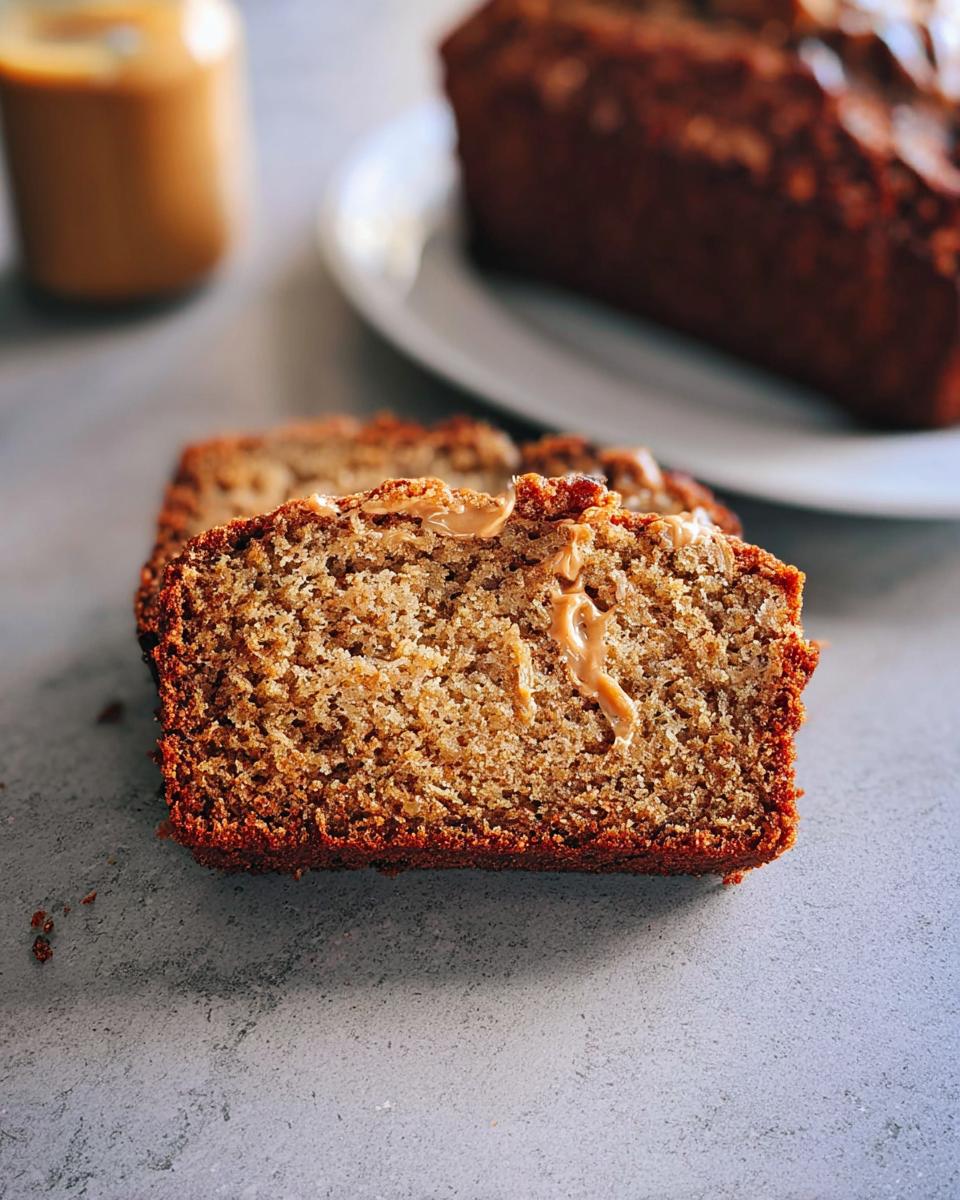
Since this is the ultimate Snack Bread, I like to prepare it a couple of ways. For breakfast, I usually toast a slice until it’s warm and crispy on the edges. That slight crunch against the soft interior is just heavenly.
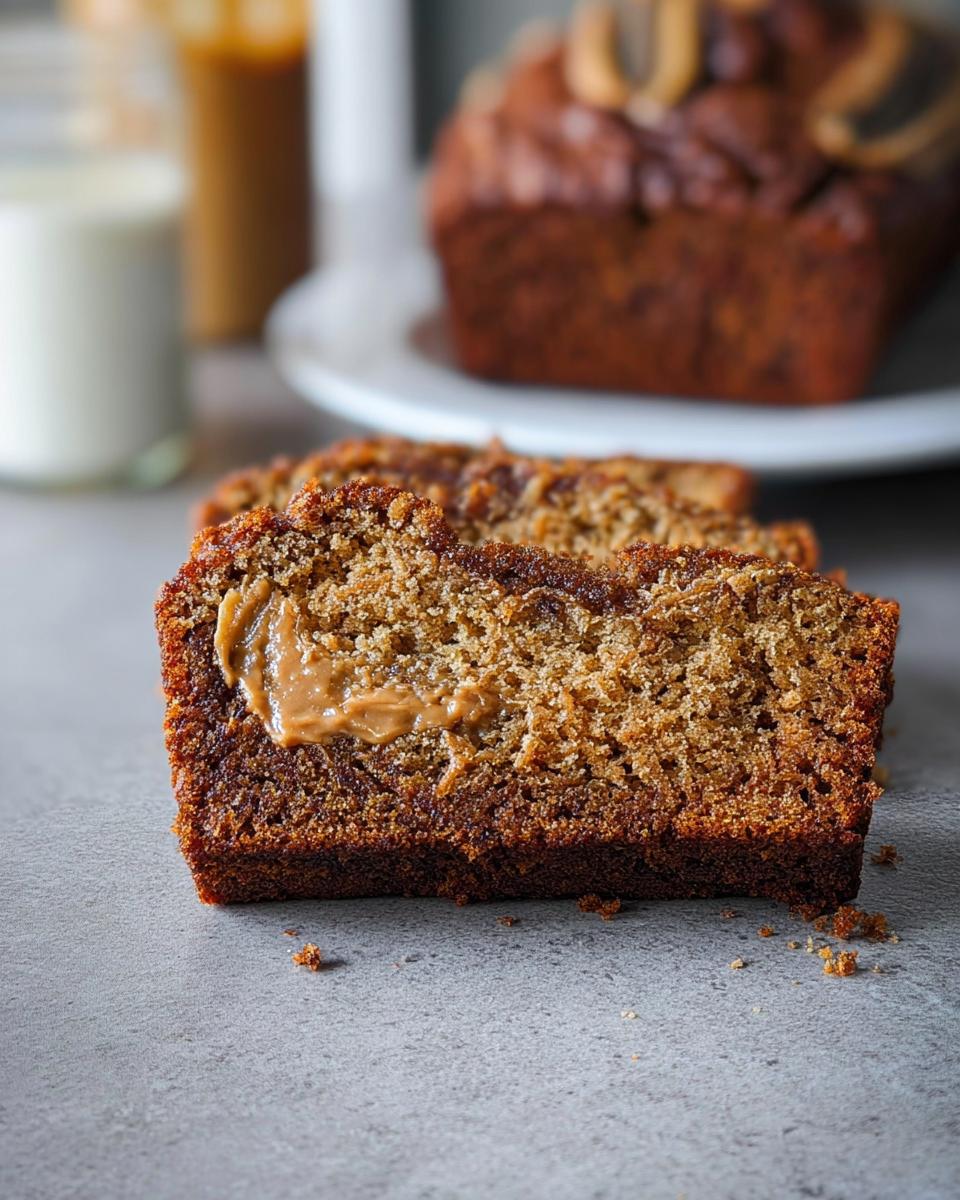
If you’re eating this post-workout, smear a thin layer of extra peanut butter on top! That adds a secondary hit of protein to keep you satisfied until your next real meal. Sometimes, I even crumble a small slice over a bowl of Greek yogurt if I want a quick, comforting parfait.
For those weekend mornings when you have a little extra time? Slice it thick, warm it gently in a skillet with just a dab of butter—yes, more butter, because why not on a weekend?—and top it with a drizzle of honey or a sprinkle of chopped nuts. This transforms it from a fast snack into a legitimate weekend brunch showstopper. Honestly, it tastes good any way you slice it, but these little additions just make it feel extra special!
Storage and Making Ahead with Peanut Butter Banana Bread
Okay, everyone asks me this because they always want some leftover for tomorrow, right? And the answer is YES, you can totally make this ahead! That’s why it’s such a powerhouse for meal prep. But you have to treat it right so that amazing moisture doesn’t turn into sad sogginess.
The absolute first rule, and I mean this from the bottom of my heart, is that you *must* let this Peanut Butter Banana Bread cool completely before you even think about wrapping it. I mean bone-cold! If you wrap it while it’s even slightly warm, all that steam gets trapped, and that’s how you get a gummy, unfortunate layer on the crust. Don’t do it to yourself!
For the counter stash, once it’s totally cool, just wrap that loaf tightly in plastic wrap. Honestly, I sometimes put the plastic-wrapped loaf into a large Ziploc bag just for extra security against drying out. It stays perfectly good on the counter for up to three whole days. That’s three days of easy breakfasts sorted!
Now, if you’re like me and you baked a double batch (because, why wouldn’t you?), freezing is your best friend. Cool the whole loaf, wrap it *super* tightly in plastic wrap like you’re preparing it for winter hibernation, and then slide it into a freezer-safe bag. It holds up beautifully for about a month. When you need a slice, just pull it out, let it come to room temperature for an hour, or if you’re impatient like me, nuke a slice for about 20 seconds. It tastes almost freshly baked, I swear!
See? Simple solutions for a delicious, time-saving Peanut Butter Banana Bread. You’re welcome!
Understanding the Nutrition in This Peanut Butter Banana Bread
I know, I know—when something tastes this much like dessert, you get nervous about the numbers! But since this becomes my go-to fuel, especially when I’m focusing on my fitness goals, I always want to know what I’m putting into my body. This Peanut Butter Banana Bread is built to satisfy hunger while still fitting nicely into a balanced plan.
Based on standard ingredient measurements for one slice (the recipe yields about 10 slices), here’s a snapshot of the estimated nutrition breakdown. Remember, because we’re using real ingredients and things like brown bananas, these are super helpful guideline numbers:
- Calories: 227
- Fat: 9g
- Saturated Fat: 3g
- Protein: 4g (That Protein Boost from the peanut butter really helps!)
- Carbohydrates: 31g
- Sugar: 16g
- Fiber: 1g
- Cholesterol: 23mg
Now, a quick word of caution, because I’m a chef, not a registered dietitian! These numbers are calculated estimates based on my usual pantry staples. If you swap out your butter for something else, or use a different brand of peanut butter, the actual macros will shift a little bit. But overall, this loaf keeps things in a great zone for a filling, satisfying snack!
For me, knowing I get a solid 4 grams of protein alongside that comforting banana flavor keeps me feeling great, whether I’m eating it for breakfast or just grabbing a slice in the afternoon. It proves that you don’t have to sacrifice flavor for function!
Common Questions About Making Peanut Butter Banana Bread
It’s completely normal to have questions when trying a new recipe, especially when you’re hoping for that perfect Comfort Bake result! I’ve gathered the most frequent things folks ask me about this specific Peanut Butter Banana Bread. Hopefully, these quick answers save you a trip to the notes section!
You want clarity, and I want you to succeed in the kitchen. Let’s dive into those panics before they even start!
Can I add chocolate chips to the Peanut Butter Banana Bread?
Oh, absolutely yes! If you’re going to do it, be smart about it. Chocolate chips are one of my favorite things to stir in for an extra treat. I usually suggest about half a cup of semi-sweet or dark chocolate chips stirred in right at the very end with your dry ingredients. Give them a light coat of flour first if you want them suspended nicely throughout the loaf, otherwise they’ll sink to the bottom while it bakes!
What kind of bananas should I use for the best flavor?
This is where you cannot compromise, friends! You want bananas that look like they’ve had a bit of a tough life—squishy, mostly brown, maybe even black! Those bananas are packed with sugar and moisture, which is exactly what this recipe is relying on. If your bananas are still yellow or green when you go to bake, they won’t mash down right, and your bread won’t have that deep, natural sweetness that cuts through the peanut butter richness. Seriously, wait until they are brown!
How can I ensure I get a good Protein Boost from this recipe?
That’s a great question focusing on the fuel aspect! While the peanut butter already gives us a nice little Protein Boost, if you want to push it higher, try swapping out about a quarter cup of the all-purpose flour for a scoop of unflavored or vanilla protein powder. Just be careful! Protein powders tend to absorb more moisture, so you might need to add an extra splash of milk (if you use it in the recipe) or just know that the texture might be slightly drier. But every little bit helps when you’re planning for nutritious snacks!
Why is my loaf sticking to the pan even though I greased it?
Baking fats can be tricky, especially with sweeter loaves like this Peanut Butter Banana Bread. Grease is good, but grease plus flour is better! If you find sticking is a common issue for you, you might want to make a quick pan release paste—it’s just equal parts oil, shortening, and flour mixed into a paste. Brush that thick layer all over, right into the corners, before pouring the batter in. It forms a non-stick barrier that rarely fails, even with higher sugar content bakes!
Share Your Comfort Bake Creations
That’s it! You’ve made the loaf, you’ve smelled the amazingness, and now you’re probably enjoying the most satisfying slice of homemade Peanut Butter Banana Bread imaginable. But baking shouldn’t happen in a vacuum, right? I absolutely love hearing how this recipe turns out for you all in your own kitchens!
This recipe is truly a labor of love, and seeing your success stories—whether you’re a busy parent making a quick breakfast or someone finding that perfect post-workout fuel—is the best part of running this blog. Don’t keep those delicious outcomes to yourself!
First off, if you followed along and loved the results, please do me a huge favor and leave a rating down in the comment section below! Five stars if it earned it! Knowing what works for you helps the next person feel confident tackling this bake. Tell me what adjustments you made, too. Did you try adding protein powder? Did you top it with chocolate chips?
And most importantly, I want to see the loaves! Take a picture of your gorgeous, crackly-topped Peanut Butter Banana Bread and tag me over on social media. I try my very best to see and share every single one. It’s proof that healthy comfort food is totally achievable, even when you’re crushing those weeknight dinner goals!
Thanks so much for baking with me today. Happy eating, and I’ll catch you in the next recipe!
Peanut Butter Banana Bread
Ingredients
Equipment
Method
- Preheat your oven to 350ºF. Grease a 9×5-inch loaf pan with nonstick cooking spray and set it aside.
- In a medium bowl, whisk together the flour, baking soda, and salt. Set this aside.
- In a large bowl, mash the ripe bananas with a fork. Add the peanut butter and melted butter, and stir until combined. Stir in the brown sugar, egg, and vanilla extract until smooth.
- Stir the dry ingredients into the wet ingredients. Avoid overmixing.
- Pour the batter into the prepared pan. Bake for 50-65 minutes, or until a toothpick inserted into the center of the bread comes out clean. Check the bread at 50 minutes, as oven times vary.
- Remove the pan from the oven and place it on a wire cooling rack. Let the bread cool in the pan for 10 minutes. Run a knife around the edges of the bread and carefully remove it from the pan. Allow the bread to cool on the wire cooling rack until it is slightly warm. Cut into slices and serve.