When you need a dessert that screams ‘special occasion’ but still fits perfectly into your balanced lifestyle? You need this recipe! Forget any preconceived notions you have about baking being overly complicated or tedious. This **Chocolate Marble Cheesecake** is ridiculously rich, unbelievably creamy, and the way that dark chocolate weaves through the vanilla filling creates that showstopping swirl that makes everyone gasp when you set it down.
I remember the first time I decided to make a keto-friendly Chocolate Marble Cheesecake. It was during a family gathering, and I wanted to bring something special that everyone could enjoy. As the mixer whirred and the rich chocolate and creamy cheese mingled together, I reflected on how far I’d come since my college days. There was something deeply satisfying about crafting a dessert that catered to my keto lifestyle while also winning over my family, many of whom were skeptical about “healthier” versions of classic favorites. That cheesecake not only filled our bellies but also sparked conversations about balance in our diets—reminding us all that indulgence can be part of a well-rounded life.
Trust me, you don’t have to be the Keto Performance Chef to nail this recipe. It’s designed for every home baker looking for that classic, decadent experience without the fuss. Get ready for compliments!
Why This Chocolate Marble Cheesecake is a Showstopper Cake
Seriously, this isn’t just cheesecake; it’s an event! If you need a dessert that people talk about long after the party wraps up, you’ve found it. It hits every high note perfectly.
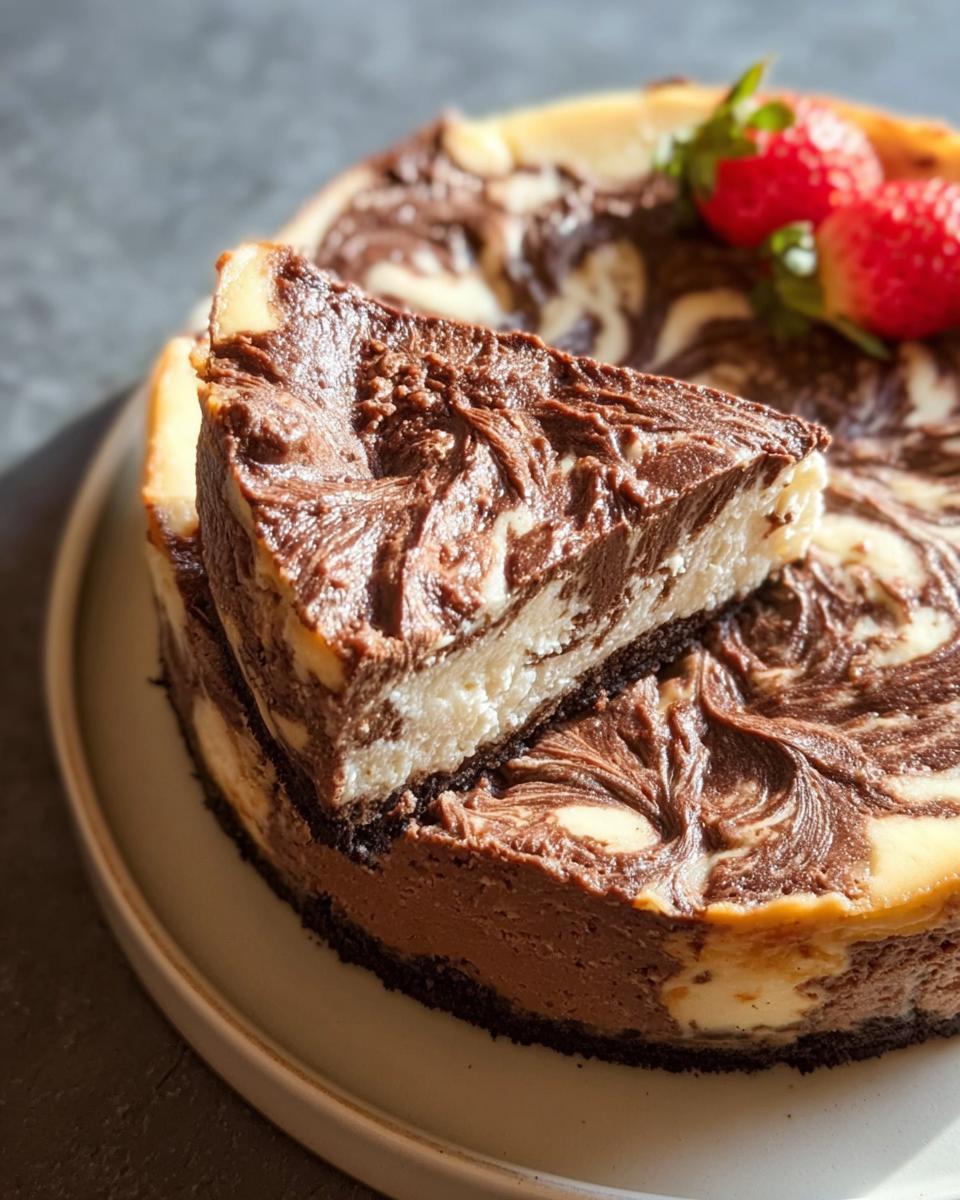
- It delivers the most unbelievably rich and creamy texture you can imagine.
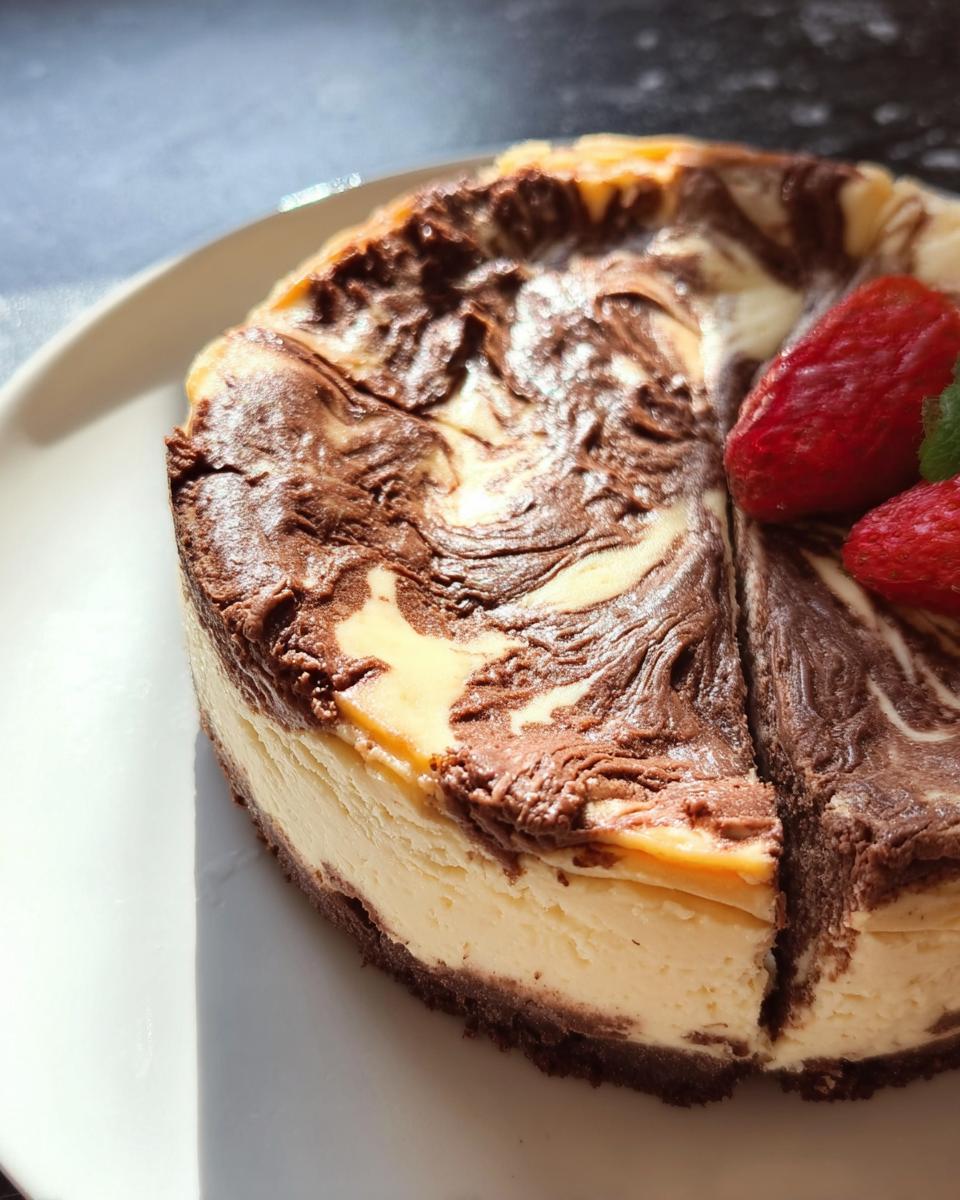
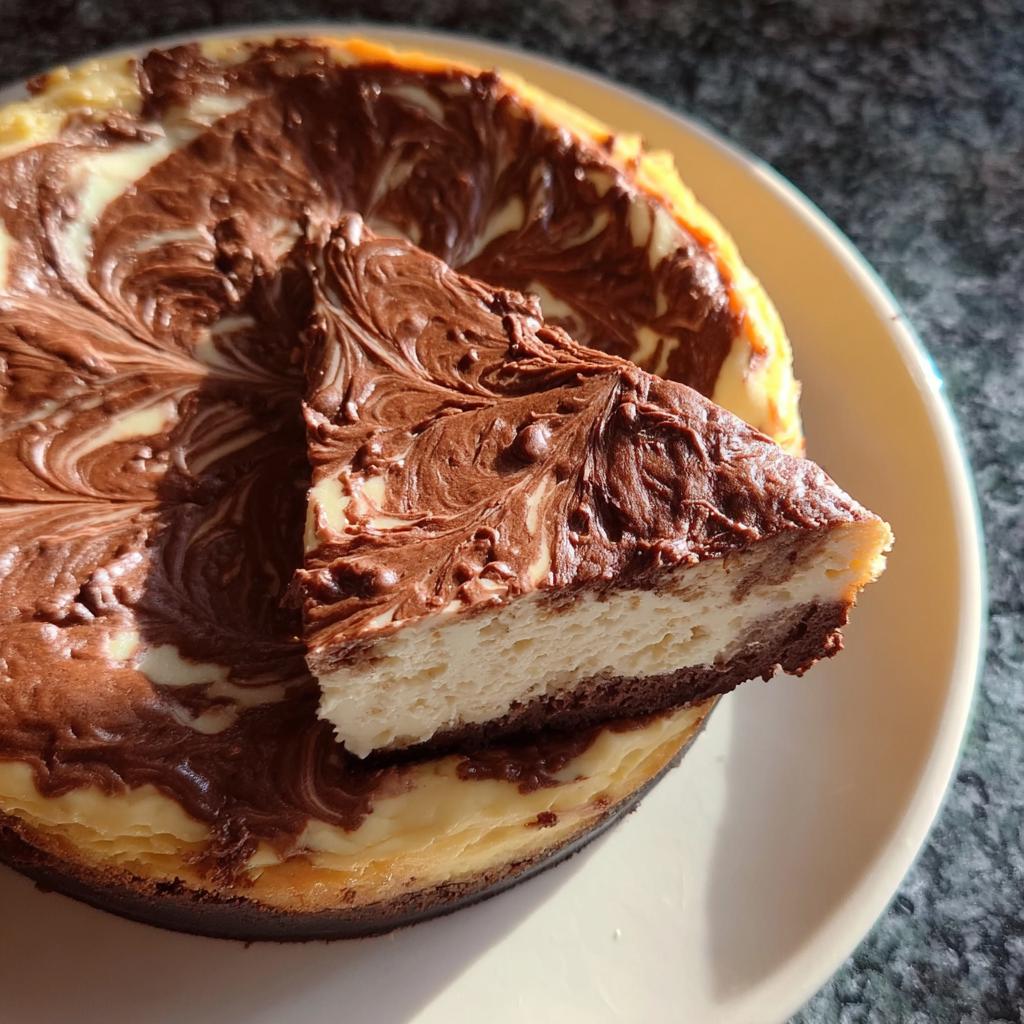
- The beautiful way the dark and light batters meet creates a visually stunning chocolate swirl cheesecake that looks completely professional.
- Plus, these kinds of decadent marble dessert recipes always end up being the first things gone at any gathering—a true favorite for potlucks!
Get ready, because this is truly one of those showstopper cakes.
Gathering Your Ingredients for the Chocolate Marble Cheesecake
Okay, stop right there! We need to talk about getting our ingredients ready before we even think about turning on the mixer. With a delicate **Chocolate Marble Cheesecake** like this, precision matters, especially when it comes to temperature. Forget getting these ingredients out of the fridge five minutes before mixing—we need them cooperative!
I love organizing things this way because it breaks down the components, just like how we separate the crust from the main filling. Think of this as getting your mise en place ready for success. If you want that smooth, velvety bite instead of a lumpy mess, you must use room-temperature cream cheese. And please, use the good quality semisweet stuff for that rich chocolate punch! Want some more inspiration for make-ahead wonders? Check out this lovely chocolate mousse recipe while you gather everything.
For the Crust Ingredients
First, we build the stage for our creamy filling. You’ll need:
- 1.5 cups of crushed chocolate graham crackers—make sure they are finely crushed!
- 6 tablespoons of butter, and this MUST be softened, not melted, please!
For the Cheesecake Filling Ingredients
This is where the magic happens, so pay attention to those details:
- 2 ounces of semisweet chocolate, chopped up nicely so it melts quickly.
- 2 packages (that’s two whole 8-ounce packages!) of cream cheese. I cannot stress this enough: they must be completely softened.
- 1/2 cup of white sugar.
- 1/2 teaspoon of vanilla extract for that classic background note.
- 2 eggs. Remember to use them one at a time when mixing later!
Step-by-Step Instructions to Create Your Chocolate Marble Cheesecake
This is the fun part, but we have to be methodical! Don’t even think about rushing the mixing, or your beautiful marble dessert recipe will end up grainy. Remember, we are aiming for total smoothness here. First things first: get that oven humming at 325 degrees F (165 degrees C). We’ll need that heat ready for the crust and the main bake. If you want more secrets on getting kitchen processes just right, I have some great tips on sauces over making the perfect au jus that might help your focus!
Preparing and Baking the Crust
Grab your medium bowl and mix those crushed chocolate graham crackers and the softened butter together until they look nice and crumbly—like wet sand. Press that mixture firmly into the bottom of your 9-inch springform pan. You want a tight, even base for this rich dessert! Slide that into the oven now for only 10 minutes to set. Once done, pull it out and just let it sit; it needs to cool down a bit while we tackle the filling.
Mixing the Cream Cheese Batter
Time for the chocolate element! Put your chopped chocolate in a microwave-safe bowl and zap it until it’s totally melted and smooth. Stir until you get that glossy sheen. Now, move to your large bowl. Beat the cream cheese, sugar, and vanilla until it’s creamy—no lumps allowed! Add those eggs in one at a time, mixing gently after each addition. Don’t overbeat once the eggs are in, or we’ll end up with bubbles!
Here’s a pro move: scoop out about 1 cup of that light cream cheese mixture and blend it in with your melted chocolate. Now you have your two separate batters ready to go!
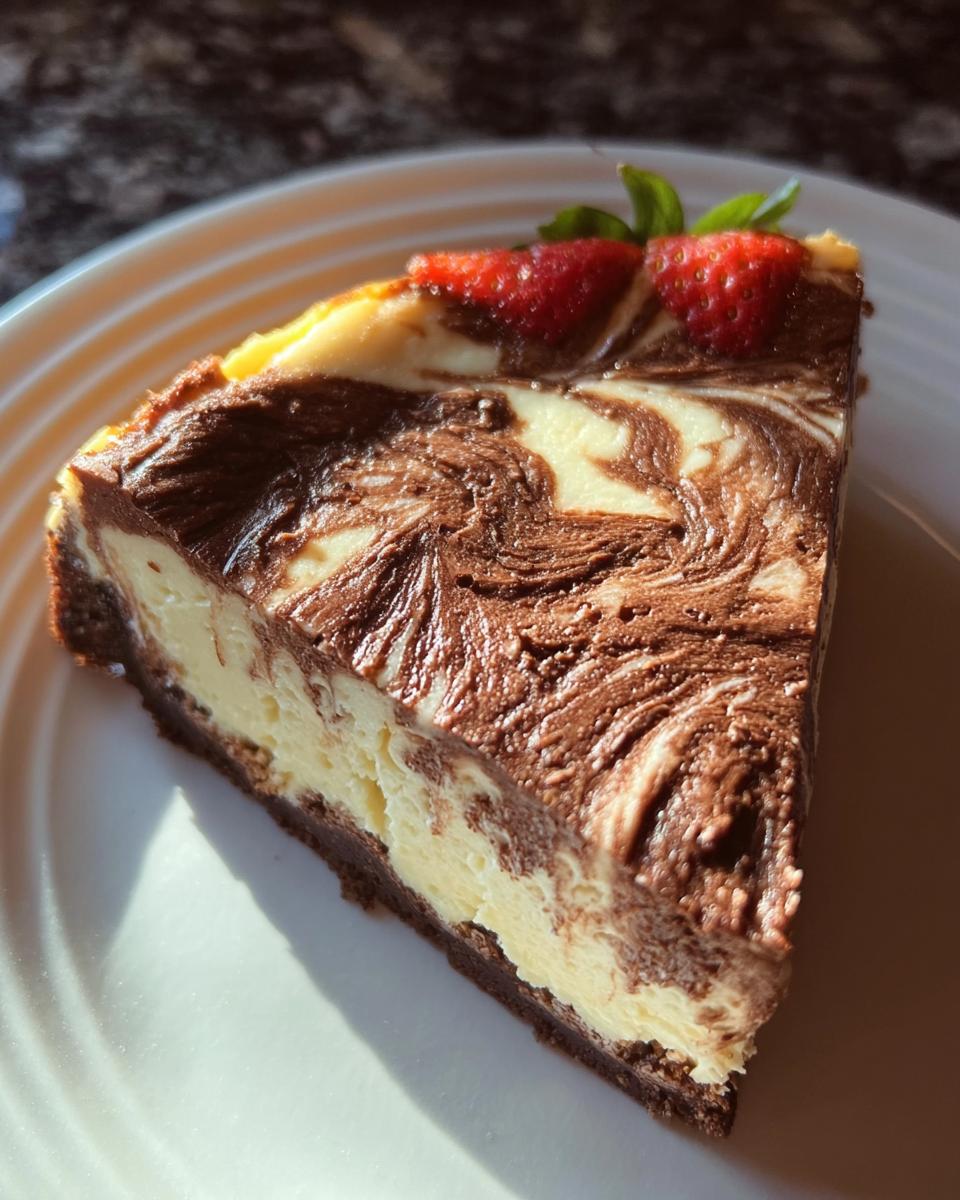
Achieving the Perfect Chocolate Swirl Cheesecake Look
Spread the plain, vanilla batter evenly over your cooled crust first. Next, randomly dollop that chocolate batter all over the top—don’t try to pour it neatly! Take the tip of a knife and gently drag it through both batters just once or twice. Don’t over-swirl! We want distinct ribbons for that beautiful **chocolate swirl cheesecake**. Pop it into the 325°F oven for 30 to 35 minutes. When the center sets (it will still look a little wobbly, that’s okay!), pull it out. Crucially, let it cool down COMPLETELY on the counter before you even *think* about shoving it in the fridge for those 3 hours minimum!
Tips for a Perfect Chocolate Marble Cheesecake Every Time
Baking a cheesecake feels intimidating, I know! But I’ve got my game plan worked out, honed over years of wanting that perfect dessert for gatherings. The biggest fear is always cracks, right? Well, it all comes down to air and temperature control. When you are mixing up the cream cheese batter, go slow once those eggs are in! If you beat it too fast, you’re whipping air in, and that air expands in the oven, causing the top to tear open like a stressed-out pastry chef!
Also, don’t skip the cooling process! That fast temperature change from hot oven to cold counter is what makes this **Chocolate Marble Cheesecake** panic! Let it cool gradually on the counter before covering it and moving it to the fridge. If you’re looking for more personalized baking help, feel free to reach out to me through my contact page; I love troubleshooting baking disasters!
Ingredient Notes and Substitutions for Your Marble Dessert Recipes
Let’s get specific about what goes into our creation here. Since you might be thinking keto (like I usually am!), I need to be clear: this recipe calls for white sugar, and for this specific batch, that’s what we’re using for texture. If you’re converting this to be strictly low-carb later, you’d need to swap that out for your favorite zero-carb sweetener, but stick to the recipe first!
But the one thing you absolutely cannot cheat on? That cream cheese! It has to be perfectly softened. If it’s chilly, you’ll end up beating it forever trying to smooth it out, and you’ll incorporate too much air. A smooth base is vital for these great marble dessert recipes.
Serving Suggestions for Your Chocolate Marble Cheesecake
This **Chocolate Marble Cheesecake** is already such a gorgeous centerpiece—it truly shines on its own! Since the flavor is so rich and decadent, I find that lighter toppings work the absolute best. You really don’t need much to turn this into a picture-perfect moment.
If you want a little something extra, try a few fresh raspberries scattered around the plate or a very light dollop of homemade whipped cream. They offer a nice, bright contrast to the deep chocolate. It’s such a wonderful showstopper cake; you just need to make sure the plate complements the swirl!
Storage and Reheating Instructions for Chocolate Marble Cheesecake
Now for the toughest part: waiting! You absolutely have to chill this **Chocolate Marble Cheesecake** before slicing. The recipe calls for at least 3 hours, but honestly? I always wait overnight. That extra chill time really firms up the texture and locks in all that amazing marbled flavor.
When it comes to storing leftovers (if there are any, ha!), keep it covered tightly in the springform pan or transferred to an airtight container in the fridge. This keeps that creamy top from drying out. And please, don’t even think about reheating cheesecake! These rich, creamy desserts are meant to be served delightfully cold. Anything else just ruins that perfect texture we worked so hard for!
Frequently Asked Questions About Chocolate Swirl Cheesecake
I get so many questions about making sure this dessert turns out picture-perfect, especially since it’s one of those stunning showstopper cakes! Cheesecake can seem tricky, but once you know these little kitchen secrets, you won’t have any trouble at all creating a fantastic **Chocolate Marble Cheesecake**.
How do I prevent my Chocolate Marble Cheesecake from cracking?
Ah, the dreaded crack! Honestly, it’s all about air and temperature. When you mix your batter, especially after you add the eggs, you need to mix gently. Too much air whipped in means the structure rises too fast and then collapses! You need that smooth batter, not aerated foam. Then, the cooling process is huge. Never move a hot pan straight into the fridge. Let it cool slowly on the stove or counter first. Slow cooling prevents that sudden shock that causes those ugly rips!
Can I make this chocolate swirl cheesecake ahead of time?
Yes! In fact, I prefer it that way! The flavor deepens overnight, and you get an even better texture when it’s fully chilled. The recipe says 3 hours minimum chilling time, but if you can manage to leave it covered in the fridge until the next day, you absolutely should. It makes serving so much less stressful, which is key when you’re hosting!
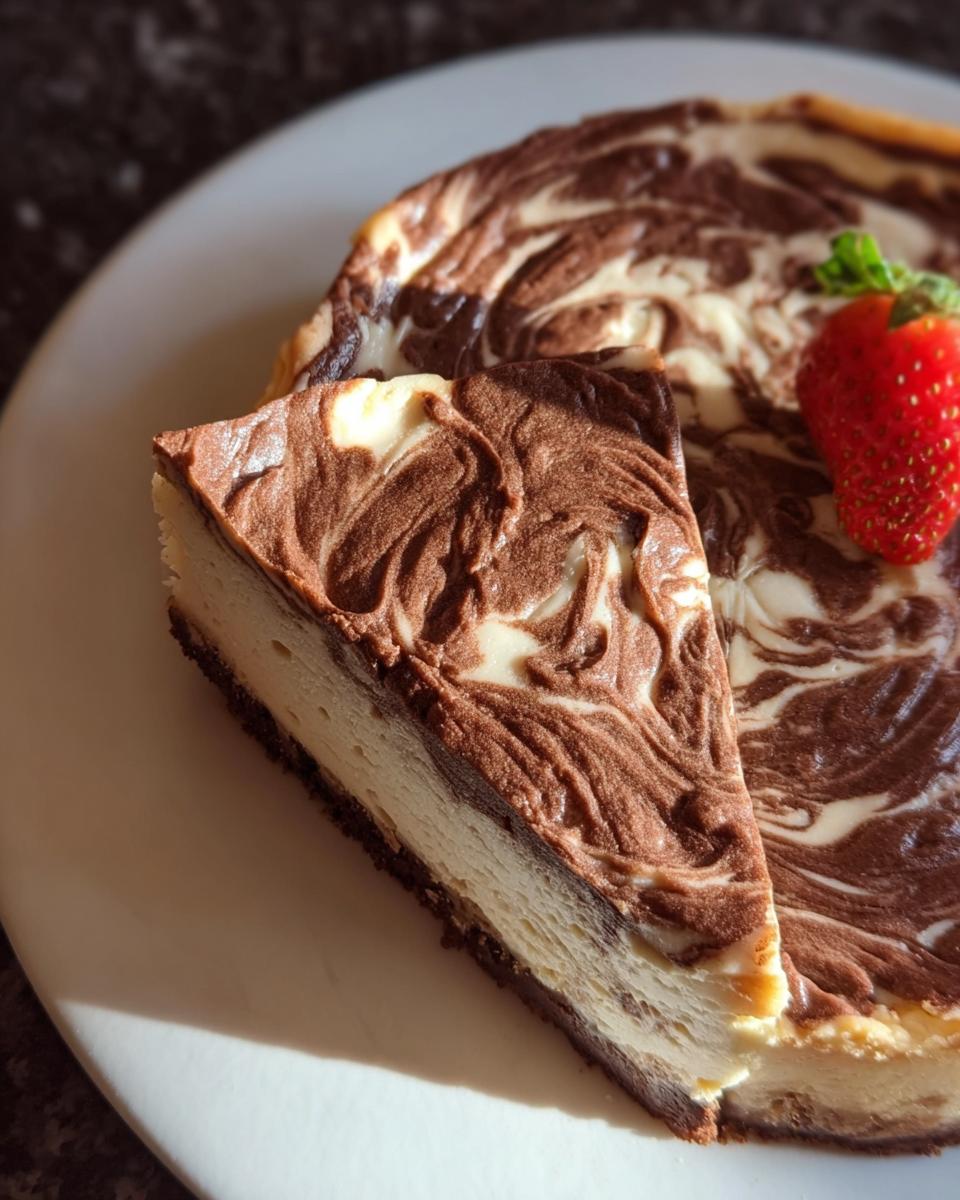
What is the best way to cut clean slices of this marble dessert recipe?
This is my biggest pro-tip for any cheesecake, especially one as rich as this **Chocolate Marble Cheesecake**! Forget using a cold knife; that just drags the creamy filling all over the place. You need a long, thin knife, and you need to dip it into a tall glass of very hot water before every single cut. Wipe the knife dry quickly and slice straight down. Dip, wipe, cut. Dip, wipe, cut. It slices through beautifully, leaving you with stunning, recognizable ribbons for every piece of your marble dessert recipe.
Sharing Your Chocolate Marble Cheesecake Experience
Whew! You did it! You’ve created a masterpiece—a stunning, creamy, swirled beauty of a **Chocolate Marble Cheesecake**. Now comes the best part: sharing it with the world (or at least your very lucky family and friends!).
I truly hope this recipe brings as much joy to your kitchen as it does to mine, especially when I pull it out as a fabulous potluck favorite. Don’t keep this deliciousness a secret! I’d absolutely love to hear how it turned out for you.
Did the swirl look amazing? Did your skeptical uncle finally admit that “specialty” desserts can be the best? Head down to the comments below and let me know! Tell me if you stuck to the plan or if you tried adding a topping—I’m always looking for new ways to present this showstopper.
If you ended up loving this simple process, please consider rating the recipe! Every little bit of feedback helps other bakers feel confident enough to tackle their own fantastic chocolate marble cheesecake next time they need a treat. Happy baking, friends!
Chocolate Marble Cheesecake
Ingredients
Equipment
Method
- Preheat your oven to 325 degrees F (165 degrees C).
- Combine graham cracker crumbs and butter in a medium bowl; mix well. Press the mixture into the bottom of a 9-inch springform pan.
- Bake the crust in the preheated oven for 10 minutes. Set it aside.
- Place the chopped chocolate in a microwave-safe bowl; heat it in the microwave until melted, stirring occasionally until the chocolate is smooth.
- Beat the softened cream cheese, sugar, and vanilla in a large bowl until creamy and smooth. Blend in the eggs, adding them one at a time.
- Remove 1 cup of the plain cream cheese mixture and mix it with the melted chocolate.
- Spread the plain batter into the baked crust. Drop the chocolate batter randomly over the top. Swirl the batter with the tip of a knife to create a marbled effect.
- Bake in the preheated oven until the center is set, which takes 30 to 35 minutes. Cool the cheesecake to room temperature, then refrigerate it for 3 hours to overnight before serving.