

There’s just something magical about a dinner that’s both fun *and* totally customizable, isn’t there? We all know that weeknight dinner struggle can be real, and sometimes you just need a meal that the whole family will actually get excited about. That’s where these awesome Ground Beef Recipes With Homemade Crunchwraps for Fun Dinners come in! I’ve been making these for years, and they’ve become my go-to when I want a crowd-pleaser that doesn’t take hours. Seriously, the crunch, the gooey cheese, that savory beef – it’s the perfect combo! Watching my kids totally devour them makes all the effort totally worth it, and I know you’ll love them just as much.
Why You’ll Love These Ground Beef Recipes With Homemade Crunchwraps
Seriously, these homemade crunchwraps are a game-changer for dinner! Here’s why you’ll be hooked:
- Super Easy to Make: We’re talking minimal prep and cook time, perfect for busy weeknights.
- Totally Customizable: Load ’em up with your favorite fillings! Everyone can build their own perfect crunchwrap.
- Kid-Approved Flavor: That crispy, cheesy goodness? It’s a guaranteed hit with the little ones (and the big ones too!).
- Deliciously Fun Dinner: Forget boring meals, these are a fun twist that everyone will be talking about.
Essential Ingredients for Your Homemade Crunchwraps
Alright, let’s get down to business! To make these amazing Ground Beef Recipes With Homemade Crunchwraps, you’ll want to gather these goodies. Trust me, having everything ready makes the whole process a breeze and totally worth checking out more ground beef recipes!
Here’s what you’ll need:
- 1 pound ground beef
- 1 packet taco seasoning (use your favorite blend!)
- 2/3 cup water
- 8 large flour tortillas (about 10-inch is perfect)
- 4 small flour tortillas (about 6-inch works best)
- 1 cup shredded cheddar cheese
- 1 cup shredded Monterey Jack cheese
- 1/2 cup sour cream
- 1/2 cup salsa
- 1 cup crushed tortilla chips (like, actual chips you crush up!)
- 2 tablespoons vegetable oil (for getting that perfect golden crust)
Step-by-Step Guide to Making Ground Beef Recipes With Homemade Crunchwraps
Alright, let’s get these delicious little flavor bombs ready! Making these homemade crunchwraps is way simpler than you might think. Just follow along, and you’ll be enjoying them in no time.
Preparing the Savory Ground Beef Filling
First things first, we need to get that awesome beef filling going. Grab a large skillet and toss in your pound of ground beef. Cook it over medium-high heat until it’s all nicely browned – no pink bits allowed! Once it’s browned, carefully drain off any extra grease. Nobody wants a greasy crunchwrap, right? Now, stir in that taco seasoning packet and the water. Give it a good mix, bring it up to a simmer, and let it bubble away for about 3 to 5 minutes. You want that sauce to thicken up just right, coating all that yummy beef.
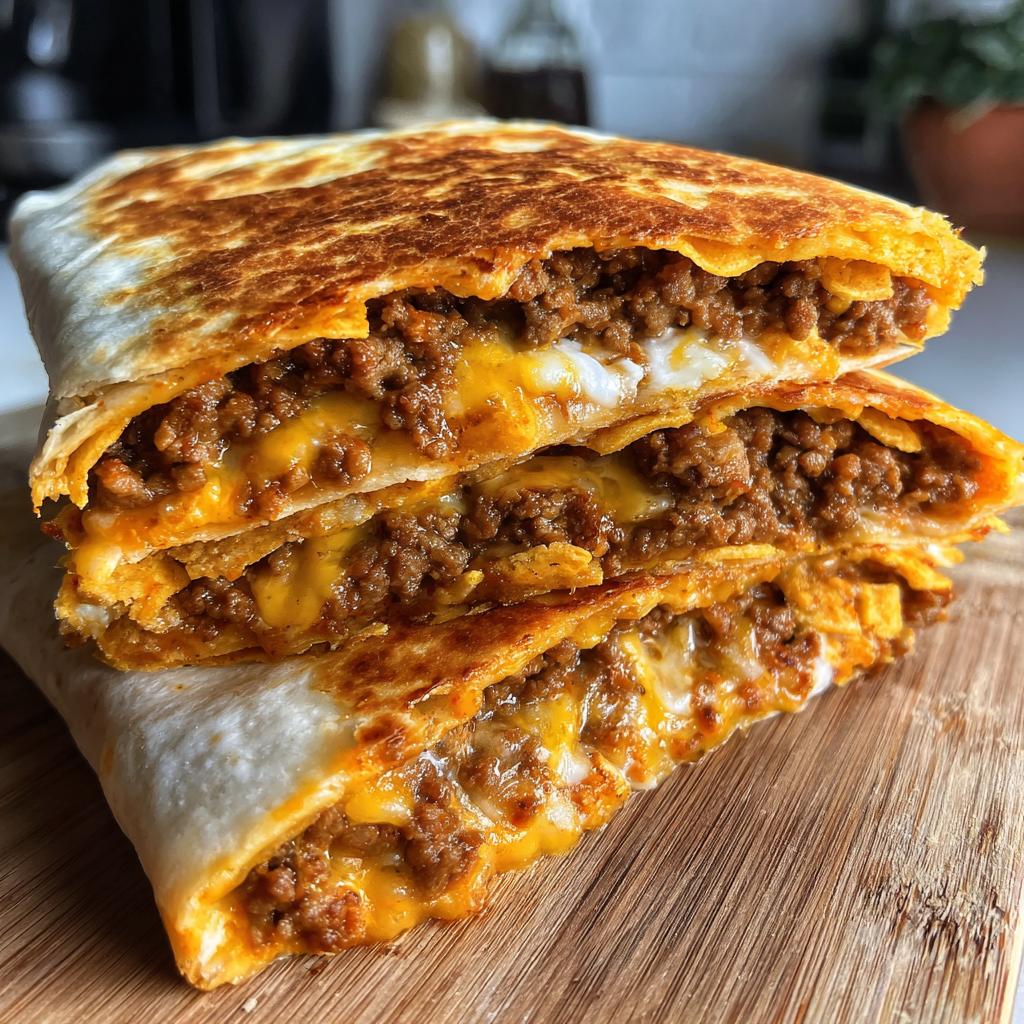
Assembling Your Perfect Homemade Crunchwraps
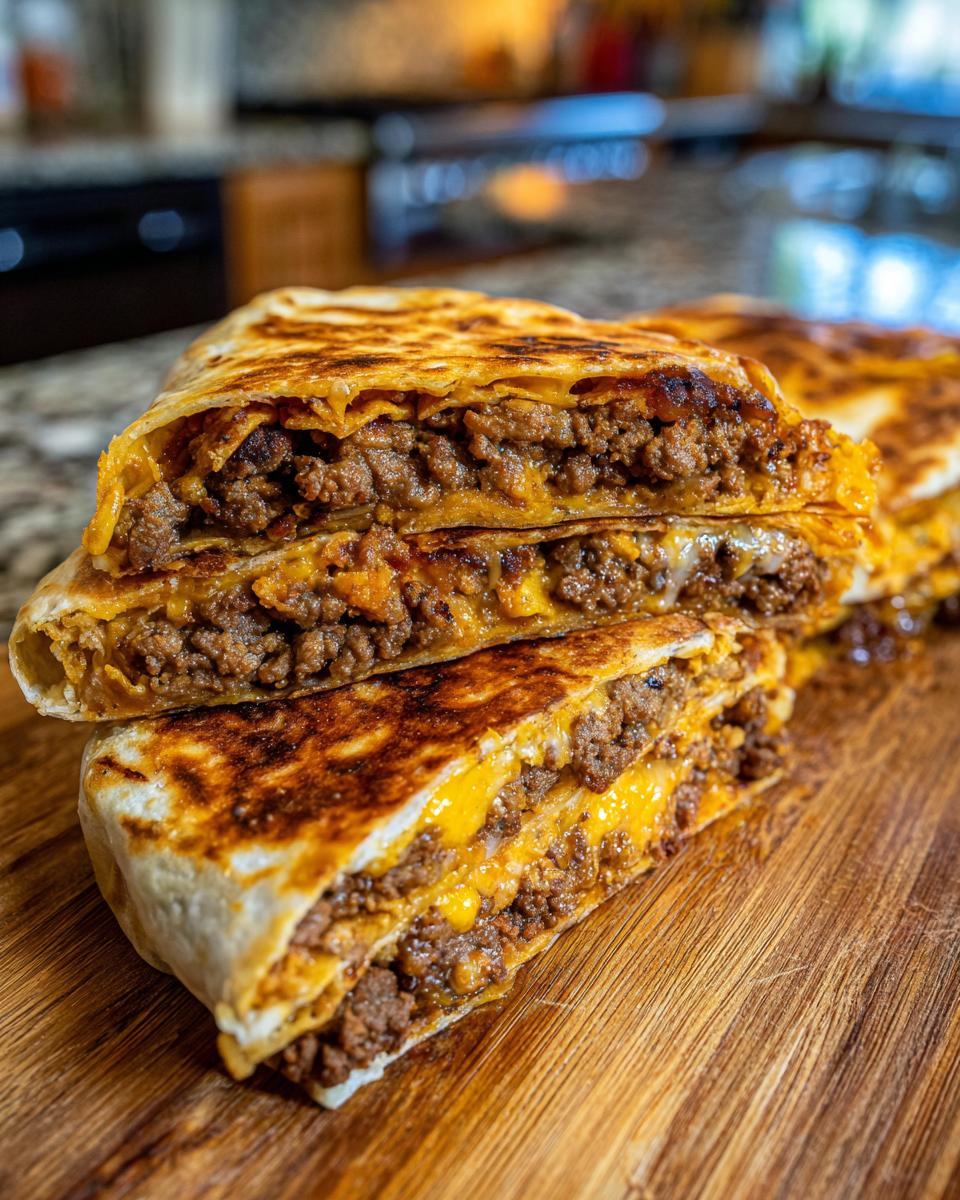
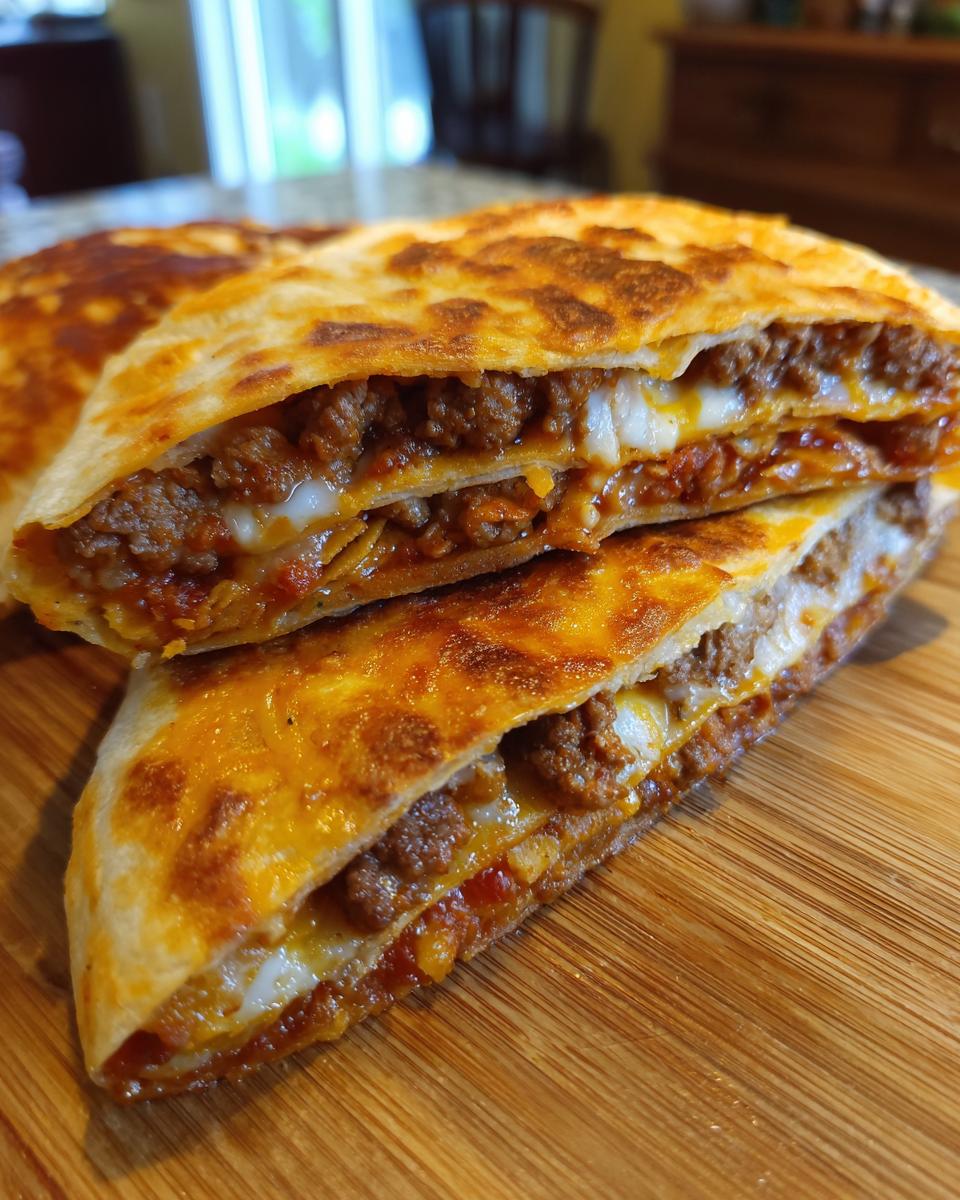
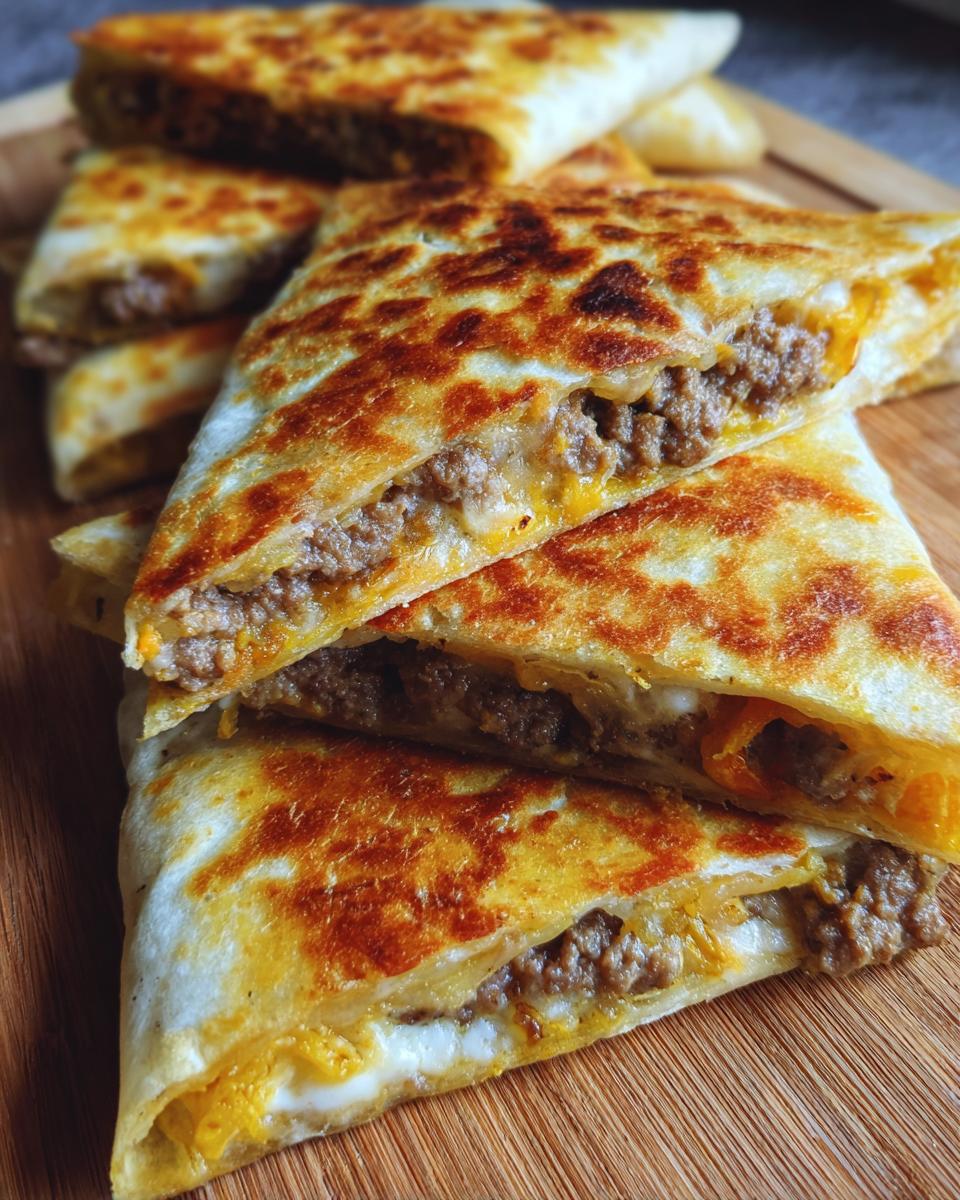
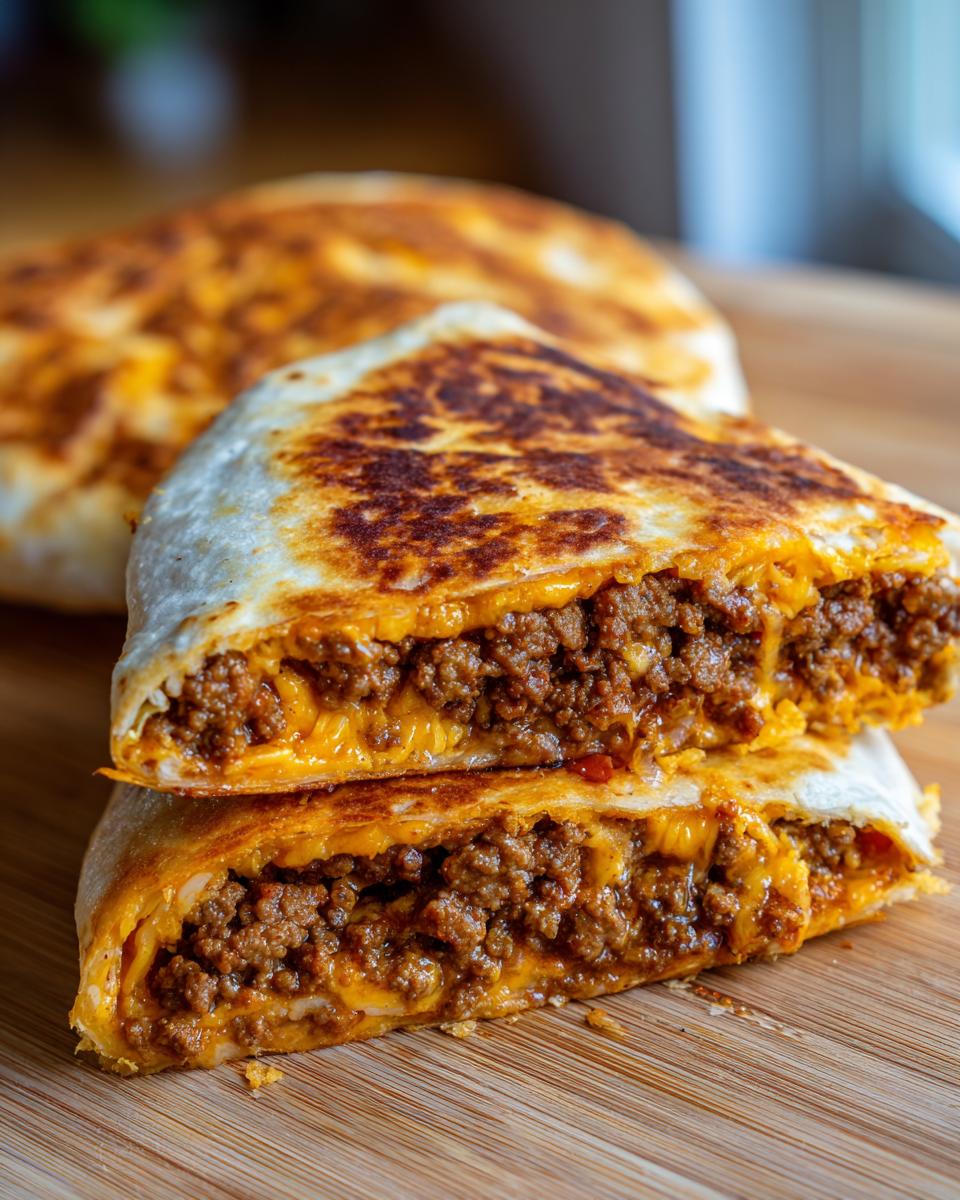
This is where the fun really begins! Lay out your 8 large (10-inch) flour tortillas. Now, take that seasoned ground beef mixture and spread a nice layer onto *half* of each tortilla. Don’t go all the way to the edges, or it’ll get messy later. Next, it’s time for the toppings! Sprinkle on a good amount of both cheddar and Monterey Jack cheese – you want it nice and melty. Then, add a dollop of sour cream and some salsa. For that signature crunch, sprinkle on the crushed tortilla chips. Finally, place one of the smaller (6-inch) tortillas right on top of the filling. Now, carefully fold the edges of the big tortilla over the little one, kinda like you’re tucking it in. You’re trying to create a sealed package so nothing falls out. Just pinch and fold until it’s all tucked in!
Cooking Your Ground Beef Recipes With Homemade Crunchwraps to Golden Perfection
Time to get that amazing golden-brown crust! Wipe out the same skillet you used for the beef, or grab a clean one, and add the vegetable oil. Heat it over medium heat until it’s shimmering slightly. Carefully place your assembled crunchwraps, seam-side down, into the hot oil. You should hear a satisfying sizzle! Cook them for about 3 to 5 minutes on each side. You’re looking for that beautiful golden-brown color and a super crispy texture. Once one side is perfect, flip it over and cook the other side until it matches. Repeat this process with any remaining crunchwraps, adding a little more oil if needed. Trust me, the smell alone is worth it!
Tips for the Ultimate Homemade Crunchwrap Experience
Okay, so you’ve got the basic recipe down, but let’s talk about taking these crunchwraps from good to absolutely AMAZING. A few little tricks can make all the difference! First off, don’t skimp on warming those tortillas. A quick zap in the microwave or a few seconds on a dry skillet makes them super pliable so they don’t tear when you’re folding. And Speaking of folding, that seal is key! Really press down and overlap those edges firmly. You want a tight package so all that goodness stays inside while you’re cooking. I learned this from making other ‘folded’ recipes, like these juicy turkey burgers – good folding equals good results!
Ingredient Notes and Delicious Substitutions
Sometimes you might not have exactly what the recipe calls for, and that’s totally okay! For cheese, feel free to mix up the cheddar and Monterey Jack with some Pepper Jack if you like a little heat, or use an all-Mexican blend. If you’re feeling ambitious, whip up your own taco seasoning – it’s way easier than you think! Instead of crushed tortilla chips, some folks love adding crushed Fritos for a different kind of crunch. And hey, if you’re craving something like this but want to go a different route, check out these chipotle ranch chicken burritos for another fun idea!
Frequently Asked Questions About Ground Beef Recipes With Homemade Crunchwraps
Got questions about these fun dinners? I’ve got answers! Making these ground beef recipes with homemade crunchwraps is a blast, and here are a few things people often ask. They’re kind of like a super-fun version of a burrito, but with that amazing crunch! Plus, they’re way easier to handle than some of those other burrito creations out there.
Can I make crunchwraps ahead of time?
While they’re best fresh because of that amazing crispy shell, you *can* prep the seasoned ground beef filling a day in advance and store it in the fridge. Then, just assemble and cook them right before you want to eat! Trust me, that fresh crunch is divine.
What are the best fillings for crunchwraps?
Oh, the possibilities! Besides the classic ground beef and cheese, you can add things like shredded lettuce, pico de gallo, black beans, corn, or even a different protein like shredded chicken. Just make sure not to overstuff them, or they’ll be tricky to fold and cook. Keep it balanced!
How do I prevent my crunchwraps from falling apart?
The key is really sealing that large tortilla over the smaller one. Press down firmly while you’re folding and again when you’re cooking them in the pan. Making sure you don’t overfill them also helps a ton! It takes a little practice, but you’ll get the hang of it!
Can I bake these instead of frying them?
You sure can! If you prefer baking, place the assembled crunchwraps seam-side down on a baking sheet. Bake at 375°F (190°C) for about 15-20 minutes, flipping halfway through, until golden brown and crispy. It won’t be quite the same crunch as pan-frying, but it’s still delicious and a bit less hands-on.
Serving Suggestions for Your Fun Dinner
Now that you’ve made these incredible crunchwraps, what should you serve alongside them? For a perfect taco night vibe, you can’t go wrong with a light and refreshing side salad or some extra chips and your favorite salsa! I love pairing them with a fresh watermelon salsa – it’s so unexpected and tasty. And to drink? A cold glass of water, some iced tea, or even a fun soda always hits the spot!
Storage and Reheating Instructions
Got leftovers? Lucky you! Let your crunchwraps cool completely, then wrap ’em up tightly in plastic wrap or foil. Store them in the fridge for up to 2 days. For reheating, I find a skillet over medium heat works best for getting that crunch back, about 3-5 minutes per side. You can also use a toaster oven or even an air fryer!
Nutritional Information (Estimated)
So, let’s talk numbers! While every kitchen is a little different and the exact ingredients you use can change things up, here’s a rough idea of what you’re looking at per crunchwrap. Think around 550-650 calories, 25-30g of protein, 30-40g of fat, and 40-50g of carbs. Remember, these are just estimates because we all know homemade is best! For a super-boost, check out this high-protein pudding recipe for dessert!
Homemade Crunchwraps
Ingredients
Equipment
Method
- Cook the ground beef in a large skillet over medium-high heat until browned. Drain off any excess grease.
- Stir in the taco seasoning and water. Bring to a simmer and cook for 3-5 minutes, or until the sauce has thickened.
- Lay out the 8 large tortillas. Spread a layer of the seasoned ground beef mixture onto one half of each tortilla.
- Top the beef with a sprinkle of cheddar cheese, Monterey Jack cheese, sour cream, salsa, and crushed tortilla chips.
- Place a small tortilla on top of the filling. Fold the edges of the large tortilla over the small tortilla to create a sealed package.
- Heat the vegetable oil in the same skillet over medium heat. Carefully place the crunchwraps seam-side down into the skillet.
- Cook for 3-5 minutes per side, until golden brown and crispy. Repeat with remaining crunchwraps.


