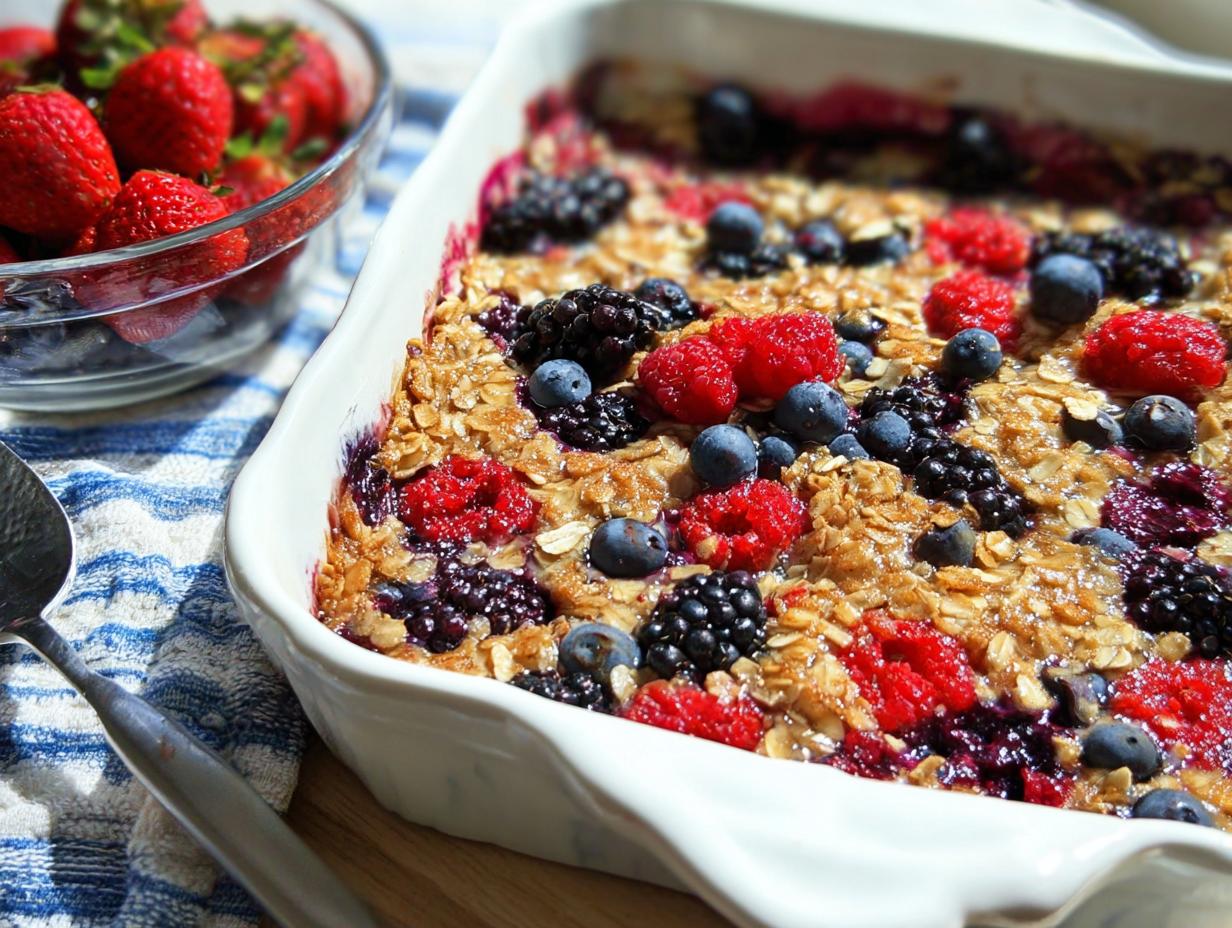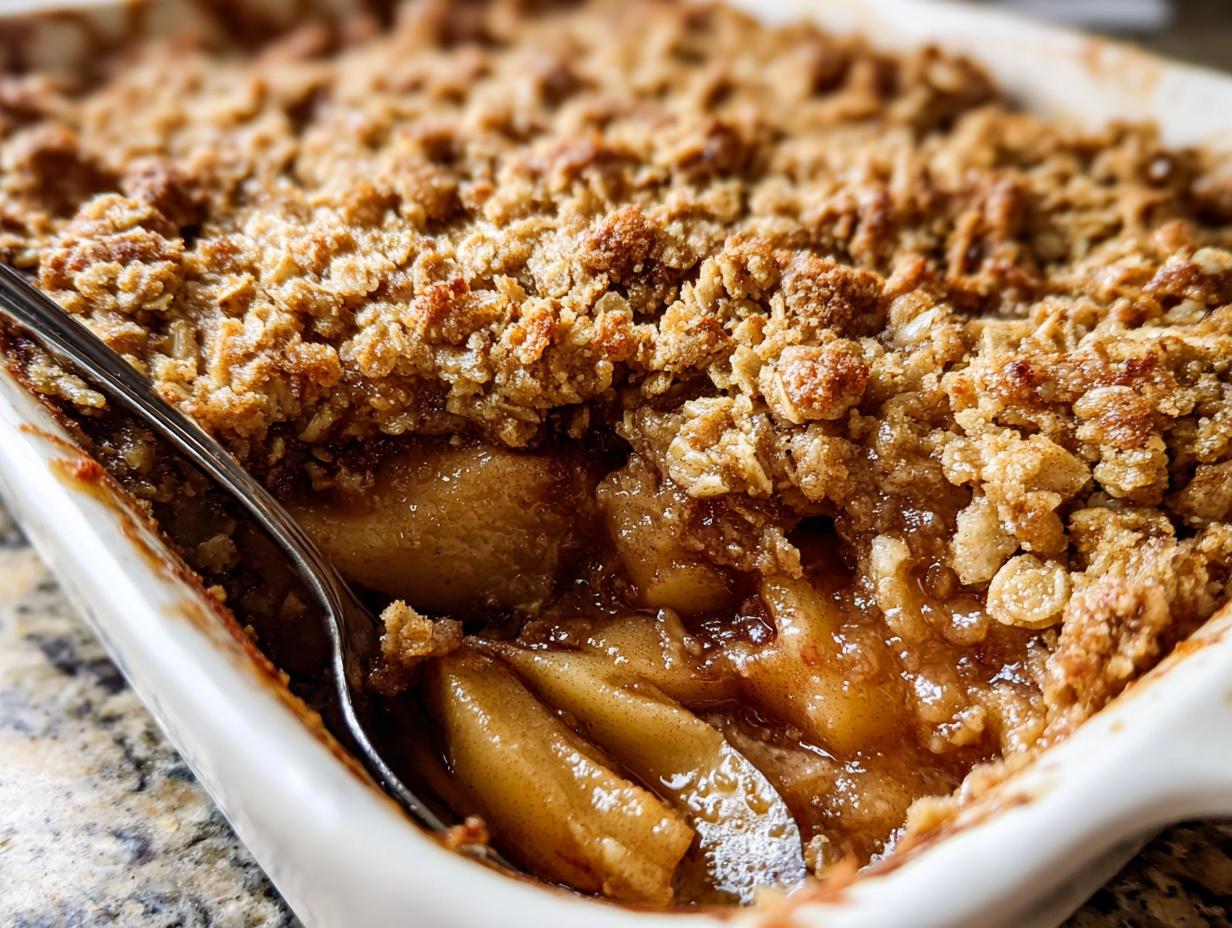
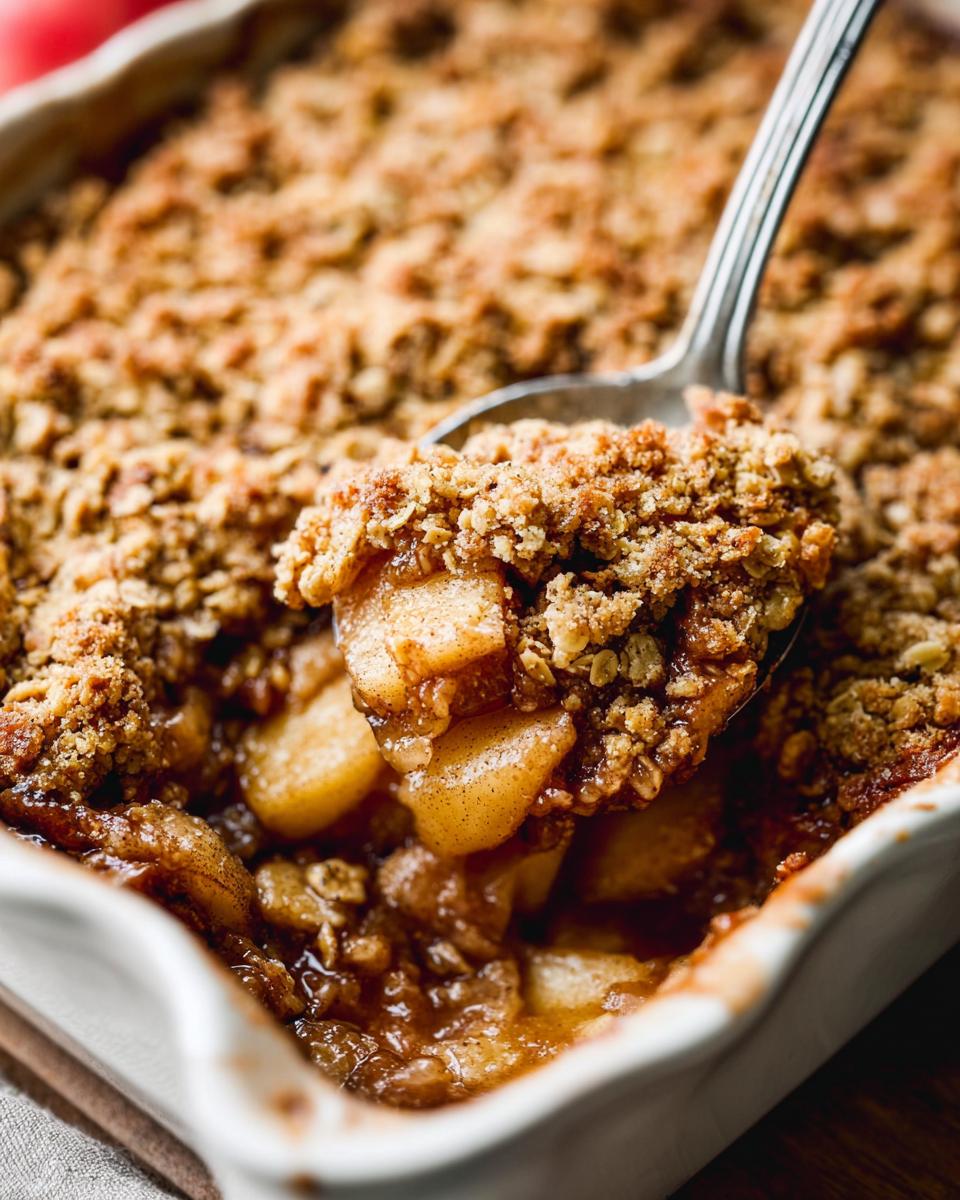
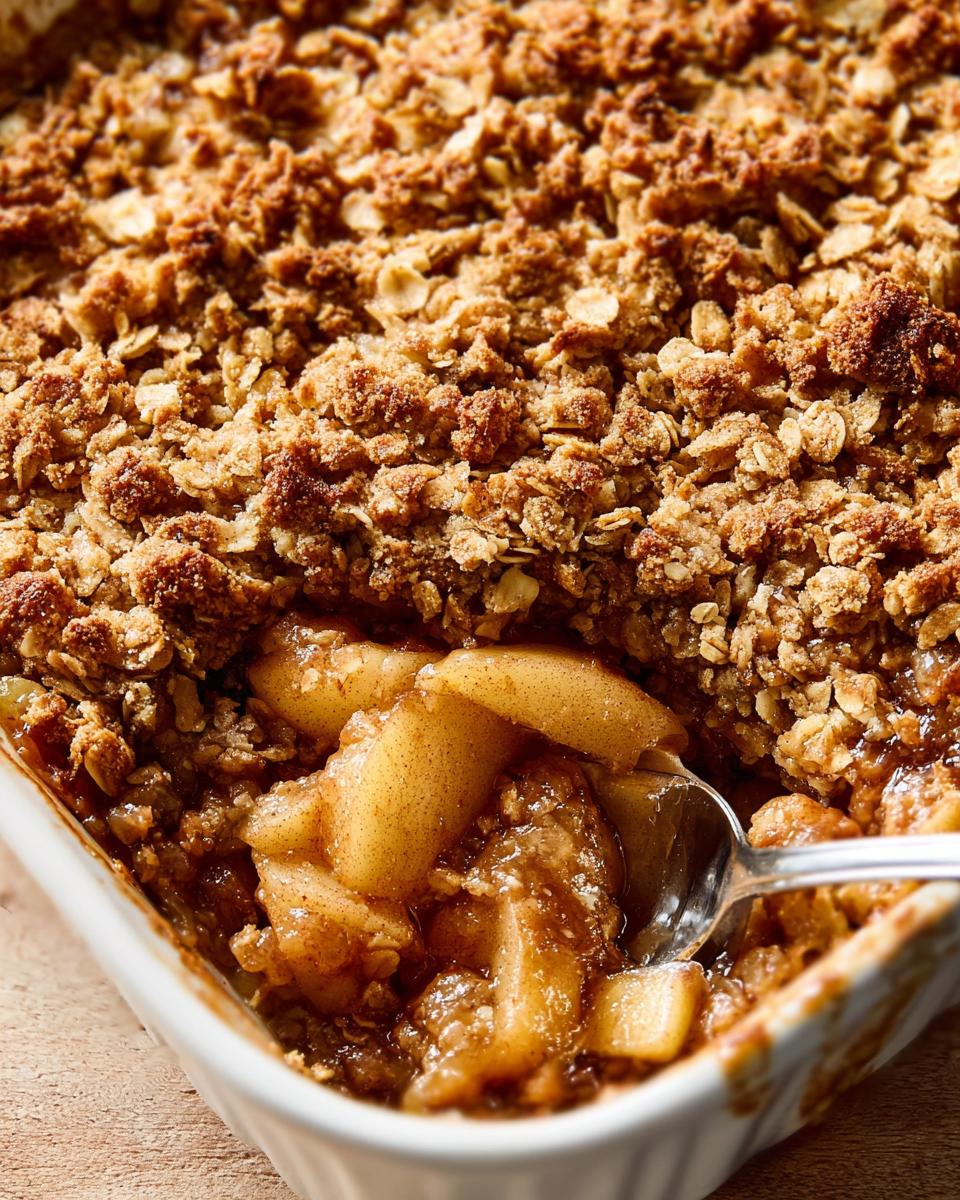
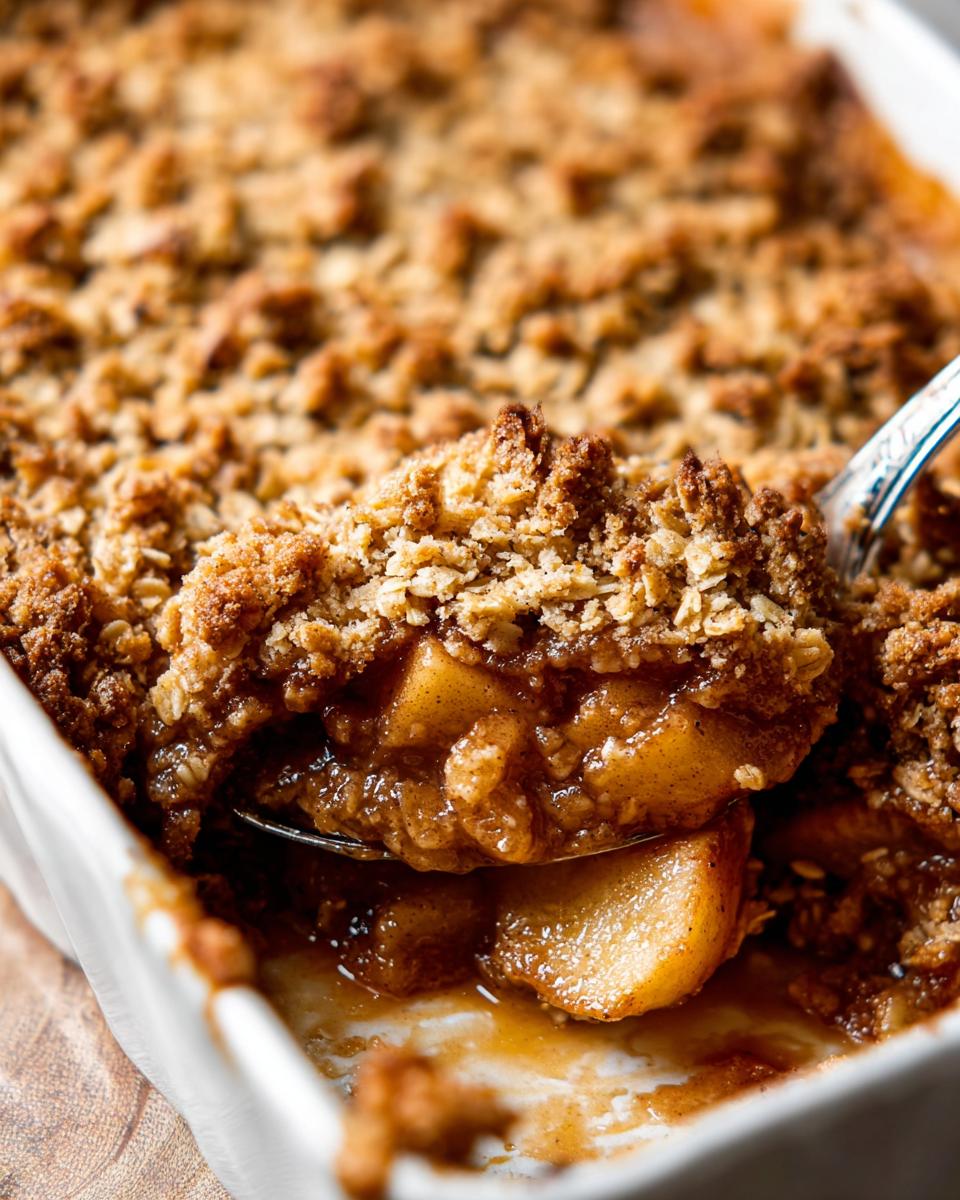
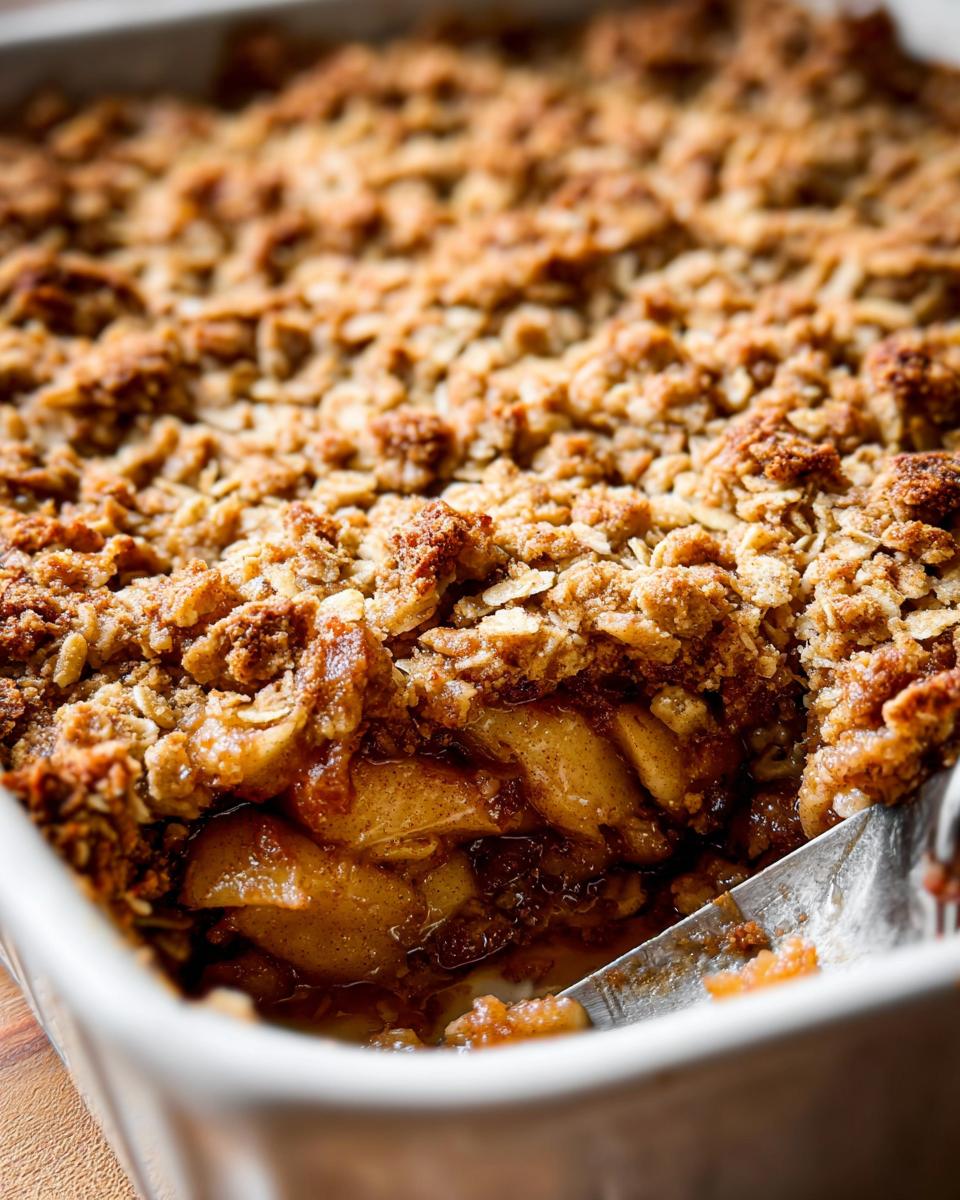
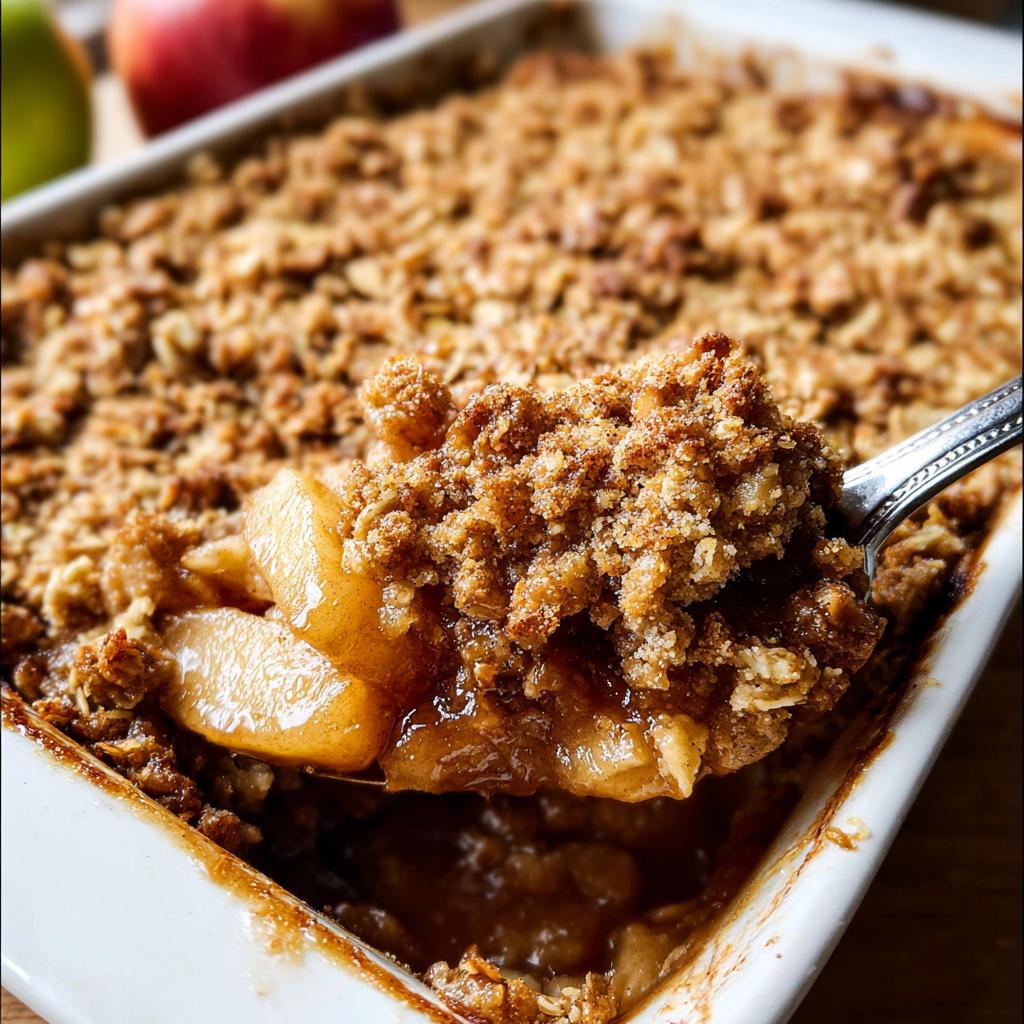
There’s nothing quite like the smell of baked apples and cinnamon wafting through the kitchen, is there? It just screams *home* and cozy evenings. For me, comfort always meant digging into a big slice of the best dessert: the Classic Apple Crisp with Oat Crumble. It’s warm, it’s sweet, and that crunch is everything!
But you know me—I love tradition, but I also love feeling good afterwards. I vividly remember the first autumn I decided to tackle making a keto-friendly crisp. I was experimenting late one night, trying to capture those classic flavors while keeping things low-carb. The aroma of cinnamon and baked apples instantly transported me back to childhood apple-picking days.
When I finally took that first bite of that warm, oat crumble-topped goodness, I knew I nailed it! It proved that you can grab those fantastic, comforting flavors without guilt. I became so obsessed that this version is now our family staple. You can find out more about my kitchen adventures right here!
Why This Classic Apple Crisp with Oat Crumble Recipe Works
Honestly, this isn’t just another fruit dessert; it’s the perfect textural experience. Nobody wants soggy apples or a floppy topping, right? We nail the contrast here:
- The apples get wonderfully tender and spicy, not mushy.
- The oat crumble topping stays perfectly crisp and golden brown—trust me on this!
- It offers that incredible, homey flavor warm fruit desserts are famous for, while fitting beautifully into our low-carb lifestyle. If you’re looking for other great diet-friendly desserts, check out my collection here for more inspiration!
Essential Equipment for Your Classic Apple Crisp with Oat Crumble
Before we dive into the glorious spices, let’s make sure you have your gear ready. Having the right tools makes this so much easier, I promise! Gathering everything first means you can just focus on stirring and smelling the magic happen while you bake.
You’ll definitely want a good, sturdy set of bowls for this dish. We need one for mixing the fruit and one for that spectacular topping.
- A big 9×13-inch baking pan—that’s the standard size that handles about 3.5 to 4 quarts worth of deliciousness.
- A large bowl for tossing the apples.
- A medium bowl specifically for prepping the oat crumble.
- A pastry cutter or just a sturdy fork for blending the butter into the topping.
- A wire rack to let the finished crisp cool just a tiny bit before serving.
Gathering Ingredients for the Apple Filling and Oat Crumble Topping
Okay, this is where the real fun starts—the prep work! We are keeping things super classic here, so the ingredients should be straightforward. Getting your fruit right is half the battle for any good warm fruit dessert, so pay attention to those little details, like how you chop those apples. I’ve linked over to my essential keto pantry list if you realize you’re missing a spice or two!
For the Apple Filling
For the filling, we need about 8 medium apples, which should give you roughly 10 cups once everything is peeled and cut into those perfect 1-inch chunks. This ensures they cook down beautifully but don’t turn to complete mush! Toss those beauties with sugar, flour, that fragrant cinnamon, a dash of nutmeg, and a splash of vanilla extract. Don’t forget the salt; it wakes up all those sweet spice flavors. If you’re interested in seeing how a few other pros handle their crisp, check out this recipe for comparison!
For the Crunchy Oat Crumble Topping
The topping is the star, honestly! This is what gives us that satisfying contrast to the soft apples below. You need flour, more brown sugar (we’re using a good amount for that deep flavor!), and a teaspoon of cinnamon whisked together first. Then comes the butter—it must be cold and cubed, about 8 tablespoons or 113 grams total. You cut that in until it looks like really coarse, pebbly sand. Finally, stir in the full cup of old-fashioned whole rolled oats. Those oats are non-negotiable for that real, hearty crumble texture!
Step-by-Step Instructions for the Classic Apple Crisp with Oat Crumble
Following these steps ensures you get that perfect ratio of soft fruit to crunchy topping every single time. Don’t rush! Prep work is simple, but precision here is what separates a good crisp from an absolutely incredible one. Remember to keep checking my other recipe tips too, like these calorie-smart recipe ideas while this bakes!
Preparation and Filling the Pan
First things first: grab your oven and set it to preheat to 350°F (177°C). Go ahead and lightly grease your 9×13-inch baking pan now so it’s ready to go. Now take all those spiced apples you mixed up in the big bowl—make sure they’re spread out evenly across the bottom of that pan. Don’t leave any big bare spots near the edges, or we might have too much sugar caramelizing weirdly!
Creating the Perfect Oat Crumble Topping
This is the most important part for that crunch—pay attention! In your medium bowl, you whisked your dry topping ingredients, right? Now you add the cold, cubed butter. You need to ‘cut’ that butter right into the flour mixture using your pastry cutter or just a fork. Keep working it until it looks really crumbly, almost like little pebbles or rough sand. Stop mixing once you see that texture! Then, gently fold in those old-fashioned oats right at the very end. That’s the secret to keeping the crumble distinct.
Baking and Resting the Classic Apple Crisp with Oat Crumble
Once your topping looks gorgeous and evenly distributed over the apples, slide it into that preheated oven. We’re looking for about 45 minutes of baking time. You’ll know it’s done when that topping is perfectly golden brown and you see the fruit juices bubbling up brightly around the edges. My personal expert tip? Use firm apples like Granny Smith or Honeycrisp—they hold their shape better than softer varieties, keeping those beautiful 1-inch chunks intact! Once it’s out, you absolutely MUST let it rest on a wire rack for at least 5 minutes before scooping. Give it that breathing time!
Tips for Success Making Your Classic Apple Crisp with Oat Crumble
Even though this apple crisp recipe is straightforward, a few little tricks make the difference between good and ‘Oh My Gosh, I need the recipe!’ The biggest enemy here is a soggy bottom, so we fight that proactively.
First, remember those apples need to be tossed completely with the flour and sugar mixture from the filling! That flour absorbs the liquid released by the apples as they bake, preventing a watery mess down below. It’s crucial for texture!
Second, keep that butter COLD when you make the topping. If your butter melts before you mix it in, you end up with greasy clumps instead of proper crumbles. If your kitchen is hot, pop the topping bowl in the fridge for 10 minutes before you cut the butter in.
Also, don’t forget to try using a mix of apples! I love Granny Smith for tartness and maybe one sweeter apple for depth. It really boosts the flavor profile of your warm fruit desserts. For more tips on mastering the kitchen, I wrote about my keto cauliflower mac and cheese secrets right here!
Serving Suggestions for Warm Fruit Desserts
Okay, the crisp is out of the oven, it’s still steaming, and now comes the best part: deciding how you’ll drown it in goodness! The instructions say to serve it warm, and I couldn’t agree more. You want that residual heat to start melting whatever glorious thing you put on top of it almost instantly.
You absolutely cannot go wrong with the classic pairing. Seriously, nothing beats a dollop of high-quality vanilla ice cream melting into those hot, spiced apples. If you’re looking for the ultimate experience, knowing the best vanilla ice cream pairings is key—even a slightly firmer, richer vanilla works wonders against the spicy hot fruit.
But don’t stop there! If you happen to have some salted caramel sauce lying around, a little drizzle over the top before the ice cream goes on adds another layer of indulgence that is just stunning. Or, if you prefer something lighter but still rich, a big spoonful of fresh, lightly whipped cream is always a winner. It’s all about making that moment special, whether you’re enjoying a quiet night in or serving these wonderful warm fruit desserts to company!
Storage and Reheating Your Classic Apple Crisp with Oat Crumble
One of the best things about this kind of baking—the warm fruit desserts—is that they actually taste even better the next day once the spices have really settled in! Don’t worry about leftovers; they are guaranteed to happen because this recipe makes plenty.
If you have any of this delicious Classic Apple Crisp with Oat Crumble left over, just cover the pan tightly with plastic wrap or foil. You can keep it safely in the refrigerator for up to five days. That’s a whole week of surprise treats waiting for you!
Now, here’s the critical part if you want that topping to taste fresh-baked again: reheating. Pop it in the oven! I know, it seems like overkill, but microwaving ruins the texture of the oat crumble topping, turning it chewy—and we absolutely cannot have that betrayal!
For the best results, I always reheat individual portions in the air fryer for about 3 to 4 minutes at 350°F. If you don’t have an air fryer, cover the portion loosely with foil and bake it in a standard oven at 325°F for about 10 minutes, just until it’s piping hot all the way through. This little blast of dry heat revives that amazing crunch we worked so hard to achieve!
This crisp travels well too, which is great if you’re bringing it to a gathering. You can even prep the filling and topping separately, store them, and then assemble and bake them fresh on site. If you love making things ahead of time, you should really check out my favorite make-ahead breakfast bakes!
Frequently Asked Questions About the apple crisp recipe
You know I love geeking out over the details! Whenever I share this apple crisp recipe, a few things always come up. I’ve gathered the most common questions here so you can bake with total confidence. If you want to explore more of my baking wisdom, you can check out my main recipe index!
Can I make the oat crumble topping ahead of time?
Oh yes, you absolutely can! This is one of my favorite tricks for busy weeknights. You can mix up the entire oat crumble topping—flour, sugar, oats, and all—and store it in an airtight container in the fridge for up to three days. I usually keep it right next to the butter! When you’re ready to bake, just toss your apples, then sprinkle that cold crumble right on top and bake as directed. It works like a charm!
What are the best apples for this apple crisp recipe?
The apple choice really dictates the final texture, so this matters! You need apples that are firm and can stand up to about 45 minutes of heat without completely dissolving. My top picks are always Granny Smith for that lovely tartness that balances the spices, or Honeycrisp if you want something a bit sweeter that still holds its shape well. Avoid the really soft Red Delicious, unless you want a texture closer to applesauce!
How do I ensure the topping stays crunchy?
This is the million-dollar question for any good crisp! While the baking time helps, the secret starts with the butter. Make sure that butter is *ice cold* and cubed—we talked about this, but it bears repeating! When you cut the cold butter into the dry ingredients, those little pockets of fat create steam pockets in the oven, which creates crunch. If your topping seems too soft before it goes in, toss the whole medium bowl back into the freezer for 10 minutes. That chill ensures a beautifully crisp result!
Estimated Nutritional Snapshot for Classic Apple Crisp with Oat Crumble
I always get asked about the numbers, especially since many of you are watching your macros closely! Here’s the honest truth: because this recipe is adaptable, and because my primary focus is nailing that classic comfort flavor, the exact nutritional profile can bounce around a little bit depending on your specific apples or low-carb sweetener swaps.
So, please view this data as a guide—a best guess, if you will—based on the standard measurements I’ve listed above, assuming you’re using standard ingredients and portioning it out for all 8 servings for one scoop.
You’ll definitely want to run your specific ingredients through your favorite counter app if you need exact figures for your dietary tracking. But generally speaking, this delivers that rich, satisfying flavor profile we want in a warm fruit dessert without weighing you down too much!
- Approximate Calories Per Serving (1/8th of the pan): 310-350 kcal
- Estimated Total Fat: 15-18g
- Estimated Total Carbohydrates: 45-50g (Please remember this count changes drastically if utilizing keto apple substitutes!)
- Estimated Protein: 4g
Share Your Classic Apple Crisp with Oat Crumble Experience
Baking is always better when you can share the results, right? I’m crossing my fingers that you loved making this Classic Apple Crisp with Oat Crumble as much as I love eating it hot out of the oven!
I’ve poured all my memories of autumn harvest days into this recipe, and now it’s yours. Seriously, I want to see your creations! Did you make it keto-friendly? Did you go wild with the toppings? Don’t keep those gorgeous golden crumbles to yourself!
Please hop down to the comments section once you’ve tried it. Tell me what you thought—did the topping stay perfectly crunchy? What kind of apples did you choose? Leaving a rating (five stars if you’re feeling generous!) helps other bakers know this is the recipe worth making.
And if you share a picture of your warm fruit desserts on social media, please tag me! It makes my day to see these cozy treats popping up outside my own kitchen. If you have feedback or want to send me a note directly for any reason, you can always reach out through my contact page. Happy crumbling, everyone!
Classic Apple Crisp with Oat Crumble
Ingredients
Equipment
Method
- Preheat your oven to 350°F (177°C). Lightly grease a 9×13-inch baking pan. Any 3.5-4-quart baking dish works.
- Mix all of the filling ingredients together in a large bowl, then spread the mixture evenly into the prepared baking pan.
- Make the topping: Whisk the flour, brown sugar, and cinnamon together in a medium bowl. Cut in the cold butter using a pastry cutter or fork until the mixture becomes very crumbly. Stir in the oats. Sprinkle this topping evenly over the apple filling.
- Bake for 45 minutes or until the topping is golden brown and the fruit juices are bubbling around the edges.
- Remove the crisp from the oven, place it on a wire rack, and allow it to cool for at least 5 minutes before serving. Serve warm, at room temperature, or cold; plain or with salted caramel and/or vanilla ice cream.
- Cover any leftovers and store them in the refrigerator for up to 5 days.