
There’s just something about classic desserts, right? They wrap you up in a warm hug of nostalgia. My absolute favorite? It has to be this timeless Classic Banana Pudding With Homemade Whipped Cream. I remember making this with my mom when I was just knee-high, the kitchen smelling like sweet vanilla and ripe bananas. It’s more than just a recipe; it’s a little slice of pure comfort, a dessert that tells a story with every spoonful of creamy custard, tender bananas, and crunchy wafers. After years of perfecting my own version, I’m so excited to share it with you!
Why You’ll Love This Classic Banana Pudding With Homemade Whipped Cream
This banana pudding recipe? It’s a winner, hands down! You’ll adore it because it’s:
- So incredibly easy to whip up, even on a weeknight!
- A guaranteed crowd-pleaser that everyone asks for seconds.
- Pure comfort in a dish – it just feels like home.
- Made with luscious, fluffy homemade whipped cream that beats store-bought any day!
Gather Your Ingredients for Classic Banana Pudding With Homemade Whipped Cream
Alright, let’s get our ducks in a row for this amazing banana pudding! Having everything ready makes the whole process so smooth. Trust me, it’s worth it.
For the Creamy Custard Base:
- 3 large egg yolks (these give it that lovely richness!)
- 1/2 cup granulated sugar (just the right amount of sweetness)
- 1/4 cup cornstarch (our magic thickener)
- 2 cups milk (I always go for whole milk if I can – it makes the custard extra decadent)
- 1 tsp vanilla extract (for that classic, comforting flavor)
For Assembling Your Masterpiece:
- 1 box vanilla wafers (about 24 cookies – grab a few extra for snacking, I won’t tell!)
- 3 large bananas (make sure they’re ripe but still a little firm, sliced up just right)
For That Cloud-Like Homemade Whipped Cream:
- 1 cup heavy cream (make sure it’s super cold right out of the fridge!)
- 2 tbsp powdered sugar (for a smooth, melt-in-your-mouth sweetness)
- 1/2 tsp vanilla extract (to make that whipped cream sing!)
Step-by-Step Guide to Making Classic Banana Pudding With Homemade Whipped Cream
Alright, rolling up our sleeves! This is where the magic really happens. Don’t worry, it’s way easier than it looks, and the result is totally worth it. We’re going to build this masterpiece layer by delicious layer.
Making the Creamy Custard Base
First things first, let’s get that gorgeous custard going. Grab a medium saucepan and whisk together your egg yolks, sugar, and cornstarch until it’s all smooth as can be. Then, slowly pour in the milk, whisking as you go so there are no lumps. Now, pop it over medium heat. Stir, stir, stir constantly! You want it to thicken up nicely, usually around 5-7 minutes. Keep an eye on it – you don’t want it to boil, just get nice and thick. Once it’s good and thick, take it off the heat. Stir in that vanilla extract. To make sure it stays super smooth, lay a piece of plastic wrap right on top of the custard itself. This stops that weird skin from forming! Pop it in the fridge to chill for at least two hours.
Whipping Up the Perfect Homemade Whipped Cream
While our custard is chilling, let’s whip up our cloud of homemade whipped cream! This is the best part. Make sure your bowl and your whisk attachment (if you’re using a mixer) are nice and cold – it really helps! Pour in your cold heavy cream, the powdered sugar, and that lovely vanilla extract. If you’re using an electric mixer, start on low and gradually increase the speed. You’re going to whip it until you get stiff peaks, which just means when you lift the whisk or beaters, the cream stands straight up without drooping. It’s so satisfying!
Assembling Your Classic Banana Pudding
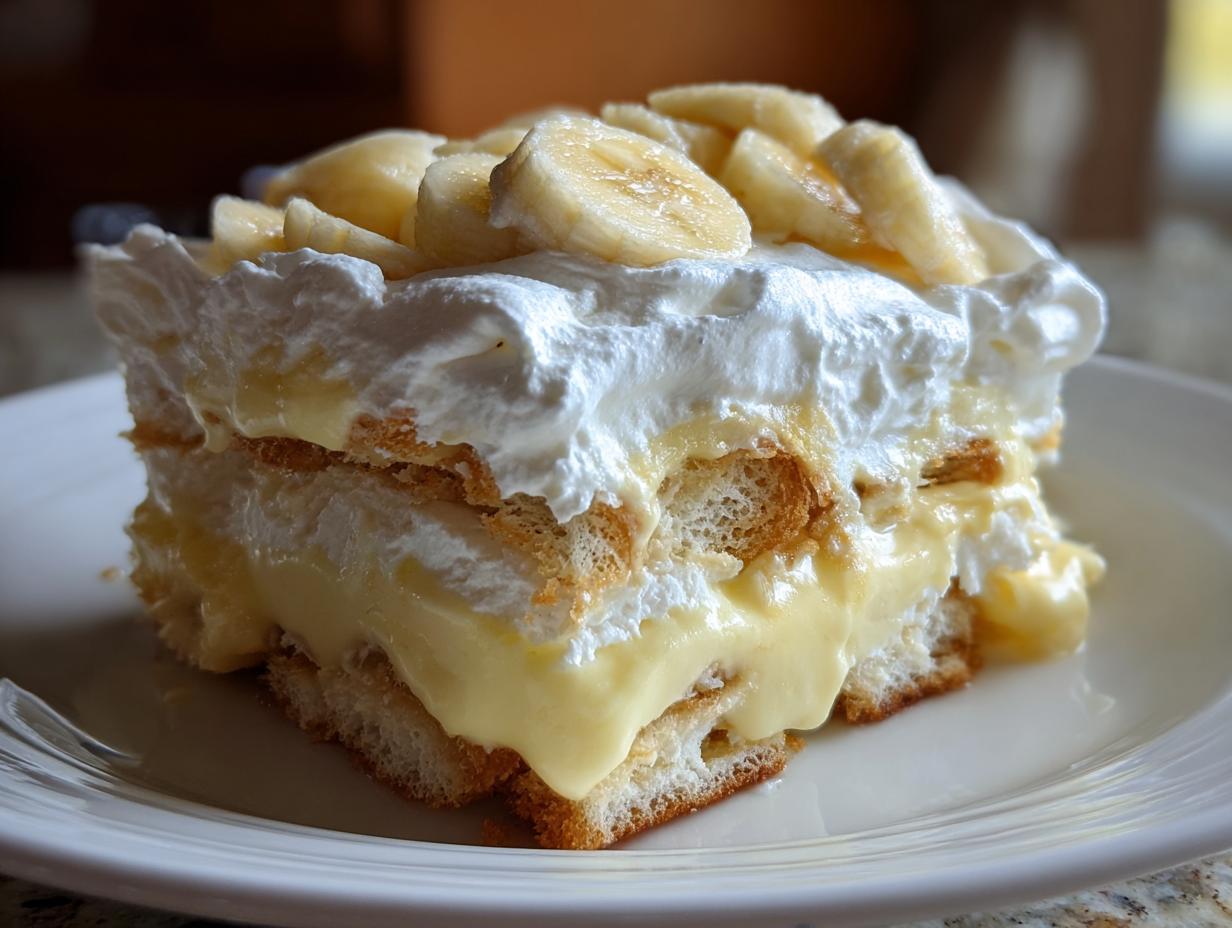
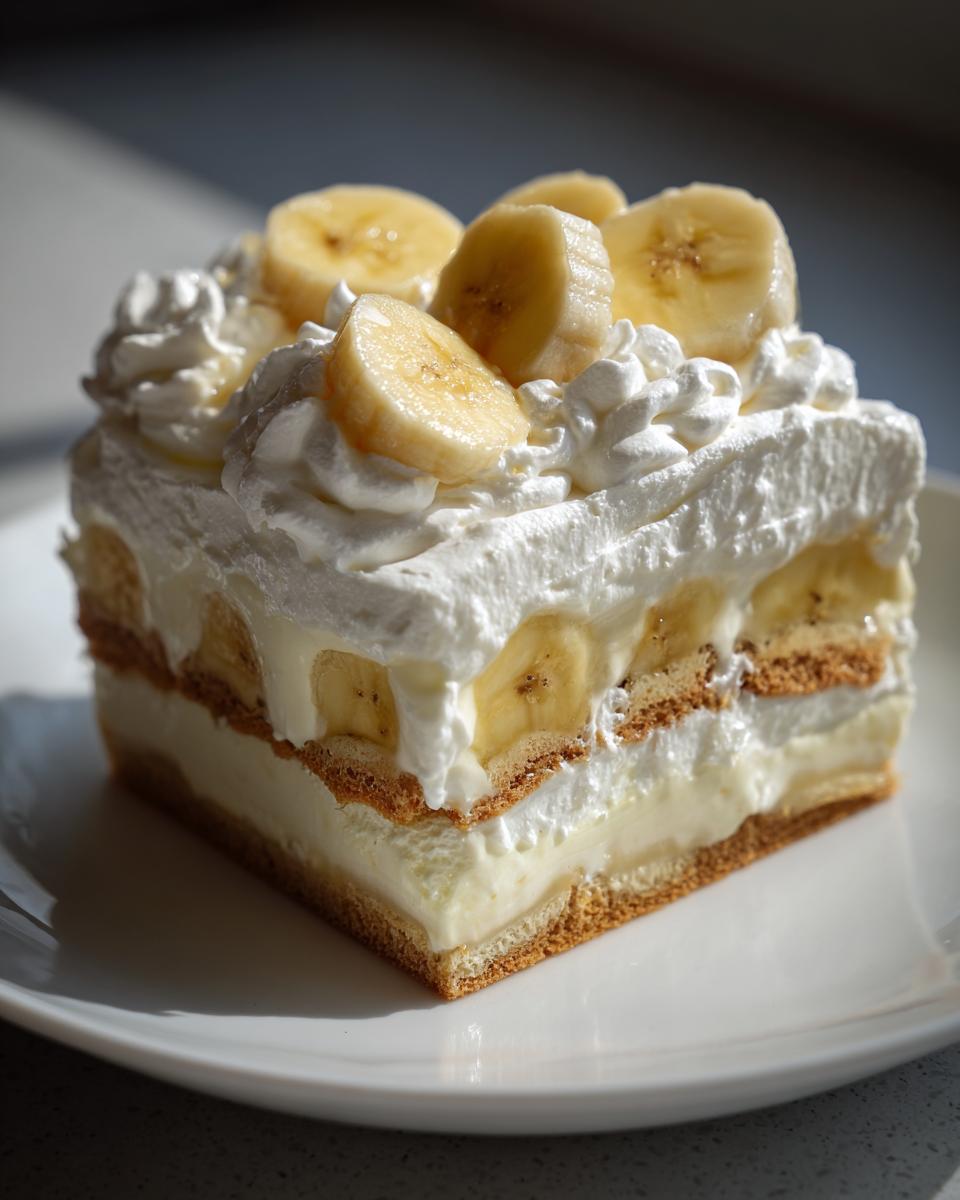
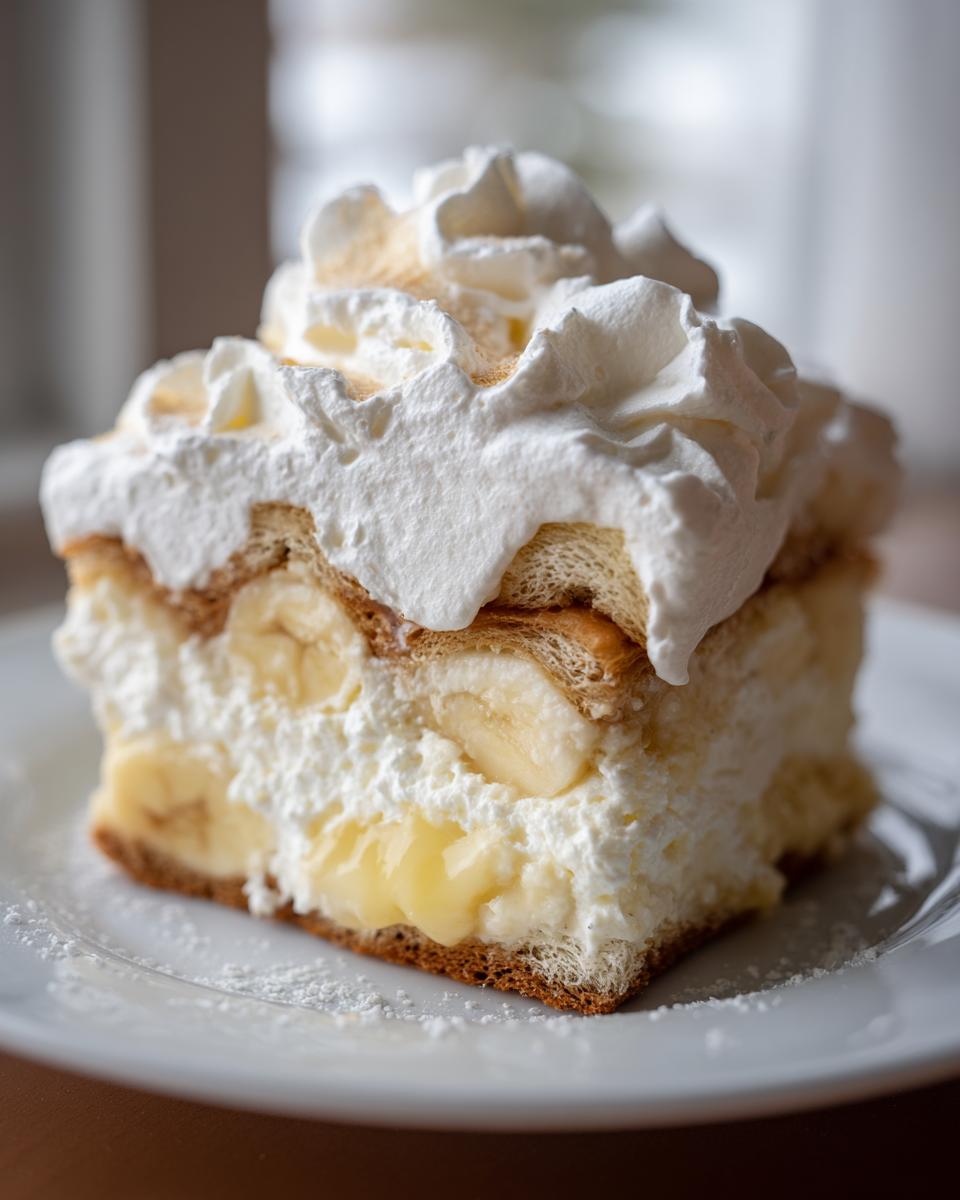
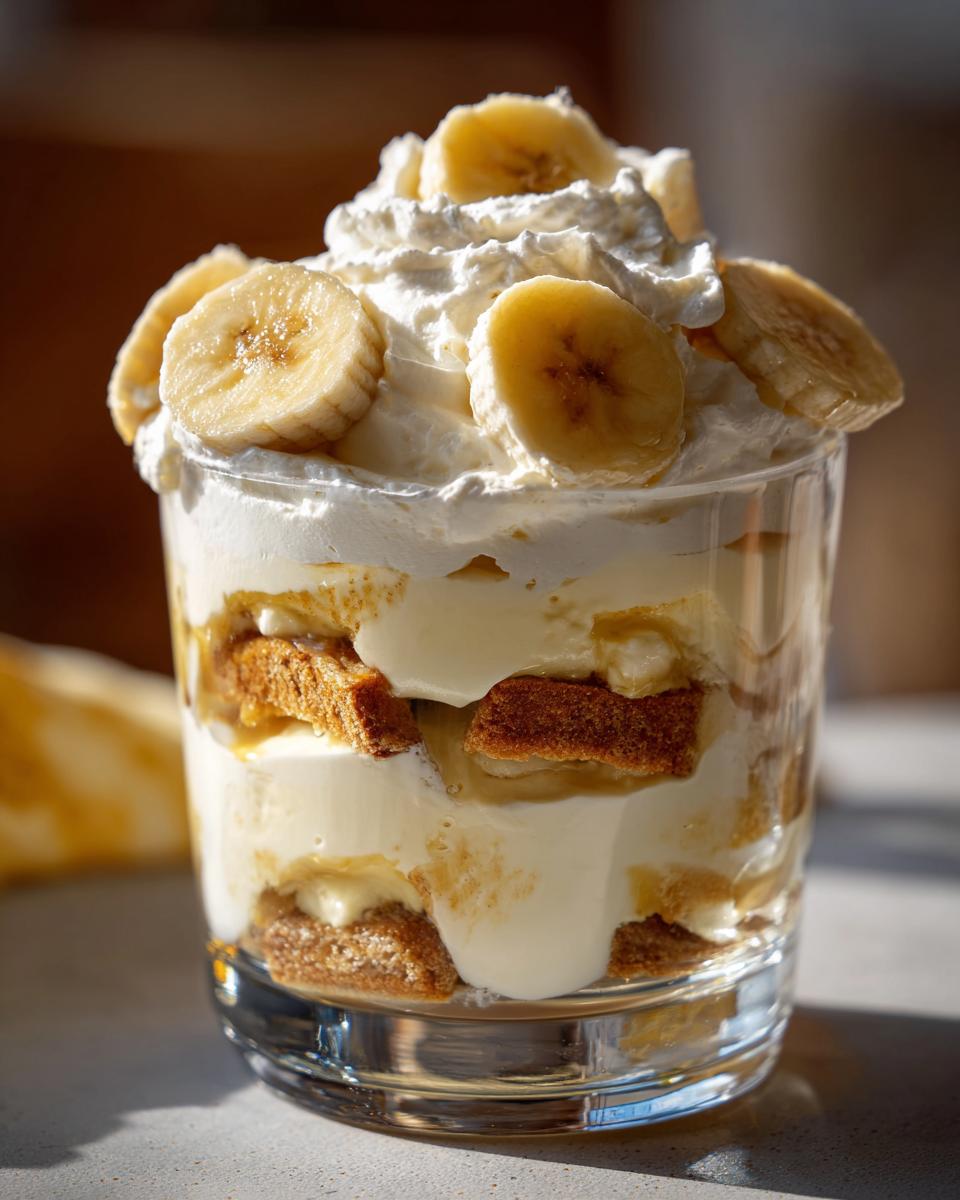
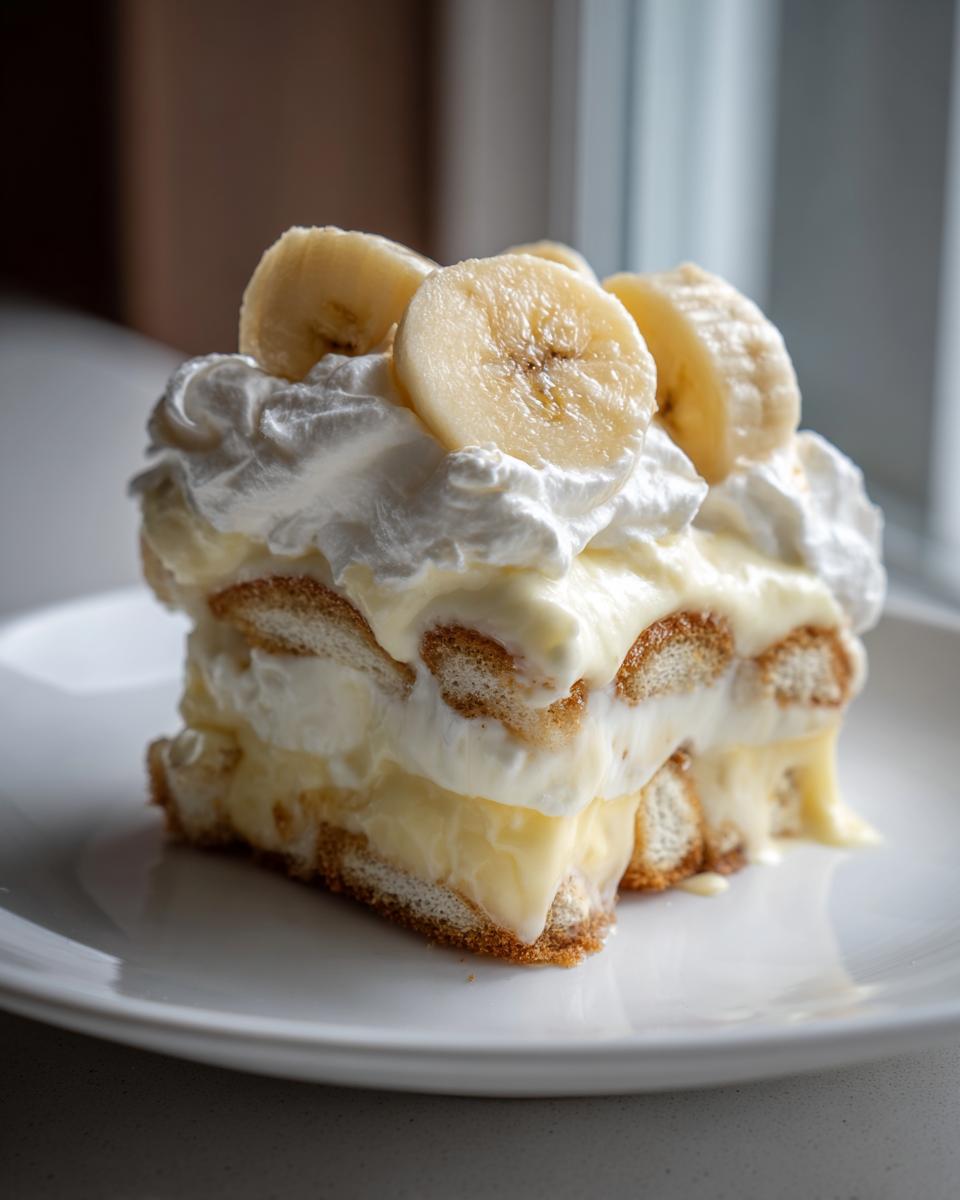
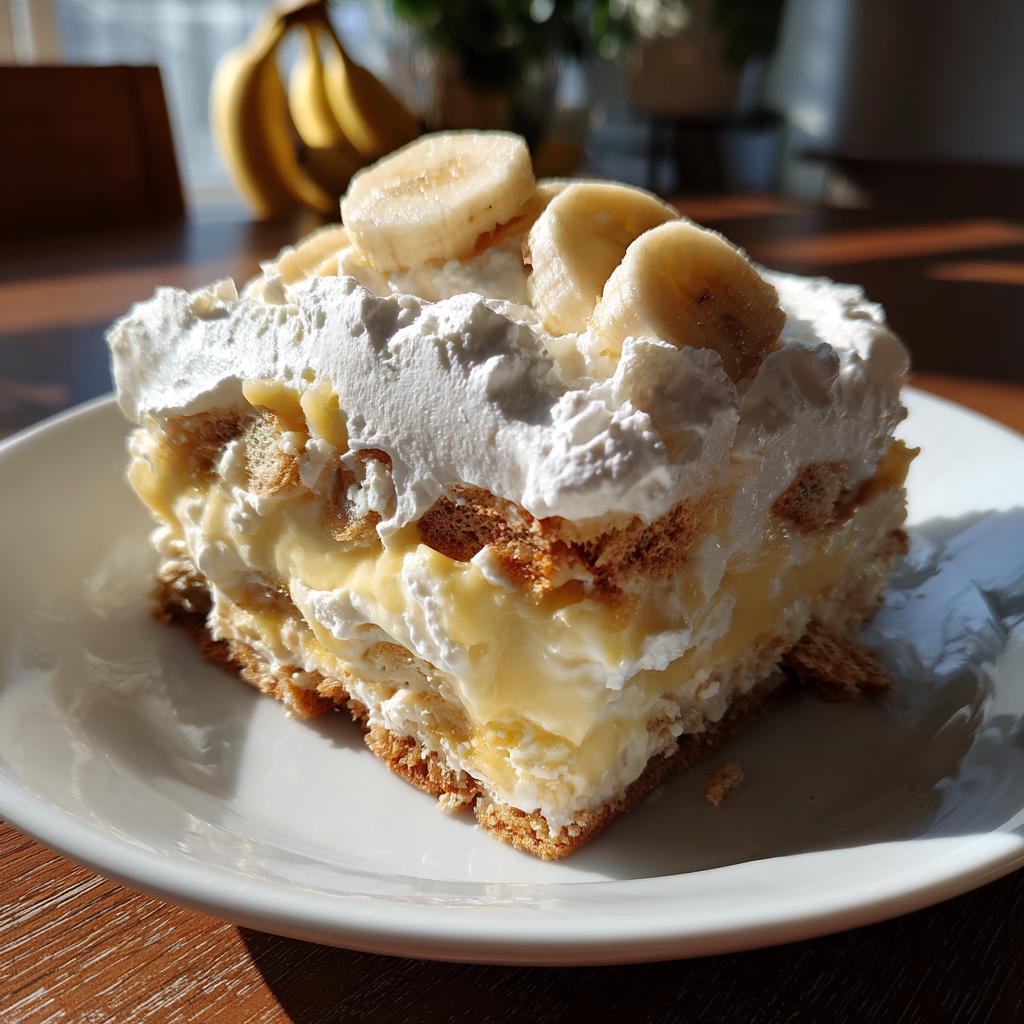
Okay, the fun part: building this beauty! Grab your best serving dish – I love a pretty glass one so you can see all the layers. Start with a layer of your vanilla wafers at the bottom. Then, arrange a nice layer of those sliced bananas right over the wafers. Now, spoon about half of that chilled, smooth custard over the bananas. Don’t be shy! Repeat the layers: another round of vanilla wafers, then a layer of bananas, and finally, the rest of that luscious custard. Top it all off by spreading that fluffy homemade whipped cream all over the top layer of custard. Make it swirly and pretty! Pop it back into the fridge for at least another 30 minutes to let everything meld together and get perfectly chilled before serving. You’ll want to see the result of all your hard work!
Tips for the Best Classic Banana Pudding
Alright, let’s talk about making this banana pudding absolutely *perfect*. You know, those little tricks that take it from great to totally unforgettable. My grandma always said a good cook knows how to tweak things just so, and I totally agree! Here are a few things I’ve learned over the years that really make a difference.
First off, banana ripeness is key! You want bananas that are ripe – those little brown spots are your friend – but they should still be firm enough to hold their shape when sliced. If they’re too mushy, your pudding can get a bit… well, *too* soft. I also like to assemble this pudding not *too* far in advance. Wafers will soak up that custard and get soft, which is delicious, but leaving it overnight can sometimes make them a bit too mushy for my liking. If you’re making it ahead, try adding the last layer of wafers and bananas just before you serve, or maybe add them right before chilling for about 30 minutes. Another thing? Make sure that custard is *really* chilled before you spread it. Warm custard will make your whipped cream melt right off, and nobody wants that! Oh, and for a little twist, sometimes I like to add a tiny pinch of salt to the custard. It just wakes up all those sweet flavors, you know? It really does make a difference! If you’re feeling adventurous, you could even try mini banana bread bites as a fun variation, though this classic pudding is hard to beat!
Ingredient Notes and Substitutions
Okay, let’s chat about the ingredients for this amazing banana pudding. Sometimes life throws you a curveball, and you need a little wiggle room, right? For the milk in the custard, if you don’t have whole milk, 2% will work, but it might not be quite as rich. Plant-based milks can be a bit tricky here; they can sometimes affect the way the custard sets, so I’d stick with dairy if possible for this classic version. And vanilla extract! Use the good stuff if you can; pure vanilla extract makes a world of difference compared to imitation. If you’re ever out of cornstarch, you *could* try using an equal amount of all-purpose flour for thickening, but you might need to cook it a little longer to get rid of that raw flour taste.
Frequently Asked Questions About Banana Pudding
Can I make this banana pudding ahead of time?
You absolutely can! This is a fantastic make-ahead dessert, perfect for potlucks or busy weeknights. Just assemble the pudding right up to the whipped cream layer, cover it tightly, and chill. Add the whipped cream and maybe a few fresh banana slices just before serving to keep it looking its best. It’s similar to how you’d prep an overnight breakfast casserole – get it ready, then finish it off later!
How do I prevent the bananas from browning?
This is the age-old banana pudding question! The best way is to slice your bananas right before you assemble the pudding. The starch in the vanilla wafers and the custard helps a little, but the key is speed. Some people swear by tossing the banana slices in a little bit of lemon juice, but I find it can slightly alter the flavor of the bananas, which is the star here! Just assemble quickly, and don’t let it sit too long before chilling.
What if my custard is too thin?
Oops! Don’t panic. If your custard seems a little too thin after cooking, you can try simmering it for another minute or two, whisking constantly. If it’s still not thick enough, you can whisk together another tablespoon of cornstarch with a tablespoon of milk to make a slurry, then gently whisk that into the warm custard and cook for another minute until it thickens. Make sure it’s chilled thoroughly before assembly!
Can I use store-bought whipped cream?
You *can*, but trust me, homemade is SO much better for this classic banana pudding! The fresh, fluffy whipped cream really completes the dessert. It’s surprisingly easy to make and tastes so much lighter and fresher than anything from a can. Give it a try; you might be surprised at how simple it is!
Storage and Reheating Instructions
Leftover banana pudding is a delicious treat! It’s best to store it in an airtight container in the refrigerator. Because of the fresh bananas and wafers, it’s ideal to eat within 1 to 2 days. If the wafers get a little soft for your liking, don’t worry! You can always top it with a few fresh banana slices and a dollop of extra homemade whipped cream right before serving to give it a fresh feel. These leftovers are often just as good, if not better, the next day!
Estimated Nutritional Information
Just a heads-up, these numbers are pretty much estimates, okay? They can change depending on exactly what kind of ingredients you use, like the brand of milk or wafers. But, generally speaking, a serving of this dreamy banana pudding is around 350-400 calories, with about 18-22g of fat, 4-6g of protein, and a good helping of carbs from those yummy bananas and cookies!
Classic Banana Pudding With Homemade Whipped Cream
Ingredients
Equipment
Method
- Make the custard: In a medium saucepan, whisk together egg yolks, granulated sugar, and cornstarch until smooth.
- Gradually whisk in the milk until combined. Cook over medium heat, stirring constantly, until the mixture thickens, about 5-7 minutes. Do not boil.
- Remove from heat and stir in vanilla extract. Let the custard cool slightly, then cover with plastic wrap directly on the surface to prevent a skin from forming. Chill for at least 2 hours.
- Make the whipped cream: In a chilled bowl, beat heavy cream, powdered sugar, and vanilla extract with an electric mixer until stiff peaks form.
- Assemble the pudding: Spread a layer of vanilla wafers in the bottom of your serving dish. Top with a layer of sliced bananas.
- Spoon about half of the chilled custard over the bananas. Repeat the layers of wafers, bananas, and custard.
- Spread the whipped cream evenly over the top layer of custard. Chill for at least 30 minutes before serving.


