Oh, the Fourth of July! It just screams backyard BBQs, fireworks, and of course, delicious desserts! This year, instead of a big ol’ cake, I’ve been absolutely obsessed with making these adorable mini tartlets. Seriously, they’re like little jewels of sweetness, perfect for piling onto a platter for your big celebration. Imagine little hands (and big hands!) grabbing these bright, fruity, creamy delights. I remember one sweltering summer afternoon, my nieces and nephews were running around, and I whipped these up as a surprise. The way their eyes lit up when they saw these tiny, perfect desserts? Priceless! They’re just so darn cute and nobody has to wrestle with cutting slices – everyone gets their own special treat. Perfect, right?
Why These Fourth of July Desserts for Mini Tartlets Are Perfect
These little tartlets are just perfect for so many reasons, trust me! For starters, they are surprisingly easy to whip up. Even if your baking skills are a little shaky, you’ll make these look like they came from a fancy bakery. Plus, they look SO festive with all those red, white, and blue berries – they’re practically begging to be on your Fourth of July dessert table! And for parties? Forget about it! They’re already portioned out, so it’s zero fuss for you and everyone gets their own little sweet treat. The best part, though, is that incredible combo: that crisp, buttery shell, the smooth, sweet cream filling, and the fresh, juicy fruit bursting with flavor. It’s a winner every time!
Ingredients for Your Fourth of July Desserts for Mini Tartlets
Okay, so here’s what you’ll need to make these little beauties! Honestly, the secret to making them really sing is using good quality stuff. It just makes a difference, you know? Like using really cold butter for the shells – that’s super important for a flaky crust. And fresh fruit, of course, makes all the difference in the world for that bright, delicious topping.
For the Tartlet Shells
You’ll need 1.5 cups of all-purpose flour, half a cup of unsalted butter that’s been cut into cubes and is super cold, quarter cup of granulated sugar, one large egg yolk, and about 2 to 3 tablespoons of ice water. Trust me, that cold butter is key!
For the Cream Filling
For that luscious filling, grab 8 ounces of cream cheese that’s been softened – don’t skip the softening part! Then, half a cup of powdered sugar for sweetness, and a teaspoon of vanilla extract for that lovely aroma and taste.
For the Fruit Topping
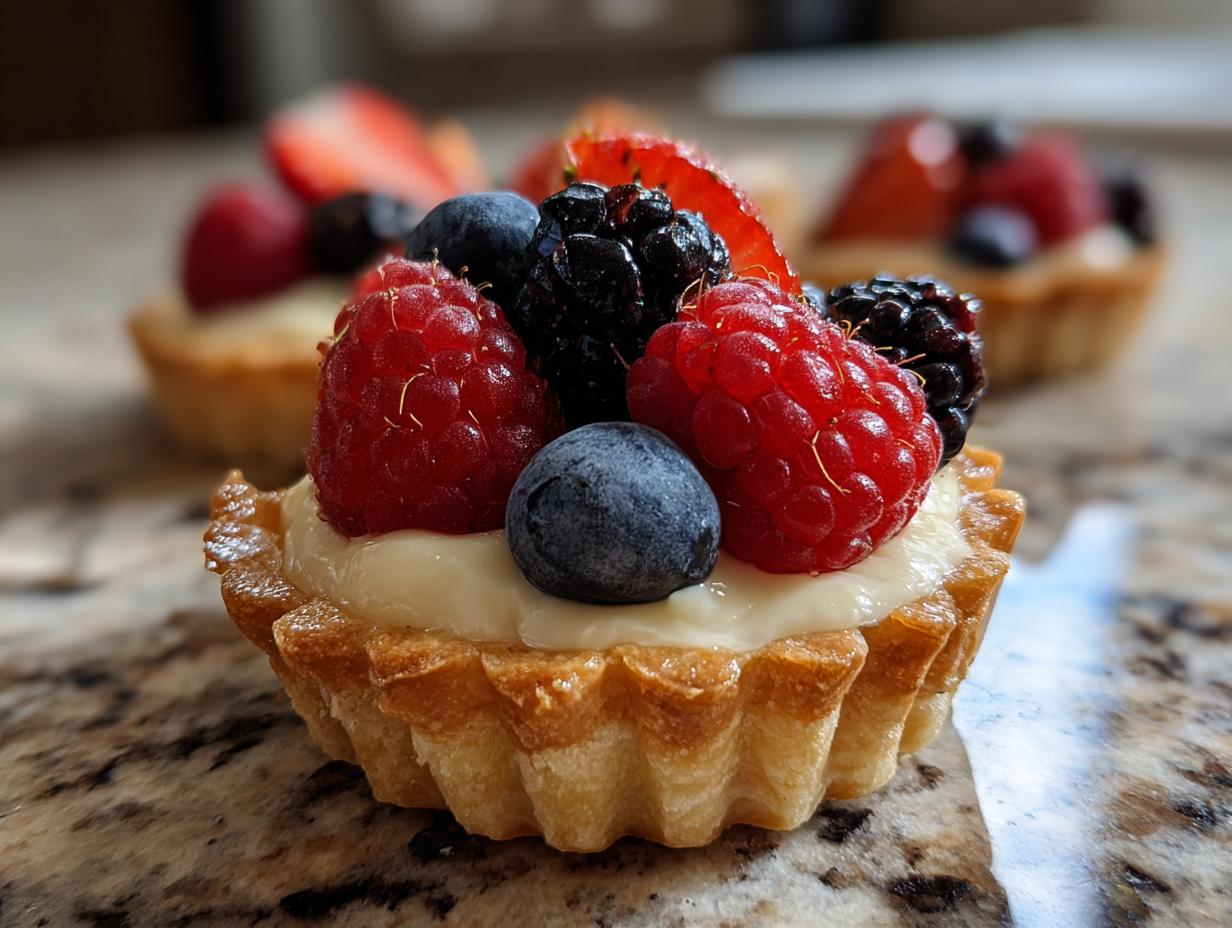
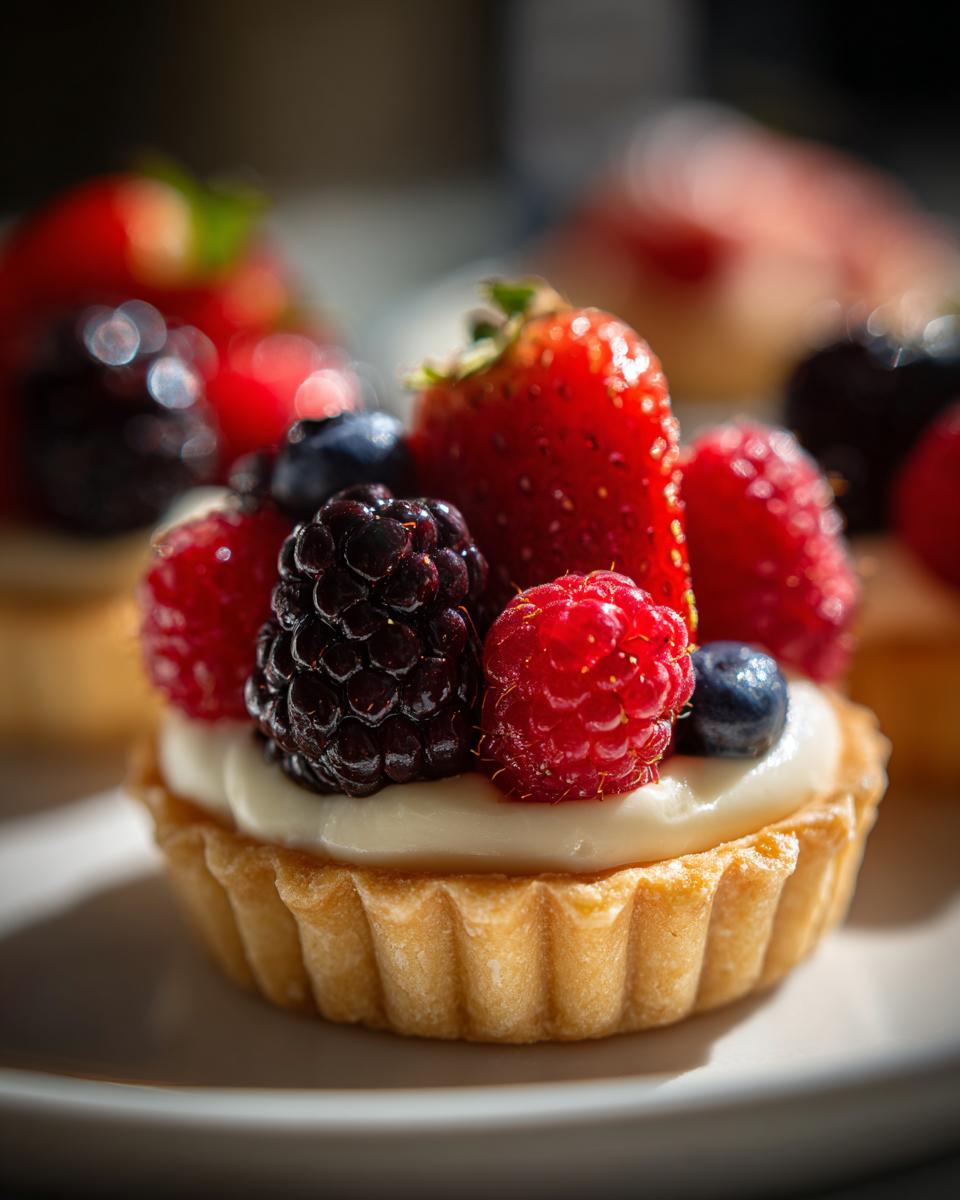
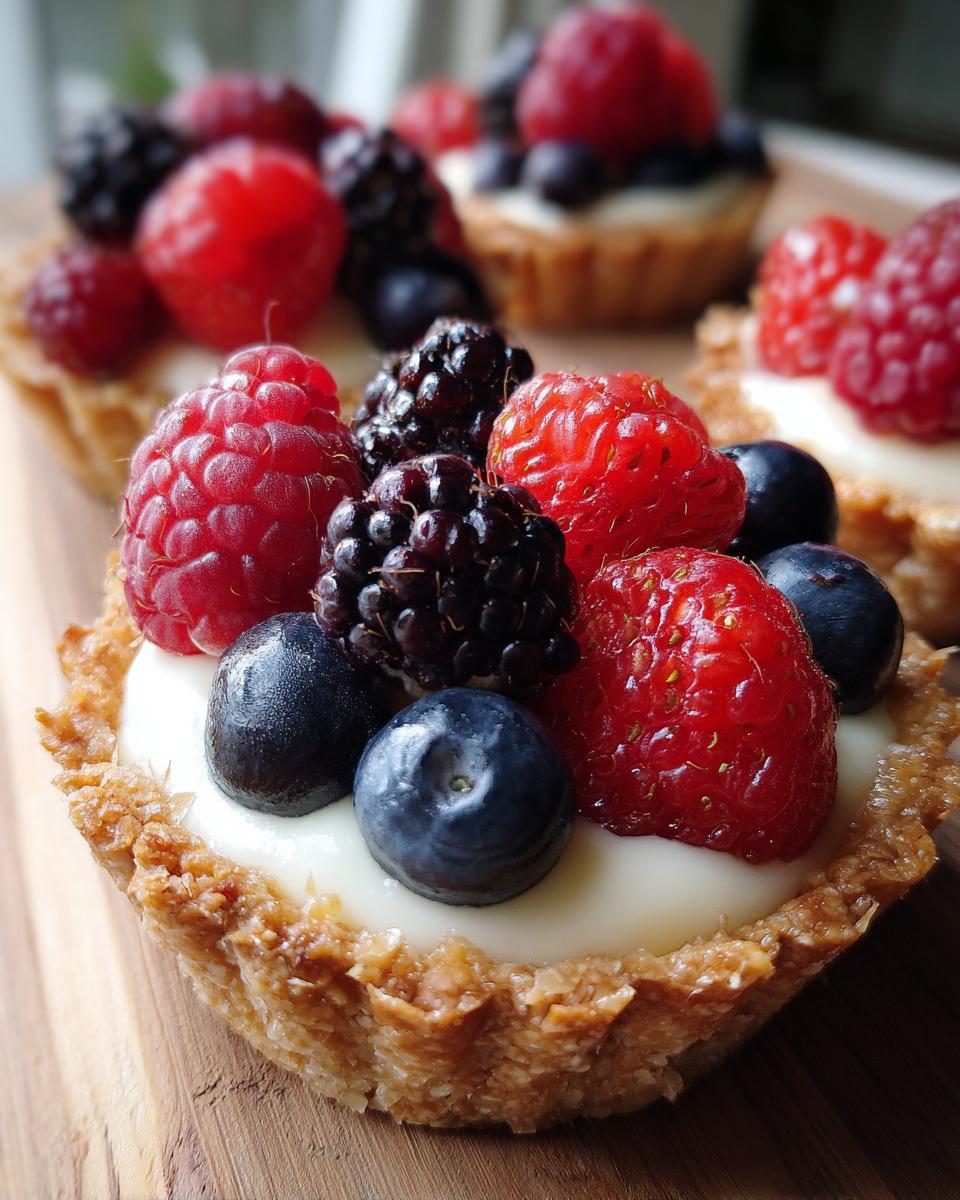
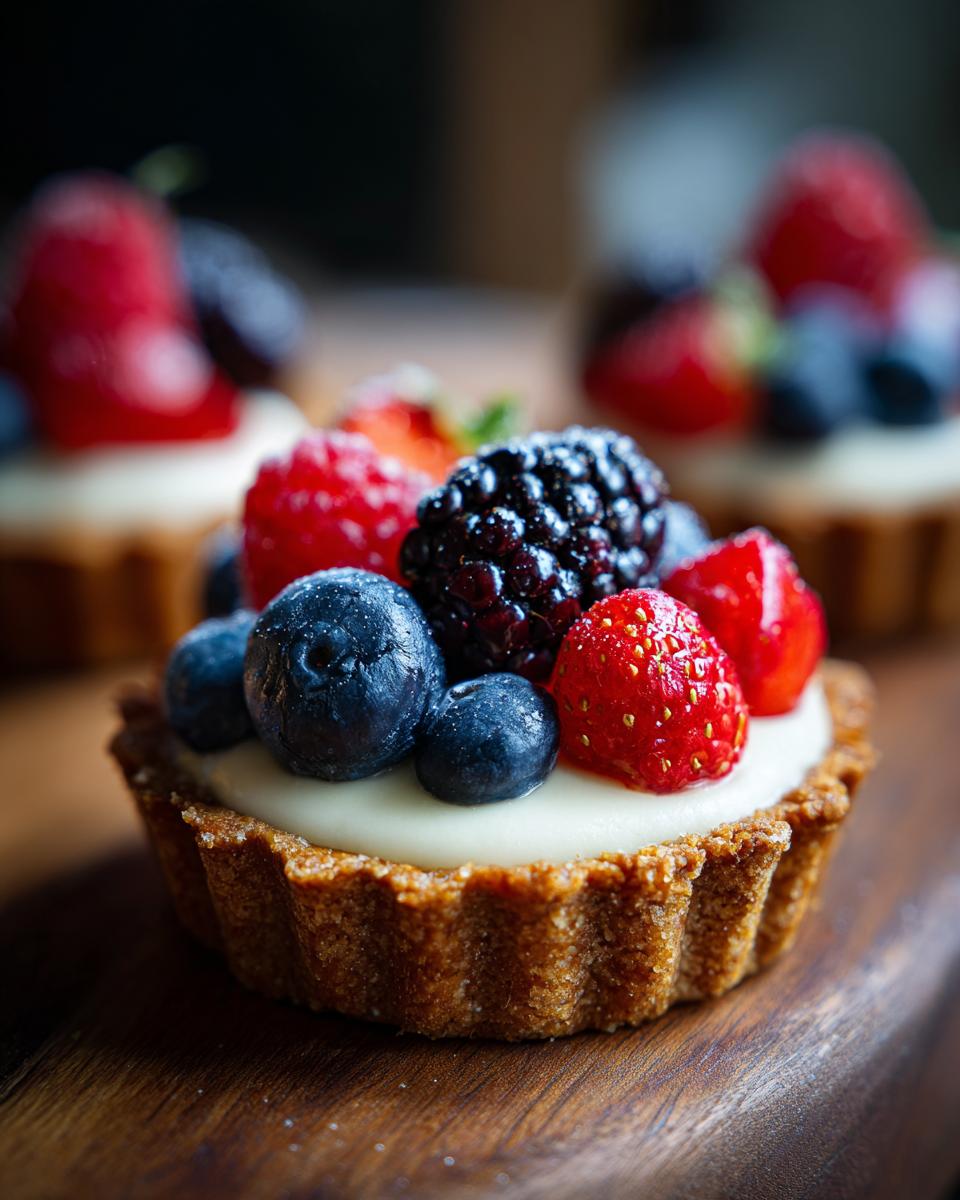
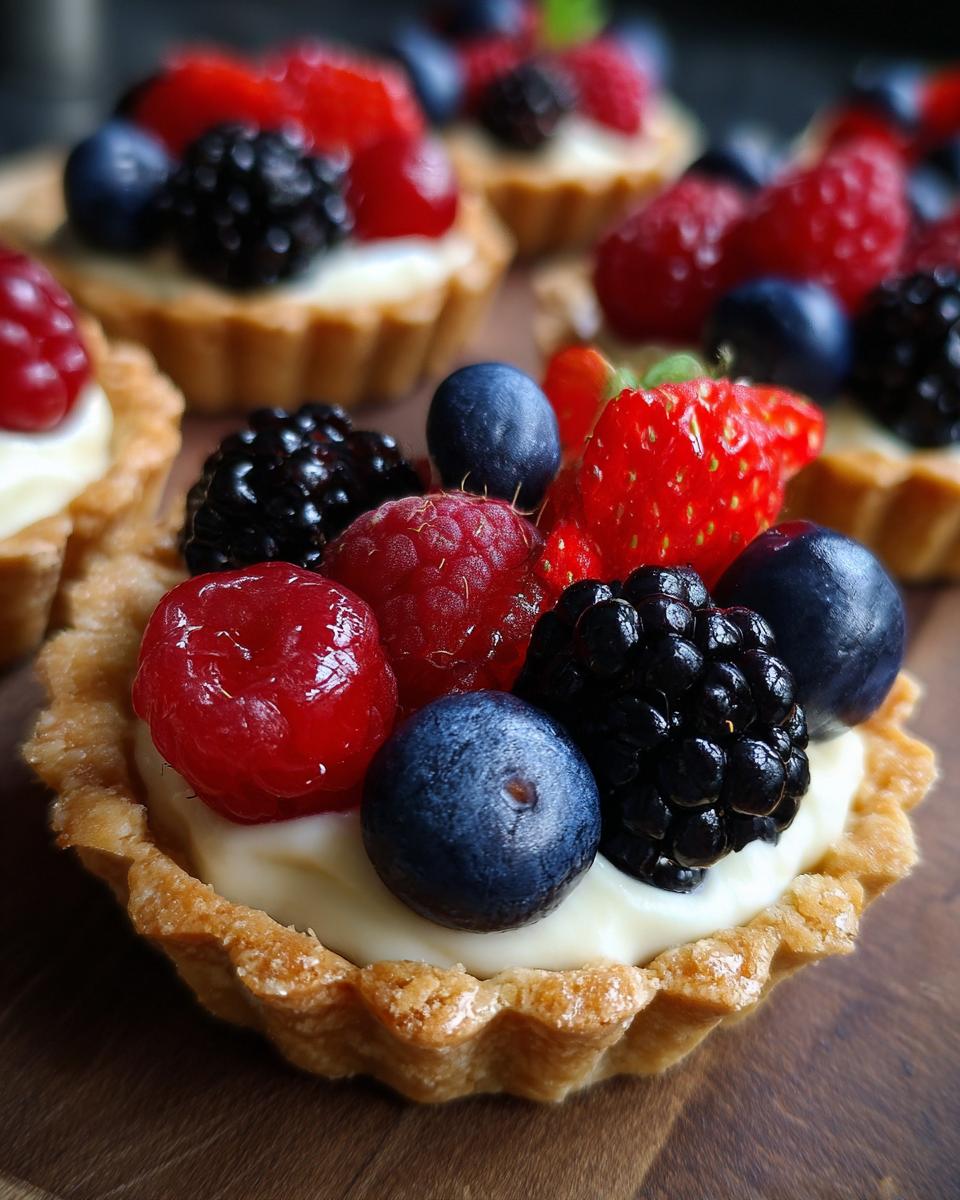
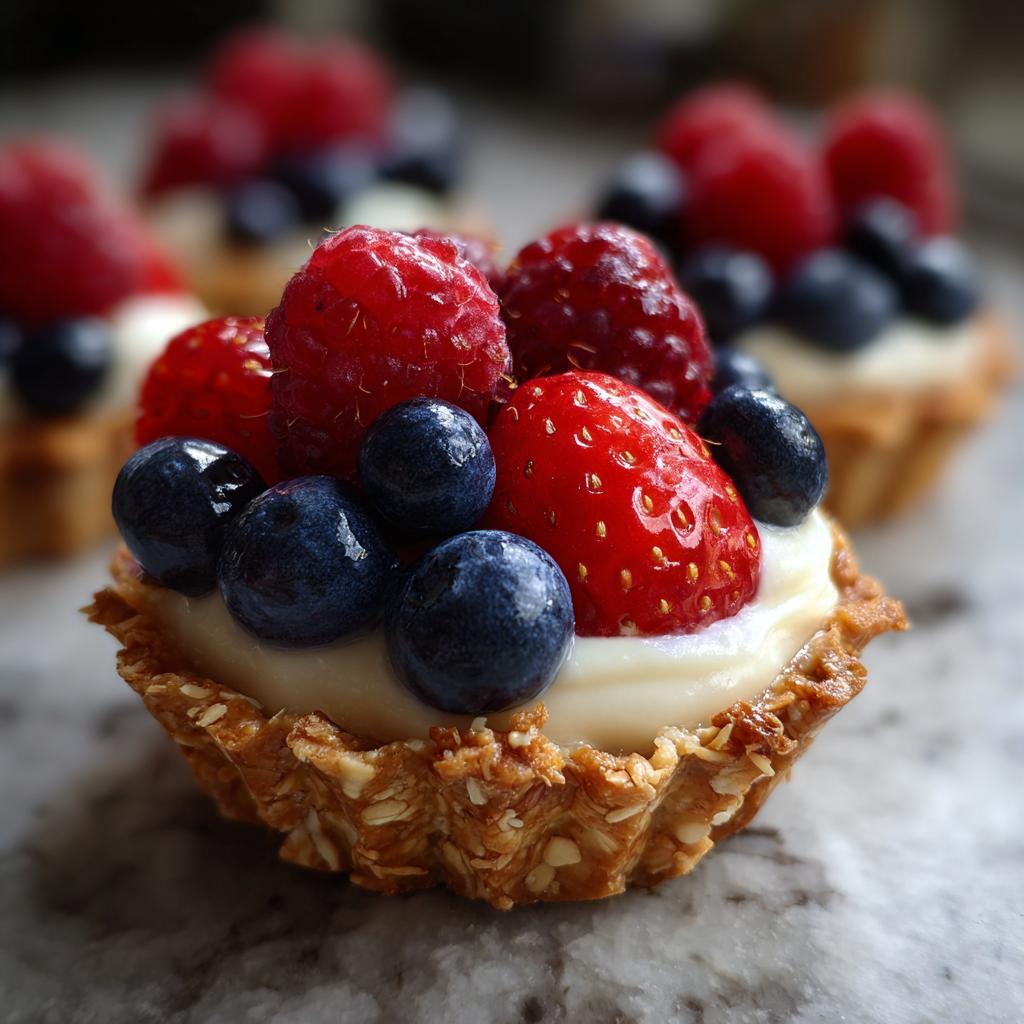
This is where the color comes in! You’ll want about 2 cups of mixed berries. I love using strawberries (hulled and sliced), blueberries, and raspberries. But hey, if you’ve got other favorite fruits like peaches or kiwi, go for it!
Step-by-Step Guide to Making Fourth of July Desserts for Mini Tartlets
Alright, let’s get these little guys made! It seems fancy, but I promise it’s totally doable. The key is to take your time and not rush things, especially with that dough. Chilling the dough is super important, otherwise, it gets really sticky and hard to work with – trust me, I’ve been there!
Preparing the Tartlet Shells
First things first, let’s get those shells ready. Grab a medium-sized bowl and whisk together your flour and sugar. Then, toss in that cold, cubed butter. Now, you can do this with a pastry blender or even your fingertips, but you want to cut that butter into the flour until it looks like coarse crumbs. Think little peas, not big lumps. Then, in a tiny bowl, whisk up that egg yolk with just a splash of ice water. Add that to your flour mixture and gently mix it all up. If it seems a bit dry, add another tablespoon of ice water, but go slow! You just want it to come together into a dough. Wrap that dough up tight and pop it in the fridge for at least 30 minutes. Seriously, don’t skip this chilling part! While it’s chilling, go preheat your oven to 375°F (190°C) and give those mini tartlet pans a good greasing. Once chilled, roll out your dough on a lightly floured surface – not too thin, not too thick! Cut out circles that will fit into your pans, press them in gently, and then poke the bottoms a few times with a fork. This stops them from puffing up like balloons! Bake them for about 12-15 minutes until they’re a lovely golden brown. Let them cool completely in the pans before you try to pop them out – they’re delicate when hot, just like these little churro bites!
Crafting the Creamy Filling
Now for the creamy dreamy part! Make sure your cream cheese is truly softened. This is where people sometimes mess up – if it’s too cold, you’ll get lumps, and nobody wants lumpy cream cheese. Just leave it on the counter for about an hour to an hour and a half. In another bowl, beat that softened cream cheese with your powdered sugar and vanilla extract. You can use a hand mixer or just a good old whisk and some elbow grease. Beat it until it’s super smooth, light, and fluffy, with no lumps in sight. It should be easy to spread or pipe. If it seems a little too stiff, you can add just a tiny splash of milk, but usually, it’s perfect as is.
Assembling Your Fourth of July Desserts for Mini Tartlets
Okay, the fun part! Once those tartlet shells are completely cool, it’s time to fill them. You can simply spoon the cream cheese filling into each shell. Or, if you want to feel like a total pro, spoon it into a piping bag fitted with a star tip (or any tip you like!) and pipe it a little swirl into each shell. It looks so pretty and professional! Then, artfully arrange your beautiful fresh berries on top. You want to get a nice mix of colors and textures. I usually put a few blueberries, some raspberries, and a slice of strawberry on each one. It looks so festive, like a tiny edible flag!
Tips for Perfect Fourth of July Desserts for Mini Tartlets
Okay, you’ve made these little beauties, but I’ve got a few insider tips to make them absolutely *perfect* and honestly, a little easier! First off, make-ahead is your friend here. You can totally bake the tart shells a day or two in advance and store them in an airtight container at room temperature. The cream filling? Yep, that can be made a day ahead too and kept in the fridge. Just assemble right before you want to serve them so those shells stay super crisp.
Now, about substitutions – if you’re not a berry fan, no worries! Other fruits like sliced peaches, kiwi, or even a nice dollop of lemon curd would be amazing. And if you want to make them no-bake entirely, you could totally try using a pre-made graham cracker crust or even some crushed crushed cookies mixed with a little melted butter for the base instead of baking. You’ll get a slightly different texture, but it’s still incredibly delicious and a real time-saver!
Frequently Asked Questions About These Mini Tartlets
Can I make the tart shells ahead of time?
Oh, absolutely! That’s one of my favorite things about these mini tartlets. You can bake the shells a day or two in advance. Just make sure they’re completely cooled and store them in an airtight container at room temperature. They’ll stay nice and crisp until you’re ready to fill and serve them!
What other fruits can I use for the topping?
You can totally get creative with the fruit topping! Besides the berries, sliced peaches, fresh mango, kiwi, or even little dollops of lemon curd would be absolutely divine. For a Fourth of July theme, just try to pick fruits that have those lovely red, white, and blue colors!
How long do these Fourth of July desserts for mini tartlets last?
Honestly, they’re best enjoyed the same day you assemble them, especially for that perfect crisp crust. But, if you have leftovers, you can store them in the refrigerator for up to 2 days. Just keep them in an airtight container. The cream filling holds up pretty well, but the shells might soften a bit over time.
Can I use store-bought tart shells?
You sure can! If you’re really short on time, using store-bought mini tart shells is totally fine. Just be sure they are the unbaked kind that you bake yourself, or if they’re pre-baked, assemble them right before serving so they don’t get soggy. Making them from scratch is more fun, though!
Serving and Storing Your Festive Tartlets
Alright, now you’ve got these adorable little tartlets all ready to go! For serving, honestly, they’re pretty darn perfect just as they are, maybe with a little dusting of powdered sugar if you feel fancy. I like to serve them chilled, especially on a warm day, so they feel extra refreshing. They look absolutely spectacular arranged on a platter or a cute tiered stand, looking all patriotic with those lovely red, white, and blue fruits. They make such a statement without much effort, which is my favorite kind of dessert!
Now, if by some miracle you actually have leftovers (highly unlikely in my house!), it’s important to store them right. Because of that yummy cream cheese filling, you really need to keep them cool. Pop any remaining tartlets into an airtight container and pop them in the refrigerator. They’ll be good for a day or two, but I’ll be honest, they’re always best eaten fresh. The crust stays crispiest that way, and you don’t want to lose that amazing crunch!
Estimated Nutritional Information
Now, about the good stuff – the numbers! Keep in mind these are just estimates, since everyone’s cream cheese and fruit can be a *little* different. But generally, you’re looking at about 200-250 calories per tartlet, with around 15-20 grams of fat and maybe 4-6 grams of protein. They’re a delightful little treat, but remember they’re a dessert, so enjoy them!
Mini Fruit and Cream Tartlets
Ingredients
Equipment
Method
- To make the tartlet shells, combine flour and sugar in a bowl. Cut in the cold butter until the mixture resembles coarse crumbs.
- In a small bowl, whisk the egg yolk with 2 tablespoons of ice water. Add this to the flour mixture and mix until just combined. Add more ice water if needed to form a dough.
- Wrap the dough in plastic wrap and refrigerate for at least 30 minutes.
- Preheat your oven to 375°F (190°C). Grease your mini tartlet pans.
- Roll out the dough on a lightly floured surface and cut out circles to fit your tartlet pans. Press the dough into the pans and prick the bottoms with a fork.
- Bake for 12-15 minutes, or until golden brown. Let them cool completely in the pans before removing.
- To make the cream filling, beat the softened cream cheese with powdered sugar and vanilla extract until smooth and creamy.
- Spoon or pipe the cream filling into the cooled tartlet shells.
- Top the tartlets with fresh mixed berries or your chosen fruit.