
You know how certain foods just hit you right in the soul? For me, that’s street food, and I still get chills thinking about the first time I had real birria—that rich, succulent beef just melting off my tongue! It was pure magic, but trying to recreate that authentic feeling while keeping things manageable in my own kitchen was a puzzle for ages. After weeks of tinkering, I finally nailed it! Friends, I’m so excited to share these My Fave Birria Tacos with you! We’re diving deep into the incredibly savory, tender braised beef filling and making that mandatory dipping sauce. Forget complicated restaurant recipes; this version is pure Mexican comfort food that you can absolutely conquer at home. You can check out some of my early inspiration over at this fantastic resource, but trust me, you’ll want to stick around because my secrets are coming up next!
Why You Will Love Making My Fave Birria Tacos
Honestly, once you try this batch, you might never want to order them out again! I developed this recipe specifically to bring that street-food magic into an everyday weeknight (even though it tastes like a weekend feast). Here’s exactly why this batch of quesabirria style tacos is going to become your family’s new obsession:
- You get that unbelievable, deep, complex spice profile from the homemade chili paste without needing a dozen obscure ingredients. It’s authentic flavor made simple!
- The texture of the braised beef filling is unreal—it’s fork-tender, swimming in sauce, and gives you that gorgeous, rich mouthfeel you dream about.
- It’s perfect for meal prep because the meat and consomme just get better overnight. Talk about a time-saver for busy weeks!
- We’re making real Mexican comfort food here, folks, but adapted so you feel great about eating it.
- The process of dipping the tortillas in that bright red fat, frying them up, and melting the cheese? It’s seriously cinematic. You’ll feel like a pro chef!
- You get to control the spice level completely. Too mild? Add more chipotle next time. Too much for the kids? Easy fix!
If you’re looking for more winning recipes that prove comfort food doesn’t have to be complicated or compromise your goals, you absolutely have to check out the rest of my kitchen adventures over at my main recipe index!
Gathering Ingredients for My Fave Birria Tacos
Okay, let’s talk ingredients! The real secret to getting that deep, authentic red color and incredible flavor in our birria tacos recipe is all about the dried peppers. Don’t sweat it though; everything comes together fast! We break our shopping list into three easy parts so you aren’t scrambling when you get into the kitchen. Remember, using good quality stock really makes the braised beef filling sing!
For the Chili Paste
This is where all the magic color and deep flavor comes from before we even touch the meat. Trust me, making a paste from scratch beats opening a jar of generic sauce any day!
- Four dried guajillo peppers—make sure you remove all the stems and seeds!
- Four dried ancho chiles—same deal here, tear them open and clean out the seeds and stems.
- Four chipotle peppers in adobo—these bring the smoky heat!
- One onion, roughly chopped.
- Four plump garlic cloves.
- Half a cup of crushed tomatoes.
- Half a cup of organic beef stock—this helps everything blend smoothly.
- One tablespoon of apple cider vinegar for a little zip.
- Two bay leaves.
- Two tablespoons of Mexican oregano.
- One teaspoon of dried thyme—don’t skip this, it adds dimension!
- Half a teaspoon each of cumin, ground cinnamon, smoked paprika, and ground allspice. Seriously, the cinnamon makes a difference!
For the Braised Beef Filling and Consomme
This part is all about getting that gorgeous, shreddable texture. While I love using chuck roast, don’t panic if that’s hard to find. You have options!
- Three pounds of organic chuck roast, cut into medium-large chunks. If you want to get really authentic, try beef shank, or hey, you can even use lamb or chicken if you prefer!
- One tablespoon of good Extra Virgin Olive Oil for searing.
- Seasonings: One teaspoon each of sea salt and black pepper, plus one teaspoon of garlic powder.
- Half an onion, diced finely.
- Four cups of organic beef stock—this is what we’ll use for braising.
- Two cups of water to top it off.
For Assembling the Quesabirria Style Tacos
Time for the fun stuff! These are the items that turn shredded meat into true quesabirria style tacos.
- Twelve organic corn tortillas.
- One cup of shredded Oaxaca cheese. This cheese melts beautifully and gives you those amazing cheese pulls!
- One cup of fresh, chopped cilantro for spiking the dipping sauce and garnishing.
- Pico de Gallo, prepared exactly how you like it, for serving on the side.
Step-by-Step Instructions for My Fave Birria Tacos
Ready to get cooking? This birria tacos recipe is really three little recipes rolled into one, but once you get the flow down, it’s smooth sailing! We start slow with the chilies—that’s where the patience comes in—and then we let the oven do the heavy lifting low and slow for about two and a half hours. Don’t rush that braising time; it’s essential for the flavor! If you need a refresher on timings and general cooking logistics while you work through the steps, you can always check out my ultimate cooking guide for quick reference.
Preparing the Flavor Base: The Chili Paste
First things first, we need to soften those dried peppers. Start by taking the stems and seeds out of your guajillo and ancho chiles—don’t skip this, or your paste will be too bitter! Toss those cleaned peppers into a medium pot with your beef stock and bring it to a boil. Once boiling, turn the heat off, cover it up, and let them sit and plump up for about 15 to 20 minutes. They need to get nice and flexible!
Once they’re soft, everything goes into your high-powered blender or food processor. Add those softened chiles along with the onion, garlic, tomatoes, vinegar, and all those beautiful spices—thyme, cumin, oregano, everything! Blend until it is completely smooth. If your mixture looks super thick, don’t be shy; add up to half a cup more stock or water until it looks like a thick, rich sauce. That’s your flavor base!
Braising the Beef for Tender Braised Beef Filling
Time for the meat! Preheat your oven to 350 degrees Fahrenheit—that nice, gentle heat is key here. Grab your Dutch oven, heat up that olive oil, and season your chuck roast chunks really well with salt, pepper, and garlic powder. Sear those chunks over medium-high heat until they get a nice golden crust on every side, maybe about 3 or 4 minutes per side. Pull them out and set them aside briefly.
In the same pot, sauté that diced onion until it smells fragrant, just a minute or two. Now, pour in your blended chili paste and stir it around for a minute or so to wake up those spices. Then add your 4 cups of beef stock and the 2 cups of water. Mix it all up, nestle that seared beef back into the pot, and bring it just barely to a simmer. Cover the Dutch oven tightly and transfer it right into that oven. Let it slow cook for about 2 ½ hours, or until that beef is so tender you can shred it with just a fork! Seriously, have patience here.
Assembling and Frying Your Quesabirria Style Tacos
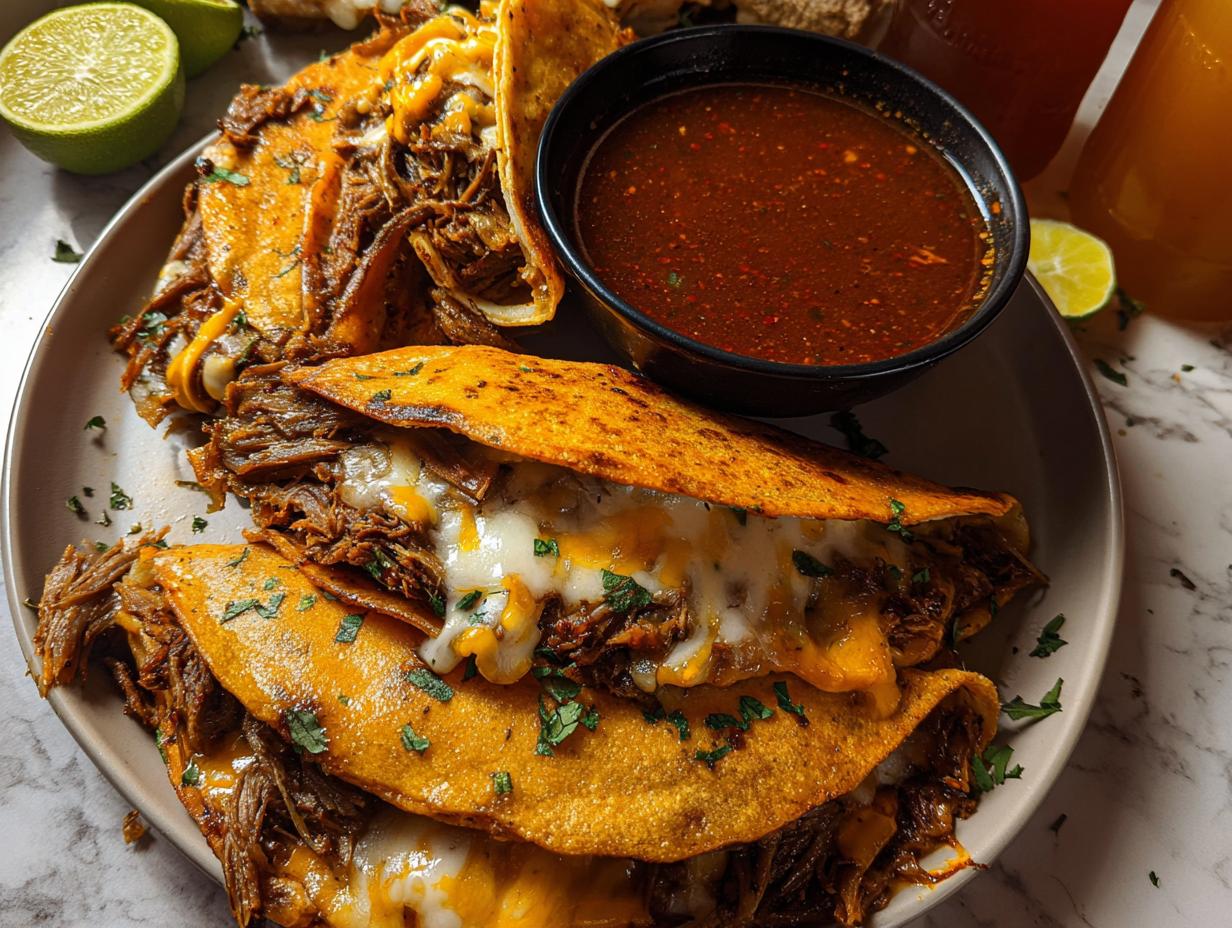
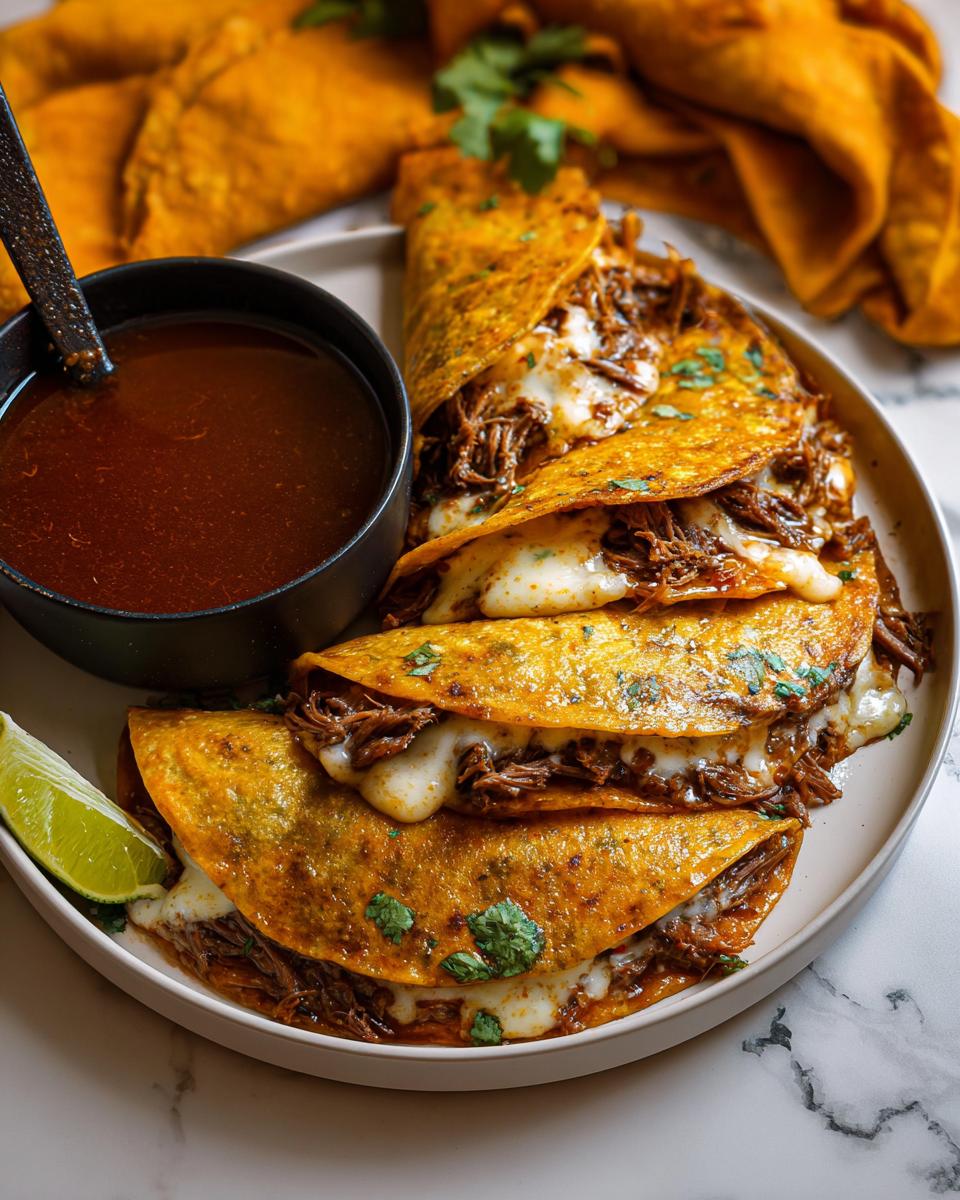
Once the meat is fall-apart tender, take it out of the oven. Shred all that glorious beef right in the pot so it soaks up all that remaining sauce—that’s your essential braised beef filling! Now, this next part is crucial for an authentic dip: scoop out about 1 cup of that red, fatty liquid (that’s your quick consomme!) into a small bowl and stir in some fresh chopped cilantro.
Get a non-stick skillet heating over medium. Dab a paper towel with a bit of oil and wipe the pan—I like mine just barely coated. Grab a corn tortilla, dip one side totally into that consomme bowl so it soaks up the color and flavor, and lay it dip-side down in the hot pan. Immediately top that dipped side with a nice sprinkle of the shredded beef, some onions, a little more cilantro, and a heap of Oaxaca cheese. Fold the tortilla in half.
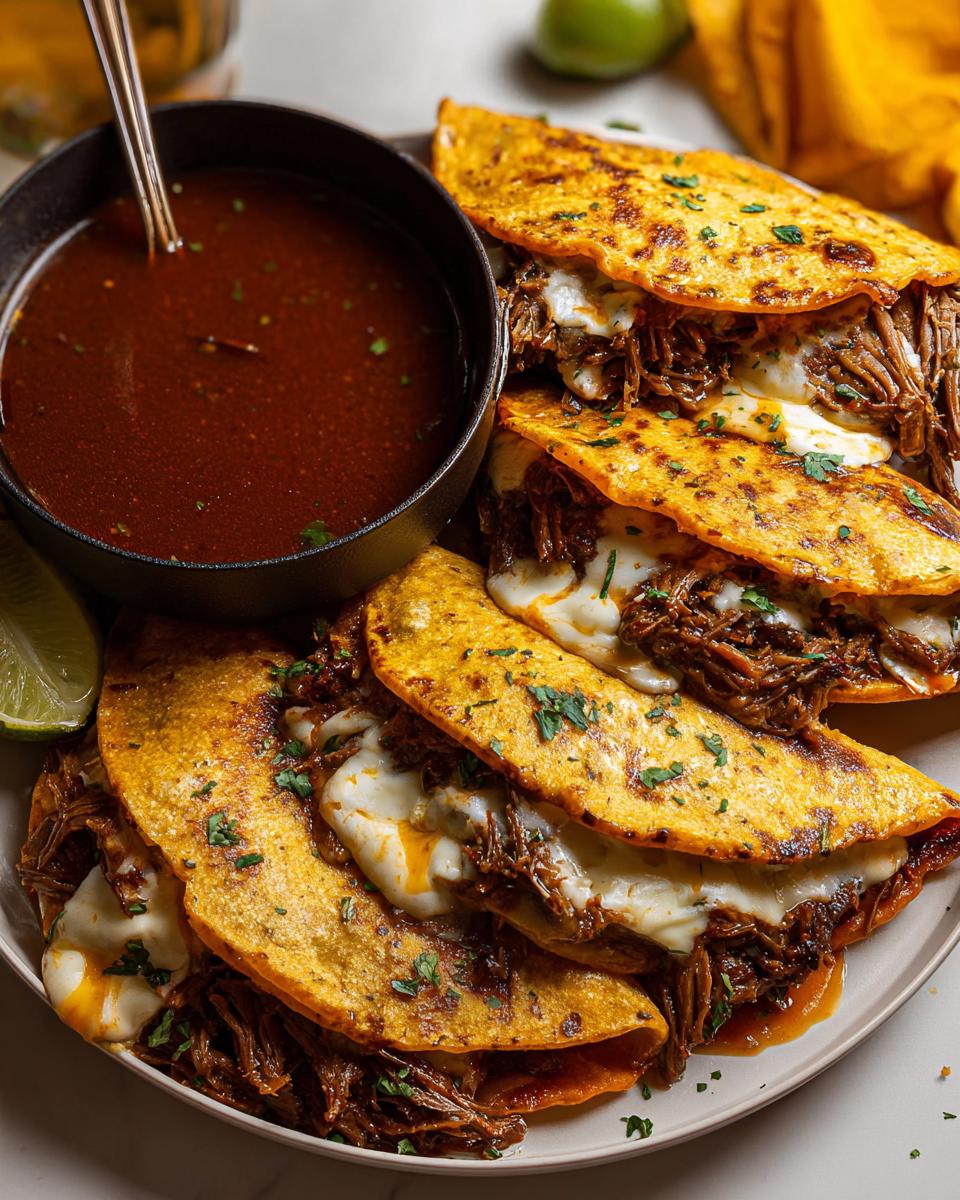
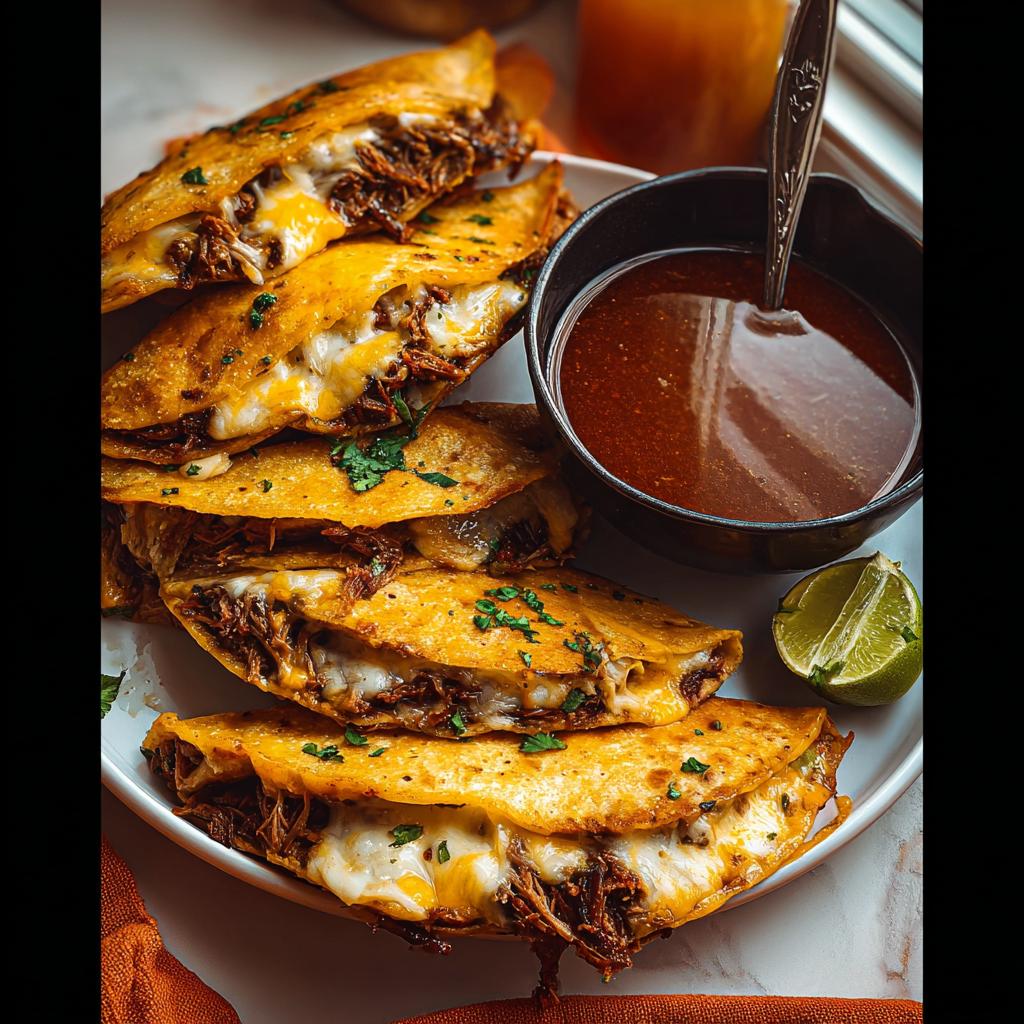
Cook it until the bottom side is slightly charred and crispy—maybe two minutes. Then, and only then, flip it carefully so the cheese side hits the pan. You want that cheese nice and melted and the second side nicely crisped up. That double-fry from the fat on the tortilla is what makes all the difference for these quesabirria style tacos! Repeat this process for all your amazing tacos!
Pro Tips for Perfect My Fave Birria Tacos
Even though this birria tacos recipe is straightforward, a few little chef tricks can take your tacos from “really good” to “call the fire department, these are amazing!” Since these flavors are so vibrant, spending just one extra minute on technique pays off huge dividends later. If you’ve mastered the braising, here are the final things I always focus on before serving these beauties up to friends.
First, let’s talk about the shredded meat texture. When you pull the meat out of the Dutch oven, resist the urge to shred it right away. Let it rest for about 15 minutes—just leaning against the side of the oven, or on a cutting board covered loosely with foil. This lets those amazing juices redistribute instead of running all over your counter when you shred it. The meat will still be piping hot, but much easier to handle!
Next up is that glorious consomme! Remember how I told you to scoop out that liquid before shredding? Make sure you are getting the oily, rich red broth from the top of the pot into that dipping bowl. That fat is liquid gold, and it’s what gives the tortilla that beautiful, rich flavor and color when you dip it. If your braise didn’t render a lot of fat, don’t worry—just skim the oil from the top of the pot after it cools slightly before shredding.
For the cheese, the melt factor is everything when making quesabirria style tacos. Oaxaca cheese is the goal because it’s stringy and mild. But if you can’t find it, don’t substitute Mozzarella unless you are mixing it with something else! Mozza can get too oily. I often combine Oaxaca with a little Monterey Jack or even a tiny bit of mild white cheddar. Make sure you pack the cheese right against the meat so it glues the taco together when melting!
And finally, don’t be afraid of the char! When frying the tortilla on the skillet, a few dark, almost black spots are exactly what you want. That slight bitterness from the char cuts through the richness of the braised beef filling so perfectly. It’s the contrast that makes this dish addictive. For more tips on getting those high-flavor results in your kitchen every time, check out my guide on getting the most out of your dinner recipes!
Ingredient Notes and Substitutions for My Fave Birria Tacos
I know staring at a recipe and seeing an ingredient you’ve never used before can sometimes feel like a roadblock, right? Especially when we are aiming for something as traditional as this Mexican comfort food. But listen, the beauty of cooking at home is customization! I want everyone to feel confident making these My Fave Birria Tacos, so let’s chat about the key players and what you can easily swap out if you need to.
The meat choice is probably the biggest question I get about this birria tacos recipe. I highly recommend the chuck roast because its marbling ensures that beautiful, fatty, shreddable texture after a long braise. However, if you can’t source it or just prefer something different, you have some great wiggle room for creating your own version!
If you are looking for a leaner option, beef sirloin works well, but you absolutely must let it braise longer to ensure it doesn’t dry out. If you follow the liquids and chili paste ratios, beef shank is phenomenal because it comes with the bone, adding tons of gelatin to your consomme, making it super rich. And heck, I’ve had people tell me they used goat meat (which is the most traditional!) or even boneless, skinless chicken thighs for a faster cook time. Just watch the chicken closely—it cooks way faster than the beef!
Now, let’s talk cheese. Oaxaca cheese is my go-to for these quesabirria style tacos because it melts perfectly and has that amazing pull; it’s designed for grating and melting! But if your grocery store doesn’t carry it, don’t stress about skipping the cheese altogether—that would be a crime! Instead, look for low-moisture mozzarella or use Monterey Jack. My personal favorite hack when I can’t find good Oaxaca is to mix one cup of good melting Provolone with half a cup of mild white cheddar. It gives you the melt, the stretch, and just a tiny bit of extra flavor complexity that blends perfectly with the braised beef filling without overpowering the chili base.
Finally, those dried chiles! If you are deeply intimidated by soaking and blending the whole chili paste—and I get it, it’s messy—you can sometimes find pre-made Birria base paste, sometimes labeled as Adobo or a ready-made marinade. If you use a pre-made paste, you’ll need to reduce the amount dramatically, maybe starting with just 2 or 3 tablespoons, because the pre-made versions are usually much more concentrated than the homemade paste we made! Always smell it first; if it smells intensely smoky and spicy, use less!
Serving Suggestions for This Mexican Comfort Food
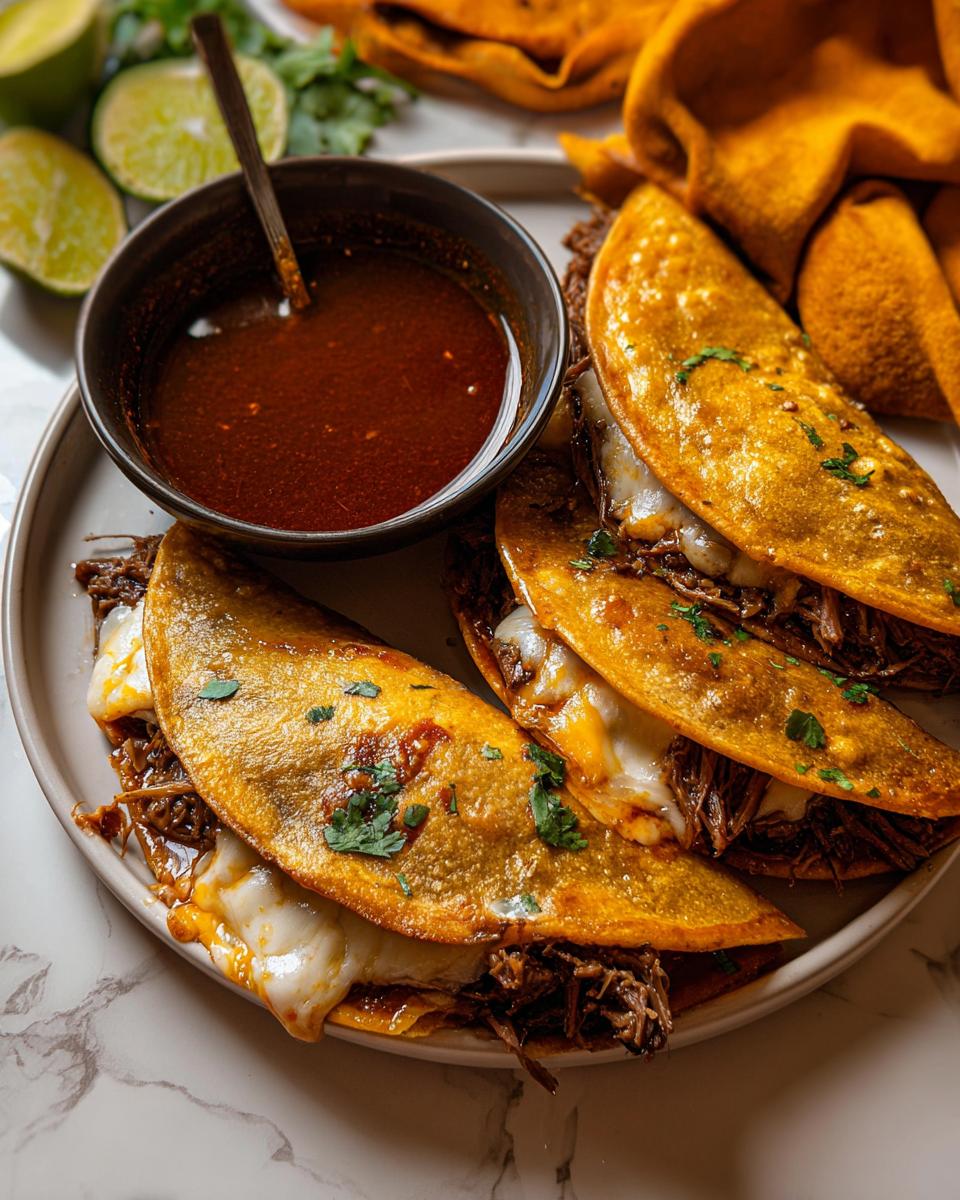
We’ve done the hard work: the meat is braised, the chiles are blended, and those gorgeous quesabirria style tacos are crispy and cheesy! Now comes the fun part—making the plate look as vibrant as it tastes. Because these tacos are so rich and savory, they really don’t need a ton of sides, but the right garnishes are absolutely mandatory to cut through that richness and elevate the whole experience. Think bright, fresh contrasts against that deep red meat!
First and foremost, you absolutely have to serve these with some really vibrant Pico de Gallo on the side. The fresh crunch of the tomato, onion, and jalapeño, mixed with that sharp burst of lime juice, is the perfect counterpoint to the rich, fatty consomme. Trust me, you don’t want to leave that out!
Next, fresh lime wedges. I can’t stress this enough! A good squeeze of fresh lime juice right over the top of the taco just before you dip it into the consomme wakes up every single flavor in that braised beef filling. It adds a necessary tanginess that makes you crave the next bite instantly.
If you want something pickled—and who doesn’t love a great pickled veggie with heavy Mexican comfort food?—I highly recommend quick-pickled red onions. They take literally five minutes: just thinly slice some red onion, toss it with a splash of white vinegar, a pinch of salt, and a little sugar, and let it sit for 30 minutes. They turn bright pink and offer the perfect sharp, acidic bite!
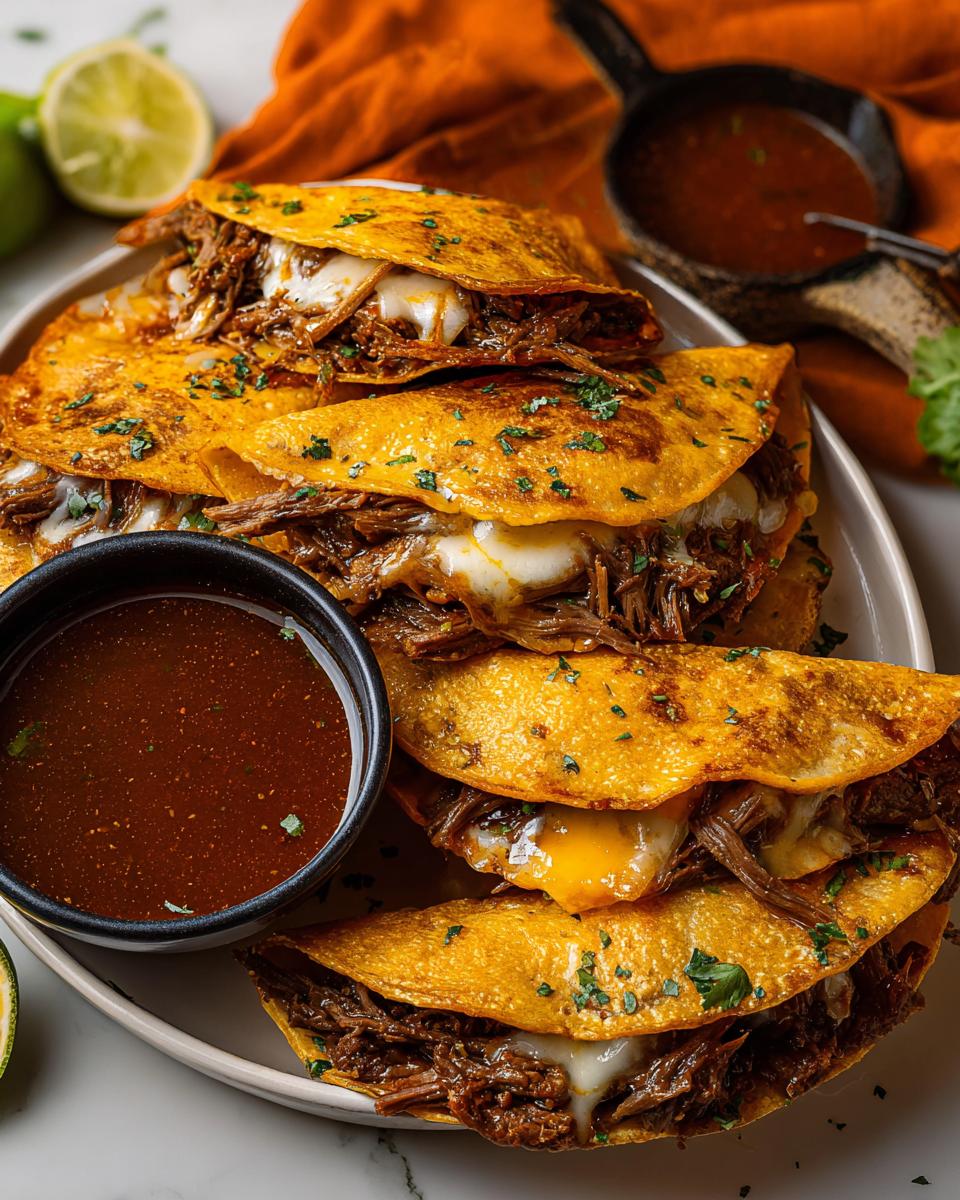
And of course, don’t forget the dedicated dipping station! Make sure your consomme is warm and ready for dunking. If you happen to have leftover cilantro, chop a bit more fresh cilantro to sprinkle right over the top of the soup bowl for a beautiful color pop right before serving. If you are looking for a show-stopping dip that isn’t the consomme, you could always whip up a batch of my bright, zesty guacamole! It’s so easy and adds another layer of freshness to the plate.
Storage and Reheating Instructions for My Fave Birria Tacos
One of the BEST things about making a big pot of braised beef filling like this? Leftovers! Seriously, this birria tacos recipe is even better the next day. I always intentionally make extra so I can enjoy them again later in the week without having to babysit the stove for another few hours. I know we all try to be good planners, and these freeze and reheat like total champions, so you can prep ahead whenever you have a free afternoon! If you like to cook once and eat all week, check out my tips on meal prepping essentials over at this link.
First rule of thumb for leftovers: always store the components separately, especially when dealing with tacos. You’ve got three main parts: the shredded meat simmered in its sauce, the consomme (the dipping broth), and the leftover tortillas.
Keep that amazing, saucy shredded beef stored in an airtight container. The consomme should also go into its own sealed container. I find that the meat lasts beautifully safe and sound in the refrigerator for about 3 to 4 days. The tortillas? They are best stored separately at room temperature in their bag, or if you aren’t planning on finishing them within a day or two, toss them in the freezer; they come back just fine!
Reheating the Meat and Consomme
Your best bet for the meat is to gently reheat it on the stovetop. Place the beef and sauce mixture in a pot over medium-low heat. You just want to bring it up to temperature slowly. If it seems a little tight, splash in a tiny bit of water or extra stock—but not too much, you want that sauce concentrated!
The consomme can be warmed right alongside it, or just place it in the microwave for 45 seconds at a time until it’s nice and hot for dipping. No one likes cold broth with their spicy tacos!
Reheating Assembled Tacos (The Oven Method is Preferred!)
If you have fully assembled tacos leftover (with the cheese melted already), you want to avoid turning them into a greasy mess in the microwave. I always reach for the oven! Preheat your oven—or toaster oven—to 350 degrees Fahrenheit. Lay the tacos out flat on a baking sheet. They only need about 8 to 10 minutes, just until they are warmed through and the tortillas are crisp again. This method avoids over-sogging them, which happens super fast in a microwave.
If you skipped assembly initially and just have tortillas, meat, and cheese ready, you can assemble them fresh. Then, just follow the frying instructions we went over earlier, dipping the (unfried) tortilla into warm consomme, filling, cheese, and frying until golden. It’s almost as fast as making them the first time around—that’s the beauty of having the braised beef filling ready to go!
Frequently Asked Questions About My Fave Birria Tacos
It is totally normal to have questions when you’re diving into a new layered recipe! I get asked variations of these same things every time people try my birria tacos recipe for the first time. Making this kind of deep, flavorful Mexican comfort food is so rewarding, and I want to make sure your first batch is absolutely perfect!
Can I make the braised beef filling ahead of time?
Yes, please do! That is my absolute favorite way to handle this recipe. As I mentioned in the notes, preparing the meat, chili paste, and consomme a day ahead is the best strategy. When you store them, make sure the shredded beef and its sauce are kept together in one container, and the extra consomme dipping broth is stored in a separate jar or container. When you are ready to eat the next day, just gently warm the meat mixture on the stovetop, warm up the consomme, and then you are just a quick 15 minutes away from assembling those gorgeous quesabirria style tacos!
What makes these quesabirria style tacos different from regular tacos?
The main difference is the texture and the dip! A regular taco is usually just fillings placed in a warmed tortilla, maybe with some salsa on top. For these quesabirria style tacos, we are doing two key things that totally change the game. First, we fry the tortilla after dipping it deeply into that rich, red consomme—that liquid fat soaks right into the corn, giving it flavor and color before it even hits the pan. Second, you MUST dip the finished taco into that warmed broth before taking a bite! You get that satisfying, slightly charred, crispy exterior from the pan, and then that immediate burst of savory, tender braised beef filling when you dip it. It’s interactive eating, and it’s addictive!
How spicy are these birria tacos recipe?
That’s a great question because we are using three different kinds of chiles! I’d say this basic birria tacos recipe lands right in the medium range—noticeably flavorful and warm, but not overly punishing. The heat comes primarily from the chipotle peppers in adobo, which also bring a lot of smokiness. If you are sensitive to heat, your best bet is to completely omit the chipotles from the chili paste, or maybe use just one instead of four! If you love it FIERY, then throw in an extra chipotle or even toss in a few serrano peppers when you are blending the chili paste. It creates wonderful braised beef filling, no matter the spice level you choose!
Share Your Experience Making My Fave Birria Tacos
I poured my heart into perfecting this recipe so you could taste that incredible flavor of authentic Mexican comfort food right in your own setting. Now that you’ve tried making these amazing My Fave Birria Tacos, I would absolutely love to hear how they turned out for you! Did the cheese pull as high as advertised? Which variation of meat did you try?
Please leave me a quick rating below so I know if this batch of quesabirria style tacos made your week! And if you snapped any glorious photos of that rich, deep red consomme or your cheesy tacos, tag me on social media or send me a note through my contact page. Happy cooking, friends—I can’t wait to see your results!
My Fave Birria Tacos
Ingredients
Equipment
Method
- To make the chili paste: Remove the stems and seeds from the dried ancho and guajillo chiles. Add the chiles to a medium pot with the beef stock and bring to a boil. Turn off the heat, cover the pot, and let the chiles sit for 15 to 20 minutes.
- When the peppers are soft, add them to a high-powered blender or food processor with the remaining chili paste ingredients. Blend until the mixture is smooth and thick. You can add up to ½ cup more beef stock or water to reach your desired consistency.
- To make the meat: Preheat your oven to 350 degrees Fahrenheit.
- In a dutch oven over medium-high heat, add the olive oil. Season the beef chunks with salt, black pepper, and garlic powder. Add the seasoned beef to the hot oil and sear on each side for 3 to 4 minutes until golden brown. Remove the seared meat and place it on a plate lined with a paper towel.
- In the same pot, add the diced onions and sauté until fragrant and translucent, about 1 to 2 minutes. Add the chili paste and stir, allowing it to simmer for 1 to 2 minutes. Stir in the beef stock and water to combine. Add the seared beef back into the pot, stir, reduce the heat to low, and let it simmer for about one minute.
- Carefully transfer the dutch oven to the preheated oven. Let the contents cook and braise slowly for about 2 ½ hours, or until the beef is tender enough to shred easily with a fork.
- Remove the dutch oven from the oven. Shred all of the meat until it has a pulled texture. Make sure you have a good amount of the saucy liquid remaining to serve over the tortillas and for dipping.
- To assemble the tacos: Remove 1 cup of the broth/liquid from the cooked beef and place it in a small bowl. Add some fresh chopped cilantro to this liquid and set it aside as the dipping sauce (consomme).
- In a non-stick skillet over medium heat, add 1 tablespoon of olive oil. Use a paper towel to wipe the oil evenly across the base of the skillet.
- Dip one side of a corn tortilla into the consomme and place it in the heated skillet, frying for a few seconds. Top the dipped side with shredded beef, diced onions, chopped cilantro, and shredded cheese. Fold the tortilla in half. Allow the cheese to melt before carefully flipping the taco to the opposite side to achieve a nice char. Remove the taco from the heat once both sides are golden brown. Repeat this process for all the tortillas.
- Serve the tacos with the dipping sauce, Pico de Gallo, or your preferred accompaniments.


